Pioneer PRV-LX1 Manual
Hide thumbs
Also See for PRV-LX1:
- Operating instructions manual (104 pages) ,
- Training manual (38 pages) ,
- Software manual (24 pages)
Table of Contents
Advertisement
Quick Links
Advertisement
Table of Contents

Related Manuals for Pioneer PRV-LX1

Summary of Contents for Pioneer PRV-LX1
- Page 1 All manuals and user guides at all-guides.com...
- Page 2 All manuals and user guides at all-guides.com...
-
Page 3: Table Of Contents
All manuals and user guides at all-guides.com Table Of Contents Overall block diagram………………………………………..3~4 Block diagram overview……………………………………..5~6 Disassembly instructions……………………………………7~17 Service mode………………………………………………….18~21 Viewing log files……………………………………………..22~23 Status LED’s……………………………………………..…….24 Troubleshooting…………………………………………..…..25~28 Block diagram JKIB, JKDB, JKOB, HPVB & 422 IB…….29 Block diagram DECB assembly…………………………….30 Block diagram PCIB assembly………………………….…..31 Block diagram AVIB assembly……………………………...32~33 Block diagram PWRB, FLKB, DRV1B, DRV2B &... -
Page 4: Overall Block Diagram
All manuals and user guides at all-guides.com CN7611 CN3501 CN6002 OPTIONAL CONNECTOR (20P) (20P) (30P) A7401 CN5501(30P) CN5502(26P) CN5503(30P) CN3203(4P) CN3204(4P) 27MDEC VIDEO SEL2 S IN 29 27 VIDEO SEL1 AV1 VIDEO DATA IC7409 IC7414 MM1117XF AV1 AUDIO DATA MM1117XF A7402 27MDEC 27MSDO... - Page 5 All manuals and user guides at all-guides.com DRV OPEN/CLOSE CN 65 (30P) D63 ,D632 FAN_DET DTCLK CN9 (2P) AV VIDEO DATA DISC IN ACCESS AV AUDIO DATA FAN_CONT CN 0 (2P) D64 ,D642 36MDEC + 2V DVCLK - 2V FAN_CONT2 (2P) DISC IN ACCESS...
-
Page 6: Block Diagram Overview
All manuals and user guides at all-guides.com Block Diagram Overview (JKIB Assembly) All inputs Video and Audio (Composite, Component Beta or SMPTE, S-Video, DV, Balanced and Unbalanced Audio) enter and pass though the JKIB assembly and enter the AVIB assembly. If using the composite input in through mode the unprocessed audio and video pass back directly to the JKOB output assembly for monitor viewing. - Page 7 All manuals and user guides at all-guides.com Block Diagram Overview (PC Mother Board) The main circuit board assembly in this device is a very high quality Pentium based personal computer main board. It interfaces directly with the front panel control by an RS232 connection on COM 2. In addition it has front and rear USB ports, a RS232 connection for a UPS, 3 PCI slots (2 used), an Ethernet connection and VGA output.
-
Page 8: Disassembly Instructions
All manuals and user guides at all-guides.com PRV-LX1 Disassembly 1. Top cover and side panels 1. Remove seven screws and lift off the top cover. 2. Remove eight screws for the L and R side covers. 2. Front Panel 1. Remove the front volume knob. - Page 9 All manuals and user guides at all-guides.com Front & Rear Bridges must be removed in order to access drives and board assemblies. 1. Remove 12 screws for the front & 8 screws for the rear bridge. 2. Remove bridges.
- Page 10 All manuals and user guides at all-guides.com 3. Drive Assy LX1 1. Disconnect two connectors. 2. Remove four screws and DVDR Drive Assembly.
- Page 11 All manuals and user guides at all-guides.com 4. HDD Assy 1. Disconnect two connectors. 2. Remove four screws. Attention: One screw is under the label. 3. Pull up on the handle and remove HDD Assy.
- Page 12 All manuals and user guides at all-guides.com 5. AVIB Assy 1. Remove four screws. 2. Remove Rear bridge. 3. Disconnect four FFC cables and four connectors. 4. Remove four screws. 5. Remove AVIB Assy with AVI shield and base.
- Page 13 All manuals and user guides at all-guides.com 6. JKIB Assy & JKOB Assy 1. Disconnect two FFC cables and a connector. 2. Remove nine screws (JKIB Assy). 3. Remove nine screws (JKOB Assy). 4. Remove three screws. 5. Remove JKIB Assy with PCI cover and Jack stay. 6.
- Page 14 All manuals and user guides at all-guides.com 7. DECB Assy & PCIB Assy 1. Disconnect two connectors. 2. Remove two screws of Rear Panel. 3. Remove two screws. 4. Pull up DECB Assy from PCI slot of Mother Board. 5. Pull up PCIB Assy from PCI slot. 6.
- Page 15 All manuals and user guides at all-guides.com 8. PWRB Assy 1. Remove Center stay and Front Bridge with 12 screws. 2. Disconnect eight connectors. 3. Remove three screws. 4. Remove the hook of Card edge spacer. 5. Remove PWRB Assy.
- Page 16 All manuals and user guides at all-guides.com 9. MOTHER BOARD Assy 1. Disconnect two connectors. 2. Remove seven screws. 3. Remove MOTHER BOARD Assy 10. ATX Power Supply Unit 1. Remove one screw inside. 2. Remove four screws outside. 3. Remove ATX Power Supply Unit.
- Page 17 All manuals and user guides at all-guides.com 11. Exchange the FAN of Power Supply 1. Remove a screw and move switch barrier. 1. screw Switch barrier 2. Remove Fan cover and disconnect a connector. Fan connector 3. Exchange the FAN. 4.
- Page 18 All manuals and user guides at all-guides.com *Cable Styling of Power Supply...
-
Page 19: Service Mode
RS-232C Loop Back Test RS-422A Loop Back Test (Error Stop) RS-232C Loop Back Test (Error Stop) [A.MON] Power On Time Clear HDD Access Time Power On Time of PRV-LX1 Copy the setting file for using FTP(Network) Copy the log file for using FTP(Network) - Page 20 Escape Test Mode [ESC]+[DISP] Debug Mode [DISP] Enter next page ---Page1--- : PRV-LX1 Information ---Page2--- : DVD Play Information ---Page3--- : Decode Information of DECB Assy ---Page4--- : Encode Information of PCIB Assy and AVIB Assy ---Page5--- : Encode Information of Application...
- Page 21 : Enter the debug mode. -[DISPLAY] : Select the next page. -[SIDE-A or B] : Enter the sub mode of debug mode. -[ESC] : Escape the debug mode. ---Page 1---: PRV-LX1 information -Program : application version : os version -FLCOM : FL cpu version...
- Page 22 All manuals and user guides at all-guides.com Service Mode -Select the error history --> Push [SIDE-A] on GGF1067 one time. “No device error” on display stands for no error. “The numbers on display stands for error code. (Ex.) 10-030305210700 40-030306093005 50-030401112233 04-030405131500 EE-YYMMDDHHMMSS EE: Error code, YY…..SS: Date...
-
Page 23: Viewing Log Files
Subnet mask: 255.255.255.0 Gateway: 192.168.0.1 4. Turn off PRV-LX1. 5. Connect the personal computer to PRV-LX1 with Network cable. 6. Turn on PRV-LX1 and the personal computer. 7. Open the log files using IE (Internet Explorer). 8. Input “ftp://192.168.0.16” at IE. - Page 24 All manuals and user guides at all-guides.com <Log list> POWER-ON=7 ------- Power on Times 1 : Power On : Mon Jun 23 21:19:26 EDT 2003 ------- Power on date Shimuke=x, Region=x,x,x PowerOnKey=xxxxx Power Off : Mon Jun 23 22:12:16 EDT 2003 ------- Power off date 2 : Power On : Tue Jul 8 10:10:12 EDT 2003 Shimuke=x, Region=x,x,x PowerOnKey=xxxxx 3 : Power On : Tue Jul 8 10:12:32 EDT 2003...
-
Page 25: Status Led's
All manuals and user guides at all-guides.com Ass'y Ass'y No. ST LED Function Status of LED on PWRB DWZ1106 D9 HDD_IND HDD access indicator HDD access V+5VSB Check STB +5V line Output +5V from Power supply (STB+5V line) V+5V Check +5V line Output +5V from Power supply (+5V line) V+3.3VD Check +3.3V line... -
Page 26: Troubleshooting
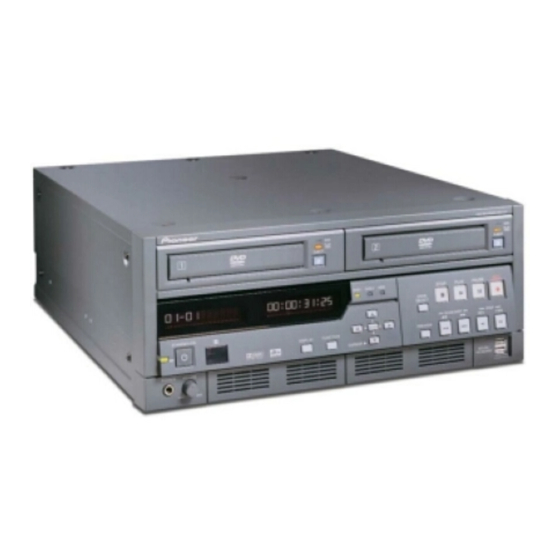
Service Manual Test Discs (DVDR, DVDRW) Service Remote GGF1381 or GGF1067 Overview: The PRV-LX1 is a Computer based product with wireless remote control capability and a front panel interface. Basic overall troubleshooting of this device will be similar to that of a Personal Computer. - Page 27 All manuals and user guides at all-guides.com Condition Check Counter Measure Standby light changes Check FL display and If no display or to green but no monitor output. monitor check startup. CPU, memory module and BIOS short pin. (1 & 2 JP14) and FLKB assy.
- Page 28 All manuals and user guides at all-guides.com Condition Check Counter Measure FL display reads: Check all connectors on Reseat board into PCI “NO BOARD PCIB board and slot. ENCODER” connection to main PC Log File Reads: “NO board. Replace PCIB board. ENCODER BOARD!!!!AGAIN!!!!”...
- Page 29 All manuals and user guides at all-guides.com Condition Check Counter Measure No RS422 control.>>>> Check operation setup. Correct settings in Check JKDB and PCIB Function Menu. connectors. No RS232 control. Run Loop Back Test in No LAN control. service mode. Not locking on External Check operation setup Correct switch setting.
-
Page 30: Block Diagram Jkib, Jkdb, Jkob, Hpvb & 422 Ib
All manuals and user guides at all-guides.com JKDB ASSY S7941 JA7401 SYNC JKIB ASSY JA7941 SEP. Ex Sync COMP JA7402 Thru CLAMP DRV/RCV JA7403 AMP(Beta) AMP(SMPTE) CN7903 AMP(Beta) CN7952 AMP(SMPTE) AMP(Beta) AMP(SMPTE) V Select Thru 422 IB ASSY JA7601 A Select Thru Beta/SMPTE CN3501... -
Page 31: Block Diagram Decb Assembly
All manuals and user guides at all-guides.com IC1311 IC1211 PCI I/F Xilinx FPGA SH-3 SH-3_ADRS PCI BUS SH-3_DATA SH-3_CTRL MPEG_ BITSTREAM IC1512 IC1513 IC1612 IC1611 MPEG Dec. SDRAM AV-1 FLASH SDRAM P/XI Y/Pb/Pr IC1851-IC1853 ANALOG Component Y/Cb/Cr IC1711 AV-1_VIDEO VIDEO Composite Enc. -
Page 32: Block Diagram Pcib Assembly
All manuals and user guides at all-guides.com JKDB ASSY DECB ASSY CN7902 (11 pin) CN1183 (7 pin) CN3301 (4 pin), CN3002 (50 pin), CN3001 (50 pin) CN2102 (11 pin) CN2405 (7 pin) CN2101 (4 pin), CN2103 (50 pin), CN2104 (50 pin) RS232C MPU BUS MPEG... -
Page 33: Block Diagram Avib Assembly
All manuals and user guides at all-guides.com From DINB ASSY From DOOB ASSY DECB ASSY (OPTION) (OPTION) CN8203 CN8602 CN1651 Digital Video Signal CN5501 CN5503 CN6002 DV I/O Signal AVI_D0,7 AVIB ASSY SDI_D0,7 SDO_D0,7 Video656 Video656 Video656 data data data Analog Video V or Y R_ADD0,7 IC5004... - Page 34 All manuals and user guides at all-guides.com From DINB ASSY From DOOB ASSY (OPTION) DECB ASSY (OPTION) CN8203 CN8602 CN1651 Digital Audio Signal AVIB ASSY CN5501 CN5503 CN6002 DV I/O Signal AV1_DAI,AV1_BCK, SDI_DAI,SDI_BCK, SDO_DAI, AV1_LRCK SDI_LRCK,AESI_DAI, SDO_BCK, AE S I_BCK,AESI_LRCKI SDO_LRCK Recording only Analog Audio...
-
Page 35: Block Diagram Pwrb, Flkb, Drv1B, Drv2B & Usb
All manuals and user guides at all-guides.com +D1, -D1, +D2, -D2 PWRB ASSY AVIB Block +3.3,±5,±12V CN681 PWR_OK +5VSB,PWR_OK CN684 USBB ASSY MOTHER PS_ON BOARD USB+5V +3.3,±5,±12V, ASSY FANCONT(Rear) PWR_OK FANCONT(DRV1) CN10 PWR_SW +5VSB FANCONT(DRV2) CN11 CN501 V+5V_FLK Serial Communication Block Block IC501... -
Page 36: Block Diagram Pwrb Assembly
All manuals and user guides at all-guides.com PWRB ASSY PWR_OK Power Control Block USBB ASSY +2.5V Power AVIB ASSY Generation Block +3.3V Power AVIB ASSY Generation Block +12V Power Generation Block POWER SUPPLY -31V FL Power UNIT FLKB ASSY Generation Block (-30.5V) -28V FL Power FLKB ASSY Generation Block (-27.0V) -
Page 37: Upgrade Instructions
All manuals and user guides at all-guides.com How to install upgrades or the Program Operating System 1. With the unit in the “Standby condition” press Enter and Standby for at least 3 seconds. Wait for the unit to power up and tray one will open automatically. - Page 38 All manuals and user guides at all-guides.com...