Table of Contents
Advertisement
Advertisement
Table of Contents

Related Manuals for Panasonic KX-FL323HK


Summary of Contents for Panasonic KX-FL323HK
- Page 1 Operating Instructions Compact Laser Fax KX-FL323HK Model No. Please read these operating instructions before using the unit and save for future reference. This unit is compatible with Caller ID. You must subscribe to the appropriate service of your service provider/telephone...
- Page 2 Copyright: L This material is copyrighted by Panasonic Communications Co., Ltd., and may be reproduced for internal use only. All other reproduction, in whole or in part, is prohibited without the written consent of Panasonic Communications Co., Ltd.
- Page 3 Important Information Important Information Important safety instructions For your safety To prevent severe injury and loss of life/property, read this section carefully before using the unit to ensure proper and safe operation of your unit. Power and ground connection Use only the power source marked on the L The following symbols are used to classify and unit.
- Page 4 Important Information Make sure that the unit is installed in a well Unplug this unit from power outlets and refer ventilated room so as not to increase servicing to an authorised service centre density of ozone in the air. Since ozone is when any of the following conditions occur: heavier than air, it is recommended that air at floor level be ventilated.
- Page 5 Important Information LED light CLASS 1M LED PRODUCT Installation and relocation Do not view directly with optical instruments. After moving the unit from cold areas to warmer areas, wait approximately 30 minutes before connecting the unit to allow LED light of CIS properties the unit to adjust to the ambient LED radiation output : Max.
- Page 6 (1). cartridges and drum units are recommended. We cannot be responsible for problems that may be caused by a non-Panasonic toner cartridge or drum unit: – Damage to the unit – Poor print quality –...
- Page 7 Important Information Illegal copies L It is unlawful to make copies of certain documents. Copying certain documents may be illegal in your country. Penalties of fines and/or imprisonment may be imposed on those found guilty. The following are examples of items that may be illegal to copy in your country.
-
Page 8: Table Of Contents
Table of Contents 1. Introduction and Installation Receiving a fax automatically – Auto answer 1. Table of Contents ON..............36 Accessories Receiving a fax manually – Auto answer OFF Supplied accessories ........9 ..............36 Accessory information ........9 Using the unit with an answering machine...38 Finding the Controls Receive polling (retrieving a fax placed on Description of buttons........ -
Page 9: Introduction And Installation
Panasonic toner cartridge and drum unit. L We cannot be responsible for any damage to the unit or degradation of print quality which may occur from the use of a non-Panasonic toner cartridge and drum unit. 5 Paper tray... -
Page 10: Description Of Buttons
1. Introduction and Installation {Manual Broad} Finding the Controls L To send a document to multiple parties manually 1.3 Description of buttons (page 32, 33). E F G H I J {Tone} L To change from pulse to tone temporarily during dialling when your line has rotary pulse service. -
Page 11: Overview
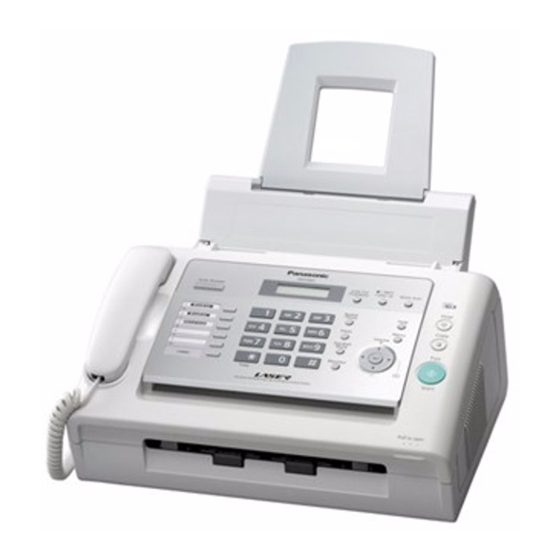
1. Introduction and Installation 1.4 Overview 1 Handset 2 Speaker 3 Document guides 4 Paper tray 5 Recording paper entrance 6 Tension plate 7 Document stacker 8 Paper stacker 9 Recording paper exit j Document exit k Front cover l Document entrance *1 The paper stacker and document stacker may not be shown in all illustrations. -
Page 12: Toner Cartridge And Drum Unit
1. Introduction and Installation Place the toner cartridge (1) into the drum unit (2) Installation vertically. 1.5 Toner cartridge and drum unit The supplied toner cartridge is a starter toner cartridge. L To replace the toner cartridge and the drum unit, see page 58. - Page 13 1. Introduction and Installation Lift open the front cover (1), holding the dotted area L Make sure that the triangles (3) match to install (2) on the right side. the drum and toner unit correctly. L If the lower glass (3) is dirty, clean it with a soft Close the front cover (1) by pushing down on both and dry cloth.
-
Page 14: Paper Tray
1. Introduction and Installation 1.6 Paper tray 1.7 Paper stacker Insert the paper tray (1) into the slot (2) on the back of Line up the slots (1) in the paper stacker with the pegs the unit. (2) on the bottom of the unit, then insert the two tabs of the paper stacker into the slots on the unit (3). -
Page 15: Document Stacker
1. Introduction and Installation 1.8 Document stacker 1.9 Handset cord Insert the document stacker (1) into the slots (2). Connect the handset cord (1). L The jack on the longer, uncoiled end (2) of the handset cord should be connected to the handset. -
Page 16: Recording Paper
1. Introduction and Installation Pull the tension plate forward (1). 1.10 Recording paper A4 size recording paper can be used. The unit can hold: – Up to 250 sheets of 60 g/m to 75 g/m paper. – Up to 230 sheets of 80 g/m paper. - Page 17 1. Introduction and Installation Push the tension plate back (1).
-
Page 18: Preparation
2. Preparation L If you use the unit with a computer and your internet 2 Preparation Connections and Setup provider instructs you to install a filter (5), please 2.1 Connections connect it as follows. Caution: L When you operate this product, the power outlet should be near the product and easily accessible. -
Page 19: Dialling Mode
2. Preparation Help 2.2 Dialling mode 2.3 Help function If you cannot dial (page 24, 30), change this setting The unit contains helpful information which can be depending on your telephone line service. printed for quick reference. – “BASIC SETTINGS”: How to set the date, time, your logo and fax number. -
Page 20: Adjusting Volume
2. Preparation 2.4 Adjusting volume 2.5 Date and time You must set the date and time. {Set} {A}{B} {Set} {<}{>} {Menu} Ringer volume While the unit is idle, press {A} or {B}. L If any documents are in the document entrance, you Press {Menu}. -
Page 21: Your Logo
2. Preparation Note: L The other party’s fax machine will print the date and 2.6 Your logo time on the top of each page you send according to The logo can be your name or the name of your your unit’s date and time setting. company. - Page 22 2. Preparation 1. Press {2} 2 times. Keypad Characters LOGO=| G H I 2. Press {4} 3 times. LOGO=B| 3. Press {*}. M N O 6 LOGO=B| 4. Press {5} 3 times. Q R S LOGO=Bi| U V 8 To correct a mistake 1.
-
Page 23: Your Fax Number
2. Preparation 2.7 Your fax number {Set} {<}{>} {Menu} {Flash} {Stop} Press {Menu}. SYSTEM SETUP PRESS [( )] Press {#}, then {0}{3}. YOUR FAX NO. PRESS SET Press {Set}. L The cursor (|) will appear on the display. NO.=| Enter your fax number, up to 20 digits. NO.=1234567| Example: L To enter a “+”, press {*}. -
Page 24: Telephone
3. Telephone 3 Telephone Automatic Dialling 3.1 Storing names and telephone 3.2 Making a phone call using the numbers into the phonebook phonebook The phonebook allows you to make calls without having Before using this feature, store the desired names and to dial manually. -
Page 25: Erasing A Stored Item
3. Telephone Press {Menu} repeatedly to display “PHONEBOOK SET”. 3.4 Erasing a stored item Select the desired station key. 3.4.1 Erasing a specific item For station 1–3: Press one of the station keys, press {A} or {B} Press {>}. repeatedly to select “DIAL MODE”, then press L Confirm that there are no documents in the {Set}. -
Page 26: Caller Id
3. Telephone Press {*}. Caller ID L If you do not need to edit the name, skip to step 3.6 Caller ID service This unit is compatible with the Caller ID service Edit the name. For further details, see the storing offered by your local telephone company. -
Page 27: Viewing And Calling Back Using Caller Information
3. Telephone – To print automatically after every 30 new calls, activate feature #26 (page 46). 3.7 Viewing and calling back using caller information You can easily view caller information and call back. Important: L If the area code of the received telephone number is the same as yours, the area code may need to be deleted before calling back. -
Page 28: Editing A Caller's Telephone Number Before Calling Back
3. Telephone Press {<}. Display while viewing L To cancel erasing, press {Stop} 2 times. L When the unit could not receive a name, the display Press {Set}. will show “NO NAME RCVD”. L To erase other items, repeat steps 2 to 4. L When no calls have been received, the display will show “NO CALLER DATA”. -
Page 29: Storing Caller Information Into The Phonebook / One-Touch Dial
3. Telephone 3.10.2 Into the one-touch dial 3.10 Storing caller information into the phonebook / one-touch {Caller ID} dial Station keys {A}{B} {Menu} 3.10.1 Into the phonebook {Caller ID} {>}{A}{B} {Menu} {Lower} {Set} Press {Caller ID}. Press {A} or {B} repeatedly to display the desired item. -
Page 30: Fax
4. Fax – “PHOTO”: For documents containing photographs, 4 Fax Sending Faxes shaded drawings, etc. 4.1 Sending a fax manually – “MIXED” (Photo with text): For documents containing photographs and text. L Using the “FINE”, “SUPER FINE”, “PHOTO” and “MIXED” settings will increase transmission time. L If the resolution setting is changed during feeding, it will be effective from the next page. -
Page 31: Document Requirements
4. Fax Note: Printing a sending report L Remove clips, staples or other fasteners. A sending report provides you with a printed record of L Do not set the following types of documents: (Make a transmission results. To print sending reports, make sure copy of the document using another copier and set feature #04 is activated (page 45). -
Page 32: Sending A Fax Using One-Touch Dial Feature And Phonebook
4. Fax 4.3 Sending a fax using one- 4.4 Broadcast transmission touch dial feature and phonebook By storing one-touch dial and phonebook items (page 24, 25) into the broadcast memory, you can send the Before using this feature, store the desired names and same document to multiple parties (up to 20). - Page 33 4. Fax L After transmission, the unit will automatically 4.4.2 Adding a new item into the broadcast print a report (broadcast sending report). memory Note: L If you select “FINE”, “SUPER FINE”, “PHOTO” or After initial programming, you can add new items (up to a combined total of 20).
-
Page 34: Selecting The Way To Use Your Unit
4. Fax L The {Auto Answer} indicator is OFF. Receiving Faxes 4.5 Selecting the way to use your unit Depending on your situation, select the way you prefer to use your unit. – Use only as a fax (FAX ONLY mode) –... - Page 35 4. Fax How to receive calls When receiving phone calls, the answering machine will record voice messages.
-
Page 36: Receiving A Fax Automatically - Auto Answer On
4. Fax 4.6 Receiving a fax automatically 4.7 Receiving a fax manually – – Auto answer ON Auto answer OFF 4.6.1 Activating FAX ONLY mode 4.7.1 Activating TEL mode Press {Auto Answer} repeatedly to display the Make sure feature #73 is set to “TEL” beforehand following. - Page 37 4. Fax How to receive faxes with an extension telephone How phone calls and faxes are received If you have another telephone connected to the [EXT] 1. “INCOMING CALL” will be displayed but the unit will jack or the same line (extension telephone), you can use not ring.
-
Page 38: Using The Unit With An Answering Machine
4. Fax 4.8 Using the unit with an answering machine 4.8.1 Setting up the unit and an answering machine Connect the answering machine (1). L Answering machine is not supplied. L Remove the stopper (2) if attached. L The number of rings is determined by the “Silent fax recognition ring setting”... -
Page 39: Receive Polling (Retrieving A Fax Placed On Another Fax Machine)
4. Fax If a fax calling tone is detected, the unit will receive a L The unit will start reception. fax automatically. L Regarding the remote access code for the answering machine, see the operating instructions of the answering machine. Receiving a voice message and fax document in one call The caller can leave a voice message and send a fax... -
Page 40: Junk Fax Prohibitor (Preventing Fax Reception From Undesired Callers)
4. Fax To erase an item from the junk fax prohibitor list 4.10 Junk fax prohibitor 1. Press {Junk Fax Prohibitor}. (preventing fax reception from 2. Press {>} repeatedly to display “JUNK LIST undesired callers) DISP.”. 3. Press {Set}. If you subscribe to Caller ID service (page 26), this feature prevents fax reception from calls that do not 4. -
Page 41: Duplex Ring
5. Duplex Ring 5 Duplex Ring Duplex Ring 5.1 Using with the ring detection feature When you subscribe to a duplex ring service, your telephone company will assign you a new fax number and will also tell you the assigned ring pattern. Please complete the following setup on your unit to identify the assigned ring pattern. -
Page 42: Copy
6. Copy 6 Copy Copying 6.1.1 More copying features 6.1 Making a copy To enlarge a document 1. Insert the document, then press {Copy}. 2. Press {>}. 3. Press {A} repeatedly to select from “105%” to “200%” by changing the enlargement rate 5% at a time. - Page 43 6. Copy To collate multiple copies The unit can collate multiple copies in the same order as the original document pages. 1. Insert the document, then press {Copy}. 2. Enter the number of copies (up to 99). 3. Press {>} 2 times to display “COLLATE OFF”. 4.
-
Page 44: Programmable Features
7. Programmable Features 7 Programmable Features Features Summary 7.1 Programming {Set} {Menu} Press {Menu}. Press {#} and the 2-digit code (page 45 to page 50). Press the desired selection to display the desired setting. L This step may be slightly different depending on the feature. -
Page 45: Basic Features
7. Programmable Features 7.2 Basic features Feature/Code Selection Setting the date and time Enter the date and time using the dial keypad. See page 20 for details. {#}{0}{1} Setting your logo Enter your logo using the dial keypad. See page 21 for details. {#}{0}{2} Setting your fax number Enter your fax number using the dial keypad. -
Page 46: Advanced Features
7. Programmable Features 7.3 Advanced features Feature/Code Selection Setting the journal report {0} “OFF”: The unit will not print a journal report, but will keep a record of to print automatically the last 30 fax transmissions and receptions. {1} “ON” (default): The unit will print a journal report automatically after {#}{2}{2} every 30 new fax transmissions and receptions (page 31). - Page 47 7. Programmable Features Feature/Code Selection Changing the silent fax To change the number of times the unit rings while in TEL/FAX mode. recognition ring setting {3} “3” (default) {4} “4” {#}{3}{0} {5} “5” {6} “6” {7} “7” {8} “8” {9} “9” Note: L See page 37 for details.
- Page 48 7. Programmable Features Feature/Code Selection Setting friendly reception To receive a fax automatically when you answer a call and hear a fax calling tone (slow beep). {#}{4}{6} {0} “OFF”: You have to press {Start} for fax reception. {1} “ON” (default): You do not have to press {Start} for fax reception. Setting the auto To answer a call with an extension telephone in TEL/FAX mode (page 37), disconnection...
- Page 49 7. Programmable Features Feature/Code Selection Setting recall/flash time The recall/flash time depends on your telephone exchange or host PBX. {1} “900msec” {#}{7}{2} {2} “700msec” (default) {3} “600msec” {4} “400msec” {5} “300msec” {6} “250msec” {7} “200msec” {8} “160msec” {9} “110msec” {*} “100msec” {0} “90msec”...
- Page 50 7. Programmable Features Feature/Code Selection Resetting advanced {0} “NO” (default) features to their default {1} “YES” settings To reset the advanced features: {#}{8}{0} 1. Press {Menu}. 2. Press {#}, then {8}{0}. 3. Press {1} to select “YES”. 4. Press {Set}. 5.
-
Page 51: Help
8. Help 8 Help 8.1 Error messages – Reports If a problem occurs during fax transmission or reception, one of the following messages will be printed on the sending and journal reports (page 31). Message Code Cause & Solution COMMUNICATION ERROR 40-42 L A transmission or reception error occurred. -
Page 52: Error Messages - Display
8. Help 8.2 Error messages – Display If the unit detects a problem, one or more of the following messages will appear on the display. Display Cause & Solution “CALL SERVICE” L There is something wrong with the unit. Contact our service personnel. “CHANGE DRUM”... - Page 53 8. Help Display Cause & Solution “REPLACE DRUM SOON” L The drum life is near to an end. Replace the drum unit as soon as possible (page 58). “RX MEMORY FULL” L The memory is full of received documents due to a lack of recording paper or a recording paper jam.
-
Page 54: When A Function Does Not Work
8. Help Troubleshooting 8.3 When a function does not work 8.3.1 Initial settings Problem Cause & Solution I cannot hear a dial tone. L The telephone line cord is connected to the [EXT] jack on the unit. Connect to the [LINE] jack (page 18). L If you use a splitter/coupler to connect the unit, remove the splitter/coupler and connect the unit to the wall jack directly. - Page 55 8. Help 8.3.3 Fax – sending Problem Cause & Solution I cannot send documents. L The telephone line cord is connected to the [EXT] jack on the unit. Connect to the [LINE] jack (page 18). L The other party’s fax machine is busy or has run out of recording paper. Try again.
- Page 56 8. Help Problem Cause & Solution The printing quality is poor. L If documents can be copied properly, the unit is working normally. The other party may have sent a faint document or there may be something wrong with the other party’s machine. Ask them to send a clearer copy of the document or to check their fax machine.
- Page 57 8. Help Problem Cause & Solution The printing quality is poor. Original Copy A B C L Some paper has instructions recommending which side to print on. Try turning the paper over. L You may have used paper with a cotton and/or fibre content that is over 20%, such as letterhead or resume paper.
-
Page 58: Replacing The Toner Cartridge And The Drum Unit
(page 68). If printing quality is still poor, replace the toner cartridge and drum unit. To ensure that the unit operates properly, we recommend the use of Panasonic toner cartridge (Model No. KX-FAT90E) and drum unit (Model No. KX-FAD91E). See page 9 for accessory information. - Page 59 8. Help L If you replace only the toner cartridge, tap on the inside of the drum unit to maintain the print used toner cartridge several times to allow the quality. remaining toner to fall into the drum unit before L Repeat for the other groove.
- Page 60 8. Help Press down the toner cartridge firmly (1). Keep Install the drum and toner unit (1) by holding the pressing while turning the lever on each side of the tabs. toner cartridge towards you (2). Make sure that the triangles (1) match, to install the toner cartridge correctly.
- Page 61 8. Help L While the unit displays “PLEASE WAIT”, do not open the front cover, or disconnect the power cord. Waste disposal method Waste material should be disposed of under conditions which meet all national and local environmental regulations.
-
Page 62: Paper Jams
9. Paper Jams Close the front cover (1) by pushing down on both 9 Paper Jams Jams sides, until locked. 9.1 Recording paper jam The display will show the following. PAPER JAMMED 9.1.1 When the recording paper has jammed near the drum and toner unit Remove the handset and document stacker. - Page 63 9. Paper Jams Remove the recording paper (1), then remove the Remove the jammed paper (1) from the fuser unit drum and toner unit (2) to allow the jammed paper by pulling it upwards carefully, then install the drum (3) to pull free from the rear cabinet. and toner unit.
-
Page 64: Document Jams
9. Paper Jams Place the handset on the cradle and attach the document stacker. 9.2 Document jams Pull the tension plate forward (1), then re-insert the Note: recording paper. L Do not pull out the jammed document forcibly before L Before re-inserting, make sure to fan and opening the front cover. - Page 65 9. Paper Jams Pull open the inner cover (1). Close the front cover (1) by pushing down on both sides, until locked. Note: Place the handset on the cradle and attach the L Do not touch the transfer roller (2). document stacker.
-
Page 66: Cleaning
10. Cleaning Clean the document separation roller (1) with a 10 Cleaning Cleaning cloth moistened with isopropyl rubbing alcohol, and 10.1 Cleaning the inside of the let all parts dry thoroughly. unit Clean the inside of the unit: – If misfeeding of your original occurs frequently. –... - Page 67 10. Cleaning Clean the document feeder roller (1) with a cloth Re-install the drum and toner unit (1) by holding the moistened with isopropyl rubbing alcohol, and let all tabs. parts dry thoroughly. Clean the upper glass (2) with a soft and dry cloth. L Do not damage the transparent sheet (3) when cleaning the document feeder roller.
-
Page 68: General Information
11. General Information 11 General Information Printed Repor ts 11.1 Reference lists and reports You can print out the following lists and reports for your reference. – “SETUP LIST”: Provides you with the current settings of the programming features (page 45 to page 50). –... -
Page 69: Specifications
11. General Information Specifications Printing resolution: 600 × 600 dpi 11.2 Specifications LED light of CIS properties: Applicable lines: LED radiation output: Max. 1 mW Public Switched Telephone Network Wavelength: Green 520 nm typ. Document size: Emission duration: Continuous Max. 216 mm in width, Max. 600 mm in length *1 Transmission speed depends upon the contents of Effective scanning width: the pages, resolution, telephone line conditions and... - Page 70 4.4 Using the unit as a printer Scanning 4.5 Using the unit as a scannerRemote Control 4.6 Operating the unit from your computer. 4.7 Fax sending/receiving using Multi-Function Station Thank you for purchasing a Panasonic fax machine. Things you should keep a record of Attach your sales receipt here.
-
Page 71: Index
12. Index Delayed transmission (Feature #25): 46 12. Index Dialling mode (Feature #13): 19 12.1 Index Display # #01 Date and time: 20 Contrast (Feature #39): 47 #02 Your logo: 21 Error messages: 52 #03 Your fax number: 23 Document size: 31 #04 Sending report: 31, 45 Drum life: 70 #06 FAX ring count: 45... - Page 72 12. Index Printer test: 68 Sending: 31, 45 Setup: 68 Telephone number: 68 Reset (Feature #80): 50 Resolution: 30, 42 Ringer type (Feature #17): 20, 45 Ring setting FAX ONLY (Feature #06): 45 Silent fax (Feature #30): 47 TEL/FAX (Feature #78): 49 S Scan contrast (Feature #58): 48 Sending faxes Broadcast: 33...
- Page 73 Notes...
- Page 74 Notes...
- Page 75 Notes...
- Page 76 Sole agent: 9th Floor, Peninsula Centre 67, Mody Road, Tsimshatsui East, Kowloon, Hong Kong Web site: http://www.panasonic.oa.com.hk Manufacturer: 1-62, 4-chome, Minoshima, Hakata-ku, Fukuoka 812-8531, Japan Global web site: http://www.pan asonic.net/ PNQX2241ZA CM0809DY0 PNQX2241ZA CM0809DY0...