Advertisement
Quick Links
Advertisement

Related Manuals for HP V5040U


Summary of Contents for HP V5040U
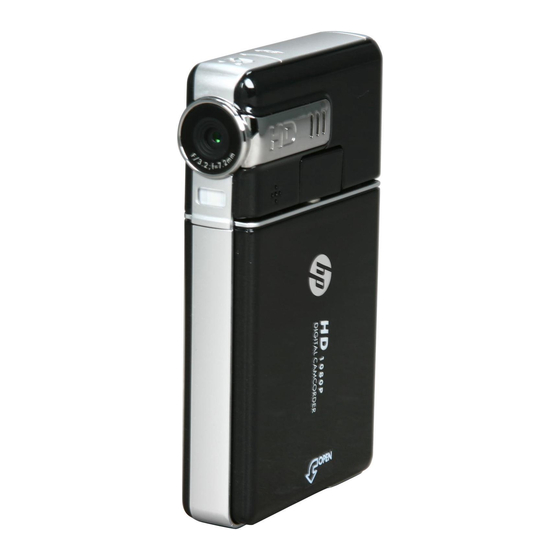
- Page 1 HP V5040U HP V5040U Digital Camcorder Digital Camcorder User Manual User Manual...
- Page 2 Contents Contents Section 1 Section 1 Getting to Getting to Know Know our Digi Digital Camcorder tal Camcorder ............ Section Section Getting Getting Started Started............................Section Section Enjoying Enjoying Record Record Mode...
- Page 3 For the latest For the latest revision, please visit HYPERLINK http://www.hp.com revision, please visit HYPERLINK http://www.hp.com/support . /support .
- Page 4 Front View Front View SD card Cover SD card Cover Macro Focus Switch Macro Focus Switch Lens Lens LCD Panel LCD Panel Light Light Power Button Power Button Rear View Rear View Movie Shutter Button Movie Shutter Button Picture Shutter Button Picture Shutter Button Tele Button(Up Button)
- Page 5 Side View Side View Speaker Speaker Microphone Microphone Battery Cover Battery Cover Bottom View Bottom View Strap Hook Strap Hook Tripod Socket Tripod Socket...
- Page 6 Section 2 Section 2 Getting Started Getting Started Loading the Battery Loading the Battery Before using the camera, users must load Lithium-ion rechargeable battery. Before using the camera, users must load Lithium-ion rechargeable battery. Follow the arrow A direction and slide to eject the battery cover. Follow the arrow A direction and slide to eject the battery cover.
- Page 7 urning the Camera urning the Camera On and Getting On and Getting Started Started • • To turn on the camera: To turn on the camera: Flip out the LCD panel; the camera will turn on automatically. Flip out the LCD panel; the camera will turn on automatically. Or press Power Button for one second to turn on it.
- Page 8 Section 3 Section 3 Enjoying the Record Mode Enjoying the Record Mode Button Function Button Function Direction Button: Direction Button: Right Butt Right Button: HD(1080p)/WVGA mode switch HD(1080p)/WVGA mode switch Left Button: Left Button: Digital Light On/ Light On/ Light OFF Digital Light On/ Light On/ Light OFF Tele Button(Up Button) : Tele Button(Up Button) :...
- Page 9 LCD Monitor Information LCD Monitor Information The indicator shown below may display on LCD when movies and pictures are recorded: The indicator shown below may display on LCD when movies and pictures are recorded: Movie Resolution Movie Resolution HD (1080p) (30fps) HD (1080p) (30fps) HD (720p) (30fps)
- Page 10 Motion Detection Motion Detection Scene Scene Skin Skin Night Night Backlight Backlight Macro Position Focusing Macro Position Focusing Manual White Balance Manual White Balance SD Card inserted SD Card inserted Battery: full power Battery: full power Battery: medium power Battery: medium power ...
- Page 11 QVGA (30fps) QVGA (30fps) Picture Recording Picture Recording • • Press the Picture Shutter Button ( Press the Picture Shutter Button ( take take picture. picture. • • Press RECORD/PLAY mode toggle and RETURN Button( Press RECORD/PLAY mode toggle and RETURN Button( view view picture.
- Page 12 Options for Record Menu Options for Record Menu • • Resolution Resolution • • Resolution Resolution • • Scene Scene • • Stabilization Stabilization • • Self-timer Self-timer • • WB (White Balance) WB (White Balance) • • Motion Detect Motion Detect •...
- Page 13 Movie Mode Submenu Setting Movie Mode Submenu Setting In Record Mode, press In Record Mode, press OK Button to enter record Button to enter record menu screen. menu screen. Use Right/Left Buttons to select Movie Mode. Use Right/Left Buttons to select Movie Mode. The Movie Mode submenu contains 3 options-- The Movie Mode submenu contains 3 options-- Resolution, Stabilization, and Motion Detect--for...
- Page 14 Motion Detection Motion Detection In Movie Mode submenu, press Up/Down In Movie Mode submenu, press Up/Down Buttons to select Motion Detect. Buttons to select Motion Detect. Use Right/Left Buttons to choose On or Off. Use Right/Left Buttons to choose On or Off. Press Menu/OK Button to validate the setting Press Menu/OK Button to validate the setting then press RECORD/PLAY mode toggle and...
- Page 15 Picture Mode Submenu Setting Picture Mode Submenu Setting In Record Mode, press In Record Mode, press OK Button to enter record Button to enter record menu screen. menu screen. Use Right/Left Buttons to select Picture Mode. Use Right/Left Buttons to select Picture Mode. The Picture Mode submenu contains The Picture Mode submenu contains options,...
- Page 16 Effect Submenu Setting Effect Submenu Setting In Record Mode, press In Record Mode, press OK Button to enter record OK Button to enter record menu screen. menu screen. Use Right/Left Buttons to select Effect. Use Right/Left Buttons to select Effect. The Effect submenu contains 3 options, Scene, The Effect submenu contains 3 options, Scene, WB(White Balance), and ISO for you to adjust...
- Page 17 WB (White Balance) WB (White Balance) The camera adjusts the color balance of images automatically. Three manual white balance settings are The camera adjusts the color balance of images automatically. Three manual white balance settings are available: available: •...
- Page 18 Section 4 Section 4 Playback Mode Playback Mode Enjoying the Enjoying the Button Function Button Function The Buttons have the following functions in Movie and Picture Playback Modes. The Buttons have the following functions in Movie and Picture Playback Modes. Direction Button: Direction Button: Right Button:...
- Page 19 LCD Monitor Information LCD Monitor Information Indicators on the LCD screen while in Playback Mode: Indicators on the LCD screen while in Playback Mode: HD (1080p) (30fps) HD (1080p) (30fps) HD (720p) (30fps) HD (720p) (30fps) WVGA (60fps) WVGA (60fps) VGA (30fps) VGA (30fps)
- Page 20 Operations for Playback Mode Operations for Playback Mode The Playback Mode is for viewing and managing movies and pictures on the built-in memory or on an The Playback Mode is for viewing and managing movies and pictures on the built-in memory or on an SD card.
- Page 21 Movie Playback Mode Menu Movie Playback Mode Menu In Movie Playback Mode, press Menu/OK Button In Movie Playback Mode, press Menu/OK Button to enter Movie Playback menu screen. to enter Movie Playback menu screen. .Use Up/Down Buttons to select four options, .Use Up/Down Buttons to select four options, Delete, YouTube Direct, Repeat One, and Repeat Delete, YouTube Direct, Repeat One, and Repeat...
- Page 22 Y YouT ouTube Direct ube Direct (For more detailed operational instructions, please refer to Section 9.) (For more detailed operational instructions, please refer to Section 9.) Use Up/Down Buttons to select the YouTube Use Up/Down Buttons to select the YouTube Direct option.
- Page 23 Picture Playback Picture Playback In Picture thumbnail preview folder, use Direction In Picture thumbnail preview folder, use Direction Buttons to locate the picture you want to view. Buttons to locate the picture you want to view. Press OK Button to view the picture. Press OK Button to view the picture.
- Page 24 Picture Playback Mode Menu Picture Playback Mode Menu In Picture Playback Mode, press OK Button to In Picture Playback Mode, press OK Button to enter Picture Playback menu screen. enter Picture Playback menu screen. Use Up/Down Buttons to select three options, Use Up/Down Buttons to select three options, Delete, Lock, and Slideshow.
- Page 25 Lock Pictures Lock Pictures Single or all pictures can be locked. This function can prevent the pictures from being deleted Single or all pictures can be locked. This function can prevent the pictures from being deleted accidentally. accidentally. Use Up/Down Buttons to select the Use Up/Down Buttons to select the Lock option.
- Page 26 Section 5 Section 5 Setting Y Setting Your Camera Camera Setting Menu Setting Menu In Record Mode, press OK Button to enter record In Record Mode, press OK Button to enter record menu screen. menu screen. Use Right/Left Buttons to select Setting. Use Right/Left Buttons to select Setting.
- Page 27 Time Setting Time Setting In setting submenu, press Up/Down Button to In setting submenu, press Up/Down Button to select Time Setting. select Time Setting. Press OK Button to go to the Time Setting Press OK Button to go to the Time Setting menu.
- Page 28 Ensure that the appropriate TV standard of your area is selected – either NTSC or PAL. Ensure that the appropriate TV standard of your area is selected – either NTSC or PAL. Wrong TV system setting may cause image icker. Wrong TV system setting may cause image icker.
- Page 29 Default Setting Default Setting To restore the default factory setting, select this option. To restore the default factory setting, select this option. In setting submenu, press Down Button to select In setting submenu, press Down Button to select Default Setting.
- Page 30 Section 6 Section 6 Viewing Pictures and Movies on a TV Viewing Pictures and Movies on a TV Connecting to a High-Defnition 16:9(Wide) TV Connecting to a High-Defnition 16:9(Wide) TV Connect one end of the HDMI cable to your camera’s HDMI Out port. Connect one end of the HDMI cable to your camera’s HDMI Out port.
- Page 31 Section 7 Section 7 Viewing Pictures and Movies on PC Viewing Pictures and Movies on PC Installing Bundled Software Installing Bundled Software The CD-ROM supplied with this camera contains 2 pieces of software. The CD-ROM supplied with this camera contains 2 pieces of software. •...
- Page 32 Section 8 Section 8 Burning the Recorded Clip into Burning the Recorded Clip into Bundled software CD contains ArcSoft MediaImpression features burning the movie clip into DVD. You Bundled software CD contains ArcSoft MediaImpression features burning the movie clip into DVD. You can share this DVD movie with family and friends by using regular DVD player.
- Page 33 The operation screen will appear: The operation screen will appear: • • Select the folder that contains the video les Select the folder that contains the video les you want to burn. you want to burn. •...
- Page 34 Section 9 Section 9 Uploadin Uploading Video g Video Files Files to Y YouT ouTube The built-in built-in Y YouT ouTube Direct ube Direct application application offers you an easy way to upload your video clips to YouTube offers you an easy way to upload your video clips to YouTube instantly.
- Page 35 Preview the video: double click on the video clip Preview the video: double click on the video clip in thumbnail screen. Click Play/Pause icon to in thumbnail screen. Click Play/Pause icon to play/pause. Click Return icon to back to thumbnail preview screen. play/pause.
- Page 36 Fill in the information in the Fill in the information in the blanks. blanks. If you do not have a YouTube account, click [SignUp] to register a new YouTube account rstly. If you do not have a YouTube account, click [SignUp] to register a new YouTube account rstly. Then, the YouTube sign-up screen will appear.
- Page 37 Click [Upload Videos] to upload the video(s). Click [Upload Videos] to upload the video(s).
- Page 38 Section 10 Section 10 Specifcations and Specifcations and System Requirement System Requirement Specifcations Specifcations r r Lens Lens F3.2 (f = 7.2mm) F3.2 (f = 7.2mm) Focus Range Focus Range 200cm (6.7 feet)~innite (Normal Mode) 200cm (6.7 feet)~innite (Normal Mode) Center: 20 cm (0.67 feet) (Macro Mode) Center: 20 cm (0.67 feet) (Macro Mode)
- Page 39 System Requirement System Requirement Windows 2000/XP/Vista, Windows 7 Windows 2000/XP/Vista, Windows 7 Pentium III 800 MHz above Pentium III 800 MHz above 512 MB RAM 512 MB RAM CD ROM CD ROM 300MB free HDD space 300MB free HDD space Available Available USB port...
- Page 40 Section 11 Section 11 Troubleshooting Troubleshooting Troubleshooting Troubleshooting 1.If the LCD image is not clear when shooting, how can the focus be adjusted? 1.If the LCD image is not clear when shooting, how can the focus be adjusted? Try to switch between Macro and Normal Mode.
- Page 41 Should your HP Branded Product require service within the Warranty period, Should your HP Branded Product require service within the Warranty period, please contact the original point of purchase or an authorized HP reseller in please contact the original point of purchase or an authorized HP reseller in your country.
- Page 42 Contact/P Contact/Phone Suppor hone Support: ë ë ç ç North America North America & &...
- Page 43 P/N: 7525C00126A P/N: 7525C00126A...