Table of Contents
Advertisement
Quick Links
Advertisement
Table of Contents

Related Manuals for HP V5040UA


Summary of Contents for HP V5040UA
- Page 1 HP V5040U Digital Camcorder User Manual...
-
Page 2: Table Of Contents
Contents Section 1 Getting to Know Your Camera ..........2 Section 2 Getting Started ..............5 Section 3 Enjoying the Record Mode ..........7 Section 4 Enjoying the Playback Mode ..........17 Section 5 Setting Your Camera ............25 Section 6 Viewing Pictures and Movies on a TV ......29 Section 7 Viewing Pictures and Movies on PC ........ -
Page 3: Section 1 Getting To Know Your Camera
Section 1 Getting to Know Your Camera Overview About this Manual: This manual is designed to assist you in using your new digital camera. All information presented is as accurate as possible but is subject to change without notice. For the latest revision, please visit HYPERLINK http://www.hp.com/support . This camera contains a 5 Mega Pixel sensor that produces H.264 video files. -
Page 4: Front View
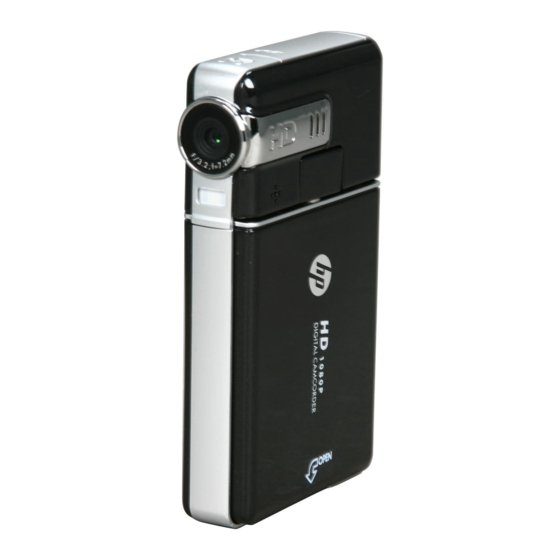
Front View SD card Cover Macro Focus Switch Lens LCD Panel Light Power Button Rear View Movie Shutter Button Picture Shutter Button Tele Button(Up Button) OK Button Wide Button (Down Button) Video Resolution toggle / Right Button Illumination light / Left Button RECORD/PLAY mode toggle &... -
Page 5: Side View
Side View Speaker Microphone Battery Cover Bottom View Strap Hook Tripod Socket... -
Page 6: Section 2 Getting Started
Section 2 Getting Started Loading the Battery Before using the camera, users must load Lithium-ion rechargeable battery. Follow the arrow A direction and slide to eject the battery cover. Insert the battery following to the correct polarity marks ( + or -). Close the battery cover firmly. -
Page 7: Turning The Camera Off
Turning the Camera On and Getting Started • To turn on the camera: Flip out the LCD panel; the camera will turn on automatically. Or press Power Button for one second to turn on it. • To take a movie, press the Movie Shutter Button ( •... -
Page 8: Section 3 Enjoying The Record Mode
Section 3 Enjoying the Record Mode Button Function Direction Button: Right Button: HD(1080p)/WVGA mode switch Left Button: Digital Light On/ Light On/ Light OFF Tele Button(Up Button) : Digital Zoom In Wide Button(Down Button) : Digital Zoom out OK Button: Menu ON/Validate the setting Power Button: Press down for one second to turn on or turn off the camera. -
Page 9: Lcd Monitor Information
LCD Monitor Information The indicator shown below may display on LCD when movies and pictures are recorded: Movie Resolution HD (1080p) (30fps) HD (720p) (30fps) WVGA (60fps) VGA (30fps) QVGA (30fps) Picture Resolution High Standard Number of images that can still be taken at current resolution Recording time of movie that can still be taken at current resolution Digital Light On Light On... -
Page 10: Movie Recording
Motion Detection Scene Skin Night Backlight Macro Position Focusing Manual White Balance SD Card inserted Battery: full power Battery: medium power (10) Battery: low power Battery: power empty Zoom meter: (11) HD(1080p):2X (2X Digital zoom) Other video resolution:1X~4X (4X Digital zoom) (12) Stabilization Note... -
Page 11: Picture Recording
QVGA (30fps) Picture Recording • Press the Picture Shutter Button ( ) to take a picture. • Press RECORD/PLAY mode toggle and RETURN Button( ) to view the picture. • Three resolution settings are available: Image Quality High Quality:12 Mega Pixels Standard Quality:5 Mega Pixels Low Quality:3 Mega Pixels Taking Close up Pictures... -
Page 12: Options For Record Menu
Options for Record Menu Movie Mode Picture Mode Effect • Resolution • Resolution • Scene • Stabilization • Self-timer • WB (White Balance) • Motion Detect • Operations for Record Mode Operation Display Screen Press OK Button when in Record Mode. Use Right/Left Buttons to move between main menu options, which are Movie Mode, Picture Mode, and Effect. -
Page 13: Movie Mode Submenu Setting
Movie Mode Submenu Setting Operation Display Screen In Record Mode, press OK Button to enter record menu screen. Use Right/Left Buttons to select Movie Mode. The Movie Mode submenu contains 3 options-- Resolution, Stabilization, and Motion Detect--for you to adjust the camera setting. Movie Resolution Operation Display Screen... -
Page 14: Motion Detection
Motion Detection Operation Display Screen In Movie Mode submenu, press Up/Down Buttons to select Motion Detect. Use Right/Left Buttons to choose On or Off. Press Menu/OK Button to validate the setting then press RECORD/PLAY mode toggle and RETURN Button ( ) to back to Record mode. -
Page 15: Picture Mode Submenu Setting
Picture Mode Submenu Setting Operation Display Screen In Record Mode, press OK Button to enter record menu screen. Use Right/Left Buttons to select Picture Mode. The Picture Mode submenu contains 2 options, Resolution, and Self-timer, for you to adjust the camera setting. -
Page 16: Effect Submenu Setting
Effect Submenu Setting Operation Display Screen In Record Mode, press OK Button to enter record menu screen. Use Right/Left Buttons to select Effect. The Effect submenu contains 3 options, Scene, WB(White Balance), and ISO for you to adjust the camera setting. Scene You can select the mode according to the scene condition. - Page 17 WB (White Balance) The camera adjusts the color balance of images automatically. Three manual white balance settings are available: • Auto: The camera automatically adjusts white balance. • Daylight: Under outdoors. • Fluorescent: Under fluorescent light condition. • Tungsten: Under tungsten light condition. Operation Display Screen In Effect submenu, press Up/Dow...
-
Page 18: Section 4 Enjoying The Playback Mode
Section 4 Playback Mode Enjoying the Button Function The Buttons have the following functions in Movie and Picture Playback Modes. Direction Button: Right Button: Go to the next movie/picture. Fast forward Left Button: Go to the previous movie/picture. Fast rewind Tele Button(Up Button) : Zoom in/Volume increase. - Page 19 LCD Monitor Information Indicators on the LCD screen while in Playback Mode: Movie Playback Mode Picture Playback Mode HD (1080p) (30fps) HD (720p) (30fps) WVGA (60fps) VGA (30fps) QVGA (30fps) High Standard Movie playback time counter Current Number/ Total number of movie or picture. Movies is selected to upload to YouTube Volume Indicate the screen is in movie playback mode:Play/Pause...
-
Page 20: Operations For Playback Mode
Operations for Playback Mode The Playback Mode is for viewing and managing movies and pictures on the built-in memory or on an SD card. Operation Display Screen Press RECORD/PLAY mode toggle RETURN Button ( ) to switch from Record Mode to Playback Mode Main Menu.There are 2 options in the Playback Mode, Movie and Picture. -
Page 21: Movie Playback Mode Menu
Movie Playback Mode Menu Operation Display Screen In Movie Playback Mode, press Menu/OK Button to enter Movie Playback menu screen. .Use Up/Down Buttons to select four options, Delete, YouTube Direct, Repeat One, and Repeat All. Delete Movies Operation Display Screen Use Up/Down Buttons to select the Delete option. -
Page 22: Youtube Direct
YouTube Direct (For more detailed operational instructions, please refer to Section 9.) Operation Display Screen Use Up/Down Buttons to select the YouTube Direct option. Press Menu/OK Button to go to the YouTube Direct menu. Use Right/Left Buttons to select the movie. Use Up Button to select all movies or Down Button to select single movie. -
Page 23: Picture Playback
Picture Playback Operation Display Screen In Picture thumbnail preview folder, use Direction Buttons to locate the picture you want to view. Press OK Button to view the picture. Use Right/Left Buttons to go to the next or last picture. While the picture is selected, use Tele Button to magnify. -
Page 24: Picture Playback Mode Menu
Picture Playback Mode Menu Operation Display Screen In Picture Playback Mode, press OK Button to enter Picture Playback menu screen. Use Up/Down Buttons to select three options, Delete, Lock, and Slideshow. Delete Picture Operation Display Screen Use Down Buttons to select the Delete option. Press OK Button to go to the Delete menu. -
Page 25: Lock Pictures
Lock Pictures Single or all pictures can be locked. This function can prevent the pictures from being deleted accidentally. Operation Display Screen Use Up/Down Buttons to select the Lock option. Press OK Button to go to the Lock menu. Use Right/Left Buttons to select the picture. Use Up Button to lock/unlock all pictures or Down Button to lock/unlock single picture. -
Page 26: Section 5 Setting Your Camera
Section 5 Setting Your Camera Setting Menu Operation Display Screen In Record Mode, press OK Button to enter record menu screen. Use Right/Left Buttons to select Setting. The Setting submenu contains 7 options for configuring your camera set up. They are Sound (operation sound),Information,Time Setting,Format,TV,Language,and Default Setting. -
Page 27: Time Setting
Time Setting Operation Display Screen In setting submenu, press Up/Down Button to select Time Setting. Press OK Button to go to the Time Setting menu. Move between Year, Month. Day, Hour and Minute by using Right/Left Buttons. Adjust the numeric value by using Up/Down Buttons. Press OK Button to validate the setting. - Page 28 Ensure that the appropriate TV standard of your area is selected – either NTSC or PAL. Wrong TV system setting may cause image flicker. NTSC standard: USA, Canada, Japan, South Korea and Taiwan etc. PAL standard: UK, Europe, China, Australia, Singapore and Hong Kong etc. Operation Display Screen In setting submenu, press Up/Down Button to...
-
Page 29: Default Setting
Default Setting To restore the default factory setting, select this option. Operation Display Screen In setting submenu, press Down Button to select Default Setting. Press OK Button to go to the Default Setting confirmation screen. Use Right/Left Buttons to choose Yes or No. Choosing “Yes”... -
Page 30: Section 6 Viewing Pictures And Movies On A Tv
Section 6 Viewing Pictures and Movies on a TV Connecting to a High-Definition 16:9(Wide) TV Connect one end of the HDMI cable to your camera’s HDMI Out port. Connect the other end of the cable to a television. Set video input source of a TV to “ HDMI” option. The steps for viewing stored pictures and movie on a TV are exactly the same as for viewing them on the LCD monitor. -
Page 31: Section 7 Viewing Pictures And Movies On Pc
Section 7 Viewing Pictures and Movies on PC Installing Bundled Software The CD-ROM supplied with this camera contains 2 pieces of software. • ArcSoft MediaImpression is a user-friendly application that helps you managing your media, burning your video into DVD, and uploading your videos to YouTube easily. •... -
Page 32: Section 8 Burning The Recorded Clip Into Dvd
Section 8 Burning the Recorded Clip into DVD Bundled software CD contains ArcSoft MediaImpression features burning the movie clip into DVD. You can share this DVD movie with family and friends by using regular DVD player. To create a DVD: Install ArcSoft MediaImpression (Refer to Section 7) Click Windows [ Start ] g[ (All) Programs ] g[ ArcSoft MediaImpression ]... - Page 33 The operation screen will appear: • Select the folder that contains the video files you want to burn. • Select the files • Click button to add the files into slide • Click [Burn to Disc] Click [ Start ] to start DVD burning.
-
Page 34: Section 9 Uploading Video Files To Youtube
Section 9 Uploading Video Files to YouTube The built-in YouTube Direct application offers you an easy way to upload your video clips to YouTube instantly. It helps you share them with your family and friends on YouTube website. To upload video files to YouTube: Select the video clips in Movie Playback Mode. - Page 35 Preview the video: double click on the video clip in thumbnail screen. Click Play/Pause icon to play/pause. Click Return icon to back to thumbnail preview screen. Upload video cilp (1) Upload single video clip or selected video clips:In thumbnail screen,click up/down icon to change the pages.
- Page 36 Fill in the information in the blanks. If you do not have a YouTube account, click [SignUp] to register a new YouTube account firstly. Then, the YouTube sign-up screen will appear. Please follow the instruction on YouTube website. If you want to save the user’s name and password, click [Save User Info].
- Page 37 Click [Upload Videos] to upload the video(s).
-
Page 38: Section 10 Specifications And System Requirement
Section 10 Specifications and System Requirement Specifications Image Sensor 5 Mega Pixel CMOS Sensor Operation Modes Movie Record, Picture Record Lens F3.2 (f = 7.2mm) Focus Range 200cm (6.7 feet)~infinite (Normal Mode) Center: 20 cm (0.67 feet) (Macro Mode) Digital Zoom 1080p:2X Other video resolution:4X Shutter... - Page 39 System Requirement Windows 2000/XP/Vista, Windows 7 Pentium III 800 MHz above 512 MB RAM CD ROM 300MB free HDD space Available USB port 16-bit Color Display Note The LCD screen is manufactured using extremely high-precision technology so over 99.99% of the pixels are operational for effective use. However, some tiny black and/or bright dots (white, red, blue or green) may appear on the LCD screen. These dots are a normal result of the manufaturing process, and do not affect the recording.
-
Page 40: Section 11 Troubleshooting
Section 11 Troubleshooting Troubleshooting 1.If the LCD image is not clear when shooting, how can the focus be adjusted? Try to switch between Macro and Normal Mode. Macro Mode: For object in distance about 20 cm (0.67 feet) , Normal Mode: For object in distance beyond 200cm (6.7 feet). 2.The files on the memory card do not display smoothly when the LCD shows the “!”... -
Page 41: Section 12 Getting Help
Section 12 Getting Help Should your HP Branded Product require service within the Warranty period, please contact the original point of purchase or an authorized HP reseller in your country. If service is not available at those locations, please contact an HP Branded Product warranty agent from the support contact list provided on this document. - Page 42 Contact/Phone Support: Country Language Number België Dutch and German + 32 2700 1724 Français French + 33 171230454 Deutschland German + 49 6950073896 Ireland English + 353 1850882016 Italia Italian + 39 269682189 Netherlands Dutch + 31 202015093 Espana Spanish + 34 914533458 Switzerland German/French/Italian...
- Page 43 P/N: 7525C00115A...