
Related Manuals for Philips GC 8930


Summary of Contents for Philips GC 8930
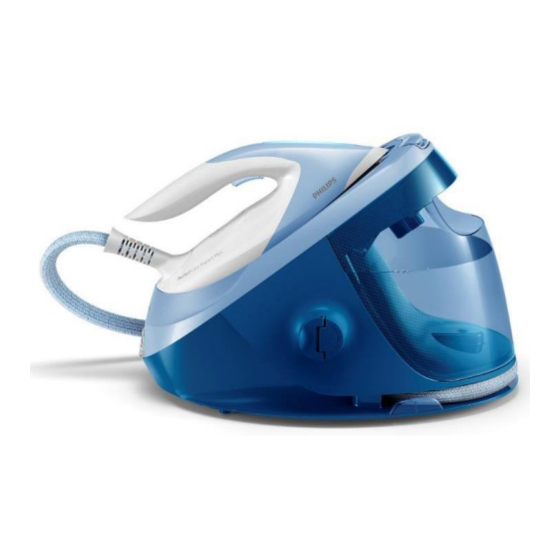
- Page 1 PERFECT CARE EXPERT PLUS STEAM GENERATOR GC 8930 GC 8940 GC8942 GC8950 GC8952 GC 8960 GC 8962 For internal use only Published by Philips Consumer Lifestyle P a g e Document No. : CSW-07-081-18111...
-
Page 2: Table Of Contents
- Product Matrix - Functions/ Features Information - Wiring Diagram 3. Troubleshooting 4. Disassembly and Reassembly Instructions 5. Service Parts 6. Revision History For internal use only Published by Philips Consumer Lifestyle P a g e Document No. : CSW-07-081-18111... -
Page 3: Important Repair Instructions
4. Loose part Check that there are no loose parts such as extra screws in the product that can cause short circuit or product malfunction. For internal use only Published by Philips Consumer Lifestyle P a g e Document No. : CSW-07-081-18111... - Page 4 Tank Empty LED will remain Is time <3 steam trigger twice on for 3 secs. Release Successfully secs? within 0.5 sec interval Power button Entered FMT For internal use only Published by Philips Consumer Lifestyle P a g e Document No. : CSW-07-081-18111...
- Page 5 Important Repair Instructions (Continue) 5.3 Process Self Check Mode, start Self Check Mode For internal use only Published by Philips Consumer Lifestyle P a g e Document No. : CSW-07-081-18111...
-
Page 6: Product Information Product Matrix
Dimensions (H x W x D) 269 x 426 x 239 269 x 426 x 239 269 x 426 x 239 269 x 426 x 239 - mm For internal use only Published by Philips Consumer Lifestyle P a g e Document No. : CSW-07-081-18111... -
Page 7: Functions/ Features Information
Descaling reminder: Light Hose Storage: Hose storage compartment Cord storage: Velcro fix Sustainability ECO setting Energy saving: 45% energy reduction For internal use only Published by Philips Consumer Lifestyle P a g e Document No. : CSW-07-081-18111... -
Page 8: Wiring Diagram
Product Information (Continue) Wiring Diagram - Iron For internal use only Published by Philips Consumer Lifestyle P a g e Document No. : CSW-07-081-18111... - Page 9 Product Information (Continue) Wiring Diagram - Stand For internal use only Published by Philips Consumer Lifestyle P a g e Document No. : CSW-07-081-18111...
-
Page 10: Troubleshooting
Change Stand Botttom Assy Button Assy Change Button Assy Notes: * Refer to page 23 for Power PCBA/ Pump Assy replacement Reassembly Instruction For internal use only Published by Philips Consumer Lifestyle 10 | P a g e Document No. : CSW-07-081-18111... - Page 11 Tank LED Boiler Thermistor Short Circuit ECO, Turbo, Tank LED scrolling anti-clockwise ECO LED Turbo LED Tank LED Boiler Thermistor Open Circuit For internal use only Published by Philips Consumer Lifestyle 11 | P a g e Document No. : CSW-07-081-18111...
-
Page 12: Disassembly And Reassembly Instructions
7. Remove Trigger 5 & Trigger Spring 15. Remove Hose Clip 8. Remove Screw D in front of Housing Prted 4 16. Remove Hose Cord Assy For internal use only Published by Philips Consumer Lifestyle 12 | P a g e Document No. : CSW-07-081-18111... - Page 13 Power Button Assy 7. Remove Rinse Bush Assy 17. Remove Inox Clamp 8. Remove Return Tube 18. Remove Hose from Boiler Assy For internal use only Published by Philips Consumer Lifestyle 13 | P a g e Document No. : CSW-07-081-18111...
- Page 14 28. Remove Mainscord 23. Remove Inlet Coupling Assy 29. Remove Hall Sensor PCBA 24. Remove Spacer Bottom 30. Remove Pump Assy For internal use only Published by Philips Consumer Lifestyle 14 | P a g e Document No. : CSW-07-081-18111...
- Page 15 Step 1: Use a screw driver to lift up the spring in the Lock Assy. Step 2: Remove the lifted spring. Step 3: Slide and lift up the Lock Assy For internal use only Published by Philips Consumer Lifestyle 15 | P a g e Document No. : CSW-07-081-18111...
- Page 16 7. Connect all wire per picture below. 8. Assemble Ryton Ring 9. Assemble Housing Prted 10. Assemble Screw D, fasten Screw D For internal use only Published by Philips Consumer Lifestyle 16 | P a g e Document No. : CSW-07-081-18111...
- Page 17 Do not drop, hit or knock the ASO/ PCBA. (ESD wrist strap & proper pack with ESD bag) c. Ensure there is click sound after Connector to Terminal engagement for wire connection. For internal use only Published by Philips Consumer Lifestyle 17 | P a g e...
- Page 18 8. Assemble Hall Sensor PCBA 26 and dress wire 9. Connect Hose to E-Valve 22, Lock Hose Clip with long nose plyer. For internal use only Published by Philips Consumer Lifestyle 18 | P a g e Document No. : CSW-07-081-18111...
- Page 19 Front Lock Bracket Assy 11, assemble Screw Q, fasten Screw Q 20. Assemble Front Lock Slider Assy 12 and Front Lock Slider Spring For internal use only Published by Philips Consumer Lifestyle 19 | P a g e Document No. : CSW-07-081-18111...
- Page 20 Do not drop, hit or knock the ASO/ PCBA. (ESD wrist strap & proper pack with ESD bag) Ensure there is click sound after Connector to Terminal engagement for wire connection. For internal use only Published by Philips Consumer Lifestyle 20 | P a g e...
- Page 21 Crimping Tool CAUTION: When crimping on plastic part such as DE-AIR VALVE, avoid over crimping to prevent damage (crack) to plastic part. For internal use only Published by Philips Consumer Lifestyle 21 | P a g e Document No. : CSW-07-081-18111...
- Page 22 CAUTION #1: The torque wrench engagement is allowed ONLY at the yellow box locations in below picture. CAUTION #2: Ensure torque wrench jaw does not contact the solenoid body. For internal use only Published by Philips Consumer Lifestyle 22 | P a g e Document No. : CSW-07-081-18111...
- Page 23 Table 1 Jumper wires on PCBA Label on Pump Pump label Jumper wire to cut on PCBA J1 (Pump -1) J2 (Pump-2) For internal use only Published by Philips Consumer Lifestyle 23 | P a g e Document No. : CSW-07-081-18111...
-
Page 24: Service Parts
4239 022 74801 MAINS CORD ASSY 4239 022 74811 4239 022 74811 4239 022 74811 4239 022 74811 Notes: * Option for CRP For internal use only Published by Philips Consumer Lifestyle 24 | P a g e Document No. : CSW-07-081-18111... - Page 25 4239 022 74801 MAINS CORD ASSY 4239 022 74811 4239 022 74811 4239 022 74811 4239 022 74811 Notes: * Option for CRP For internal use only Published by Philips Consumer Lifestyle 25 | P a g e Document No. : CSW-07-081-18111...
- Page 26 4239 022 74801 MAINS CORD ASSY 4239 022 74811 4239 022 74811 4239 022 75161 4239 022 74811 Notes: * Option for CRP For internal use only Published by Philips Consumer Lifestyle 26 | P a g e Document No. : CSW-07-081-18111...
- Page 27 4239 022 74801 MAINS CORD ASSY 4239 022 74811 4239 022 74811 4239 022 74811 4239 022 74811 Notes: * Option for CRP For internal use only Published by Philips Consumer Lifestyle 27 | P a g e Document No. : CSW-07-081-18111...
- Page 28 4239 022 74801 MAINS CORD ASSY 4239 022 74811 4239 022 74811 4239 022 74811 4239 022 74811 Notes: * Option for CRP For internal use only Published by Philips Consumer Lifestyle 28 | P a g e Document No. : CSW-07-081-18111...
- Page 29 4239 022 75141 MAINS CORD ASSY 4239 022 74811 4239 022 74811 4239 022 74811 4239 022 74811 Notes: * Option for CRP For internal use only Published by Philips Consumer Lifestyle 29 | P a g e Document No. : CSW-07-081-18111...
- Page 30 4239 022 75141 MAINS CORD ASSY 4239 022 74811 4239 022 74811 4239 022 74811 4239 022 74811 Notes: * Option for CRP For internal use only Published by Philips Consumer Lifestyle 30 | P a g e Document No. : CSW-07-081-18111...
- Page 31 4239 022 75141 4239 022 74811 MAINS CORD ASSY 4239 022 74811 4239 022 75161 4239 022 75161 Notes: * Option for CRP For internal use only Published by Philips Consumer Lifestyle 31 | P a g e Document No. : CSW-07-081-18111...
- Page 32 4239 022 74801 MAINS CORD ASSY 4239 022 74811 4239 022 74811 4239 022 75561 4239 022 74811 Notes: * Option for CRP For internal use only Published by Philips Consumer Lifestyle 32 | P a g e Document No. : CSW-07-081-18111...
- Page 33 4239 022 74801 4239 022 74811 MAINS CORD ASSY 4239 022 74811 4239 022 75561 4239 022 75561 Notes: * Option for CRP For internal use only Published by Philips Consumer Lifestyle 33 | P a g e Document No. : CSW-07-081-18111...
- Page 34 4239 022 74791 POWERBOARD PCBA 4239 022 74801 BUTTON ASSY 4239 022 74811 MAINS CORD ASSY Notes: * Option for CRP For internal use only Published by Philips Consumer Lifestyle 34 | P a g e Document No. : CSW-07-081-18111...
- Page 35 Service Parts - Iron exploded view Parts without pos. number are not service item and can’t be ordered. Scale: Not to scale For internal use only Published by Philips Consumer Lifestyle 35 | P a g e Document No. : CSW-07-081-18111...
- Page 36 Service Parts - Stand exploded view Parts without pos. number are not service item and can’t be ordered. Scale: Not to scale For internal use only Published by Philips Consumer Lifestyle 36 | P a g e Document No. : CSW-07-081-18111...
-
Page 37: Revision History
Disassembly Instruction. -Add new versions: 889893010090, 889893010300, 889893010400, 889893011160, 889894220300, 889894220400, 889894221160, 889895031160 Add new versions: 889894220040, 889895939400 Chong Yoke Lan 29-Oct-2018 For internal use only Published by Philips Consumer Lifestyle 37 | P a g e Document No. : CSW-07-081-18111...