Advertisement
Quick Links
Thank you for purchasing a Sealey product. Manufactured to a high standard this product will, if used according to these instructions
and properly maintained, give you years of trouble free performance.
IMPORTANT: PLEASE READ THESE INSTRUCTIONS CAREFULLY. NOTE THE SAFE OPERATIONAL REQUIREMENTS, WARNINGS AND CAUTIONS.
USE THE PRODUCT CORRECTLY AND WITH CARE FOR THE PURPOSE FOR WHICH IT IS INTENDED. FAILURE TO DO SO MAY CAUSE
DAMAGE AND/OR PERSONAL INJURY AND WILL INVALIDATE THE WARRANTY. PLEASE KEEP INSTRUCTIONS SAFE FOR FUTURE USE.
1. SAFETY INSTRUCTIONS
Keep crane, lifting slings, support and beams in good working order and condition. Follow the inspection requirements as described
in Section 5. Take immediate action to repair or replace damaged parts by contacting your supplier. Ensure that all accessory lifting devices
3
are suitably certified. If crane is damaged, immediately remove from service.
Ensure the surface on which the crane is used is level and firm, being capable of sustaining the crane and the maximum load.
NEVER use crane on tarmacadam or other soft surfaces.
3
Ensure the crane legs and arms are locked before use and jib extension is locked in fixed jib position by means of the lock pin.
7
Keep children and unauthorised persons away from the work area.
3
Keep work area clean and tidy and free from unrelated materials and ensure that there is adequate lighting.
3
Ensure that load does not exceed the maximum lifting capacity. Overloading the crane is dangerous. Where appropriate, use only
3
the lifting points recommended by the manufacturer of the load to be lifted.
3
Before lifting the load ensure that the crane jib is in the lowest possible position, that there are no obstacles which may snag the load whilst
being lifted and that the area above the jib is clear.
3
Do not apply any sideways pressure to the crane during lifting or suspension of load.
To avoid injury, be fully aware of your own and other persons locations in relation to the lifting and lowering of the load.
7
Keep a sound footing and balance, wear non-slip shoes and ensure that the floor is not slippery.
3
Ensure the centre of gravity always remains inside the crane base.
3
Do not harness the load at an angle and do not allow the load to swing during lifting.
3
Do not allow load to drop suddenly. Lower load with care and be fully aware of the condition of the surface onto which load is to be lowered.
7
Do not operate the hydraulic power unit beyond its maximum stroke as indicated on the label.
7
Do not load beyond rated capacity for each specified jib position as indicated in Section 2. The capacity of crane reduces as jib is extended.
7
Do not position any part of your body beneath the load and do not climb on the crane.
7
Do not use the crane to move or transport a load around the workshop. The crane is a lifting device only.
7
Do not attempt to adjust the safety valve, which has been set and sealed by the manufacturer.
7
Do not use the crane to perform a task for which it is not designed.
7
Do not use whilst under the influence of drugs, alcohol or intoxicating medication.
7
When not in use, store the crane in a safe, dry, childproof area.
7
WARNING! Failure to heed safety and warning instructions may result in damage and/or personal injury and will invalidate the warranty.
3
p
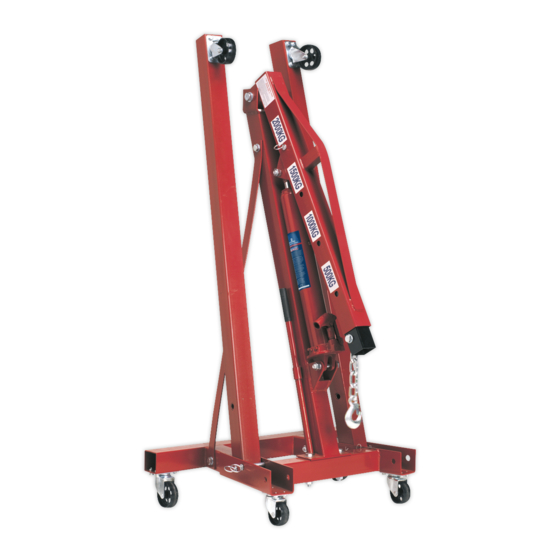
2. SPECIFICATION
2 Ton folding crane - economy
model. Fast folding for easy
storage and transportation. Heavy
duty castors. Weighs only 104kg
and is perfect for mobile or
workshop use. Pump access
from side.
3. ASSEMBLY INSTRUCTIONS
Your crane is delivered assembled but in a folded condition. Before use it is necessary to lay the folded crane on it’s ‘back’ on the floor and
proceed as follows:
3.1.
Raise the crane legs and lock them into place by passing the locking pins through the body. Retain with cotter pins.
3.2.
Lift the assembled crane onto wheels.
3.3.
Open release valve by turning to left and pump 10-20 times. This will flush the hydraulic system and purge any air that may be present.
3.4.
Pull crane jib up slightly, close valve and pump the handle. The jib will now raise. Pump the jib all the way up and then lower it (this will
confirm that the oil level is correct).
3.5.
Crane is now ready. Ensure it is complete and not damaged. If you experience any problems contact your supplier immediately.
4. OPERATING INSTRUCTIONS
WARNING! Before using the crane ensure that you have read and understood Section 1 safety instructions and that 3.3 and
3.4 have been successfully completed.
p
4.1.
Close the release valve at base of ram by turning valve tap clockwise.
4.2.
Put the handle into the pump socket and pump. The jib will then move - continue to pump until the jib reaches the required height.
4.3.
Connect the crane hook to the load using a suitable certified sling or support beam. Ensure that you are aware of the load weight
and have checked that it is within the capacity of the crane at the jib extension you are using. When removing engines ensure you
know the weight you are lifting and use only lifting points recommended by the vehicle manufacturer.
4.4.
Lift only directly above the load. p WARNING! DO NOT LIFT THE LOAD AT AN ANGLE.
INSTRUCTIONS FOR:
Model:
Max. lift @ min. jib extension: mm . . . . . . . . .1800
Max. lift @ max. jib extension: mm . . . . . . . . .2055
Height (max) of frame legs: mm . . . . . . . . . . . .185
Length (max) of frame: mm . . . . . . . . . . . . . .1652
Width (max) of frame legs: mm . . . . . . . . . . . .1175
Overall height: mm . . . . . . . . . . . . . . . . . . . . .1630
Width (max) inside frame legs: mm . . . . . . . .1030
Distance between rear wheel centres: mm . . . .445
Weight: kg . . . . . . . . . . . . . . . . . . . . . . . . . . . .104
PH20
FOLDING CRANE
Lifting capacity, Position 1: kg . . . 2000
Lifting capacity, Position 2: kg . . .1500
Lifting capacity, Position 3: kg . . .1000
Lifting capacity, Position 4: kg . . . .500
Length of jib, Position 1: mm . . . . .920
Length of jib, Position 2: mm . . . .1100
Length of jib, Position 3: mm . . . .1280
Length of jib, Position 4: mm . . . .1460
PH20 - 0016 - (2) - 240801
Advertisement

Related Manuals for Sealey PH20


Summary of Contents for Sealey PH20
- Page 1 INSTRUCTIONS FOR: Model: Thank you for purchasing a Sealey product. Manufactured to a high standard this product will, if used according to these instructions and properly maintained, give you years of trouble free performance. IMPORTANT: PLEASE READ THESE INSTRUCTIONS CAREFULLY. NOTE THE SAFE OPERATIONAL REQUIREMENTS, WARNINGS AND CAUTIONS.
- Page 2 5.2.2. The ram is filled with oil and should only require occasional topping up - DO NOT use brake fluid, as this will damage the hydraulic seals. Proceed as follows: a) Use only good quality hydraulic jack oil available from your Sealey dealer. b) Fully lower the jib extension arm.
- Page 3 SERIAL NUMBER: 1460 This test was commissioned by Jack Sealey Limited, Kempson Way, Suffolk Business Park, Bury St. Edmunds, Suffolk, 1P32 7AR, and was undertaken by the manufacturer and holder of the construction file. This certificate is signed by the Chief Engineer for the manufacturer.