Advertisement
Quick Links
AB930 & AB9301
Issue No: 2 - 11/04/08
Thank you for purchasing a Sealey Product. Manufactured to a high standard this product will, if used according
to these instructions and properly maintained, give you years of trouble free performance.
IMPORTANT: PLEASE READ THESE INSTRUCTIONS CAREFULLY. NOTE THE SAFE
OPERATIONAL REQUIREMENTS, WARNINGS AND CAUTIONS. USE THIS PRODUCT
CORRECTLY AND WITH CARE FOR THE PURPOSE FOR WHICH IT IS INTENDED. FAILURE TO
DO SO MAY CAUSE DAMAGE AND/OR PERSONAL INJURY AND WILL INVALIDATE THE
WARRANTY. PLEASE KEEP INSTRUCTIONS SAFE FOR FUTURE USE.
1. SAFETY INSTRUCTIONS
WARNING! Ensure that Health and Safety, local authority and general workshop practice regulations
are adhered to when using tools.
Ensure that the air brush and accessories are in a clean, sound condition and good working order. Take
action for immediate repair or replacement of damaged parts. Use recommended parts only. The use of
unauthorised parts may be dangerous and will invalidate the warranty.
Ensure the air brush supply hose is not tangled, twisted or pinched.
DO NOT use air brush or accessories if damaged.
DO NOT operate air brush under the influence of drugs, alcohol, intoxicating medication, or if fatigued.
DO NOT direct spray against yourself, other persons or animals, electrical equipment or the machine itself.
DO NOT use the air brush for a task it is not designed to perform.
Wear approved eye protection and a suitable respirator when painting. A full range of personal safety
equipment is available from your Sealey Dealer.
DO NOT allow smoking or open flame in the work area.
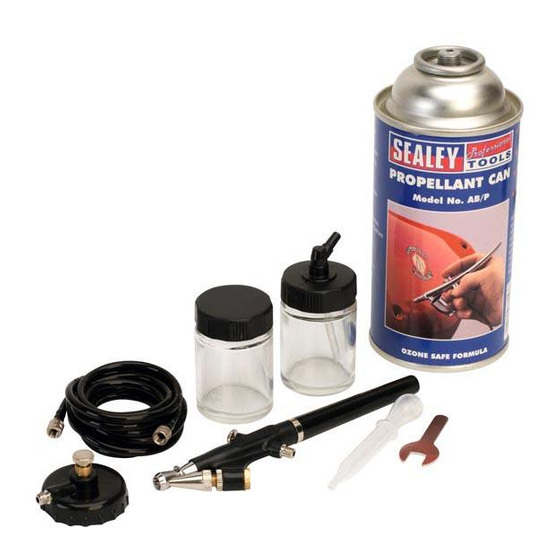
2. ASSEMBLY
Note: Numbers in brackets refer to item numbers in the parts diagram.
2.1. Fit the jar adaptor with lid (13) into the fluid needle assembly (24) as shown in fig.1.
2.2. Screw one end of the hose assembly (19) onto the air hose fitting (10).
2.3. Screw the other end of the hose (19) to the air supply.
2.4. When using a compressor (Sealey Model No. AB900), connect the air hose (19) to the air hose adaptor
(supplied with the compressor) before connecting to the compressor, fig.2.
2.5. When using a propellant can (Sealey Model No. AB/P), connect the air hose (19) to the regulator valve/
cap (11).
2.6. Ensure the valve is turned fully anti-clockwise before screwing to the top of the propellant can, fig.1.
Fig.1.
3. OPERATING INSTRUCTIONS
3.1. Mask the area which is NOT to be painted.
3.2. Ensure the object to be painted is free from dust, grease and the surface has been prepared
3.3. After mixing and thinning the paint, as instructed by the paint manufacturer, fill the paint jar just over
half full and screw onto the lid of the jar adaptor lid.
Note: Mix thoroughly, making sure that the paint is free from lumps. It may be necessary to strain the paint first.
INSTRUCTIONS FOR :
AIR BRUSH KITS
AB930 & AB9301
MODELS:
Fig.2.
AB930 & AB9301
Issue No: 2 - 11/04/08
Advertisement

Related Manuals for Sealey AB930


Summary of Contents for Sealey AB930
- Page 1 2.3. Screw the other end of the hose (19) to the air supply. 2.4. When using a compressor (Sealey Model No. AB900), connect the air hose (19) to the air hose adaptor (supplied with the compressor) before connecting to the compressor, fig.2.
- Page 2 Sealey Group, thinners. Bury St. Edmunds, Suffolk. 01284 703534 sales@sealey.co.uk email 4.5. Re-assemble the air brush by reversing the paragraphs 4.3.1 and 4.3.2. above. AB930 & AB9301 Issue No: 2 - 11/04/08 AB930 & AB9301 Issue No: 2 - 11/04/08...