D-Link DP-300U Quick Installation Manual
Hide thumbs
Also See for DP-300U:
- User manual (152 pages) ,
- Quick installation manual (62 pages) ,
- Quick installaion manual (12 pages)
Table of Contents
Advertisement
Quick Links
This product can be setup using
any current web browser, i.e.,
Internet Explorer 6 or Netscape
Navigator 7.0
Before You Begin
You will need an Ethernet-enabled device, such as a laptop or desktop computer
and a USB or parallel-port printer that will connect to the DP-300U.
Important: TURN OFF the power to the printer before installing
the DP-300U.
Check Your Package Contents
If any of the above items are missing, please contact your reseller.
©2003 D-Link Systems, Inc. All rights reserved. Trademarks or registered trademarks are the property of their respective holders. Software and
specifications subject to change without notice. DP-300U 02142003
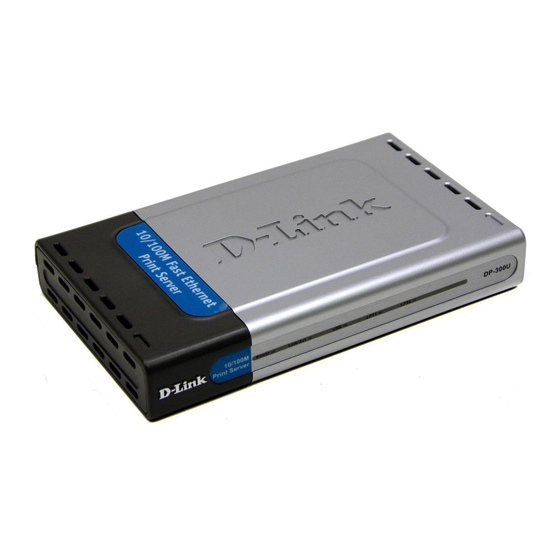
DP-300U Multi-Port Print Server
CD-ROM (Software, Manual and Warranty)
5V DC 2.5A Power Adapter
1
DP-300U
D-Link Fast Ethernet
Print Server
Using a power
supply with a
different voltage rating
will damage this
product and void its
warranty.
Advertisement
Table of Contents

Related Manuals for D-Link DP-300U


Summary of Contents for D-Link DP-300U
- Page 1 If any of the above items are missing, please contact your reseller. ©2003 D-Link Systems, Inc. All rights reserved. Trademarks or registered trademarks are the property of their respective holders. Software and specifications subject to change without notice. DP-300U 02142003...
- Page 2 LAN port of the gateway or switch. Note: Do not connect the power cord to the DP-300U until you are advised to do so The USB Port is designed only for direct connection to USB Printer. No other USB devices will be recognized.
- Page 3 CD-ROM. The factory default IP address of the DP-300U is 192.168.0.10. In order to print to the printer(s) through the DP-300U, the DP-300U must have the same IP network settings as your network. IP address can be assigned manually or automatically by DHCP, BOOTP or RARP.
- Page 4 Using your web browser enter the IP address of the DP-300U. By default the IP address is set 192.168.0.10 The IP address of the DP-300U can be modified on the Network tab of the web configuration menu. The following instructions use the print server’s default IP address as...
- Page 5 Setting up your DP-300U for network printing in Windows XP (continued) Click on the Configuration tab to view the current Port Settings. Write down on a piece of paper the Port name that you wish to use. For Windows XP: Go to Start>Printers and Faxes>Add...
- Page 6 Setting up your DP-300U for net- work printing in Windows XP (continued) Select “Local Printer.” Please make sure to deselect Automatically detect and install my Plug an Play printer. Click Next Select “Create a new port.” At the pull-down menu, highlight “Standard TCP/IP...
- Page 7 Setting up your DP-300U for network printing in Windows XP (continued) Type in the IP address of the print server. (i.e. 192.168.0.10) The port name will automatically be filled in. Click Next This may take a few seconds Select “Custom”...
- Page 8 Setting up your DP-300U for network printing in Windows XP (continued) Click Next Click Finish In this window, scroll down to find your printer. (If it is not listed, insert the driver CD or diskette that came with your printer.) Click on “Have Disk.”...
- Page 9 Setting up your DP-300U for network printing in Windows XP (continued) At this screen, you can input a name for this printer. Click Next Select “Yes” to print a test page Click Next Your Setup is Complete! The printer is now ready for printing with Windows XP, on your network.
-
Page 10: Technical Support
Technical Support You can find software updates and user documentation on the D-Link website. Tech Support for customers within Australia: D-Link Technical Support over the Telephone: 1300-766-868 Monday to Friday 8:00am to 8:00pm EST Saturday 9:00am to 1:00pm EST D-Link Technical Support over the Internet: http://www.dlink.com.au... - Page 11 You can find software updates and user documentation on the D-Link website. Tech Support for customers within South Eastern Asia and Korea: D-Link South Eastern Asia and Korea Technical Support over the Telephone: +65-6895-5355 Monday to Friday 9:00am to 12:30pm, 2:00pm-6:00pm...
- Page 12 Technical Support You can find software updates and user documentation on the D-Link website. Tech Support for customers within India D-Link Technical Support over the Telephone: +91-22-26526741 +91-22-26526696 –ext 161 to 167 Monday to Friday 9:30am to 7:00pm D-Link Technical Support over the Internet: http://ww.dlink.co.in...
- Page 13 Technical Support You can find software updates and user documentation on the D-Link website. D-Link provides free technical support for customers for the duration of the warranty period on this product. Customers can contact D-Link technical support through our web site or by phone.
- Page 14 Technical Support You can find software updates and user documentation on the D-Link website. Tech Support for customers within the U.A.E & North Africa: D-Link Technical Support over the Telephone: (971) 4-391-6480 (U.A.E) Sunday to Wednesday 9:00am to 6:00pm GMT+4 Thursday 9:00am to 1:00pm GMT+4 D-Link Middle East &...
- Page 15 You can find software updates and user documentation on the D-Link website. Tech Support for customers within South Africa and Sub Sahara Region: D-Link South Africa and Sub Sahara Technical Support over the Telephone: +27-12-665-2165 08600 DLINK ( For South Africa only )
- Page 16 Technical Support You can find software updates and user documentation on the D-Link website. Tech Support for Latin America customers: D-Link Technical Support over the followings Telephones: Argentina: 0800-666 1442 Monday to Friday 09:00am to 22:00pm Chile: 800-214 422 Monday to Friday 08:00am to 21:00pm...
-
Page 17: Lieferumfang Überprüfen
Geräts und zum Sollte eines dieser Teile fehlen oder beschädigt sein, wenden Erlöschen der Sie sich an Ihren Fachhändler. Garantie. © 2003 D-Link Systems, Inc. Alle Rechte vorbehalten. Marken und eingetragene Marken sind Eigentum ihrer jeweiligen Inhaber. Änderungen vorbehalten. DP-300U 02142003... - Page 18 Netzstecker Anschluss Anschluss Schließen Sie das Netzteil am DP-300U an. Stecken Sie dann das Netzteil in eine Steckdose. Der DP-300U wird angeschaltet, und ein Selbsttest wird durchgeführt. Für das Drucken unter Mac OS beachten Sie bitte die Hinweise im Handbuch...
- Page 19 Betriebssystemen oder zur webbasierten Verwaltungsoberfläche finden Sie im Handbuch auf der CD-ROM. Die IP-Adresse des DP-300U ist auf 192.168.0.10 voreingestellt. Über den DP- 300U kann nur gedruckt werden, wenn er dieselben Netzwerk-IP-Einstellungen wie das Netzwerk hat. Die IP-Adresse kann manuell oder automatisch über DHCP, BOOTP oder RARP zugewiesen werden.
- Page 20 So stellen Sie den DP-300U Druckerserver unter MS Windows XP ein (Fortsetzung): Klicken Sie auf “OK”, um die IP-Adresse zuzuweisen. Klicken Sie auf “OK” Starten Sie den Webbrowser, und geben Sie die IP-Adresse des DP-300U ein. Die IP-Adresse ist auf 192.168.0.10...
- Page 21 So stellen Sie den DP-300U Druckerserver unter MS Windows XP ein (Fortsetzung): Klicken Sie auf die Registerkarte “Konfiguration”, um die aktuellen Anschlusseinstellungen einsehen zu können. Notieren Sie auf einem Zettel den Namen des Anschlusses, den Sie verwenden möchten. Oder unter Windows XP: Klicken Sie auf “Start”>“Drucker und...
- Page 22 So stellen Sie den DP-300U Druckerserver unter MS Windows XP ein (Fortsetzung): Wählen Sie “Lokaler Drucker”. Vergewissern Sie sich, dass der Punkt “Plug & Play- Drucker automatisch erkennen und installieren” deaktiviert ist. Klicken Sie auf Next Wählen Sie “Neuen Anschluss erstellen”.
- Page 23 So stellen Sie den DP-300U Druckerserver unter MS Windows XP ein (Fortsetzung): Geben Sie die IP-Adresse des Druckerservers ein. (z.B. „192.168.0.10") Der Schnittstellenname wird automatisch eingefügt. Klicken Sie auf Next Dies kann einige Minuten dauern. Wählen Sie “Custom” Klicken Sie dann auf Settings.
- Page 24 So stellen Sie den DP-300U Druckerserver unter MS Windows XP ein (Fortsetzung): Klicken Sie auf Next Klicken Sie auf Finish Blättern Sie nach unten, und markieren Sie Ihren Drucker. (Ist der Drucker nicht aufgeführt, legen Sie die zum Drucker gehörende Treiber- CD oder Treiberdiskette ein.)
- Page 25 So stellen Sie den DP-300U Druckerserver unter MS Windows XP ein (Fortsetzung): Geben Sie in diesem Dialogfeld einen Druckernamen ein. Klicken Sie auf Next Klicken Sie auf “Yes”, um eine Testseite zu drucken. Klicken Sie auf Next Die Installation ist abgeschlossen! Sie können nun mit dem Drucker im...
-
Page 26: Technische Unterstützung
0,12€/Min aus dem Festnetz der Deutschen Telekom. Telefonische technische Unterstützung erhalten Sie Montags bis Freitags von 09.00 bis 17.30 Uhr. Wenn Sie Kunde von D-Link außerhalb Deutschlands, Österreichs, der Schweiz und Osteuropas sind, wenden Sie sich bitte an die zuständige Niederlassung aus der Liste im Benutzerhandbuch. - Page 27 Si l’un des éléments ci dessus manque, contactez votre revendeur. ©2003 D-Link Systems, Inc. Tous droits réservés. Les marques sont la propriété de leurs propriétaires respectifs. Le logiciel et les spécifications sont susceptibles d’être modifiés sans préavis. DP-300U 02142003...
- Page 28 Vérifiez que l’imprimante est éteinte. Connectez l’une des extrémités du câble USB ou du câble d’imprimante au port USB ou parallèle du DP-300U (voir ci-dessous) et l’autre extrémité au port USB ou parallèle de l’imprimante. Allumez l’imprimante.
- Page 29 Windows ou des informations sur l’interface de gestion web, reportez vous au manuel qui se trouve sur le CD-ROM. L’adresse IP par défaut du DP-300U est 192.168.0.10. Pour imprimer sur la ou les imprimantes via le DP-300U, il faut que les paramètres IP du DP-300U soient les mêmes que ceux de votre réseau.
- Page 30 À l’aide de votre navigateur internet, entrez l’adresse IP du DP 300U. Par défaut, l’adresse IP est 192.168.0.10. L’adresse IP du DP-300U peut être modifiée dans le volet Network du menu de configuration web. Les instructions suivantes utilisent l’adresse IP par défaut du serveur d’impression à...
- Page 31 Configuration de votre DP-300U pour l’impression en réseau sous Windows XP (suite) Cliquez sur l’onglet Configuration pour visualiser les paramètres de port. Notez sur un morceau de papier le nom de port que vous voulez utiliser Pour Windows XP : Clic gauche sur Démarrer >...
- Page 32 Configuration de votre DP-300U pour l’impression en réseau sous Windows XP (suite) Sélectionnez “Imprimante locale”. Attention de désélectionner Détection et installation automatiquement de l’imprimante Plug and Play. Cliquez sur Next Sélectionnez “Créer un nouveau port”. Dans le menu déroulant, sélectionnez “Port TCP/IP standard”.
- Page 33 Configuration de votre DP-300U pour l’impression en réseau sous Windows XP (suite) Tapez l’adresse IP du serveur d’impression (c’est-à-dire 192.168.0.10). Le nom de port est affiché automatiquement. Cliquez sur Next Cela peut prendre quelques secondes. Sélectionnez “Custom”. Cliquez sur Settings.
- Page 34 Configuration de votre DP-300U pour l’impression en réseau sous Windows XP (suite) Cliquez sur Next Cliquez sur Finish Dans cette fenêtre, recherchez votre imprimante. (Si elle ne figure pas dans la liste, mettez le CD ou la disquette pilotes fourni avec votre imprimante).
- Page 35 Configuration de votre DP-300U pour l’impression en réseau sous Windows XP (suite) Sur cet écran, vous pouvez taper un nom pour l’imprimante. Cliquez sur Next Sélectionnez “Yes” pour imprimer une page de test Cliquez sur Next La configuration est terminée ! L’imprimante est prête à...
-
Page 36: Assistance Technique
Vous trouverez la documentation et les logiciels les plus récents sur le site web D-Link. Ceux-ci peuvent contacter le service technique de D-Link par notre site internet ou par téléphone. Support technique destiné aux clients établis en France: Assistance technique D-Link par téléphone :... - Page 37 Antes de empezar Se necesita un dispositivo con conexión Ethernet, como un portátil u ordenador de sobremesa y un puerto de impresora paralelo o USB, que se conectará al DP-300U. Importante: APAGAR la impresora antes de instalar el DP-300U. Comprobar el contenido del paquete Servidor de impresión multipuerto DP-300U...
- Page 38 Usando el cable USB o el cable de impresora, conectar uno de los extremos del cable al puerto USB o al paralelo del DP-300U (como se muestra más abajo), y el otro extremo al puerto USB o al paralelo de la impresora.
- Page 39 Web, consúltese el manual disponible en el CD-ROM. La dirección IP del DP-300U es, por defecto, 192.168.0.10. Para imprimir con la(s) impresora(s) a través del DP-300U, el DP-300U debe tener los mismos parámetros de red IP que la red. La dirección IP puede asignarse manualmente o automáticamentey con DHCP, BOOTP o RARP.
- Page 40 Configurar el DP-300U para la impresión en red en Windows XP (continuación) Hacer click en OK para aplicar los parámetros de la dirección IP. Hacer click en Usando el navegador de Internet, introducir la dirección IP del DP-300U. La dirección IP por defecto es 192.168.0.10...
- Page 41 Configurar el DP-300U para la impresión en red en Windows XP (continuación) Hacer click en la ficha Configuration para ver los valores actuales en Port Settings. Se recomienda escribir en un papel el nombre del puerto que se desea utilizar.
- Page 42 Configurar el DP-300U para la impresión en red en Windows XP (continuación) Seleccionar Local Printer. Deseleccionar Automatically detect and install my Plug an Play printer. Hacer click en Next Seleccionar Create a new port. En el menú desplegable, marcar Standard TCP/IP Port.
- Page 43 Configurar el DP-300U para la impresión en red en Windows XP (continuación) Escribir en la dirección IP address del servidor de impresión. (p.ej. 192.168.0.10) El nombre del puerto se mostrará automáticamente. Hacer click en Next Esto puedo tardar unos segundos.
- Page 44 Configurar el DP-300U para la impresión en red en Windows XP (continuación) Hacer click en Next Hacer click en Finish En esta ventana, se ha de desplazar el scroll para encontrar la impresora. (Si no figura en la lista, deberá...
- Page 45 Configurar el DP-300U para la impresión en red en Windows XP (continuación) En esta pantalla, se puede introducir un nombre para esta impresora. Hacer click en Next Seleccionar Yes para imprimir una página de prueba Hacer click en Next La configuración ha terminado La impresora ahora está...
-
Page 46: Asistencia Técnica
El servicio de soporte técnico tiene presencia en numerosos países de la Región Latino América, y presta asistencia gratuita a todos los clientes de D-Link, en forma telefónica e internet, a través de la casilla soporte@dlinkla.com Soporte Técnico Help Desk Argentina: Teléfono: 0800-6661442 Lunes a Viernes 09:00 am a 22:00 pm... -
Page 47: Prima Di Cominciare
Se uno dei componenti dovesse risultare mancante, contattare il garanzia. rivenditore. ©2003 D-Link Systems, Inc. Tutti i diritti sono riservati. I marchi o i marchi registrati sono dei rispettivi proprietari. Il software e le specifiche sono soggetti a cambianti senza preavviso. DP-300U 02142003... - Page 48 Verificare che la stampante sia SPENTA. Connettere un’estremità di un cavo USB o di un cavo parallelo alla porta USB o alla porta parallela del dispositivo DP-300U (come illustrato nella figura seguente). Connettere l’altra estremità del cavo alla porta USB o alla porta parallela della stampante.
- Page 49 Manuale utente contenuto nel CD-ROM. L’indirizzo IP di default del dispositivo DP-300U è 192.168.0.10. Per inviare dei processi alle stampanti attraverso il dispositivo DP-300U, quest’ultimo deve avere le stesse impostazioni IP della rete. L’indirizzo IP può essere impostato manualmente o dinamicamente mediante server DHCP, BOOTP o RARP.
- Page 50 Cliccare su Utilizzando il browser web, inserire l’indirizzo IP del dispositivo DP-300U. L’indirizzo IP di default è 192.168.0.10 L’indirizzo IP del dispositivo DP-300U può essere modificato accedendo alla scheda Network del menu web configuration. Nella seguente procedura viene utilizzato come esempio l’indirizzo IP di default del server.
- Page 51 Configurazione del dispositivo DP-300U per stampe di rete in ambiente Windows XP (continua) Cliccare sulla scheda Configuration per visualizzare il valore corrente dei parametri Impostazioni Porta Registrare su un foglio di carta il nome della porta da utilizzare. Windows XP: Selezionare Start>Stampanti e...
- Page 52 Configurazione del dispositivo DP-300U per stampe di rete in ambiente Windows XP (continua) Selezionare “Local Printer.” Verificare che l’opzione Rileva ed installa Automaticamente la stampante Plug an Play sia deselezionata. Cliccare su Next Selezionare “Crea una nuova porta.” Selezionare “Standard TCP/ IP Port”...
- Page 53 Configurazione del dispositivo DP-300U per stampe di rete in ambiente Windows XP (continua) Inserire l’indirizzo IP del Print Server. (per esempio 192.168.0.10) Il nome della porta viene inserito automaticamente dal sistema. Cliccare su Next L’operazione richiede qualche secondo Selezionare “Custom”...
- Page 54 Configurazione del dispositivo DP-300U per stampe di rete in ambiente Windows XP (continua) Cliccare su Next Cliccare su Finish Scorrere l’elenco contenuto in questa finestra fino a individuare la stampante. (Se la stampante non è contenuta nell’elenco, inserire il CD o...
- Page 55 Configurazione del dispositivo DP-300U per stampe di rete in ambiente Windows XP (continua) In questa finestra, inserire il nome della stampante. Cliccare su Next Selezionare “Yes” per stampare una pagina di prova Cliccare su Next La configurazione è terminata! La stampante è pronta per l’esecuzione di stampe di rete in...
-
Page 56: Supporto Tecnico
Supporto tecnico Gli ultimi aggiornamenti e la documentazione sono disponibili sul sito D-Link. Supporto tecnico per i clienti residenti in Italia D-Link Mediterraneo S.r.L. Via N. Bonnet 6/B 20154 Milano Supporto Tecnico dal lunedì al venerdì dalle ore 9.00 alle ore 19.00 con orario continuato Telefono: 02-39607160 URL : http://www.dlink.it/supporto.html... - Page 57 гарантии. Если чего-либо из вышеназванного не хватает, обратитесь к вашему поставщику. ©2003 D-Link Systems, Inc. All rights reserved. Trademarks or registered trademarks are the property of their respective holders. Software and specifi cations subject to change without notice. DP-300U 02142003...
- Page 58 к сетевому порту - “Network Port” (см. ниже). Другой конец кабеля подключите к порту коммутатора или шлюза. Примечание: не подключайте кабель питания к DP-300U, пока в инструкции ниже это не будет указано Порт USB предназначен только для прямого подключения к принтеру...
- Page 59 пожалуйста, обратитесь к руководству пользователя на CD-ROM. IP адрес по умолчанию для DP-300U 192.168.0.10. Для того, чтобы печатать на принтер(ы) через DP-300U, DP-300U должен иметь те же настройки IP, что и ваша сеть. IP адрес может быт назначен вручную...
- Page 60 чтобы применить настройки IP адреса Нажмите Используя web-браузер, подключитесь к DP-300U. По умолчанию IP адрес 192.168.0.10 IP адрес DP-300U может быть изменен на вкладке Network меню настройки web-интерфейса. Следующие инструкции используют настройки по умолчанию для IP адреса принт- сервера. Выполните необходимые...
- Page 61 Настройка DP-300U для сетевой печати в Windows XP (продолжение) Нажмите на вкладку Configuration чтобы посмотреть текущие настройки Port Settings. Запишите имя порта, который вы хотите использовать. Для Windows XP: Нажмите Start>Printers and Faxes>Add a Printer или Start>Control Panel> Printers and Faxes Дважды...
- Page 62 Настройка DP-300U для сетевой печати в Windows XP (продолжение) Выберите “Local Printer.” Пожалуйста, убедитесь, что отключена функция Automatically detect and install my Plug an Play printer. Нажмите Next Выберите “Create a new port.” В ниспадающем меню выберите “Standard TCP/IP Port.”...
- Page 63 Настройка DP-300U для сетевой печати в Windows XP (продолжение) Наберите IP адрес принт- сервера (например, 192.168.0.10) Имя порта заполнится автоматически. Кликните Next Это может занять несколько минут Выберите “Custom” Затем кликните Settings. Кликните Settings Выберите “LPR” Введите имя порта, который будет...
- Page 64 Настройка DP-300U для сетевой печати в Windows XP (продолжение) Нажмите Next Нажмите Finish В этом окне выберите ваш принтер. (Если не отображается, вставьте CD-ROM или дискету, поставляемую с вашим принтером) Нажмите “Have Disk.” Нажмите Next...
- Page 65 Настройка DP-300U для сетевой печати в Windows XP (продолжение) В этом меню вы можете задать имя принтера. Нажмите Next Нажмите “Yes” для печати пробной страницы Нажмите Next Установка окончена! Теперь принтер готов к сетевой печати с Windows XP. Нажмите Finish...
-
Page 66: Техническая Поддержка
Техническая поддержка Обновления программного обеспечения и документация доступны на Интернет-сайте D-Link. D-Link предоставляет бесплатную поддержку для клиентов в течение гарантийного срока. Клиенты могут обратиться в группу технической поддержки D-Link по телефону или через Интернет. Техническая поддержка D-Link: (095) 744-00-99 Техническая поддержка через Интернет... - Page 67 DP-300U 該產品可使用當前任何WEB瀏覽器 進行安裝,如:Internet Explorer 6 D-Link高速乙太網路 或Netscape Navigator 7.0 印表伺服器 準備 需要一台支援乙太網路的設備,如筆記型電腦或桌上型電腦,一個連接至 DP-300U的USB或平行埠印表機。 注意:安裝DP-300U前請關閉印表機電源。 檢查包裝內物品 DP-300U 印表伺服器 CD-ROM (軟體,使用手冊) 使用不同電壓 5V DC 2.5A 電源供應器 規格的電源會損壞 該產品,且不在 保固範圍內。 以上物件如有任何缺失,請聯繫經銷商。 版權所有。D-Link與D-Link商標為友訊科技的商標,其他註冊商標分別隸屬該公司所有。最新規格以原廠通告為準, 恕不另行通知。DP-300U 02142003...
- Page 68 將DP-300U連接至網路 首先,將CAT5乙太網路RJ-45直線的一端插入“網路埠”(如下所示), 將另一端插入閘道器或交換器的LAN埠。 注意:請先不要將電源線與DP-300U連接。 USB埠只可與USB印表機相連。 其他USB設備無法識別。 另外,確認印表機已關閉。 使用USB纜線或印表機纜線,將纜線的一端連至DP-300U(如下所示) 的USB或平行埠,另一端連至印表機的USB或平行埠。 平行埠1 平行埠2 網路埠 電源插頭 USB 埠 然後,將電源供應器的一端插入DP-300U,另一端插入電源插座。 DP-300U將會開啟,開始自我檢測。 關於Mac OS列印,請參考光碟上的使用手冊。...
- Page 69 在Windows XP下為DP-300U安裝 網路列印 如需獲得其他web管理介面的Windows作業系統的安裝及資訊, 請參考光碟上的使用手冊。 DP-300U的預設IP地址為192.168.0.10,如要透過DP-300U列印,DP-300U 必須與您的網路具有相同的IP網路設定。IP地址可以手動分配或通過DHCP, BOOTP或RARP自動分配。如要連接印表伺服器的WEB設定,手動為網路上 的PC設置IP地址,確保其與印表伺服器在同一個子網段。 進入開始 >右擊網路連線 >選擇內容 >雙擊與 網路卡相關的 區域連線 單擊 Internet Protocol (TCP/IP) 單擊 內容 輸入一個與印表伺服器在 同一範圍的靜態IP地址。 選擇 使用下列的IP地址 IP 地址: 192.168.0.52 子網路遮罩: 255.255.255.0 單擊確定...
- Page 70 在Windows XP下為DP-300U安裝 網路列印(繼續) 單擊確定使IP位址設定生效 單擊確定 使用WEB瀏覽器輸入 DP-300U的IP地址。 預設IP地址為192.168.0.10 DP-300U的IP位址可在WEB設定 功能表的Network(網路)選項 中修改 使用印表伺服器的預設IP地址為例 來做說明。如果你改變了DP-300U 的IP地址,請做相對應的改變。...
- Page 71 在Windows XP下為DP-300U安裝 網路列印(繼續 單擊Configuration標簽查看當前 Port Settings. 在一張紙上寫下你希望使用 的埠名稱 對於Windows XP: 進入開始 > 印表機和傳真>新增印表機 或進入 開始>控制台> 印表機和傳真 雙擊新增印表機圖示 單擊下一步...
- Page 72 在Windows XP下為DP-300U安裝 網路列印(繼續) 選擇本機印表機 請確認取消選定 自動偵測並安裝 我的即插即用印表機 單擊下一步 選擇 建立新的連接埠 單擊下一步 單擊下一步...
- Page 73 在Windows XP下為DP-300U安裝 網路列印(繼續) 輸入印表伺服器的IP地址 (如:192.168.0.10) 埠名稱會自動填上 單擊下一步 這可能需要幾秒鐘 選擇“自訂” 然後單擊“設定” 單擊設定﹚ 匡拒 “LPR” 輸入印表機所使用 的埠名稱 單擊確定...
- Page 74 在Windows XP下為DP-300U安裝 網路列印(繼續) 單擊下一步 單擊完成 在這個畫面中,往下拉尋找 印表機。(如果沒出現在列表中, 插入印表機的驅動CD或磁片) 單擊“從磁片安裝” 然後,往下拉選擇印表機 單擊下一步...
- Page 75 在Windows XP下為DP-300U安裝 網路列印(繼續) 在這個螢幕中,請輸入該 印表機的名稱 單擊下一步 選擇“是”列印測試頁 單擊下一步 安裝完成! 在Windows XP下該網路上的 印表機準備開始列印 單擊完成...
- Page 76 友冠技術支援 台灣地區用戶可以透過我們的網站,電子郵件或電話與 友冠資訊技術支援人員聯絡。 支援服務時間從 週一到週五,上午8:30 a.m. 到 7:00 p.m Web: http://www.dlinktw.com.tw/ FAQ: http://www.dlinktw.com.tw/suppFaq.asp Email: dssqa_service@dlinktw.com.tw Phone: 0800-002-615 如果您是台灣地區以外的用戶,請參考使用手冊 中記載的D-Link 全球各地分公司的聯絡資訊 取得支援服務。 產品維修與保固相關資訊,請參考友冠資訊網頁說明: http://www.dlinktw.com.tw/suppFaq.asp...