D-Link DGS-1016D Manual
16/24-port 10/100/1000mbps gigabit ethernet switch
Hide thumbs
Also See for DGS-1016D:
- Manual (74 pages) ,
- User manual (44 pages) ,
- Quick installation manual (41 pages)

Related Manuals for D-Link DGS-1016D


Summary of Contents for D-Link DGS-1016D
- Page 1 D-Link ™ DGS-1016D DGS-1024D 16/24-Port 10/100/1000Mbps Gigabit Ethernet Switch Manual Building Networks for People RECYCLABLE (November 2005) P/N: 6DGS1024D.02G...
-
Page 2: Fcc Warning
Reproduction in any manner whatsoever without the written permission of D-Link Computer Corporation is strictly forbidden. Trademarks used in this text: D-Link and the D-LINK logo are trademarks of D-Link Computer Corporation; Microsoft and Windows are registered trademarks of Microsoft Corporation. -
Page 3: Table Of Contents
OWER NPUT ON INSTALLATION Package Contents ... 19 EFORE ONNECT TO THE Mounting the Switch on a Rack ... 21 Attaching the Rubber Feet ... 22 Provide for Adequate Ventilation ... 22 ... 23 OWER Power Failure... 23 CONNECTING THE SWITCH Switch to End Node... -
Page 4: Preface
D-Link DGS-1016D/DGS-1024D Unmanaged Gigabit Ethernet Switch Preface The DGS-1016D/DGS-1024D Manual is divided into sections that describe the system installation and operating instructions with examples. Section 1, Introduction - A description of the physical features of the Switch, including LED indicators, ports and panel descriptions. -
Page 5: Safety Instructions
D-Link DGS-1016D/DGS-1024D Unmanaged Gigabit Ethernet Switch Safety Instructions Use the following safety guidelines to ensure your own personal safety and to help protect your system from potential damage. Throughout this safety section, the caution icon ( and precautions that you need to review and follow. - Page 6 Safety Instructions (continued) • To help avoid damaging your system, be sure the voltage selection Switch (if provided) on the power supply is set to match the power available at your location: – 115 volts (V)/60 hertz (Hz) in most of North and South America and some Far Eastern countries such as South Korea and Taiwan –...
-
Page 7: General Precautions For Rack-Mountable Products
D-Link DGS-1016D/DGS-1024D Unmanaged Gigabit Ethernet Switch General Precautions for Rack- Mountable Products • Observe the following precautions for rack stability and safety. Also refer to the rack installation documentation accompanying the system and the rack for specific caution statements and procedures. - Page 8 D-Link DGS-1016D/DGS-1024D Unmanaged Gigabit Ethernet Switch Safety Instructions (continued) • Always load the rack from the bottom up, and load the heaviest item in the rack first. • Make sure that the rack is level and stable before extending a component from the rack.
-
Page 9: Protecting Against Electrostatic Discharge
D-Link DGS-1016D/DGS-1024D Unmanaged Gigabit Ethernet Switch Protecting Against Electrostatic Discharge Static electricity can harm delicate components inside your system. To prevent static damage, discharge static electricity from your body before you touch any of the electronic components, such as the microprocessor. You can do so by periodically touching an unpainted metal surface on the chassis. -
Page 10: Introduction
LED Indicators Power Input on Rear Panel Switch Description The 16-port DGS-1016D and 24-port DGS-1024D Switches provide dedicated 10, 100 or 1000 Mbps Ethernet bandwidth on each port. The ports will automatically detect the speed, duplex and MDI/MDIX status of the device it is connecting to, and adjust these settings accordingly. -
Page 11: Switch Features
Switch Features The DGS-1016D 16-Port and DGS-1024D 24-port Switches do not require any management. Both Switches are designed for easy installation, flexibility and high performance. Connect devices to the Switch as the scale and volume of network traffic increases. •... -
Page 12: Gigabit Ethernet Technology
NIC’s are able to perform 10 times the number of operations in the same amount of time. 802.1P and QoS The DGS-1024D and DGS-1016D Switches support 802.1p priority queuing Quality of Service. The implementation of QoS (Quality of Service) and benefits of using 802.1p priority queuing are described here. -
Page 13: Understanding Qos
The illustration below shows how 802.1P priority queuing is implemented on the Switch. The eight IEEE 802.1P priority levels defined by the standard are mapped to the four class queues used in the Switch. Mapping QoS on the Switch The picture above shows the default priority setting for the Switch. - Page 14 • Priority 7 is assigned to the Switch's Q3 queue. The Switch uses strict priority for Scheduling. Strict priority-based scheduling, any packets residing in the higher priority queues are trans- mitted first.
-
Page 15: Front-Panel Components
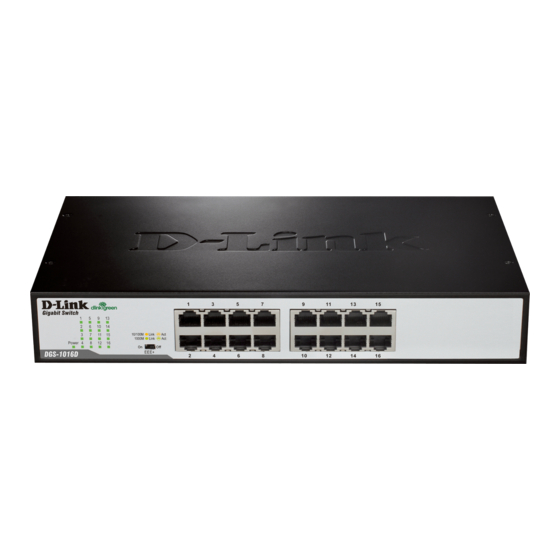
On the front panel of the Switch you will see the following. • LED status indicators • 16 Auto-Negotiating 10/100/1000Mbps ports on the DGS-1016D • 24 Auto-Negotiating 10/100/1000Mbps ports on the DGS-1024D Front Panel View of the Switch LED Indicators... -
Page 16: Cable Diagnostic
3 seconds. If a cable fault is detected, the corresponding port’s speed LED will light amber for 5 seconds. The Switch is then reset for normal operation. It takes about 2 seconds for the Switch to reset. The entire Cable Diagnostic process takes about 10 seconds from the time the Switch is powered on. - Page 17 Link/Act 100Mbps/1000Mbps Cable Diagnostic (during boot up only) Description This lights green while the Switch is receiving power. A steady green light indicates the corresponding port is connected and a valid link is established. This will blink green when there is activity on the port.
-
Page 18: Power Input On Rear Panel
Power Input on Rear Panel The power cable connection is located on the rear panel of the Switch. Rear panel view of the Switch Switch power input is provided by and internal universal power supply (100-240VAC : 12V/3.3A). The AC power connector is a standard three-pronged connector that supports the power cord. -
Page 19: Installation
10/100/1000BASE-T Gigabit Ethernet Switch • Four rubber feet with adhesive backing • One power Cord • Mounting ears for rack-mounting • This manual If any item is found missing or damaged, please contact your local D-Link reseller for replacement. SECTION 2... -
Page 20: Before You Connect To The Network
• Make sure that there is adequate space for proper heat dissipation from and adequate ventilation around the Switch. Leave at least 10 cm (4 inches) of space at the front and rear of the Switch for ventilation. • Install the Switch in a fairly cool and dry place for the acceptable temperature and humidity operating ranges. -
Page 21: Mounting The Switch On A Rack
Mounting the Switch on a Rack The DGS-1016D/1024D can easily be mounted on a rack. Two mounting ears are provided for this purpose. Make sure that the front panel is exposed in order to view the LEDs. Please refer to the following... -
Page 22: Attaching The Rubber Feet
Provide for Adequate Ventilation CAUTION: Do not place any device on top of Switch, or place the Switch on top of any device or object that will block the free flow of air through the ventilation slots on the sides, top, and bottom of the Switch’s case. -
Page 23: Power On
After the Switch is powered on, the LED indicators will blink briefly while the system resets. Power Failure As a precaution, in the event of a power failure, unplug the Switch. When power is resumed, plug the Switch back in. -
Page 24: Connecting The Switch
(10, 100, 1000Mbps) and duplex of the device connected to the Switch. Cable Quality For all connections to the Switch, use these rules to determine the • For connections to 10BASE-T and 100BASE-TX devices, use Category 5 or 5e UTP/STP cable. -
Page 25: Switch To End Node
End nodes include PCs outfitted with a 10, 100 or 1000 Mbps RJ-45 Ethernet/Fast Ethernet Network Interface Card (NIC) and Ethernet ready routers. Use standard Ethernet cable to connect the Switch to end nodes. Switch ports will automatically adjust to the hardware characteristics (MDI-II/MDI-X, speed, duplex) of the device to which it is connected. -
Page 26: Switch To Hub Or Switch
Switch to Hub or Switch Connect to another switch or hub Observe the guidelines for cable quality stated at the beginning of this section. The Link/Act LEDs for each port lights green when the link is valid. -
Page 27: Connecting To Network Backbone Or Server
Connecting to Network Backbone or Server Any port may be used to uplink the Switch to a network backbone or network server. When linking to a 10000BASE-T device the port operates in full duplex mode. Connection to a Server Observe the guidelines for cable quality stated at the beginning of this section. -
Page 28: Technical Specifications
Technical Specifications General Standards: Protocol: Data Transfer Rate: Topology: Network Cables: Number of Ports: Appendix IEEE 802.3 10BASE-T IEEE 802.3u compliance IEEE 802.3ab compliance IEEE 802.1p compliance Half or Full-Duplex operations at 10/100Mbps Full-Duplex operations at 1000Mbps IEEE 802.3x Flow Control supports for Full Duplex Support back pressure for Half-Duplex operation CSMA/CD Ethernet:... -
Page 29: Physical And Environmental
32°F ~ 104F ° (0 °C ~ 40 ºC) 5% ~ 95% RH, non-condensing 11.02 in. x 7.09 in. x 1.73 in. (280 mm x 180 mm x 44 mm) DGS-1024D: 1.79 kg / DGS-1016D: 1.69 kg FCC Class A, CE Class A, VCCI Class A CSA International... - Page 30 Transmission Method: Store-and-forward RAM Buffer: Filtering Address Table: Packet Filtering/ Forwarding Rate: MAC Address Learning: Jumbo Frame DGS-1016D Supports 340KB RAM per device DGS-1024D Supports 500KB RAM per device 8K MAC address per device Full wire speed Self-learning, auto-aging 9.6 KBytes support...
-
Page 31: Glossary
– Multiple simultaneous broadcasts that typically absorb available network bandwidth and can cause network failure. console port – The port on the Switch accepting a terminal or modem connector. It changes the parallel arrangement of data within computers to the serial form used on... - Page 32 MIB – Management Information Base. Stores a device’s management characteristics and parameters. MIBs are used by the Simple Network Management Protocol (SNMP) to contain attributes of their managed systems. The Switch contains its own internal MIB. multicast – Single packets copied to a specific subset of network addresses. These...
- Page 33 – The port in a resilient link that will take over data transmission if the main port in the link fails. switch – A device that filters, forwards, and floods packets based on the packet’s destination address. The Switch learns the addresses associated with each switch port and builds tables based on this information to be used for the switching decision.
-
Page 34: Usa Warranty And Registration Information
D-Link’s sole obligation shall be to repair or replace the defective Hardware during the Warranty Period at no charge to the original owner or to refund at D-Link’s sole discretion. Such repair or replacement will be rendered by D-Link at an Authorized D-Link Service Office. - Page 35 If a material non-conformance is incapable of correction, or if D-Link determines in its sole discretion that it is not practical to replace the non- conforming Software, the price paid by the original licensee for the non-conforming Software will be refunded by D-Link;...
- Page 36 D-Link Systems, 17595 Mt. Herrman Street, Fountain Valley, CA. 92708. D-Link will not be held responsible for any packages that are lost in transit to D-Link. The repaired or replaced packages will be shipped to the customer via UPS Ground or any common carrier selected by D-Link, with shipping charges prepaid.
- Page 37 RETURNED TO D-LINK FOR WARRANTY SERVICE) RESULTING FROM THE USE OF THE PRODUCT, RELATING TO WARRANTY SERVICE, OR ARISING OUT OF ANY BREACH OF THIS LIMITED WARRANTY, EVEN IF D-LINK HAS BEEN ADVISED OF THE POSSIBILITY OF SUCH DAMAGES. THE SOLE...
- Page 38 Trademarks: D-Link is a registered trademark of D-Link Systems, Inc. Other trademarks or registered trademarks are the property of their respective manufacturers or owners. Copyright Statement: No part of this publication or documentation accompanying this Product may be reproduced in any form or by any means or used to make any derivative such as translation, transformation, or adaptation without permission from D-Link Corporation/D-Link Systems, Inc., as stipulated by the United States...
- Page 39 Register online your D-Link product at http://support.dlink.com/register/...
-
Page 40: International Offices
International Offices U.S.A 17595 Mt. Herrmann Street Fountain Valley, CA 92708 TEL: 1-800-326-1688 URL: www.dlink.com Canada 2180 Winston Park Drive Oakville, Ontario, L6H 5W1 Canada TEL: 1-905-8295033 FAX: 1-905-8295223 URL: www.dlink.ca Europe (U. K.) Floor, Merit House Edgware Road, Colindale London NW9 5AB U.K. -
Page 41: International Offices
Australia 1 Giffnock Avenue North Ryde, NSW 2113 Australia TEL: 61-2-8899-1800 FAX: 61-2-8899-1868 URL: www.dlink.com.au India D-Link House, Kurla Bandra Complex Road Off CST Road, Santacruz (East) Mumbai - 400098 India TEL: 91-022-26526696/56902210 FAX: 91-022-26528914 URL: www.dlink.co.in Middle East (Dubai) P.O.Box: 500376...