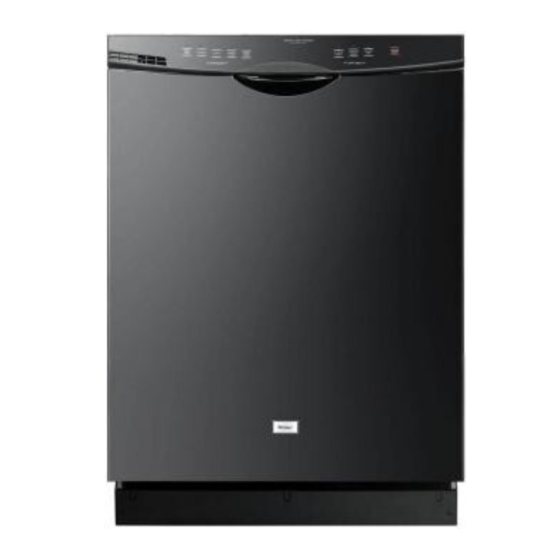
Haier DWL3025 Installation Manual
Haier dishwasher installation manual
Hide thumbs
Also See for DWL3025:
- Installation manual (84 pages) ,
- User manual (100 pages) ,
- Energy manual (2 pages)
Table of Contents
Advertisement
Quick Links
Advertisement
Table of Contents

Related Manuals for Haier DWL3025


Summary of Contents for Haier DWL3025
- Page 1 Dishwasher Installation Manual Model DWL3025 Quality • Innovation • Style...
-
Page 2: Table Of Contents
WHAT DO I NEED TO HAVE TO INSTALL THE DISHWASHER? ......4-10... -
Page 3: Before Using Your Dishwasher
BEFORE USING THE DISHWASHER IMPORTANT: READ AND SAVE THESE INSTRUCTIONS Doing so will: make installation easier. help you in the future if you have questions. help if you have an electrical inspection. YOU CAN BE SERIOUSLY INJURED IF YOU DO NOT FOLLOW INSTRUCTIONS IMMEDIATELY. - Page 4 YOU NEED TO • Carefully open dishwasher door while someone grasps the rear of the dishwasher. Remove shipping materials and lower rack. Close dishwasher door. Latch the dishwasher door shut. • Install this dishwasher as specified in these instructions. • Have everything you need (tools, materials, parts) to properly install the dishwasher.
-
Page 5: Built-In Dishwasher Installation Instructions
F. Flat-blade screwdriver G. Gloves H. Utility knife I. 2 twist-on wire connetors which are the proper size to connect your house hold wiring to 16-gauge wiring in dishwasher J. Small level K. Safety glasses L. 90° elbow with ” (0.9 cm) N.P.T external threads on one end. (The other end must fit your water supply line.) - Page 6 In addition for new installations Q. Electric drill R. ½”, ¾”and 1½” hole saw bits S. Small tubing cutter T. Wire stripper U. 1½”-2” screw-type clamp if connecting to waste-tee V. Copper tubing ( ” recommended) or flexible strainless steel braided fill line W.
-
Page 7: Requirements
See page 9 for dimensions. If the floor in the dishwasher opening in uneven (example: tile flooring only part way into opening) you will needed to take special care in measuring dimensions and in leveling dishwasher. - Page 8 If using conduit, use a cUL-listed/CSA-certified conduit connector. If connecting dishwasher with a power supply cord: - Use a cUL-listed, 16-gauge, three-conductor power supply cord that meets all local codes and ordinaces. Maximum length of the power supply cord is 6 feet (1.8 m).
- Page 9 DRAIN You must: - Use the new drain hose supplied with your dishwasher. If this is not suitable, use a new drain hose with a maximum length of 12 feet(3.7 m) that meets all current AHAM/IAPMO test standards, is resistant to heat and detergent, and fits the drain connector on your dishwasher.
-
Page 10: Cabinet Dimensions
(5.1 cm) 9” (22.9 cm) (25.4 cm) 3¼” (8.3 cm) ” (86 cm) by removing wheels from dishwasher. ” (17.5 cm) if height of opening is 34½” (87.6 cm) at lowest point. 24” (61 cm) 34” (86.4 cm) min.* min. -
Page 11: What Do I Need To Do Before I Install The Dishwasher
If the water line and the direct wire reach into the opening far enough, go to step 10, page 12. If you are installing a new dishwasher , complete all of the following steps: Electrical Follow all national and local codes and ordinaces for completing electrical supply to cabinet. -
Page 12: Water Line
Wiring the dishwasher will be easier if you route wire into the cabinet opening from the left side. 3. Direct wire method: Cut a ¾” (1.9 cm) hole “C” in righthand cabinet side, rear or floor. Optional locations are shown. -
Page 13: Drain Hose
(copper tubing will bend and kink easily) until it is far enough into the cabinet opening to connect it to dishwasher inlet on the front left of dishwasher. 8. Turn shutoff valve “H” to “ON” position. Flush water into a bucket to get rid of particles that may clog the inlet valve. - Page 14 This connection “P” MUST be before drain trap “O” and above the floor at 15 ” (40 cm) to 39 20” (50.8 cm) above the floor where dishwasher will be installed. Go to step 12. 11c. Waste disposer, no air gap 1. Remove the disposer knockout plug.
-
Page 15: Prepare Dishwasher
Do not use dishwasher until completely installed. Do not push down on open door. Doing so can result in serious injury or cuts. Use two people to move and install dishwasher. Failure to do so can result in back or other injury. HELPFUL TIP:... - Page 16 If using conduit use a cUL-listed/CSA certified conduit connector. If you are installing a power supply cord kit, do so now and follow kit instructions. Put cardboard under dishwasher until it is installed. The cardboard will help protect floor covering during installation. HELPFUL TIP:...
- Page 17 If the minimum cutout height is less than 34” (86.4 cm), the adjustable legs can be removed for additional clearance. This will allow the dishwasher to fit into a 33 cutout, but the dishwasher will be more difficult to move into position. If the wheels are removed, protect the floor when moving the dishwasher.
- Page 18 If this is not possible,the brackets “M” may be moved to the sides of the dishwasher. If you are going to attach the dishwasher to the countertop,skip to step 13. If you are going the attach the dishwasher to the sides of the cabinet, follow steps 8 through 12.
- Page 19 Tensioners on both sides of dishwasher should be secured at same holes. 14. Grasp the dishwasher door at the edges of the door panel “W”. Tilt dishwasher backwards on wheels “X”. Move dishwasher close to cabinet opening. DO NOT PUSH ON FRONT OF PANEL OR ON CONSOLE - THEY MAY DENT.
- Page 20 18. Remove cardboard from under dishwasher. It is okay if dishwasher fits tightly into cabinet opening. Do not remove insulation blanket - it reduces the sound level. 19. Align front of dishwasher door panel “Y” with cabinet doors “Z”.
-
Page 21: How Do I Install The Dishwasher
Place level against top front opening of tub “CC”. Check that dishwasher is level from side to side. If dishwasher is not level, adjust front legs up or down until dishwasher is level. - Page 22 Install strain relief and route direct wire so that it does not touch dishwasher motor or lower part of dishwasher tub. Pull direct wire “A” through hole in terminal box. • Select the proper size twist-on connectors to connect your household wiring to 16-gauge dishwasher wiring.
-
Page 23: Water Connection
Failure to follow these instructions can result in death, fire, or electrical shock. Check that power supply cord does not touch dishwasher motor or lower part of dishwasher tub. Go to step 5. Water Connection 1 Slide nut “I” onto copper tubing “J” about 1” (2.5 cm). -
Page 24: Drain Connection
Make sure the water line stays within the shaded area shown on page 7 when the dishwasher is installed in the cabinet. With copper tubing “J” pushed into compression fitting as far as it will go, use an adjustable wrench and tighten compression fitting nut “I”... -
Page 25: Secure Dishwasher
This will prevent screws from falling into pump area when securing dishwasher to countertop. 2. Check that dishwasher is still level and centered in the opening. 3. Secure dishwasher to countertop with two, No. ST4.2 x 18 Phillips-head screws “B”. -
Page 26: Check Operation
2. Check that all parts have been installed and no steps were skipped. Check that you have all the tools you used. 3. At fuse box or circuit breaker, turn on electrical power supply to dishwasher. Start dishwasher and allow it to complete the shortest wash cycle. After the first two minutes, unlatch door, wait five seconds, then open door. - Page 27 Side view Model DWL3025 25” (63,5 cm) ¾”(1.9cm) insulation may be compress -ed. 21”(53.3cm) “ (86 cm) minimum with wheels removed...
- Page 28 IMPORTANT Do Not Return This Product To the Store If you have a problem with this product,please contact the “Haier Customer Satisfaction Center” at 1-877-337-3639. DATED PROOF OF PURCHASE MODEL # AND SERIAL # REQUIRED FOR WARRANTY SERVICE Haier America...