
Related Manuals for Pioneer XC-L11


Summary of Contents for Pioneer XC-L11
-
Page 1: Connecting The Subwoofer
STEREO CD TUNER COMBINÉ RADIO/CD XC-L11 STEREO POWER AMPLIFIER AMPLIFICATEUR DE PUISSANCE STÉRÉO M-L11 SPEAKER SYSTEM ENCEINTES ACOUSTIQUE S-L11-Q-LRW S-L11-S-LRW Operating Instructions Mode d’emploi... - Page 2 These labels can be found on the rear panel of the Ces étiquettes se trouvent sur le panneau arrière du XC-L11 and on the top panel of the M-L11. XC-L11 et sur le panneau supérieur du M-L11. CAUTION ATTENTION DANGER D'ELECTROCUTION...
- Page 3 Operating Environment Conditions de Fonctionnement H045 En H045 Fr Operating environment temperature and humidity: Tempéraure et humidité ambiante lors du fonctionnement: ° ° ° ° ° ° ° ° C – +35 C (+41 F – +95 F); less than 85%RH (cooling C –...
-
Page 4: Table Of Contents
VENTILATION: When installing this unit, make sure to leave space around the unit for ventilation to improve heat radiation (at least 30 cm at top, 15 cm at rear, and 15 cm at each side). WARNING: Slot and openings in the cabinet are provided for ventilation and to ensure reliable operation of the product and to protect it from overheating, to prevent fire hazard, the openings should never be blocked and covered with items, such as newspapers, table-cloths, curtains, etc. - Page 5 VENTILATION: Lors de l’installation de cet appareil, veillez à ménager un espace suffisant autour de ses parois de manière à ce que la chaleur puisse se dissiper aisément (au moins 30 cm à l’apartie supérieure, 15 cm à l’arrière et 15 cm de chaque côté). ATTENTION: Les évents et les ouvertures dans la structure sont prévus pour la ventilation et pour assurer le bon fonctionnement du produit et pour la protéger des risques de surchauffe, et des risques d’incendie, les...
-
Page 6: Before You Start
Using this manual Utilisation de ce mode d’emploi This manual is for the XC-L11 CD tuner, as well as for the M-L11, S-L11-Q-LRW, and S-L11-S-LRW. It is split into three Ce mode d'emploi est consacré au tuner CD XC-L11, ainsi sections: setting up (chapters 1 and 2);... -
Page 7: Using The Remote Control
Before You Start Avant de commencer Put in the supplied battery. Placez la pile (accessoire inclus). Take care to put it in the right way up (+ side up). Veillez à la placer dans le bon sens (côté + vers le haut). Push the battery holder back in, and your Replacez le porte-pile dans la télécommande. -
Page 8: Hints On Installation
Before You Start Avant de commencer Hints on installation Conseils d’installation We want you to enjoy using this unit for years to come, so Nous souhaitons que vous puissiez profiter de cette unité please bear in mind the following points when choosing a pendant les années à... -
Page 9: Avoiding Problems With Condensation
Before You Start Avant de commencer • Vous disposez d’une certaine liberté pour placer le caisson • Although you have some freedom in placement, experiment de graves mais essayez divers emplacements, car certains with different subwoofer locations—some will sound better peuvent donner un meilleur résultat acoustique que than others from your usual listening position. -
Page 10: Connecting The System Components
Connecting Up Raccordements Connecting the system components Branchement des composantes du système Before making or changing any rear panel connections, Avant d’effectuer ou de modifier les branchements sur le make sure that all the components are switched off and panneau arrière, assurez-vous que toutes les unplugged from the power supply. -
Page 11: Branchement Du Caisson De Graves
Orifices pour la fixation de l'unite au mur Caution Attention Pioneer bears no responsibilty for accidents resulting Pioneer décline toute responsabilité dans le cas from faulty assembly or installation, insufficient d'accidents dus à un montage ou à une installation mounting strength of walls or other building fixtures, incorrects, à... -
Page 12: Connecting The Speakers
Connecting Up Raccordements Connecting the speakers Branchement des enceintes For proper sound, it’s important to connect the + (red) Pour un son de bonne qualité, il est nécessaire de brancher and – (black) terminals for each speaker correctly. The correctement les bornes + (rouge) et – (noire) à chaque supplied speaker cables are marked to make connection enceinte. -
Page 13: Setting Up The Speaker Stands
Connecting Up Raccordements Caution Attention Ne branchez aucun autre amplificateur au système, Do not connect any other amplifier to this system. In sinon, dans de rares cas, de la fumée pourrait apparaître rare cases this may result in smoke or fire. ou un incendie, survenir. -
Page 14: Mounting The Satellite Speakers On A Wall
Mounting the satellite speakers on a wall Fixation des enceintes satellites sur un Before mounting speakers on a wall check that the wall is strong enough. Pioneer disclaims any responsibility Avant d’installer les enceintes sur un mur, assurez-vous que celui-ci est suffisamment solide pour les supporter. -
Page 15: Am Loop Antenna
Connecting Up Raccordements AM loop antenna Antenne cadre AM 1 Assemble the antenna as shown. 1 Installez l’antenne comme illustré. Note Remarque If you plan to mount the AM antenna to a wall or other Si vous comptez installer l’antenne AM sur un mur ou surface, secure the stand with screws before clipping the sur toute autre surface, fixez le support avec des vis loop to the stand. -
Page 16: Fm Wire Antenna
Connecting Up Raccordements FM wire antenna Antenne filaire FM • Plug the supplied FM antenna into the FM • Branchez l’antenne FM (accessoire inclus) antenna terminal. à la borne de l’antenne FM. For best results, extend the FM antenna fully and fix to Pour une efficacité... -
Page 17: Connecting Other Components
Connecting Up Raccordements Important Avant d’effectuer ou de modifier les branchements sur le Before making or changing any rear panel connections, panneau arrière, assurez-vous que toutes les make sure that all the components are switched off and composantes sont désactivées et débranchées de la unplugged from the power supply. -
Page 18: Connecting The Optional Cd Recorder
Connecting Up Raccordements Connecting the optional CD Branchement de l’enregistreur de recorder disques compacts en option Ce raccordement concerne l'enregistreur de CD This connection is for the optional PDR-L77 CD PDR-L77 en option. Pour les instructions d'utilisation, recorder. Please refer to the manual that came with the veuillez vous reporter au mode d'emploi qui unit for operation instructions. -
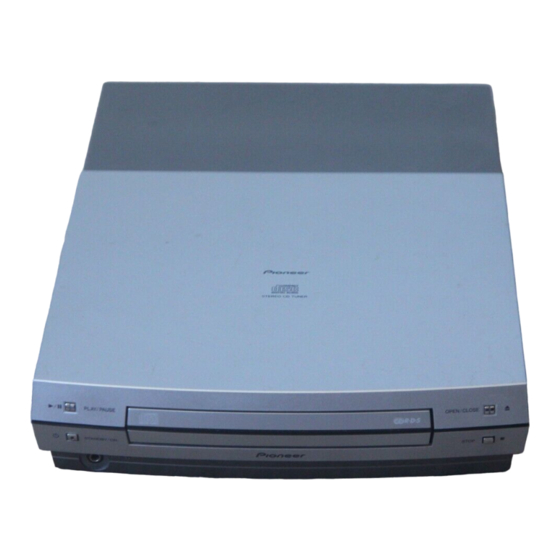
Page 19: Front Panel
Controls and Displays Commandes et fenêtre d’affichage Front panel Panneau avant 0 OPEN/CLOSE 6 PLAY/PAUSE (TOUCH SENSOR) (TOUCH SENSOR) 6 PLAY/PAUSE (CAPTEUR A EFFLEUREMENT) (CAPTEUR A EFFLEUREMENT) Disc tray STANDBY/ON Tiroir à disque 7 STOP PLAY/PAUSE OPEN/CLOSE STANDBY/ON STOP Headphone jack Prise du casque à... -
Page 20: Display
Controls and Displays Commandes et fenêtre d’affichage Display Fenêtre d’affichage RPT–1 Record timer – page 43 Programmateur d’enregistrement – page 43 Timer – page 39-43 Affichage de l’heure – page 39-43 Réveil page 40 Wake up timer page 40 Stereo channel indicators Indicateurs de canaux stéréo 5 Character display 5 Fenêtre d’affichage à... -
Page 21: Introduction
Getting Started Préparation Introduction Introduction This chapter covers using menus, Ce chapitre décrit l’utilisation des switching on and setting the clock, all menus, l’activation et le réglage de the basic controls for playing discs, l’affichage de l’heure, toutes les using the tuner, playing external commandes de base qui permettent de sources, and adjusting the sound. -
Page 22: Switching On And Setting The Clock
Getting Started Préparation Switching on and setting Activation et réglage de the clock l’affichage de l’heure This system has a built in clock, which Ce système comporte une horloge intégrée needs to be set to be able to use the qu’il faut régler pour pouvoir utiliser les timer features. -
Page 23: Changing The Clock Display Format
Getting Started Préparation Changing the clock display format Changement du format d’affichage de You can choose to display the clock and timer settings in l’heure 12-hour or 24-hour format. Vous pouvez afficher l’heure et les réglages de programmation en format 12 ou 24 heures. 1 If the system is on, press STANDBY/ON to put it into standby. -
Page 24: Playing Cds
Getting Started Préparation Playing CDs Lecture de CD Ce chapitre ne traite que des The basic controls for playing discs are commandes de base de la lecture de covered here. Further functions are disques. Les fonctions complémentaires detailed in the next chapter. sont détaillées dans le chapitre suivant. -
Page 25: Listening To The Radio
Getting Started Préparation Listening to the radio Ecoute de la radio The following steps show you how to Les étapes suivantes décrivent comment tune in to FM and AM radio broadcasts régler les ondes FM et AM de la radio à using the automatic, manual and l’aide des fonctions de syntonisation high-speed tuning functions. -
Page 26: Improving Fm Stereo Sound
Getting Started Préparation Improving FM stereo sound Amélioration du son stéréo FM If you’re listening to a stereo FM broadcast, but find that Si vous écoutez une émission en FM stéréo mais qu’il y a there is a lot of noise because of a weak signal, try beaucoup de parasites car le signal de transmission est switching to mono. -
Page 27: Playing Other Connected Components
Getting Started Préparation Playing other connected Commandes des autres components appareils de la chaîne Il est possible que vous ayez branché You may have connected various other plusieurs autres appareils à votre components to your system. These système, parmi lesquels un include a VCR, TV, the optional tape magnétoscope, un poste de télévision, deck or optional MD deck. -
Page 28: Adjusting The Sound
Getting Started Préparation Adjusting the sound Réglage du son Volume is adjustable from zero (silence) to 36 (maxi- Le volume peut être réglé de 0 (silence) à 36 (volume mum volume) using the + and – buttons maximal), à l’aide des touches + et –... -
Page 29: Programming The Track Order
More CD features Autres fonctions du lecteur de CD Programming the track order Programmation de l’ordre de lecture des plages Ce mode vous permet de programmer jusqu’à 24 plages This mode lets you program a sequence (a playlist) of up to (playlist). -
Page 30: Checking The Playlist Order
More CD features Autres fonctions du lecteur de CD Vérification de l’ordre de lecture Checking the playlist order de la playlist You can only check the playlist order when the disc is stopped. Vous ne pouvez vérifier l’ordre de la playlist que lorsque le Once stopped, you can step through the playlist using the disque n’est pas en cours de lecture. -
Page 31: Using Random Play
More CD features Autres fonctions du lecteur de CD Astuce You can use either of the repeat modes together with the Vous pouvez utiliser l’un ou l’autre des modes de répétition en program play mode. association avec le mode de lecture programmée. Setting the repeat mode to plays the tracks in Si vous sélectionnez le mode de répétition... -
Page 32: Changing The Display
More CD features Autres fonctions du lecteur de CD Changing the display Changement de l’affichage You can choose to display various kinds of information during Vous pouvez choisir d’afficher plusieurs types d’informations playback and stop modes. Switch between them by pressing pendant les modes de lecture et d’arrêt. -
Page 33: Saving Station Presets
More tuner features Autres fonctions du tuner Saving station presets Mémorisation des stations If you often listen to a particular radio station, it's présélectionnées convenient to have the receiver store the frequency for Si vous écoutez souvent une station radio particulière, il easy recall whenever you want to listen to that station. -
Page 34: Listening To Station Presets
More tuner features Autres fonctions du tuner Listening to station presets Ecoute des stations présélectionnées Having saved up to 30 station presets (see page 33), you Après avoir enregistré jusqu’à 30 stations can be listening to a station with a couple of button présélectionnées (reportez-vous à... -
Page 35: Tuner System Displays
More tuner features Autres fonctions du tuner 5 Use the 4 and ¢ buttons to change 5 Utilisez les touches 4 et ¢ pour the displayed character; press SET to changer le type de caractère affiché; select it. appuyez sur la touche SET pour le sélectionner. -
Page 36: Using Rds
More tuner features Autres fonctions du tuner Using RDS Utilisation de la fonction RDS Radio Data System, or RDS as it’s usually known, is a Le système de radiodiffusion de données numériques, system used by FM radio stations to provide listeners connu sous le nom de RDS (Radio Data System), est un with various information—the name of the station and système utilisé... -
Page 37: Displaying Rds Information
More tuner features Autres fonctions du tuner Weather reports Bulletin météo WEATHER WEATHER Finance and business Finance et affaires FINANCE FINANCE Children’s' entertainment Divertissement pour les enfants CHILDREN CHILDREN Social affairs Affaires sociales SOCIAL A SOCIAL A Religious programming Emission religieuse RELIGION RELIGION Phone in talk show... -
Page 38: Searching For A Program Type
More tuner features Autres fonctions du tuner Note Remarque • The RDS indicator ( )will light in the RDS mode. • Le témoin RDS ( )s’allume en mode RDS. • If no RDS signal can be received, • Si aucun signal RDS signal n’est reçu, l’indication NO DATA displayed. -
Page 39: Using The Wake Up Timer
Using the Timer Utilisation des fonctions de l’horloge Using the wake up timer Utilisation de la fonction de réveil L’horloge peut servir de réveil et vous permet de vous You can use the timer as an alarm clock to wake up to réveiller au son d’un disque, de la radio, d’une cassette the sound of a disc loaded, the radio, or the optional ou d’un minidisque si vous possédez le lecteur de... -
Page 40: Activating/Deactivating The Wake Up Timer
Using the Timer Utilisation des fonctions de l’horloge 7 Check the settings you just made. 7 Vérifiez les réglages que vous venez The display shows the timer settings: d’effectuer. La fenêtre d’affichage indique les réglages de programmation: TIMER CHECK 9:3O TIMER CHECK OFF 1O:3O 9:3O... -
Page 41: Using The Sleep Timer
Using the Timer Utilisation des fonctions de l’horloge TIMER CHECK TIMER CHECK 9:3O 9:3O OFF 1O:3O OFF 1O:3O VOLUME VOLUME CHECK END CHECK END Using the sleep timer Utilisation du programmateur de veille The sleep timer switches the system into standby after a Le programmateur de veille met l’appareil en veille après specified amount of time so that you can fall asleep un laps de temps spécifié... -
Page 42: Recording Using The Timer
Using the Timer Utilisation des fonctions de l’horloge Le témoin du programmateur de veille ( ) s’allume The sleep timer indicator ( ) lights when the sleep lorsque le programmateur de veille est activé. timer is active. * Cette fonction n’est pas disponible si vous avez réglé le * Not available if you're playing a CD or MD in repeat lecteur de CD ou de MD en mode de lecture répétée (ou play (or a tape in endless play). -
Page 43: Activating/Deactivating The Record Timer
Using the Timer Utilisation des fonctions de l’horloge 6 Set the switch off time. 6 Réglez l’heure de désactivation. OFF 1O:3O OFF 1O:3O Procédez de la même manière que pour le réglage de Set in the same way as the switch on time. l’heure d’activation. -
Page 44: Beep Mode
Informations complémentaires Additional Information Beep mode Mode de signal sonore When set to on, the system beeps when you press 6 or Lorsqu’il est activé, l’appareil émet un signal sonore lorsque vous appuyez sur la touche 6 ou 0, sur le 0 on the front panel. -
Page 45: Taking Care Of Your System
En principe, il n’y a aucune raison pour que l’optique dirt or dust, consult your nearest Pioneer authorized de lecture de disques se salisse; toutefois, si cela devait se service center. -
Page 46: Storing Discs
This system is designed for use with conventional, fully circular discs only. Use of shaped discs is not recom- mended. Pioneer disclaims all liability arising in connection with the use of shaped CDs and DVDs. Cet appareil n’est conçu que pour lire des disques ordinaires parfaitement circulaires. -
Page 47: Troubleshooting
éléments suivants. La défaillance peut parfois être trouble cannot be rectified even after checking the points provoquée par un autre appareil. Vérifiez les autres below, ask your nearest Pioneer authorized service center composantes et appareils électriques utilisés. Si vous ne to carry out repair work. - Page 48 If the display shows OPTION ERROR • Si l’indication Good Bye ne s’affiche pas et que le when power is restored, contact your nearest Pioneer témoin de veille (témoin du programmateur) du authorized service center to carry out repair work.
-
Page 49: Specifications
Frequency range ........1 10 to 20,000 Hz Maximum power ............30 W Dimensions ....... 125 (W) x 70 (D) x 228 (H) mm Weight ................1.0 kg Published by Pioneer Corporation. Copyright © 2001 Pioneer Corporation. All rights reserved. -
Page 50: Spécifications
Gamme de fréquences ....... 1 10 à 20.000 Hz Alimentation maximale ..........30 W Dimensions ......125 (L) x 70 (P) x 228 (H) mm Poids ................1,0 kg Publication de Pioneer Corporation. © 2001 Pioneer Corporation. Tous droits de reproduction et de traduction réservés. -
Page 52: Demo Display
Haven 1087, Keetberglaan 1, B-9120 Melsele, Belgium TEL: 03/570.05.11 PIONEER ELECTRONICS AUSTRALIA PTY. LTD. 178-184 Boundary Road, Braeside, Victoria 3195, Australia, TEL: [03] 9586-6300 PIONEER ELECTRONICS DE MEXICO S.A. DE C.V. San Lorenzo 1009 3er Piso Desp. 302 Col. Del Valle Mexico D.F. C.P. 03100 TEL: 5-688-52-90 <ARE7277-A>...