Table of Contents
Advertisement
Quick Links
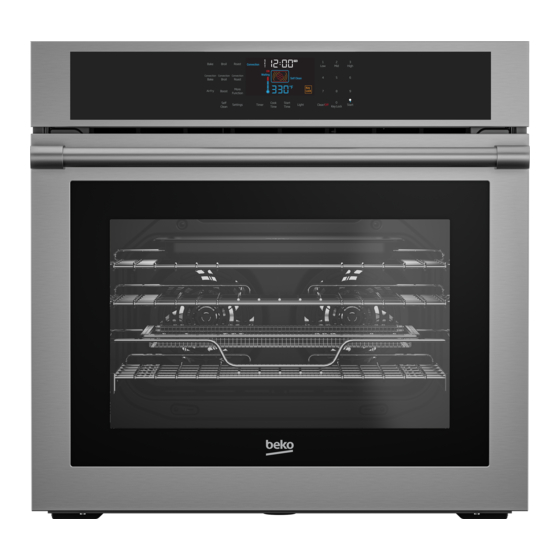
BUILT-IN OVEN
INSTALLATION MANUAL
IMPORTANT
Before Before beginning installation, read these instructions thoroughly and
carefully. Observe all local and national codes, requirements, and ordinances.
DO NOT remove permanently affixed labels, warnings, or plates from the product
as this may void the warranty. Installers should leave these instructions with
the consumer who should retain them for the local inspector's use and for
future reference.
WOS30200SS
285.6002.88/R.AA/18.01.2022
7735687919
Advertisement
Table of Contents

Related Manuals for Beko WOS30200SS


Summary of Contents for Beko WOS30200SS
- Page 1 DO NOT remove permanently affixed labels, warnings, or plates from the product as this may void the warranty. Installers should leave these instructions with the consumer who should retain them for the local inspector’s use and for future reference. WOS30200SS 285.6002.88/R.AA/18.01.2022 7735687919...
- Page 2 BEFORE INSTALLATION READ AND SAVE THESE INSTRUCTIONS PLEASE READ THESE INSTRUCTIONS BEFORE USING THIS APPLIANCE. Dear Valued Customer, Thank you for your purchase - this appliance is intended for normal household use only. It is not approved for outdoor or other non-household uses (including sea or air-going vessels).
-
Page 3: Table Of Contents
TABLE OF CONTENTS SAFETY INSTRUCTION ................4 SAFETY INFORMATION ..............4 BASIC SAFETY INSTRUCTIONS ...........5 ELECTRICAL SAFETY ..............5 INTRODUCTION ...................8 SPECIFICATIONS ..................9 DIMENSIONS .....................10 CUTOUT DIMENSIONS ................11 HIGH CUPBOARD INSTALLATION ..........11 UNDER COUNTER INSTALLATION ..........12 FLUSH MOUNT INSTALLATION ..........13 INSTALLATION ...................14 ELECTRICAL REQUIREMENTS ..........14 UNPACKING .................15 BEFORE INSTALLATION .............16 INSTALLATION CONDITIONS ............17... -
Page 4: Safety Instruction
SAFETY INSTRUCTION SAVE THESE INSTRUCTIONS PLEASE READ THESE INSTRUCTIONS BEFORE INSTALLING THIS APPLIANCE. This appliance is intended for normal household use only. It is not approved for outdoor or other non-household uses (including sea- or air-going vessels). See the Statement of Limited Warranty. If you have any questions, contact the manufacturer. -
Page 5: Basic Safety Instructions
SAFETY INSTRUCTION WARNING WARNING This product can expose To avoid risk of serious you to chemicals including injury or death, the oven Nickel (Metallic) which should be installed by is known to the State of a qualified installer or California to cause cancer. technician. - Page 6 SAFETY INSTRUCTION WARNING WARNING To avoid risk of electrical To avoid risk of serious shock, serious injury, or death: injury or death: • Verify electrical power is turned • Any additions, changes, or off at the breaker box until conversions required in order oven is installed and ready to for this appliance to satisfacto- operate.
- Page 7 6.5 ft away from the product. not, or you observe unusual or excessive noise, contact • DO NOT let electrical sup- your authorized Beko dealer ply cord come in contact before continuing operation. with rear surface of oven or over hot cooking section.
-
Page 8: Introduction
All height, width, and depth dimensions are shown in inches (as well as metric). Beko US, Inc. reserves the absolute and unrestricted right to change product materials and specifications, at any time, without notice. Please visit our website www.bekoappliances.com or call 888-352-2356 to verify the latest specifications with final dimensional data and other details prior to installation and making a cutout. -
Page 9: Specifications
SPECIFICATIONS Specifications Type Built-In Size 30 in. (762 mm) Color Stainless Steel Oven Type Multifunction Control Type Light Emitting Diode (LED) Display Accessories/Oven Cavity (Each Oven) Cavity Enamel Color Black Rack Positions 6 level wire rack Oven Lights 2 x 40 W Halogen (each oven) Chromed Racks Oven Capacity 5.7 cu. -
Page 10: Dimensions
DIMENSIONS in. (620 mm) in. (755 mm) 7/16 in. (595 mm) 7/16 Front Side in. (594 mm) in. (683 mm) -
Page 11: Cutout Dimensions
CUTOUT DIMENSIONS HIGH CUPBOARD INSTALLATION (241 mm) (133 mm) 24 in. (610 mm) in. to 28 7/16 (682 to 723 mm) Junction box location (junction box may be (724 mm) located in adjacent cabinet.) -
Page 12: Under Counter Installation
CUTOUT DIMENSIONS UNDER COUNTER INSTALLATION Junction box location (junction box may be located in adjacent cabinet) (241 mm) 24 in. 1 in. (610 mm) (25 mm) (718 mm) (133 mm) 36 in. (915 mm) 3/4 in. (19 mm) 4 in. (102 mm) (724 mm) If installing in lower cabinet, leave 4 in. -
Page 13: Flush Mount Installation
CUTOUT DIMENSIONS FLUSH MOUNT INSTALLATION (241 mm) 1 in. (25 mm) (133 mm) 29 in. (622 mm) (736 mm) Junction box location 9” (junction box may be inset cutout located in adjacent cabinet) (241 mm) height depth 1 in. (25 mm) 30 in. -
Page 14: Installation
INSTALLATION Preparation of location and WARNING electrical installation for the oven is the customer’s responsibility. The appliance should be properly To avoid risk of electrical installed and grounded by a qualified shock, serious injury, or technician. The appliance must death, verify electrical be installed in accordance with all power is turned off at the local electrical regulations. -
Page 15: Unpacking
INSTALLATION making electrical connections to the Main power must be shut off before appliance. Ensure connections are removing the appliance for clean- made in accordance with local codes ing or servicing. and ordinances. • Do not remove permanently affixed • The appliance should be installed labels, warnings, or plates from and connected to electrical power oven. -
Page 16: Before Installation
INSTALLATION BEFORE INSTALLATION CAUTION The appliance is intended for installation in commercially available To avoid risk of injury, or kitchen cabinets and a minimum product or property damage: clearance must be ensured between • Use two or more people or the appliance and kitchen walls, suitable lifting device when lift- floors, and furniture for safety. -
Page 17: Installation Conditions
INSTALLATION to the State of California to cause will be installed on should be able cancer, birth defects, or other to withstand the weight of 220 lbs reproductive harm, and requires (100 kg) or more. businesses to warn of potential •... - Page 18 INSTALLATION 2. Using both hands, grasp the 4a. Connect green GROUND wire sides of the oven door, raise and and white wire from oven to lift up and out. branch circuit NEUTRAL wire in junction box. Connect red and black wires from oven to corresponding branch circuit red and black wires in junction box.
- Page 19 INSTALLATION CAUTION CAUTION To avoid risk of tipping, To avoid risk of injury ensure oven is installed and or product or property secured properly. damage, ensure electrical supply cord is free and not 7. Install oven racks. clamped, bent, or squeezed. Do not route electrical supply cord so that it will be in contact with rear surface...
- Page 20 INSTALLATION 8. Install oven door to hinges. 9. Lock hinge clamps and close oven door. 10. Connect or turn on power at main supply. 11. Ensure appliance powers on.
-
Page 21: Prepare For Use
PREPARE FOR USE SETTING THE TIME Note: Before using the oven, the clock must be set. If the clock is not set, the oven will not work. 1. Touch the “Settings” touchpad once. 2. The “Time” ,” Clock” and “Current time display” indicators begin flashing. 3. - Page 22 PREPARE FOR USE 5. Then touch ”0” on the touchpad. 6. Then touch ”2” on the touchpad. 7. Then touch ”6” on the touchpad. 8. Confirm the time by touching “Start” on the touchpad or wait approximately 10 seconds.
-
Page 23: Setting Clock Mode (12Hr Or 24Hr)
PREPARE FOR USE SETTING CLOCK MODE (12HR OR 24HR) 1. Touch the “Settings” touchpad two times. 2. The “12 24” indicator begins flashing. 3. Use touchpad 4 or 6 on numeric keypad to select 12hr or 24hr clock mode. 4. Confirm the selection by touching “Start” on the touchpad or wait approximately 10 seconds. -
Page 24: Initial Heating
• Check oven self-clean function - oven door will lock automatically. Check broil element on through oven door glass. Abort self-clean cycle to unlock oven door. SERVICE INFORMATION Please contact you authorized Beko dealer or visit www.bekoappliances.com to locate and get information for the closest authorized Beko service center.