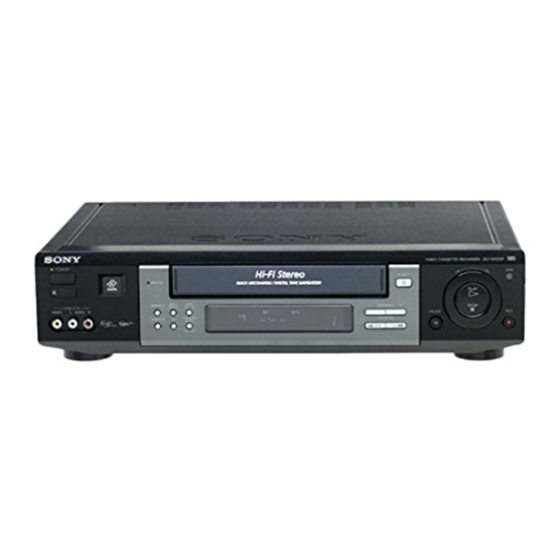
Sony SLV-M20HF Hook-Up Manual
Hide thumbs
Also See for SLV-M20HF:
- Service manual (143 pages) ,
- Operating instructions manual (88 pages) ,
- Hookups and settings (52 pages)

Related Manuals for Sony SLV-M20HF


Summary of Contents for Sony SLV-M20HF
- Page 1 3-862-974-11 (1) Video Cassette Recorder Hookup/Setup SLV-M20HF ©1998 by Sony Corporation...
- Page 2 If you are unable to insert the plug fully into the outlet, contact your Sony dealer. • Unplug the unit from the wall outlet if you do not intend to use it for an extended period of time.
-
Page 3: Table Of Contents
Table of contents Step 1: Unpacking Step 2: Setting up the remote commander Step 3: Hookups Audio/video (A/V) hookup 11 Hookup 1: Using cable box control 14 Hookup 2: No cable box, or incompatible cable box with only a few scrambled channels 17 Hookup 3: Antenna hookup 20 Hookup 4: Incompatible cable box with many scrambled channels... -
Page 4: Step 1 Unpacking
Step 1 Unpacking Check that you have received the following items with the VCR: • Remote commander • Cable Mouse (cable box controller) • Size AA (R6) batteries • 75-ohm coaxial cable with F-type connectors • Audio/video cable (3-phono, 1-mini •... -
Page 5: Step 2: Setting Up The Remote Commander
• Do not use a new battery with an old one. • Do not use different types of batteries. • Some Sony AV receivers may not be operated with the remote commander. continued... - Page 6 TV. You can also use the buttons marked with a dot (•) to control a Sony TV. To control the VCR, reset TV / VIDEO to VIDEO . • If you set your TV’s code number correctly while the TV is turned on, the TV turns...
- Page 7 If more than one code number is listed, try entering them one at a time until you find the one that works with your TV. Manufacturer Code Manufacturer Code Manufacturer Code number number number Sony 04, 10 Akai Sampo Magnavox 03, 08, 12 Sanyo Centurion Marantz 04, 13 Scott...
-
Page 8: Step 3: Hookups
• Be sure you make connections firmly. Loose connections may cause picture distortion. • If your TV doesn’t match any of the examples provided, see your nearest Sony dealer or qualified technician. ® * DSS is a registered trademark of DIRECTV, Inc., a unit of Hughes Electronics Corporation. -
Page 9: Audio/Video (A/V) Hookup
10. If you want to record off-air or off your cable TV system, complete these connections first, and then go to the following pages for antenna or cable hookups. * S-Link™ is a trademark of Sony Corporation. A Use this hookup if your TV has stereo jacks Stereo receiver... - Page 10 Step 3: Hookups (continued) C Use this hookup if your TV has the S-Link™ function Stereo receiver AUDIO VIDEO AUX IN LINE-1 IN S-LINK LINE OUT VIDEO AUDIO OUT AUDIO S-LINK Audio cable (not supplied) Audio/video cable (supplied) Note • To play a tape in stereo, you must use the A/V connection. A/V hookup: VCR setup After you’ve connected your TV and completed antenna or cable hookup,...
- Page 11 Pages 11 to 13 Hookup 1 Using cable box control Recommended use You should use this hookup if you have a cable box, especially if your cable system scrambles all or most channels. This hookup allows the VCR’s cable box control feature to control the channel on the cable box, simplifying the recording process.
- Page 12 Step 3: Hookups (continued) Hookup 1: VCR setup Set the RF UNIT switch to RF UNIT CH 3 or CH 4, whichever channel is not used in your area. If both are used, set the switch to either channel. For details, see page 43. If you made A/V EASY connections (from page 9),...
- Page 13 6 Select your cable box SET UP CABLE BOX SET UP output channel and CABLE BOX CONTROL CABLE MOUSE press the cursor stick BOX CODE NO. SET UP i s d o n e (OK). BOX OUTPUT CH t o s e l e c t CABLE BOX CH.
-
Page 14: Few Scrambled Channels
Step 3: Hookups (continued) Hookup 2 Pages 14 to 16 No cable box, or incompatible cable box with only a few scrambled channels Recommended use Use this hookup if you do not have a cable box. Also use this hookup if your cable company cannot supply a cable box that is compatible with the VCR’s cable box control feature, and your cable system scrambles only a few channels. - Page 15 Hookup 2: VCR setup Set the RF UNIT switch to RF UNIT CH 3 or CH 4, whichever channel is not used in your area. If both are used, set the switch to either channel. For details, see page 43. If you made A/V EASY connections (from page 9),...
- Page 16 Step 3: Hookups (continued) 6 The AUTO PRESET SET UP TUNER PRESET SET UP starts. AUTO PRESET SET UP i s d o n e ROCESS I NG P l e a s e wa i t Normal display Automatic clock setting Once you’ve set up the VCR, it automatically sets the clock the first time you turn off the VCR.
- Page 17 Pages 17 to 19 Hookup 3 Antenna hookup Make the following connections if you’re using an antenna (if you don’t have cable TV). A Use this hookup if you’re using: • VHF/UHF antenna (you get channels 2–13 and channels 14 and higher) •...
- Page 18 Step 3: Hookups (continued) Hookup 3: VCR setup Set the RF UNIT switch to RF UNIT CH 3 or CH 4, whichever channel is not used in your area. If both are used, set the switch to either channel. For details, see page 43. If you made A/V EASY connections (from page 9),...
- Page 19 6 The AUTO PRESET SET UP TUNER PRESET SET UP starts. AUTO PRESET SET UP i s d o n e ROCESS I NG P l e a s e wa i t Normal display Automatic clock setting Once you’ve set up the VCR, it automatically sets the clock the first time you turn off the VCR.
- Page 20 Step 3: Hookups (continued) Hookup 4 Pages 20 to 22 Hookup 4 Hookup 4 Incompatible cable box with many scrambled channels Recommended use Use this hookup if your cable company cannot supply a cable box that is compatible with the VCR’s cable box control feature, and your cable system scrambles all or most channels.
- Page 21 Hookup 4: VCR setup Set the RF UNIT switch to RF UNIT CH 3 or CH 4, whichever channel is not used in your area. If both are used, set the switch to either channel. For details, see page 43. If you made A/V EASY connections (from page 9),...
- Page 22 Step 3: Hookups (continued) 6 The AUTO PRESET SET UP TUNER PRESET SET UP starts. AUTO PRESET SET UP i s d o n e ROCESS I NG P l e a s e wa i t Normal display Automatic clock setting To use the Auto Clock Set feature with this hookup, you need to manually select a channel that carries a time signal: Tune the cable box to a channel that carries a time signal.
- Page 23 Pages 23 to 25 Hookup 5 DSS (Digital Satellite System) receiver Recommended use Use this hookup if you have a DSS receiver. It allows the VCR’s cable box control feature to control the channel on the DSS receiver, simplifying the recording process.
- Page 24 Step 3: Hookups (continued) Hookup 5: VCR setup Set the RF UNIT switch to RF UNIT CH 3 or CH 4, whichever channel is not used in your area. If both are used, set the switch to either channel. For details, see page 43. If you made A/V EASY connections (from page 9),...
- Page 25 5 Enter your DSS receiver code number and push SET UP CABLE BOX the cursor stick to .. For details, see page 35. CABLE BOX CONTROL CABLE MOUSE BOX CODE NO. – –– BOX OUTPUT CH En t e r y o u r CABLE BOX Cod e No.
-
Page 26: Channels, Using An A/B Switch
Step 3: Hookups (continued) Hookup 6 Pages 26 to 28 Incompatible cable box with only a few scrambled channels, using an A/B switch Recommended use By using an A/B switch (not supplied), this hookup allows you to record both scrambled and unscrambled channels conveniently. What you can do with this hookup •... - Page 27 Hookup 6: VCR setup Set the RF UNIT switch to RF UNIT CH 3 or CH 4, whichever channel is not used in your area. If both are used, set the switch to either channel. For details, see page 43. If you made A/V EASY connections (from page 9),...
- Page 28 Step 3: Hookups (continued) 5 The TUNER PRESET menu appears. Set SET UP TUNER PRESET ANTENNA/CABLE to CABLE and press the ANTENNA / CABLE cursor stick (OK). For details, see page 40. CABLE t o s e l e c t Th e n p u s h Pu s h EASY SET UP t o q u i t 6 The AUTO PRESET...
-
Page 29: Selecting A Language
Selecting a language You can change the on-screen display language. MENU Cursor stick >/. • MENU Press MENU, then push the cursor stick to LANGUAGE >/. to move the cursor to LANGUAGE ENGLISH and press the cursor stick (OK). ESPAÑOL •... -
Page 30: Setting The Clock
Setting the clock Using the Auto Clock Set feature Some TV and cable channels transmit time signals with their broadcasts. Your VCR can pick up this time signal to automatically set the clock. The Auto Clock Set feature works only if MENU a channel in your area is broadcasting a time signal. - Page 31 To activate the Auto Clock Set function, turn off the VCR. The VCR automatically sets the clock by searching for a channel that carries a time signal and sets your time zone and Daylight Saving Time (if applicable). Notes • The clock cannot be set automatically if you don’t receive a channel that carries a time signal in your area.
- Page 32 Setting the clock (continued) Using Manual Clock Set The GUIDE Plus+ system operates according to the time signals transmitted from certain TV stations. However, when you set CLOCK SET to MANUAL, the manual timer operates according to the VCR’s own clock, and the GUIDE Plus+ timer operates according to the time signals transmitted from certain TV MENU...
- Page 33 • CURSOR Push the cursor stick to / to highlight CLOCK SET the day and push the cursor stick to >/. 2 : 0 0 / 6 / 1 9 9 8 MON to set the day. t o s e l e c t c u r r e n t PUSH OK Th e n, p u s h...
-
Page 34: Setting Up Cable Box Control
Setting up cable box control (Skip this section if you are Number using Hookup 2, 3, 4, or 6.) buttons Your VCR includes a cable box control CH +/– feature that allows the VCR to control most brands of cable boxes/DSS receivers via the Cable Mouse. - Page 35 Press the number buttons to enter the CABLE BOX CONTROL cable box/DSS receiver code number, then CABLE MOUSE push the cursor stick to .. BOX CODE NO. BOX OUTPUT CH Find your cable box/DSS receiver code number from the chart below. t o s e l e c t CABLE •...
- Page 36 038, 071, 074, 122, 222, 269, Sharp Zenith 011, 065, 536 Signal Zentek Signature Wave Master SL Marx Spectravision DSS receiver Code numbers Sprucer 032, 318 brand Standard Components 107, 166 Starcom 014, 026, 058, 109 Sony Stargate 026, 051...
- Page 37 To ensure correct operation • Place the Cable Mouse so that it hangs out over the cable box/DSS receiver front. • Do not place the cable box/DSS receiver on top of the VCR. • Position the cable box/DSS receiver away from the VCR. •...
- Page 38 Setting up cable box control (continued) If you cannot get your VCR to control the cable box/DSS receiver • Check that the Cable Mouse is connected to the CABLE BOX CONTROL jack on the VCR. • Check the position of the Cable Mouse. •...
-
Page 39: Presetting Channels
Presetting channels (Skip this section if you are using cable box/DSS receiver control feature.) This VCR is capable of receiving VHF channels 2 to 13, UHF channels 14 to 69 MENU and unscrambled CATV channels 1 to 125. First, we recommend that you Cursor stick preset the receivable channels in your >/./?//... - Page 40 Presetting channels (continued) • CURSOR • To preset cable TV channels: TUNER PRESET Push the cursor stick to ?// to set ANTENNA / CABLE CABLE AUTO PRESET ANTENNA/CABLE to CABLE. MANUAL SET ERASE FINE TUNING PUSH OK t o s e l e c t a n t e m, t h e n p u s h •...
- Page 41 Presetting/disabling channels manually Number buttons, ENTER CH +/– MENU Cursor stick >/./?// Press MENU and select TUNER PRESET, • MENU TUNER PRESET then press the cursor stick (OK). ANTENNA / CABLE CABLE AUTO PRESET • CURSOR MANUAL SET ERASE FINE TUNING S e l e c t CH w i t h 0 –...
- Page 42 Presetting channels (continued) If the picture is not clear Normally, the Auto Fine Tuning (AFT) Number function automatically tunes in channels buttons, clearly. If, however, the picture of a ENTER channel is not clear, you can also use the manual tuning function. MENU Cursor stick >/./?//...
-
Page 43: General Setup Information
General setup information Setting the RF unit When connecting the VCR to the TV RF UNIT using only the antenna cable, you must set the RF UNIT switch on the rear of the VCR so that the TV can receive the correct signal from the VCR. - Page 44 General setup information (continued) Attaching the external 300-ohm twin antenna connector lead cable When using a 300-ohm twin lead cable for VHF/UHF antenna, use the EAC-32 EAC-32 antenna antenna connector (not supplied) to connector connect the antenna to the VCR. (not supplied) Loosen the screws on the antenna connector.
-
Page 45: Index To Parts And Controls
Index to parts and controls Refer to the pages indicated in parentheses ( ) for details. Front panel 1 POWER switch/indicator (6, 43) !™ p STOP button 2 SmartFile sensor !£ Shuttle ring 3 SMARTFILE indicator !¢ P PAUSE button 4 INPUT SELECT button (30) !∞... - Page 46 Index to parts and controls (continued) Display window STEREO SAP SPEP LP VIDEO APC BLANK 1 2 3 1 Timer indicator 8 BLANK indicator 2 Child Lock indicator 9 Tracking indicator 3 STEREO indicator 0 Line/channel indicator (30) 4 SAP (Second Audio Program) !¡...
- Page 47 Rear panel 1 AC power cord (8) 7 VHF/UHF IN connector (11, 14, 17, 20, 23, 26) 2 S LINK (CONTROL S IN) jack (10) 8 VHF/UHF OUT connector (11, 14, 3 CABLE BOX CONTROL 17, 20, 23, 26) (CONTROL S OUT) jack (11, 23) 9 RF (Radio Frequency) UNIT switch 4 LINE-1 IN AUDIO L/R/VIDEO (43)
- Page 48 Index to parts and controls (continued) Remote commander 1 6 EJECT button 2 Number buttons (6, 35, 41) 3 SET button 4 ENTER button (41) 5 SMARTFILE button 6 r REC (record) button 7 Blue button 8 GUIDE button 9 Green button 0 0 REW (rewind) button !¡...
- Page 49 !∞ TV / VIDEO switch (5, 6) !§ COMMAND MODE switch (6) !¶ POWER switch (6, 43) !• VCR Plus+ button !ª TV/VIDEO button (6, 30, 43) @º CLEAR button @¡ DISPLAY button (40) @™ CH (channel) +/– buttons (6, 37, 41) @£...
- Page 50 Index to parts and controls (continued) Remote commander, with top cover opened 1 SP (Standard Play)/EP (Extra Play) button 2 INFO (information) button 3 AUDIO MONITOR button 4 COUNTER RESET button 5 QUICK TIMER button 6 =/+ INDEX SEARCH buttons 7 SMART CUE button 8 INPUT SELECT button (30) 9 TV/VIDEO button (6, 30, 43)
-
Page 52: Index
34 Cable hookup 11 Presetting channels 39 Cable Mouse 34 S, T, U, V, W, X, Y, Z Clock setting 30 Connecting S-Link™ 10 cable TV 11 external antenna connector 44 UHF/VHF band mixer 44 Sony Corporation Printed in Malaysia...