Philips CEM250/55 User Manual
Philips car entertainment system cem250 bluetooth sd/sdhc card slots
Hide thumbs
Also See for CEM250/55:
- Service manual (32 pages) ,
- Quick start manual (4 pages) ,
- Service manual (34 pages)
Table of Contents
Advertisement
Quick Links
Download this manual
See also:
Service Manual
Advertisement
Table of Contents

Related Manuals for Philips CEM250/55


Summary of Contents for Philips CEM250/55
- Page 1 Register your product and get support at EN User manual CEM250-55-IFU-ENG.indd CEM250-55-IFU-ENG.indd Car Entertainment System CEM250 2008-10-28 2008-10-28 10:27:48 10:27:48...
-
Page 2: Table Of Contents
Contents 1 Important Safety Notice 2 Your Car Audio System Introduction What’s in the box Overview of the main unit Overview of the remote control 3 Get started Install the car audio Install remote control battery Turn on Set clock 4 Listen to radio Tune to a radio station Store radio stations in memory... -
Page 3: Important
This equipment should not be used for such purposes. FCC Declaration of conformity Model number: PHILIPS CEM250/55 Trade Name: Philips Responsible Party: Philips Consumer Electronics P. O. Box 671539... - Page 4 residential installation. This equipment generates, uses, and can radiate radio frequency energy and, if not installed and used in accordance with the instruction manual, may cause harmful interference to radio communications. However, there is no guarantee that interference will not occur in a particular installation. If this equipment does cause harmful interference to radio or television reception, which can be determined by turning the equipment off and...
- Page 5 Any changes or modifi cations made to this device that are not expressly approved by Philips Consumer Lifestyle may void the user’s authority to operate the equipment. 2008 © Koninklijke Philips Electronics N.V. All rights reserved.
-
Page 6: Your Car Audio System
2 Your Car Audio System Congratulations on your purchase, and welcome to Philips! To fully benefi t from the support that Philips offers, register your product at www.Philips.com/welcome. Introduction With the in-car audio system, you can enjoy your drive while you listen to: •... -
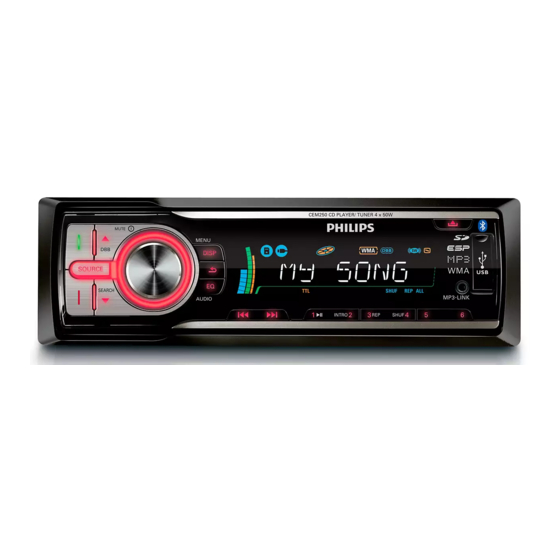
Page 7: Overview Of The Main Unit
Overview of the main unit (green/red) • Answer phone (green) • Dial number (green) • View call log (green) • Terminate call (red) / DBB • Select tuner band. • Select MP3/WMA folder. • Scroll up menu. • Turn on or off Dynamic Bass Boost (DBB) sound. -
Page 8: Overview Of The Remote Control
• Access system menu. • Return to previous menu. • Stop search. • Disable screen blackout. g Display panel • Unlock the panel i USB socket j External equipment socket • Select preset station no. 6 • Select preset station no. 5 m SHUF, 4 •... - Page 9 • Tune for radio station • Skip/search for a track. • Mute or restore volume. • Turn the unit on or off. d MENU • Access system menu. e AUDIO • Access audio setting menu. f 5/6/7/8/9/0+ • Select track or preset radio station. •...
-
Page 10: Get Started
Use the controls only as stated in this user manual. Always follow the instructions in this chapter in sequence. If you contact Philips, you will be asked for the model and serial number of your unit. The model number and serial number are on the bottom of your unit. - Page 11 Connect wires: for cars with ISO connectors Caution • Ensure that all loose leads are insulated with electrical tape. Pull out the ISO connectors from car dashboard and connect them to the bigger end of the supplied standard connector. Connect the other end of the supplied standard connector to the unit.
- Page 12 Connector Connect to Microphone REAR LINE Rear right OUT R speaker REAR LINE Rear left speaker OUT L SUB OUT Subwoofer ANTENNA Antenna Cut off the bigger end of the supplied standard connector. Check the car’s wiring carefully and connect them to the supplied standard connector.
- Page 13 Ignition key +12V DC when ON/ACC BLUE Motor/electric antenna relay control lead/ Amplifi er relay control lead Ground BLACK ORANGE/ Illumination switch WHITE YELLOW To the +12V car battery which is energized at all times Connect the supplied standard connector to the unit.
-
Page 14: Attach The Front Panel
Install the sleeve into the dashboard and bend the tabs outward to fi x the sleeve. Note • Skip this step if the unit is not fi xed by sleeve but supplied screws. Place the supplied rubber cushion over the end of the mounting bolt. -
Page 15: Install Remote Control Battery
Press the left side of the panel and point the left hole at the left pillar. Release the panel to engage the left side. Install remote control battery Caution • Risk of explosion! Keep batteries away from heat, sunshine or fi re. Never discard batteries in fi re. •... -
Page 16: Listen To Radio
4 Listen to radio Tune to a radio station Press SOURCE repeatedly to select Tuner. Press to select band: [FM1] , [FM2] , [FM3] , [AM1] , or [AM2] . Press to tune to a radio station manually. The radio station is broadcast. »... -
Page 17: Use Bluetooth Devices
5 Use bluetooth devices With this car audio system, you can listen to audio fi les from a player or make a call if bluetooth connection is available on your phone or player. Pairing bluetooth devices You can pair your bluetooth device with the unit as follows: Turn on bluetooth function on the device. -
Page 18: Call Waiting
Call waiting If there is another incoming call during call, [ CALL WAITING ] fl ashes on the display panel. Press to terminate the present call. The other call is automatically » answered. The fi rst call is terminated. » Call transfer You can transfer voice from loudspeaker to mobile phones during call. -
Page 19: Play Audio Fi Les
6 Play audio files Note • Ensure that the disc or device contains playable fi les. Play a disc Note • You cannot play CDs encoded with copyright protection technologies. You can play commercially available audio CDs and these discs: •... -
Page 20: Control Play
Insert SD/MMC card Note • The system supports SDHC cards. Press to release the panel. Insert the SD, or MMC card into the card slot. The unit starts playing from the SD/ » MMC card automatically. Remove the SD/MMC card Press and hold to turn off the unit. -
Page 21: Repeat Play
Repeat play During play, press 3, REP repeatedly to select: [REP 1] (repeat one track): play the • current track repeatedly. [REP FOLD] (repeat one folder): play all • tracks in the current folder repeatedly. [REP ALL] (repeat all tracks): play all tracks •... -
Page 22: Adjust Sound
7 Adjust sound Adjust volume Turn clockwise/anticlockwise to increase/decrease volume. Turn Dynamic Bass Boost (DBB) on/off Press DBB for 3 seconds, the current setting is displayed: [DBB ON] : The Dynamic Bass Boost » (DBB) function is on. [DBB OFF] : The DBB function is off. »... -
Page 23: Adjust System Settings
8 Adjust system settings Set PIN code You can set a password for bluetooth connection. Press MENU / DISP for 3 seconds. Press repeatedly to until [PIN CODE] is displayed. Press to confi rm selection. Turn and then press to enter a digit. Repeat step 4 to enter other three digits. -
Page 24: Turn Beep Sound On/Off
Press MENU / DISP for 3 seconds. repeatedly to until [V - Press LAST] or [V - ADJ] is displayed. Turn to select a setting: [V - LAST] : Each time you turn on • the unit, the volume remains from its previous use. - Page 25 Preset adjustments such as preset » channels and sound adjustments are erased. CEM250-55-IFU-ENG.indd CEM250-55-IFU-ENG.indd 2008-10-28 2008-10-28 10:28:25 10:28:25...
-
Page 26: Additional Information
FUSE 15A Note • If the new fuse gets damaged again, there may be an internal malfunction. Consult your Philips dealer. Remove the unit You can remove the unit from the dashboard. Detach the front panel. Pull out the unit by using the removal keys. -
Page 27: Product Information
10 Product information Note • Product information is subject to change without prior notice. Power supply 12 V DC (11 V - 16 V), negative ground Fuse 15 A Suitable speaker 4 - 8 impedance Maximum power 50 W x 4 channels output Continuous power 24 W x 4 channels (4... - Page 28 • AAC, WAV, PCM audio fi les • DRM protected WMA fi les (.wav, .m4a, .m4p, .mp4, .aac) • WMA fi les in Lossless format • ISO9660, Joliet • Maximum title number: 999 (depending on fi le name length) • Maximum album number: 255 •...
-
Page 29: 11 Troubleshooting
If the problem remains unsolved, go to the Philips web site (www.Philips.com/support). When you contact Philips, ensure that your unit is nearby and the model number and serial number are available (see ‘Get started’ on page 11 ) . -
Page 30: 12 Glossary
12 Glossary MultimediaCard. A type of memory card with a fl ash memory. A fi le format with a sound data compression system. MP3 is the abbreviation of Motion Picture Experts Group 1 (or MPEG-1) Audio Layer 3. With the MP3 format, one CD-R or CD-RW can contain about 10 times more data than a regular CD. - Page 31 © 2008 Koninklijke Philips Electronics N.V. All rights reserved. Document order number: 12NC CEM250-55-IFU-ENG.indd CEM250-55-IFU-ENG.indd 2008-10-28 2008-10-28 10:28:30 10:28:30...