Table of Contents
Advertisement
Quick Links
Dear Customer
Thank you for purchasing this product. For optimum performance
and safety, please read these instructions carefully.
Before connecting, operating or adjusting this product, please read
the instructions completely.
Please keep this manual for future reference.
P PC
Operating Instructions
DVD Recorder
Model No.
If you have any questions contact
In the U.S.A.: 1-800-211-PANA (7262)
In Canada:
1-800-561-5505
For U.S.A. only
The warranty can be found on page 66.
For Canada only
The warranty can be found on page 67.
La guía rápida en español se encuentra en la página 70–79.
DMR-ES40V
VQT0R73
VQT0R73-1
Advertisement
Table of Contents

Related Manuals for Panasonic DMR-ES40VS


Summary of Contents for Panasonic DMR-ES40VS
-
Page 1: Operating Instructions
Dear Customer Thank you for purchasing this product. For optimum performance and safety, please read these instructions carefully. Before connecting, operating or adjusting this product, please read the instructions completely. Please keep this manual for future reference. P PC Operating Instructions DVD Recorder DMR-ES40V Model No. -
Page 2: Getting Started
(1) This device may not cause harmful interference, and (2) this device must accept any interference received, including interference that may cause undesired operation. Responsible Party: Panasonic Corporation of North America One Panasonic Way Secaucus, NJ 07094 Telephone No.: 1-800-211-7262 DANGER VISIBLE AND INVISIBLE LASER RADIATION WHEN OPEN. -
Page 3: Important Safety Instructions
Getting started IMPORTANT SAFETY INSTRUCTIONS Read these operating instructions carefully before using the unit. Follow the safety instructions on the unit and the applicable safety instructions listed below. Keep these operating instructions handy for future reference. (1) Read these instructions. (2) Keep these instructions. -
Page 4: Table Of Contents
≥Channel captions...17 - Preset Channel Captions ...17 - Manual Channel Captions...17 STEP 4 Set up to match your TV and remote control...18 ≥When other Panasonic products respond to this remote control...18 ≥TV operation...18 ≥Selecting TV type ...19 ≥Removing Interference ...19 Playback Playing discs...20... - Page 5 Getting started Playback Inserting a video cassette ...46 Video cassette information ...46 ≥Video cassettes ...46 ≥Video cassette care...46 ≥Maintenance...46 Playing a video cassette ...47 Fast-forward/Rewind...47 Cue/Review ...47 Jet Search...47 Slow ...47 Jet Rewind ...47 S-VHS Quasi Playback (SQPB) ...48 Repeat Playback...48 Adjusting the playback picture ...48 ≥Manual tracking ...48 ≥Vertical locking adjustment...48...
-
Page 6: Concerning Discs
° You cannot consecutively record or play both sides. ≥We recommend using Panasonic discs. We recommend using DVD-RAM discs with cartridges to protect them from scratches and dirt. ≥Discs from other manufactures may not be recorded or played due to the condition of the recording. -
Page 7: Play-Only Discs [12 Cm (5Z)/8 Cm (3Z)]
Getting started ∫ Play-only discs [12 cm (5z)/8 cm (3z)] Disc type DVD-Video DVD-RW (DVD Video Recording format) Logo Indicated in these [DVD-V] instructions with Instructions High quality DVD-RW° recorded on another DVD recorder ≥You can play programs that allow “One time movie and music discs only recording”... -
Page 8: Disc Handling
Getting started ∫ Disc handling ∫ How to hold a disc Do not touch the recorded surface. ∫ Concerning non-cartridge discs Be careful about scratches and dirt. ∫ If there is dirt or condensation on the disc Wipe with a damp cloth and then wipe dry. ∫... -
Page 9: Using Dvd-R, Dvd-Rw And +R On This Unit
∏ 1 Remote control (EUR7720LB0) (U.S.A. only) Product Registration Card Please complete and return the included product registration card, or register via the Internet at: http://www.prodreg.com/panasonic/ Hello 4:3 aspect The selected audio only is recorded. Main Hello Play on other DVD equipment Í... -
Page 10: Remote Control
Getting started Remote control DVD/ VHS POWER POWER INPUT SELECT TV/ VIDEO OPERATION SELECT CANCEL/RESET VCR Plus+ SKIP/ INDEX DIRECT NAVIGATOR TOP MENU SUB MENU SCHEDULE DISPLAY STATUS (10) (11) (12) REC MODE DVD ERASE (13) CREATE DUBBING CHAPTER (14) Note ≥Buttons such as the [¥, REC] button do not protrude as much as other buttons to stop them from being pressed accidentally. -
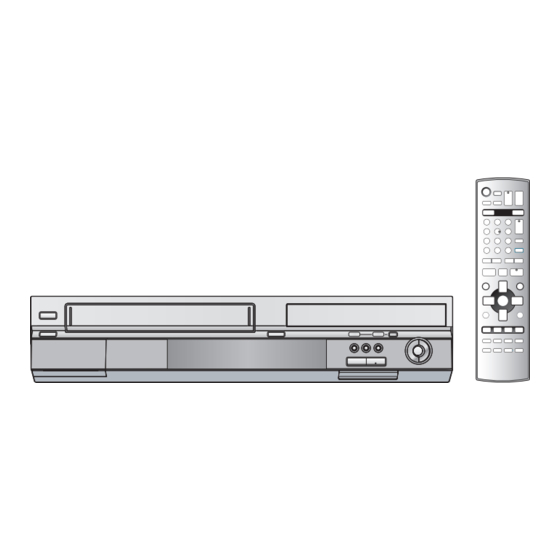
Page 11: Main Unit
Getting started Main unit POWER EJECT S VIDEO IN SKIP – – REW/FF VIDEO IN L/MONO – AUDIO IN – R (8) (9) (1) Remote control signal sensor/ DVD/VHS POWER on/off button (Í/I, POWER) ..l 15 ≥To switch the unit from on to standby mode or vice versa. -
Page 12: Step 1 Connection
Getting started STEP 1 Connection ≥Please read “Precautions for installation”. (l 3) ≥Before connection, turn off all equipment and read the appropriate operating instructions. ∫ Connecting a TV and VCR indicates included accessories. indicates accessories not included. White Yellow ∫ Connection (without Audio/Video cable) Connect in numerical order The unit supplies a signal to the TV via the 75 ≠... -
Page 13: Connecting A Cable Tv Box/Satellite Receiver
Getting started ∫ Connecting a cable TV box/satellite receiver ≥You need to subscribe to a cable TV or satellite TV service to enjoy viewing their programming. ≥Consult your service provider regarding an appropriate cable TV box or satellite receiver. ≥You can enjoy viewing cable TV or satellite TV programming. To AUDIO/VIDEO IN Audio/Video cable COMPONENT VIDEO OUT (480p/480i) -
Page 14: Dvd Output And Dvd/Vhs Output
Getting started ∫ DVD output and DVD/VHS output The unit has DVD/VHS COMMON output terminals and DVD PRIORITY output terminals. DVD/VHS COMMON output COMPONENT VIDEO OUT (480p/480i) DIGITAL AUDIO OUT R - AUDIO - L (PCM/BITSTREAM) S VIDEO OPTICAL R - AUDIO - L VIDEO R - AUDIO - L DVD PRIORITY output... -
Page 15: Step 2 Plug-In Auto Tuning
Getting started STEP 2 Plug-in Auto Tuning DVD/VHS POWER DVD/VHS POWER Í POWER VOLUME INPUT SELECT TV/VIDEO OPERATION SELECT TRACKING/V-LOCK PLAY AUDIO DIRECT NAVIGATOR FUNCTIONS CANCEL/RESET VCR Plus+ TOP MENU 3, 4 ENTER RETURN SUB MENU TIME SLIP SCHEDULE DISPLAY STATUS JET REW After plugging the unit into your household AC outlet and pressing... -
Page 16: If Plug-In Auto Tuning Fails
Getting started DVD/VHS POWER POWER INPUT SELECT TV/VIDEO OPERATION SELECT Numbered buttons CANCEL/RESET CANCEL VCR Plus+ SKIP/INDEX DIRECT NAVIGATOR TOP MENU 3, 4, 2, 1 ENTER SUB MENU SCHEDULE DISPLAY STATUS REC MODE DVD ERASE CREATE COPYING CHAPTER ∫ If Plug-in Auto Tuning fails While stopped Press [FUNCTIONS]. -
Page 17: Channel Captions
Getting started Use [3, 4] to select the channel corresponding to the guide channel and press [2]. ≥To delete a number, press [CANCEL/RESET, ¢]. ≥Repeat steps 6 and 7 to enter other channels. Press [ENTER]. ∫ To return to the previous screen Press [RETURN]. -
Page 18: Step 4 Set Up To Match Your Tv And Remote Control
∫ When other Panasonic products respond to this remote control If other Panasonic products are placed close together, change the remote control code on the main unit and on the remote control (the two must match). When changing the remote control code, make sure the two codes are same. -
Page 19: Selecting Tv Type
Getting started ∫ Selecting TV type You do not have to change the setting when connected to a 4:3 standard aspect TV that is not compatible with progressive output. (l 58) While stopped Press [FUNCTIONS]. Select “Other Functions” with [3, 4] and press [ENTER]. -
Page 20: Dvd
Playback DVD/VHS POWER DVD/VHS POWER POWER Í INPUT SELECT TV/VIDEO OPERATION SELECT Numbered buttons CANCEL/RESET VCR Plus+ SLOW/ SLOW/ SKIP/INDEX SKIP SEARCH SEARCH :, 9 ∫ DIRECT NAVIGATOR TOP MENU 3, 4, 2, 1 2;, ;1 SUB MENU ENTER SCHEDULE DISPLAY STATUS REC MODE... -
Page 21: Frame-By-Frame Viewing
Playback Frame-by-frame viewing [RAM] [-R] [-RW‹V›] [+R] (Motion picture parts only) [DVD-V] [-RW‹VR›] [VCD] While paused Press [2;] ([2]) or [;1] ([1]). ≥Each press shows the next or previous frame. ≥Press and hold to change in succession forward or backward. ≥Press [1, PLAY] to restart playback. -
Page 22: Playing Discs Which Contain Both Mp3 And Still Pictures
Playback DVD/VHS POWER POWER INPUT SELECT TV/VIDEO OPERATION SELECT Numbered buttons CANCEL/RESET VCR Plus+ SKIP SKIP/INDEX :, 9 DIRECT NAVIGATOR TOP MENU TOP MENU TOP MENU 3, 4, 2, 1 ENTER SUB MENU SUB MENU SUB MENU SCHEDULE DISPLAY STATUS STATUS REC MODE DVD ERASE... -
Page 23: Using The Tree Screen To Find A Group
Playback ∫ Using the tree screen to find a group While the file list is displayed (l 22) Press [1] while a track is highlighted to display the tree screen. Selected Group Number/Total Tree Menu G 1/ 15 Group Number MP3 music /My favorite/ ≥If the group has no track, “–... -
Page 24: Recording
Recording Recording TV programs DVD/VHS POWER DVD/VHS POWER Í POWER INPUT SELECT TV/VIDEO TV/VIDEO TV/VIDEO OPERATION SELECT Numbered buttons CANCEL/RESET VCR Plus+ SKIP/INDEX ∫ DIRECT NAVIGATOR TOP MENU 3, 4, 2, 1 ENTER SUB MENU SCHEDULE DISPLAY STATUS STATUS REC MODE REC MODE DVD ERASE µ... -
Page 25: Selecting Audio To Record
Recording Selecting audio to record [RAM] Press [AUDIO]. Stereo # SAP # Mono ^----------------------------} Stereo: Main audio (stereo). If the broadcast is “Mono audio will be monaural even if you select Stereo mode. SAP: Secondary audio program (SAP). If recorded in SAP, main audio is also recorded. -
Page 26: Playing While You Are Recording
Recording DVD/VHS POWER POWER INPUT SELECT TV/VIDEO OPERATION SKIP/INDEX SELECT ∫ DIRECT NAVIGATOR DIRECT NAVIGATOR DIRECT NAVIGATOR TOP MENU 3, 4, 2, 1 ENTER SUB MENU SCHEDULE DISPLAY REC MODE REC MODE COPYING COPYING Preparation ≥Press [DVD]. Playing while you are recording [RAM] Hint ≥Sound is not output while fast-forwarding. -
Page 27: Dv Automatic Recording (Dv Auto Recording)
Recording ∫ DV automatic recording (DV AUTO RECORDING) [RAM] When the “DV AUTO RECORDING” function is used, programs are recorded as a title. At the same time chapters are created at each break in the images automatically. Preparation (1) Turn off the main unit and DV equipment, then connect the equipment with the unit’s DV input terminal (l 57). -
Page 28: Cautions For Using Scheduled Recording On Dvd
Recording DVD/VHS POWER DVD/VHS POWER POWER Í INPUT SELECT TV/VIDEO OPERATION SELECT Numbered buttons VCR Plus+ VCR Plus+ CANCEL/RESET CANCEL SKIP/INDEX ∫ DIRECT NAVIGATOR TOP MENU 3, 4, 2, 1 ENTER SUB MENU SCHEDULE SCHEDULE DISPLAY STATUS SCHEDULE REC MODE REC MODE DVD ERASE REC MODE... -
Page 29: Manual Programming
Recording ∫ Manual programming ≥When connecting a cable TV box or satellite receiver, select the channel on the cable TV box or satellite receiver before scheduled recording starts. Press [SCHEDULE]. ≥Make sure “New Scheduled Recording” is selected. SCHEDULE LIST New Scheduled Channel Recording is selected. -
Page 30: Editing
Editing DVD/VHS POWER POWER INPUT SELECT TV/VIDEO OPERATION SELECT TRACKING/V-LOCK DIRECT NAVIGATOR TOP MENU 3, 4, 2 ENTER SUB MENU SCHEDULE DISPLAY STATUS DISC MANAGEMENT [RAM] [-R] [-RW‹V›] [+R] Preparation ≥Release protection (disc l right, cartridge l right). [RAM] ≥Insert a disc (l 8). ≥Press [DVD]. -
Page 31: Format Disc
- There is a pause of several seconds between titles during play. - Titles are divided into about 5-minute chapters°. ° This time varies greatly depending on the condition and mode of recording. ≥Visit Panasonic’s homepage for more information about DVDs. For U.S.A.: For Canada: Playback will start with:... -
Page 32: Entering Text
Editing DVD/VHS POWER POWER INPUT SELECT TV/VIDEO Numbered buttons CANCEL CANCEL/RESET SKIP SKIP/INDEX :, 9 ∫ DIRECT NAVIGATOR DIRECT NAVIGATOR DIRECT NAVIGATOR TOP MENU TOP MENU 3, 4, 2, 1 ENTER SUB MENU SUB MENU SUB MENU SCHEDULE DISPLAY Entering text [RAM] [-R] [-RW‹V›] [+R] You can give names to recorded titles, etc. -
Page 33: Using The Direct Navigator
Editing Using the Direct Navigator [RAM] [-R] [-RW‹V›] [+R] [-RW‹VR›] Press [DIRECT NAVIGATOR] and the list of titles recorded (Title View) is shown. You can play and edit a desired title. For your reference ≥You cannot edit during recording or transferring (dubbing), etc. ≥The maximum number of items on a disc: - Title: 99 ([+R] 49 titles) -
Page 34: Edit Title
Editing DVD/VHS POWER POWER INPUT SELECT TV/VIDEO CANCEL/RESET SKIP SKIP/INDEX :, 9 DIRECT NAVIGATOR DIRECT NAVIGATOR DIRECT NAVIGATOR TOP MENU TOP MENU 3, 4, 2, 1 ENTER SUB MENU SUB MENU SUB MENU SCHEDULE DISPLAY 1 Edit Title [RAM] [-R] [-RW‹V›] [+R] You can perform various kinds of title editing. -
Page 35: View Chapters
Editing 1 View Chapters [RAM] [-R] [-RW‹V›] [+R] [-RW‹VR›] Press [DIRECT NAVIGATOR] and use [3, 4, 2, 1] to select a desired title. ≥“To show other pages” l 33 Press [SUB MENU]. Select “View Chapters” with [3, 4] and press [ENTER]. Select a desired chapter with [3, 4, 2, 1]. -
Page 36: Playing Playlists
Editing DVD/VHS POWER POWER INPUT SELECT TV/VIDEO OPERATION SELECT Numbered buttons CANCEL/RESET VCR Plus+ SKIP/INDEX ∫ DIRECT NAVIGATOR TOP MENU 3, 4, 2, 1 ENTER SUB MENU SUB MENU SUB MENU SCHEDULE DISPLAY STATUS Playing playlists [RAM] [-RW‹VR›] (Play only) Note ≥You cannot create or edit playlists on this unit. -
Page 37: Other Functions For Playlists
Editing ∫ Other functions for playlists [RAM] [-RW‹VR›] (Properties only) Preparation ≥Press [DVD]. While stopped Press [FUNCTIONS]. Select “Other Functions” with [3, 4] and press [ENTER]. Select “PLAYLISTS” with [3, 4] and press [ENTER]. Use [3, 4, 2, 1] to select a playlist. -
Page 38: Convenient Functions
Convenient functions Using DISPLAY menus DVD/VHS POWER POWER INPUT SELECT TV/VIDEO OPERATION SELECT DIRECT NAVIGATOR TOP MENU 3, 4, 1 SUB MENU SCHEDULE DISPLAY DISPLAY DISPLAY REC MODE COPYING [RAM] [-R] [-RW‹V›] [+R] [DVD-V] [-RW‹VR›] 1 Disc menu [RAM] [-R] [-RW‹V›] [+R] [DVD-V] [-RW‹VR›] Disc Soundtrack Play... -
Page 39: Play Menu
Convenient functions 1 Play menu [RAM] [-R] [-RW‹V›] [+R] [DVD-V] [-RW‹VR›] [VCD] Disc Repeat play Play Video Audio Other Repeat play This function works only when the elapsed play time is displayed. Select the item for repeat play. Depending on the disc, the items that can be selected will differ. -
Page 40: Changing The Unit's Settings
Convenient functions DVD/VHS POWER POWER INPUT SELECT TV/VIDEO OPERATION SELECT Numbered buttons CANCEL/RESET VCR Plus+ SKIP/INDEX DIRECT NAVIGATOR TOP MENU 3, 4, 2, 1 ENTER SUB MENU SCHEDULE DISPLAY STATUS Changing the unit’s settings Use the following procedure to change the settings if necessary. While stopped Press [FUNCTIONS]. -
Page 41: Summary Of Settings
Convenient functions Summary of settings This description shows the initial settings for the unit. For details on menu operation. (l 40) ≥Underlined items are the factory default settings. ≥ indicates settings effective for both DVD and VHS. ≥ indicates settings effective for DVD only. ∫... - Page 42 Convenient functions ≥ Underlined items are the factory default settings. ∫ Video Still Mode When “On” is selected for “Progressive” (l 39), the setting for “Still Mode” is not effective. Select the type of picture shown when you pause play. (l 58, “Frame and field”) [Automatic] [Field] [Frame] Field...
- Page 43 Convenient functions ≥ Underlined items are the factory default settings. ∫ Display Status Messages Choose whether to show status messages automatically or not. [Automatic] [Off] On-screen Language Choose the language for these menus and the on-screen messages. [English] [Español] [Français] Blue Background Select whether to show the blue background, normally shown when TV reception is poor.
-
Page 44: Clock Settings
Convenient functions Clock Settings DVD/VHS POWER POWER INPUT SELECT TV/VIDEO OPERATION SELECT DIRECT NAVIGATOR TOP MENU 3, 4, 2, 1 ENTER SUB MENU SCHEDULE DISPLAY STATUS STATUS REC MODE DVD ERASE 1 Set Clock Automatically ≥Follow steps 1 to 5 of “Clock Settings”. Select “Set Clock Automatically”... -
Page 45: Functions Window
Convenient functions By using the FUNCTIONS window you can access the main functions quickly and easily. Preparation ≥Press [DVD]. VQT0R73... -
Page 46: Vhs Playback
Playback Inserting a video cassette The surface on which you can see a roll of tape should face up. Insert a video cassette. ≥The unit is automatically turned on. When the status display (l right) appears. (l 53) The remaining tape time counter begins when you insert a tape. -
Page 47: Playing A Video Cassette
Playback Playing a video cassette DVD/VHS POWER DVD/VHS POWER Í POWER VOLUME INPUT SELECT TV/VIDEO AUDIO OPERATION SELECT TRACKING/V-LOCK CANCEL/RESET VCR Plus+ CM SKIP SLOW/ SKIP/INDEX SEARCH 6, 5 PLAY PLAY ∫ RETURN SUB MENU DIRECT NAVIGATOR FUNCTIONS TIME SLIP SCHEDULE JET REW DISPLAY... -
Page 48: S-Vhs Quasi Playback (Sqpb)
Playback DVD/VHS POWER POWER INPUT SELECT TV/VIDEO TV/VIDEO TV/VIDEO OPERATION SELECT Numbered buttons CANCEL/RESET VCR Plus+ SKIP/INDEX ∫ DIRECT NAVIGATOR TOP MENU SUB MENU SCHEDULE STATUS DISPLAY STATUS REC MODE REC MODE REC MODE DVD ERASE µ CREATE DUBBING CHAPTER VCR/TV Preparation ≥Press [VHS]. -
Page 49: Recording
Recording Recording TV programs ∫ Recording procedures Preparation ≥Select the unit viewing channel (e.g. AV input) on the TV. ≥Check that the clock is set to the correct time. If it has not been set, set it (l 44). ≥Press [VHS]. Insert a video cassette with an intact accidental erasure prevention tab. -
Page 50: Cautions For Using Scheduled Recording On Vhs
Recording DVD/VHS POWER DVD/VHS POWER POWER Í INPUT SELECT TV/VIDEO OPERATION SELECT Numbered buttons CANCEL/RESET RESET VCR Plus+ VCR Plus+ SKIP/INDEX ∫ DIRECT NAVIGATOR TOP MENU 3, 4, 2, 1 ENTER SUB MENU SCHEDULE SCHEDULE DISPLAY STATUS SCHEDULE REC MODE REC MODE DVD ERASE REC MODE... -
Page 51: Manual Programming
Recording ∫ Manual programming ≥When connecting a cable TV box or satellite receiver, select the channel on the cable TV box or satellite receiver before scheduled recording starts. Press [SCHEDULE]. ≥Make sure “New Scheduled Recording” is selected. SCHEDULE LIST New Scheduled Channel Recording is selected. -
Page 52: Convenient Functions
Convenient functions DVD/VHS POWER POWER INPUT SELECT TV/VIDEO OPERATION SELECT CANCEL/RESET RESET VCR Plus+ SKIP/INDEX INDEX :, 9 ∫ DIRECT NAVIGATOR TOP MENU TOP MENU 3, 4, 2, 1 ENTER SUB MENU SCHEDULE DISPLAY STATUS STATUS µ REC MODE DVD ERASE CREATE COPYING CHAPTER VCR/TV... -
Page 53: When The Dvd Side Is Not Recording
Convenient functions Depending on the following, the status message displayed will change. ∫ DVD side not recording: VHS operation when not recording or making a scheduled recording on the DVD side. ∫ DVD side recording: VHS operation when recording or making a scheduled recording on the DVD side. -
Page 54: Dvd/Vhs
DVD/VHS Transferring (Dubbing) Before transferring (dubbing) You cannot transfer (dub) titles which have been treated to prevent copying. Direction From DVD-RAM, DVD-R, DVD-RW, or +R DVD-RAM, DVD-R, DVD-RW or +R Finalized disc [DVD-R, DVD-RW (DVD-Video format), +R], +RW or DVD-Video on sale that are not copy-protected, etc. -
Page 55: Transfer (Dubbing) From Vhs
Transferring (Dubbing) Transfer (Dubbing) from VHS DVD/VHS POWER POWER VOLUME INPUT SELECT TV/VIDEO OPERATION SELECT TRACKING/V-LOCK AUDIO CANCEL/RESET VCR Plus+ CM SKIP SLOW/ SKIP/INDEX SEARCH PLAY ∫ DIRECT NAVIGATOR FUNCTIONS TOP MENU SUB MENU RETURN RETURN REC MODE DVD ERASE ADD/DLT TIME SLIP CREATE... -
Page 56: Transfer (Dubbing) From Dvd
Transferring (Dubbing) Transfer (Dubbing) from DVD DVD/VHS POWER POWER INPUT SELECT INPUT SELECT TV/VIDEO INPUT SELECT OPERATION SELECT CANCEL/RESET SKIP/INDEX INDEX :, 9 CANCEL/RESET ∫ SCHEDULE DISPLAY DIRECT NAVIGATOR µ REC MODE REC MODE TOP MENU DUBBING DUBBING VHS — OPERATION SELECT /k1.3... -
Page 57: Recording From An External Device
Transferring (Dubbing) Recording from an external device POWER EJECT S VIDEO IN SKIP – REW/FF – VIDEO IN L/MONO – AUDIO IN – R /k1.3 DV IN DV IN (1) Audio/Video cable (not supplied) A Yellow (VIDEO) B White (L) C Red (R) (2) S-Video cable (not supplied) (3) DV cable (IEEE1394, 4-pin) -
Page 58: Glossary
Reference Glossary Bitstream This is a signal compressed and converted into digital form. It is converted back to a multi-channel audio signal, e.g., 5.1-channel, by a decoder. CPRM (Content Protection for Recordable Media) CPRM is technology used to protect broadcasts that are allowed to be recorded only once. -
Page 59: Frequently Asked Questions
I connect with? quality picture can be output because the unit’s component video output terminal outputs a progressive output signal. ≥All Panasonic TVs that have 480p input terminals are compatible. Consult the Is my TV progressive output compatible? manufacturer if you have another brand of TV. -
Page 60: Error Messages
Reference Error messages ∫ Common On the unit’s display ≥An error has occurred. The number following “H”, “F” or “U” depends on the status of the unit. Reset procedure: (“The unit is on but cannot be operated.” l 62) (“ ”... -
Page 61: Troubleshooting Guide
≥Periodic interruptions to reception due to satellite broadcasting breaks. ≥Operations do not work due to a poor-quality disc. (Try again using a Panasonic disc.) ≥The unit freezes due to the activation of one of its safety devices. (Press and hold [POWER Í/I] on the main unit for 10 seconds.) ∫... - Page 62 Reference Operation Cannot operate the TV. Cannot operate the DVD. Cannot operate the VHS. The remote control doesn’t work. The unit is on but cannot be operated. Cannot eject a disc. Startup is slow Takes time to read DVD-RAM Picture TV reception worsens after connecting the unit.
-
Page 63: Dvd
Reference Recording, Scheduled recording, Transfer (dubbing), External input ≥When connected to cable TV box or satellite receiver, the VCR Plus_ system does not work. Scheduled recording does not ≥The scheduled recording program is incorrect or different scheduled recording times overlap. work properly. - Page 64 DVD-R, DVD-RW (DVD-Video format), +R may be disabled. ≥A DVD-R, DVD-RW (DVD-Video format), +R recorded on the unit may not be recordable on other Panasonic DVD recorders. ≥The material you are trying to record is copy-protected.
-
Page 65: Vhs
For product information or assistance with product operation: In the U.S.A., refer to “Customer Services Directory” on page 66. In Canada, contact the Panasonic Canada Inc. Customer Care Centre at 1-800-561-5505, or visit the website (www.panasonic.ca), or an authorized Servicentre closest to you. -
Page 66: Limited Warranty (Only For U.s.a.)
Monday-Friday 9 am-9 pm; Saturday-Sunday 10 am-7 pm, EST. For hearing or speech impaired TTY users, TTY : 1-877-833-8855 Accessory Purchases Purchase Parts, Accessories and Instruction Books online for all Panasonic Products by visiting our Web Site at: http://www.pasc.panasonic.com or, send your request by E-mail to: npcparts@us.panasonic.com... -
Page 67: Limited Warranty (Only For Canada)
Limited Warranty (ONLY FOR CANADA) PANASONIC PRODUCT – LIMITED WARRANTY Panasonic Canada Inc. warrants this product to be free from defects in material and workmanship and agrees to remedy any such defect for a period as stated below from the date of original purchase. -
Page 68: Specifications
Reference Specifications ∫Power Supply: AC 120 V, 60 Hz ∫Power Consumption: 29 W ∫Recording system: DVD Video Recording format (DVD-RAM) DVD-Video format (DVD-R) DVD-Video format (DVD-RW) ∫Recordable discs: DVD-RAM: Ver. 2.0 Ver. 2.1/3k-SPEED DVD-RAM Revision 1.0 Ver. 2.2/5k-SPEED DVD-RAM Revision 2.0 DVD-R: for General Ver. -
Page 69: Index
Reference Index COMMON Antenna System ... 16 Channel adding, deleting ... 16 audio (DVD) ... 38 Auto Channel Setting ... 16 captions ... 17 guide channel VCR Plus_ system ... 16 Cleaning disc, lens, main unit ... 8 video heads ... 46 Clock setting ... -
Page 70: Español
Español Cómo empezar ≥Antes de conectar, apague todo equipo y lea las instrucciones correspondientes de funcionamiento. Referencia ≥Las conexiones del equipo descritas sirven en concepto de ejemplo. ≥Los equipos periféricos y los cables opcionales se venden por separado si no está indicado de otro modo. Conexión con un televisor y un VCR indica los accesorios incluidos. -
Page 71: Sintonización Automática Por Enchufe
Cómo empezar DVD/VHS POWER DVD/VHS POWER Í POWER VOLUME INPUT SELECT TV/VIDEO OPERATION SELECT TRACKING/V-LOCK AUDIO CANCEL/RESET CANCEL VCR Plus+ CM SKIP PLAY SLOW/ SKIP/INDEX SEARCH DIRECT NAVIGATOR FUNCTIONS FUNCTIONS PLAY TOP MENU 3, 4, 2, 1 ENTER SUB MENU RETURN RETURN TIME SLIP... -
Page 72: Dvd
Reproducción DVD/VHS POWER DVD/VHS POWER POWER Í INPUT SELECT TV/VIDEO OPERATION SELECT TRACKING/V-LOCK Teclas numéricas CANCEL/RESET VCR Plus+ SLOW/ SLOW/ SKIP SKIP/INDEX SEARCH SEARCH :, 9 ∫ DIRECT NAVIGATOR TOP MENU 3, 4, 2, 1 2;, ;1 SUB MENU ENTER SCHEDULE DISPLAY STATUS... - Page 73 Reproducción ∫ Visión cuadro por cuadro [RAM] [-R] [-RW‹V›] [+R] (Sólo partes de imagen en movimiento) [DVD-V] [-RW‹VR›] [VCD] Durante la pausa Pulse [2;] ([2]) o [;1] ([1]). ≥Cada vez que se pulsa aparece el cuadro siguiente o el anterior. ≥Mantenga pulsado para cambiar sucesivamente hacia delante o hacia atrás.
-
Page 74: Grabación
Grabación DVD/VHS POWER DVD/VHS POWER Í POWER INPUT SELECT TV/VIDEO TV/VIDEO TV/VIDEO OPERATION SELECT Teclas numéricas CANCEL/RESET VCR Plus+ SKIP/INDEX ∫ DIRECT NAVIGATOR DIRECT NAVIGATOR DIRECT NAVIGATOR TOP MENU 3, 4, 2, 1 ENTER SUB MENU SCHEDULE DISPLAY REC MODE REC MODE DVD ERASE µ... -
Page 75: Reproducción Durante La Grabación
Grabación ∫ Reproducción durante la grabación [RAM] ∫ Reproducción seguida Es posible empezar la reproducción desde el comienzo de un título mientras lo sigue grabando. Durante la grabación o la grabación temporizada Pulse [1, PLAY]. ≥La reproducción inicia mientras que procede la grabación. ∫... -
Page 76: Grabación Temporizada
Grabación DVD/VHS POWER DVD/VHS POWER POWER Í INPUT SELECT TV/VIDEO OPERATION SELECT Teclas numéricas CANCEL CANCEL/RESET VCR Plus+ VCR Plus+ SLOW/ SKIP/INDEX SEARCH ∫ DIRECT NAVIGATOR TOP MENU 3, 4, 2, 1 ENTER SUB MENU SCHEDULE SCHEDULE DISPLAY STATUS SCHEDULE REC MODE REC MODE DVD ERASE... -
Page 77: Vhs
Reproducción ∫ Introducción de un cassette de vídeo La superficie en la que puede ver el rollo de la cinta tiene que mirar hacia arriba. Inserte un cassette de vídeo. ≥Esta unidad se enciende automáticamente. Sólo cuando Espacio 11/8 10:15 PM π... -
Page 78: Grabación
Grabación DVD/VHS POWER DVD/VHS POWER POWER Í INPUT SELECT TV/VIDEO OPERATION SELECT Teclas numéricas CANCEL/RESET VCR Plus+ SKIP/INDEX ∫ DIRECT NAVIGATOR TOP MENU 3, 4, 2, 1 ENTER SUB MENU SCHEDULE SCHEDULE DISPLAY STATUS STATUS SCHEDULE REC MODE REC MODE DVD ERASE µ... -
Page 79: Programación Manual
Grabación ∫ Programación manual ≥Cuando se conecte una caja TV de cable o un receptor de satélite, seleccione el canal en la caja TV de cable o receptor de satélite antes de que comience la grabación temporizada. Pulse [SCHEDULE]. ≥Cerciórese de que esté seleccionado “Nueva grabación programada”. - Page 80 Macrovision Corporation, and is intended for home and other limited viewing uses only unless otherwise authorized by Macrovision Corporation. Reverse engineering or disassembly is prohibited. Panasonic Consumer Electronics Company, Division of Panasonic Corporation of North America One Panasonic Way, Secaucus, New Jersey 07094 http://www.panasonic.com C 2005 Matsushita Electric Industrial Co., Ltd.