Table of Contents
Advertisement
Quick Links
Advertisement
Table of Contents

Related Manuals for Bosch HGA223326Z/03


Summary of Contents for Bosch HGA223326Z/03
- Page 1 Free standing cooker HGA223326Z [en] Instruction manual...
-
Page 3: Table Of Contents
Gas connection ...................7 For your safety..................7 Additional information on products, accessories, replacement Electrical connection ................8 parts and services can be found at www.bosch-home.com and Levelling the cooker ................8 in the online shop www.bosch-eshop.com Setting up the appliance ..............8 Measures to be noted during transport..........8 Your new appliance ..............9... -
Page 4: Important Safety Information
: Important safety information Read these instructions carefully. Only then Do not use inappropriate child safety will you be able to operate your appliance shields or hob guards. These can cause safely and correctly. Retain the instruction accidents. manual and installation instructions for This appliance may be used by children future use or for subsequent owners. - Page 5 or switch off the fuse in the fuse box. Shut Accessories and ovenware become very ■ off the gas supply. hot. Always use oven gloves to remove accessories or ovenware from the cooking Hot oil and fat can ignite very quickly. Risk of fire! ■...
-
Page 6: Causes Of Damage
Risk of injury! Scratched glass in the appliance door ■ may develop into a crack. Do not use a glass scraper, sharp or abrasive cleaning aids or detergents. Incorrect repairs are dangerous. Repairs Risk of injury! ■ may only be carried out, and damaged power and gas lines replaced, by an after- sales engineer trained by us. -
Page 7: Damage To The Plinth Drawer
the baking tray leaves stains that cannot be removed. If appliance door. Always insert the accessories into the possible, use the deeper universal pan. cooking compartment as far as they will go. Cooling with the appliance door open: only allow the cooking Carrying the appliance: do not carry or hold the appliance by ■... -
Page 8: Electrical Connection
acceptance of the installation when the installation is completed to your satisfaction. Note that your invoice is required in the event that you wish make a quarantee claim. Important information for the installer This appliance may only be installed by a registered LP Gas installer registered with the Liquefied Petroleum Gas Association of Southern Africa. -
Page 9: Your New Appliance
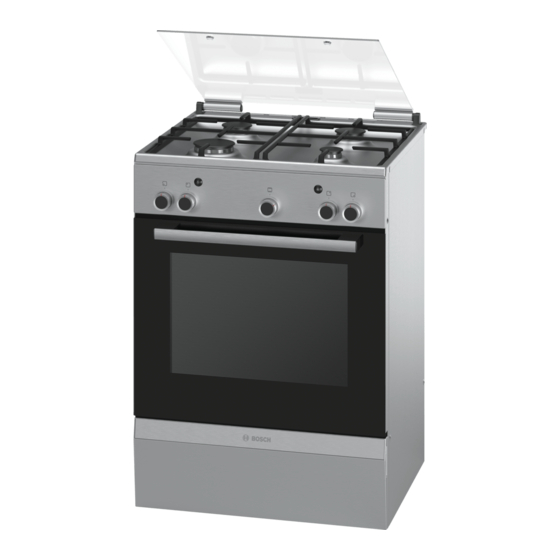
Your new appliance In this section you will find information on the appliance, the operating modes and the accessories. General information Cooking area The design depends on the respective appliance model. Here is an overview of the control panel. The design depends on the respective appliance model. -
Page 10: Control Panel
Control panel Here you can see an overview of the control panel. The design Multi-function button depends on the respective appliance model. You can use this button to set 2 different functions. When you press the button, the rotary spit is switched on and the oven light comes on. -
Page 11: Inserting The Accessories
Rotary spit For roasting joints and large poultry. You can use the rotary spit with the enamel baking tray or with the uni- versal pan. Note: Do not place food directly onto the aluminium baking tray. Line the aluminium baking tray with greaseproof paper. Note: The protecting plate is kept in the plinth drawer. -
Page 12: After-Sales Service Products
Optional accessories HEZ number Function Profi extra-deep pan with insert wire rack HEZ333003 Particularly suitable for preparing large quantities of food. Wire rack HEZ334000 For ovenware, cake tins, roasts, grilling and frozen meals. Telescopic shelf rail 2-level shelf rail HEZ338250 With the pull-out rails at level 2 and 3, the accessories can be fully pulled out without tipping. -
Page 13: Cleaning The Accessories
Keep the function selector pressed in and press the ignition The gas coming from the gas grill is ignited using the ignition button at the same time. button. Keep the function selector pushed in for 10 seconds so that the safety pilot starts up. Check whether the flame is lit. -
Page 14: Suitable Pans
Example Food Hotplate Heat setting Chocolate, butter, margarine Economy burner Small flame Melting Stock, tinned vegetables Standard burner Small flame Warming Electric hotplate** Soups Economy burner Small flame Heating and keeping warm Electric hotplate** Fish Standard burner Between large and small flame Steaming* Electric hotplate** Potatoes and other vegetables,... -
Page 15: Setting The Oven
Setting the oven Here you can find out how to set the oven. Insert the protecting plate into the groove below the control panel. This is how you adjust the lower gas burner in Insert the protecting plate with the longer edge at the front the oven and the curvature at the bottom. -
Page 16: Grilling With The Rotary Spit
Grilling with the rotary spit The rotary spit is particularly good for cooking large roasts, Insert the protecting plate into the groove below the control such as rolled roasting joints or poultry. The meat becomes panel. crispy and brown. Insert the protecting plate with the longer edge at the front and the curvature at the bottom. -
Page 17: Care And Cleaning
within 15 seconds, wait at least one minute. Then repeat the Caution! process to light the burner. The burner knob should not be actuated for longer than 15 seconds in the ignition position. If the burner does not ignite Care and cleaning With attentive care and cleaning, your hob and oven will retain Zone Cleaning agent... - Page 18 Zone Cleaning agent Zone Cleaning agent Ceramic hob* Care: Protective/care products for Shelf Hot soapy water: ceramics Clean with a dish cloth or a brush. (depending on Cleaning: Cleaning agents suitable for appliance model) You can remove the shelves for cleaning. ceramics.
-
Page 19: Upper Glass Cover
Upper glass cover Detaching and attaching the oven door Before opening the top cover, remove any spills with a cloth. For cleaning purposes and to remove the door panels, you can detach the oven door. Use glass cleaner if possible. The oven door hinges each have a locking lever. -
Page 20: Removing And Installing The Door Panels
Fold back both locking levers (figure C). Close the oven Lift the panel up and pull it out (fig. C). door. Clean the panels with glass cleaner and a soft cloth. Risk of injury! Risk of injury! If the oven door falls out accidentally or a hinge snaps shut, do Scratched glass in the appliance door may develop into a not reach into the hinge. -
Page 21: Replacing The Bulb In The Oven Ceiling Light
Replacing the bulb in the oven ceiling light If the bulb in the oven light fails, it must be replaced. Heat- resistant, 25 watt spare bulbs can be obtained from our after- sales service or a specialist retailer. Only use these bulbs. Risk of electric shock! Switch off the circuit breaker in the fuse box. -
Page 22: Tested For You In Our Cooking Studio
Tested for you in our cooking studio. Here you will find a selection of dishes and the ideal settings for Name of the gas Gas mixture (%) them. We will show you which type of heating and which temperature are best suited for your dish. You can find = 100 information about suitable accessories and the height at which = 86, N... -
Page 23: Baking Tips
Dish Accessories and oven- Level Temperature in °C Cooking time in min- ware utes Pasta bake Glass ovenproof dish, rec- 60-80 tangular* Potato gratin made using raw ingredi- Glass ovenproof dish, rec- 60-80 ents, tangular* Max. 4 cm deep Vegetable goulash Earthenware pot 80-100 * Only use heat-resistant glass dishes. -
Page 24: Tips For Roasting And Grilling
Tips for roasting and grilling The table does not contain information Select the next lowest weight from the instructions and extend the time. for the weight of the joint. How to tell when the roast is ready. Use a meat thermometer (available from specialist shops) or carry out a “spoon test”. Press down on the roast with a spoon. - Page 28 Robert Bosch Hausgeräte GmbH Carl-Wery-Straße 34 81739 München Germany www.bosch-home.com *9001146192* 081295 9001146192...