Table of Contents
Advertisement
Quick Links
STEREO CD CAR RECEIVER
OWNER'S MANUAL
MODEL : TCH-M1000 / TCH-M1001
To fully enjoy the features and functions of this new unit,
we recommend that you read this OWNER'S MANUAL
carefully and completely.
Internet address ; http://ua.lge.com
Customer Information Center LG ; (380-44) 490-7777, 8-800-303-0000
Advertisement
Table of Contents

Related Manuals for LG TCH-M1001


Summary of Contents for LG TCH-M1001
- Page 1 OWNER’S MANUAL MODEL : TCH-M1000 / TCH-M1001 To fully enjoy the features and functions of this new unit, we recommend that you read this OWNER’S MANUAL carefully and completely. Internet address ; http://ua.lge.com Customer Information Center LG ; (380-44) 490-7777, 8-800-303-0000...
-
Page 2: Precautions
Precautions CAUTION CAUTION Use of controls or adjustments or performance of procedures other than those specified here in may result in hazardous RISK OF ELECTRIC radiation exposure. SHOCK DO NOT OPEN Laser component in this product is capable of emitting radiation exceeding the limit for Class 1. -
Page 3: Before Use
Before Use • Do not attempt to disassemble this unit. Laser rays from the Notes on CD optical pickup are dangerous to the eyes. • A defective or soiled disc inserted into unit can cause sound to drop out during playback. •... -
Page 4: Table Of Contents
Table of Contents INTRODUCTION OPERATION Precautions ........2 Basic operation . -
Page 5: Remote Control/Display Window
Remote Control POWER (PWR) / MUTE button 11. VOLUME UP button SELECTION (SEL) button 12. VOLUME DOWN button FUNCTION (FUNC) button 13. REPEAT (RPT) button NUMBER button 14. DISC SELECTOR (D+) button (Optional) PLAY/PAUSE ( ) button MP3 TRACK +10 button INTRO SCAN (SCAN) button 15. -
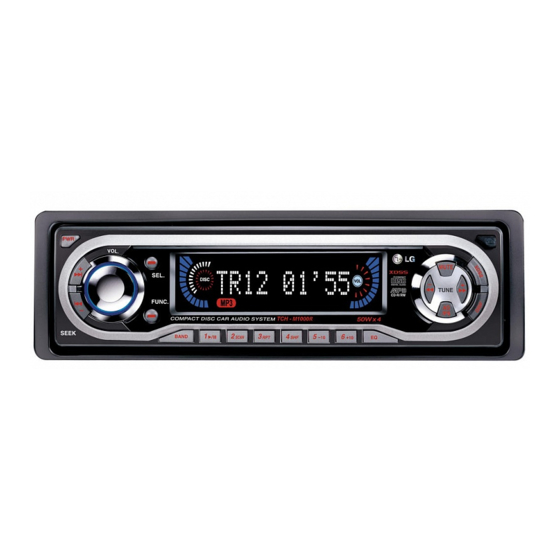
Page 6: Front Panel/Rear Panel
Front Panel/Rear Panel 5 6 7 8 18 19 13 12 11 10 9 POWER (PWR) button 11. AS/PS (auto store/preset scan) button 17 • CD SKIP ( ) button CONTROL UP/DOWN dial 12. REMOTE SENSOR • SEEK ( +/- ) button SELECTION(SEL) button 13. -
Page 7: Installation
Installation Bend the claws according to the thickness of the dashboard When removing the unit from the Basic Installation ISO-DIN Installation installation sleeve Before installing, make sure that the a Slide radio into ISO-DIN frame. ignition-switch is set to OFF and remove If you need to remove the unit from the b Install screws removed from old the terminal of the car battery to avoid... -
Page 8: Connection Diagram
Connection Diagram 1. WHITE 2. WHITE/BLACK STRIPE LEFT : WHITE 3. GRAY RIGHT: RED 4. GRAY/ BLACK STRIPE 5. GREEN 6. GREEN/ BLACK STRIPE 7. VIOLET 8. VIOLET/ BLACK STRIPE PHONE LINE (ORANGE) GROUND (BLACK) DIMMER (PINK) DIMMER SWITCH TO IGNITION (RED) IGNITION SWITCH CD CHANGER (optional) -
Page 9: Connection
Connection Precaution the terminal of the control relay switch 4-Speaker Connections for vehicles equipped with a power Before connecting, make sure that antenna. ignition switch is set to OFF, and remove This lead is not used for vehicles with terminal of the battery to avoid manual or semiautomatic antennas. -
Page 10: Detachable Front Panel
Detachable Front panel Protective Case Attachable Front panel • Do not leave the front panel in any area Detachable Front panel exposed to high temperatures or direct a Join on the front panel to on the The front panel of this unit can be sunlight. -
Page 11: Basic Operation
Basic Operation POWER ON and OFF EQUALIZER (EQ) Button SELECTION (SEL) Button Each press of the EQ button switches a press the SELECTION (SEL) button • Press POWER (PWR) button or any the unit to the other equalizer mode, as other button to turn the unit on. - Page 12 Basic Operation CONTROL UP/DOWN DIAL FUNCTION (FUNC) Button a After you have selected the proper This button serves to switch over mode by using the SELECTION between CD and RADIO operation. (SEL) button, control the desired (CD y RADIO) function by turning this dial within 5 seconds.
- Page 13 Basic Operation Except the function which is this page , the Button of the remote control function in the same way as the controls on the main unit. Point the remote control unit at the sensor POWER ON and OFF Presetting stations Press POWER button for more than 2 seconds.
-
Page 14: Cd Basic Operation(Cd/Mp3 Cd)
CD Basic Operation(CD/MP3 CD) CD/MP3 CD playback button Basic Playback Eject a disc. a Insert a disc with the labeled side up to start playback. To with draw the CD, firmly depress . If a disc is already inserted, press FUNCTION (FUNC) to The unit automatically switches to radio reception. -
Page 15: Cd Advanced Operation
CD Advanced Operation INTRO SCAN Play MP3 file information Press twice the DISP button during MP3 Press SCAN during playback. file playback. SCAN indicator lights up and the first 10 - The information ID3 TAG(Title, Artist or seconds of all the tracks on the disc are otes Album) of the MP3 file will be shown in played in order. -
Page 16: Radio Operation
Radio Operation BAND PRESET CONTROL UP/DOWN POWER SEEK(+/-) TUNE(-/+) AS/PS FUNCTION c Press one of the preset station Presetting stations Automatic Store Stations buttons (1 - 6) for more than 2 Up to 6 stations for each band F1, F2, The automatic presetting function is used seconds. - Page 17 Radio Operation Listening to the radio Seek Tuning otes The seek function is used to search for a Press any button (except • The presetting is not performed if there ) to turn the station automatically. is no station to be tuned in. on the unit.
-
Page 18: Cd Changer Player(Optional)
CD Changer player(Optional) You can play CDs with this unit by Basic Play Shuffle play connecting the optional compact disc To start play, press the( )button • To play one disc randomly, press SHF changer. button (The SHF indication is displayed). To pause, press it again. - Page 19 CD Changer player(Optional) Intro Scan Press SCAN button to scan a CD by playing only the first 10 seconds of each track. • To play one disc intro scan, press SCAN button (The SCAN indication is displayed). • To play the first 10 seconds of each track on all the discs intro scan, press SCAN button for more then 1.5 seconds (The SCAN indication is displayed).
-
Page 20: Specifications
Specifications GENERAL Output Power ......50W x 4CH(Max.) Power Source ......DC 12-15 V Speaker impedance . - Page 22 P/NO : 3834RR0050C...