
Related Manuals for Siemens HR538AB 1 Series


Summary of Contents for Siemens HR538AB 1 Series
- Page 1 Oven HR538AB.1 User manual and installation instructions Register your product on My Siemens and discover exclusive ser- vices and offers. siemens-home.bsh-group.com/welcome The future moving in. Siemens Home Appliances...
-
Page 2: Table Of Contents
en Safety 1.2 Intended use Table of contents This appliance is designed only to be built into kitchen units. Read the special installation instructions. INFORMATION FOR USE Only a licensed professional may connect ap- Safety .............. 2 pliances without plugs. Damage caused by in- correct connection is not covered under the Preventing material damage ....... -
Page 3: Safety
Safety en Opening the appliance door creates a The appliance and its parts that can be draught. Greaseproof paper may come into touched may have sharp edges. contact with the heating element and catch ▶ Take care when handling and cleaning fire. -
Page 4: Preventing Material Damage
en Preventing material damage Children may breathe in or swallow small 1.6 Steam parts, causing them to suffocate. Follow these instructions when using a steam ▶ Keep small parts away from children. function. ▶ Do not let children play with small parts. WARNING ‒ Risk of scalding! 1.5 Halogen bulb The water in the water tank may become very... -
Page 5: Environmental Protection And Saving En- Ergy
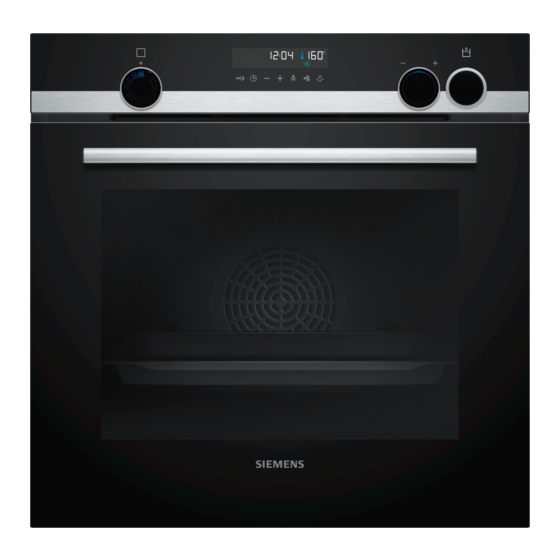
Environmental protection and saving energy en Using oven cleaner in a hot cooking compartment 2.2 Steam damages the enamel. Follow these instructions when using the steam func- Never use oven cleaner in the cooking compartment ▶ tion. when it is still warm. ATTENTION! Remove all food remnants from the cooking com- ▶... - Page 6 en Familiarising yourself with your appliance 4 Familiarising yourself with your appliance 4.1 Controls You can use the control panel to configure all functions of your appliance and to obtain information about the operat- ing status. Note: On certain models, specific details such as col- our and shape may differ from those pictured.
-
Page 7: Familiarising Yourself With Your Appliance
Familiarising yourself with your appliance en Symbol Function Time-setting options Select the time , timer , cooking time and the end time . To select the individual time-setting options, press the button sev- eral times. - Page 8 en Familiarising yourself with your appliance Symbol Type of heating and What it's used for/how it works temperature range Hot air grilling Roast poultry, whole fish and larger pieces of meat. 30 - 275 °C The grill element and the fan switch on and off alternately. The fan circulates the hot air around the food.
-
Page 9: Accessories
Accessories en Lighting ATTENTION! The oven light lights up the cooking compartment. Do not cover the ventilation slot above the appliance door. The appliance overheats. With most types of heating and functions, the lighting Ensure that the ventilation slots are unobstructed. lights up during operation. - Page 10 You will find a comprehensive range of products for your appliance in our brochures and online: You can combine the wire rack with the universal pan siemens-home.bsh-group.com to catch any liquid that drips down. Accessories vary from one appliance to another. When...
-
Page 11: Steam
Basic operation en 7 Basic operation When your food is ready, switch off the appliance. 7.1 Switching on the appliance Tips Turn the function selector to any position other than ▶ ¡ The most suitable type of heating for your food can the "Off"... - Page 12 en Steam Ending reheating Place the water tank back in the opening and press it down until it clicks into place . Switch off the appliance. Empty the water tank and dry the cooking compart- ment. → "After every steam operation", Page 12 8.3 Filling the water tank WARNING ‒ Risk of fire! Due to the hot surfaces, vapours from flammable li-...
- Page 13 Time-setting options en Requirement: The cooking compartment has cooled Drying the cooking compartment down. WARNING ‒ Risk of burns! Open the appliance door. The appliance becomes hot during operation. Note: Allow the appliance to cool down before cleaning. ▶ The drip trough is underneath the cooking com- partment.
- Page 14 en Time-setting options Press the button repeatedly until is highlighted Use the or button to delay the end time. in the display. a After a few seconds, the appliance applies the set- Use the ...
-
Page 15: Programme
Programme en 10 Programme The programmes help you to use your appliance to ¡ Unglazed clay prepare different dishes by selecting the optimum set- ¡ Plastic or plastic handles tings automatically. 10.2 Steam 10.1 Cookware for programmes For the steam function, the appliance provides you with You should therefore use heat-resistant cookware that programmes that allow you to prepare food easily and is suitable for temperatures up to 300 °C. - Page 16 en Programme No. Food Cookware Weight range Add liquid Shelf Information posi- Weight setting tion Deep roasting dish 0.5–2.5 kg As per recipe 2 Place the meat at the 10 Goulash Diced beef or pork, with lid Total weight bottom and cover with vegetables with vegetables Do not sear the meat...
- Page 17 Programme en No. Food Cookware Weight range Add liquid Shelf Information posi- Weight setting tion Roasting dish with 0.5–2.5 kg Cover the Do not sear the meat 23 Leg of lamb, medium Boned, seasoned Weight of meat bottom of the beforehand roasting dish, and add up to 250 g ve- getables if...
- Page 18 en Childproof lock For some programmes, the button can be 10.5 Setting a programme ‒ used to delay the end. The appliance selects the optimal type of heating, tem- → "Setting the end time", Page 14 perature and cooking time. All you need to do is set a After a few seconds, the programme starts and the the weight.
-
Page 19: Sabbath Mode
Basic settings en Press the button repeatedly until is highlighted Once the time has elapsed, the display shows the on the display. time as zero. The appliance stops heating up and Use the or button to set the time. responds again as usual outside of Sabbath mode. - Page 20 en Cleaning and servicing Use the or button to switch to the next basic Use the or button to switch to the next basic setting. setting . To save the changes, press and hold the ...
- Page 21 Cleaning and servicing en Appliance front Surface Suitable cleaning agents Information Stainless steel ¡ Hot soapy water To prevent corrosion, remove any patches of limescale, grease, starch or albumin (e.g. egg white) on stainless steel surfaces imme- ¡ Special stainless steel cleaning products diately.
- Page 22 en Descaling faces no longer clean themselves adequately during 15.2 Cleaning the appliance operation, heat up the cooking compartment specific- In order to avoid damaging the appliance, you must ally to the right temperature. clean your appliance only as specified, and with suit- ATTENTION! able cleaning products.
-
Page 23: Descaling
Shelf supports en Note: Do not pour more than 150 ml of liquid into the 16.4 Fourth step ( ) water tank throughout the descaling process. Fill the water tank with 150 ml water and insert it. Mixing a descaling solution: a At the end of the rinse cycle, ... - Page 24 en Appliance door First, push the rail into the middle of the rear Push the rail into the front socket until the rail socket until the rail rests against the cooking also rests against the cooking compartment wall, compartment wall, and then push this back ...
- Page 25 Appliance door en Close the appliance door fully . Grab hold of the Open the locking levers on the left- and right-hand appliance door with both hands (on the left and hinges . right) and pull it upwards and out . a The locking levers are open.
- Page 26 en Appliance door If necessary, you can remove the condensate Slide the intermediate pane into the left- and right- trough for cleaning. hand retainers . Open the appliance door. ‒ Tilt the condensate trough upwards and remove ‒ Push the intermediate pane upwards until it is in the left- and right-hand retainers ...
-
Page 27: Troubleshooting
Troubleshooting en Close the locking levers on the left- and right-hand Close the appliance door. hinges . Note: Do not use the cooking compartment again until the door panes have been correctly fitted. a The locking levers are closed. The appliance door is secured and cannot be detached. - Page 28 en Troubleshooting Fault Cause and troubleshooting Childproof lock is activated. lights up in the dis- play and no settings Use the button to deactivate the childproof lock. ▶ can be made on the → "Childproof lock", Page 18 appliance.
- Page 29 Disposal en Fault Cause and troubleshooting After using the steam Steam intensity set incorrectly. assistance, the cook- Set a higher or lower steam intensity. ▶ ing result is too dry or too moist. Place a tea towel in the cooking compartment to 19.2 Replacing the oven light bulb prevent damage.
-
Page 30: How It Works
en How it works 21.1 Product number (E-Nr.) and production number (FD) You can find the product number (E-Nr.) and the pro- duction number (FD) on the appliance's rating plate. Make a note of your appliance's details and the Cus- You will see the rating plate with these numbers if you tomer Service telephone number to find them again open the appliance door. - Page 31 How it works en Cookware without lid WARNING ‒ Risk of injury! ¡ Use a deep roasting dish. If hot glass cookware is placed on a wet or cold sur- ¡ Place the cookware onto the wire rack. face, the glass may shatter. ¡...
- Page 32 en How it works Food Accessories/cook- Shelf pos- Heating Temperature in Steam intens- Cooking ware itions function °C/grill setting time in mins Pot-roasted beef, 1.5 kg Cookware with lid 200-220 130-150 Sirloin, medium, 1.5 kg Cookware without 180-200 50-60 Burger, 3–4 cm thick Wire rack...
- Page 33 How it works en Food Accessories/cook- Shelf pos- Type of Searing Temperature in Cooking ware ition heating time in °C time in mins mins Fillet of beef, 4–6 cm thick, Cookware without lid 90-150 1 kg Veal medallions, 4 cm thick Cookware without lid ...
-
Page 34: Installation Instructions
en Installation instructions Food Accessories/ Shelf posi- Heating Temperature in Steam in- Cooking cookware tions function °C/grill setting tensity time in mins Hot water sponge cake Springform 160-170 25-35 cake tin, dia- meter 26 cm Hot water sponge cake Springform ... - Page 35 Installation instructions en ¡ Observe any available installation instructions for the WARNING ‒ Risk of fire! hob. It is dangerous to use an extended power cord and non-approved adapters. 23.4 Installation in a tall unit ▶ Do not use multiple socket strips. Observe the installation dimensions and the installation ▶...
- Page 36 en Installation instructions ¡ Ensure that air exchange is guaranteed in accord- ¡ Contact protection must be guaranteed by the in- ance with the diagram. stallation. Electrically connect the appliance with the protective contact plug Note: The appliance must only be connected to a pro- tective contact socket that has been correctly installed.
- Page 37 Installation instructions en Screw the appliance into place. For handleless kitchens with vertical bar handle strips: Attach a suitable filling piece in order to cover ‒ any sharp edges and to guarantee a safe install- ation. Pre-drill aluminium profiles to establish a screw ‒...
- Page 40 Valid within Great Britain: Imported to Great Britain by BSH Home Appliances Ltd. Grand Union House Old Wolverton Road Wolverton, Milton Keynes MK12 5PT United Kingdom Manufactured by BSH Hausgeräte GmbH under the trademark licence of Siemens AG *9001757127* 9001757127 (020519)