Table of Contents
Advertisement
Quick Links
Advertisement
Table of Contents

Related Manuals for Electrolux EGT6242


Summary of Contents for Electrolux EGT6242
- Page 1 EGT6242 User Manual...
-
Page 2: Table Of Contents
10. ENERGY EFFICIENCY.................. 17 WE’RE THINKING OF YOU Thank you for purchasing an Electrolux appliance. You’ve chosen a product that brings with it decades of professional experience and innovation. Ingenious and stylish, it has been designed with you in mind. So whenever you use it, you can be safe in the knowledge that you’ll get great results every time. - Page 3 ENGLISH injuries and damages. Always keep the instructions with the appliance for future reference. 1.1 Children and vulnerable people safety This appliance can be used by children aged from 8 • years and above and persons with reduced physical, sensory or mental capabilities or lack of experience and knowledge if they have been given supervision or instruction concerning use of the appliance in a safe way and understand the hazards involved.
-
Page 4: Safety Instructions
If the glass ceramic surface / glass surface is cracked, • switch off the appliance to avoid the possibility of electric shock. In case of hotplate glass breakage: • shut immediately off all burners and any electrical – heating element and isolate the appliance from the... - Page 5 ENGLISH • The bottom of the appliance can get access to the mains plug after the hot. We recommend to install a non- installation. combustile separation panel under the • If the mains socket is loose, do not appliance to prevent access to the connect the mains plug.
- Page 6 • Do not let the appliance stay • Make sure cookware is centrally unattended during operation. positioned on the burners. • Set the cooking zone to “off” after • Make sure the flame does not go out each use.
-
Page 7: Product Description
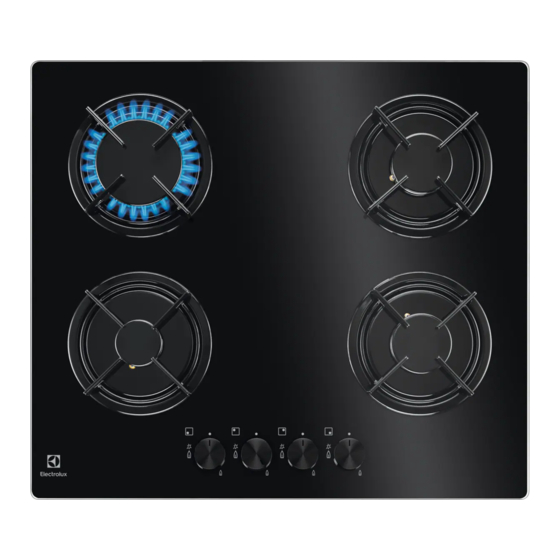
ENGLISH 2.7 Service • Contact your municipal authority for information on how to discard the • To repair the appliance contact an appliance correctly. Authorised Service Centre. • Disconnect the appliance from the • Use original spare parts only. mains supply. •... - Page 8 4.1 Burner overview If after some tries the burner does not light, check if the crown and its cap are in correct positions. WARNING! Do not keep the control knob pushed for more than 15 seconds. If the burner does...
-
Page 9: Hints And Tips
ENGLISH WARNING! Always turn the flame down or switch it off before you remove the pans from the burner. 5. HINTS AND TIPS WARNING! CAUTION! Refer to Safety chapters. Make sure that the pots are placed centrally on the burner in order to get 5.1 Cookware maximum stability and to get lower gas consumption. -
Page 10: Troubleshooting
• Wash stainless steel parts with water, • Remove when the hob is and then dry them with a soft cloth. sufficiently cool: limescale rings, water rings, fat stains, shiny metallic 6.2 Pan supports discoloration. Clean the hob with a moist cloth and some detergent. - Page 11 ENGLISH Problem Possible cause Remedy The fuse is released. Make sure that the fuse is the cause of the malfunc‐ tion. If the fuse releases again and again, contact a qualified electrician. Burner cap and crown are Place the burner cap and placed incorrectly.
-
Page 12: Installation
C) Stick it on instruction booklet. 8. INSTALLATION Current Edition, should be consulted to WARNING! determine the requisite air vent Refer to Safety chapters. requirements. For appliances installed in the Republic 8.1 Before the installation of Ireland please refer to the NSAI- Before you install the hob, write down the Domestic Gas Installation I.S. - Page 13 ENGLISH 8.4 Injectors replacement 1. Remove the pan supports. 2. Remove the caps and crowns of the burner. 3. With a socket spanner 7 remove the injectors and replace them with the ones which are necessary for the type of gas you use (see table in "Technical Information"...
- Page 14 1. The limiter valve and the electrical WARNING! system can take the appliance load Make sure the flame does (see the rating plate) not go out when you quickly 2. The supply system is equipped with turn the knob from the...
- Page 15 ENGLISH 8.7 Replacement of the 8.8 Building In connection cable The replacement of electric min. 600 mm cable must be carried out exclusively by the service min. 450 mm min. 650 mm force centre or by personnel min. 55 mm with similar competencies, in accordance with the current 30 mm...
-
Page 16: Technical Information
Kitchen unit with door A) Removable panel B) Space for connections 30 mm Kitchen unit with oven The electrical connection of the hob and the oven must be installed separately for min 20 mm safety reasons and to let easy remove... -
Page 17: Energy Efficiency
ENGLISH 9.4 Gas burners for NATURAL GAS G20 20 mbar BURNER NORMAL POWER MINIMUM POWER INJECTOR MARK 1/100 mm Rapid 0,75 Semi-rapid 0,45 Auxiliary 0,33 9.5 Gas burners for LPG G30/G31 28-30/37 mbar BURNER NORMAL MINIMUM INJECTOR NOMINAL GAS FLOW g/h POWER POWER MARK 1/100... - Page 18 11. ENVIRONMENT CONCERNS Recycle the materials with the symbol marked with the symbol with the household waste. Return the product to . Put the packaging in applicable your local recycling facility or contact containers to recycle it. Help protect the your municipal office.
- Page 19 ENGLISH...
- Page 20 www.electrolux.com/shop...