Table of Contents

Related Manuals for Kenwood CS-5130


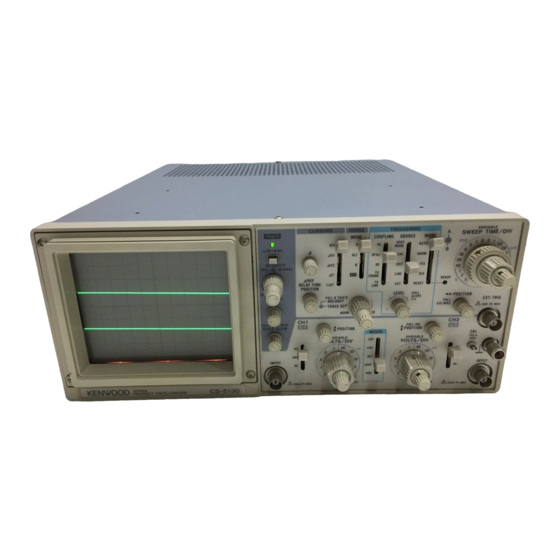
Summary of Contents for Kenwood CS-5130
- Page 1 40MHz DUAL T R A C E READOUT OSCILLOSCOPE CS-5130 40MHz DUAL T R A C E OSCILLOSCOPE CS-5135 INSTRUCTION MANUAL K E N W O O D C O R P O R A T I O N ©PRINTED IN JAPAN B50-7667-20(T)
-
Page 2: Table Of Contents
SAFETY Symbol in This Manual Use the Proper Power Cord » This symbol indicates where applicabie cautionary or Use only the power cord and connector specified for your Z I \ other imformation is to be found. product. Power Source Use the Proper Fuse This equipment operates from a power source that does not To avoid fire hazard, use a fuse of the correct type. -
Page 3: Features
FEATURES 1 . High vertical axis sensitivity of 1 mV/div and wide band- 9 . Five-revolution D E L A Y T I M E POSITION potentiometer width that covers fully specified frequency response at offers easy setting. 5 mV/div. 10. -
Page 4: Specifications
SPECIFICATIONS CS-5130 CS-5135 1 5 0 mm rectangular with internal graticule Acceleration Voltage 12 k V 8 x 10 div (1 div = 10 mm) Display Area VERTICAL AXIS (CH1 and CH2) Sensitivity 1 mV/div to 5 V/div: 1 mV to 2 mV/div ± 5 % , 5 mV/div to 5 V/div ± 3 %... - Page 5 CS-5130 CS-5135 Delay A c c u r a c y ± ( 3 % of set value + 1 % of full ± 4 % of reading on C R T scale) + (0 to 3 0 0 ns)
- Page 6 CS-5130 CS-5135 READOUT Set Value C H 1 / C H 2 scale factor (with probe detec- tion); V - U N C A L , A D D , I N V E R T A / B sweep scale factor (magnification con-...
-
Page 7: Precautions
PRECAUTIONS SAFETY 4 . A l w a y s connect a cable from the earth ground (GND) jack of the oscilloscope to the chassis of the equipment Before connecting the instrument to the power source, care- under test. Without this caution, the entire current for fully read the following information, then verify that the the equipment under test may be d r a w n through the power cord and power line fuse are ones for your power line. - Page 8 Factory installed Plug configuration Power cord and plug type Line cord plug fuse instrument fuse N o r t h A m e r i c a n 1 . 0 A , 2 5 0 V 1 2 0 v o l t / 6 0 H z F a s t b l o w N o n e R a t e d 1 5 a m p...
-
Page 9: Controls And Indicators
CONTROLS AND INDICATORS FRONT PANEL Fig. 2 © CH1 | POSITION Control © $ C H 2 POSITION/PULL INVert Control Rotation adjusts vertical position of C H 1 waveform on • C H 2 P O S I T I O N : the screen. - Page 10 Fig. 3 © CH2 INPUT J a c k © POWER Switch Vertical input for channel 2 trace in normal sweep oper- A press of this s w i t c h turns the power ON. ation. X - a x i s input in X - Y operation. ©...
- Page 11 © TRACE SEPARATION Control © S C A L E ILLUM/PULL T R A C E ROTA Control S C A L E I L L U M : Brightness adjustment of the scale of Adjusts vertical separation between A s w e e p and B the C R T .
- Page 12 Fig. 4 S I N G L E : Single-sweep mode O F F : Cursor measurement is not performed. The N O T E : Dual-trace singie-sweep observation is cursor, and cursour measurement mode and not possible if the vertical operation cursor measurement value are not displayed on the C R T .
- Page 13 AMI: T w o horizontal cursor lines are displayed on the quency is displayed in an absolute value. C R T , and voltage difference and voltage ratio NOTE: Setting of the HORIZ MODE select between them are displayed in the upper right s w i t c h ©...
-
Page 14: Rear Panel 1
CONTROLS AND INDICATORS REAR PANEL Fig. 5 (§) Z A X I S INPUT Jack (§) Fuse Holder, Line Voltage Selector Contains the line f u s e . Verify that the proper fuse is in- External intensity modulation input; T T L compatible. stalled w h e n replacing the line f u s e . -
Page 15: Directions For Use
DIRECTIONS FOR USE R E A D O U T D I S P L A Y ( C S - 5 1 3 0 Only) (1) POSITIONS OF THE DISPLAY Displays the scale factors, cursor measure- ment data, etc. at the following positions on the C R T . -
Page 16: Operating Instructions
OPERATING INSTRUCTIONS INITIAL STARTING PROCEDURE refer to the item " F r o n t P a n e l " . In the case of using a pro- be, refer to the Operation Manual attached to the probe as Prior to turning the power O N , set the s w i t c h e s as in the well as the application example "... - Page 17 • External Sync When the S O U R C E selection is in E X T , the input sig- Permits triggering from dc to over 6 0 MHz. Couples nal at the E X T T R I G INPUT @ jack becomes the trig- dc component of s y n c trigger signal.
-
Page 18: Magnified S W E E P Operation
5. Adjust the A S W E E P / T I M E DIV control © to obtain an appropriate display. Now a normal s w e e p display is ob- tained. I Trigger point 121 MAGNIFIED SWEEP OPERATION "... -
Page 19: Video Signal Observation
14) X-Y OPERATION For some measurements, an external horizontal deflection Magnified view of intensified. A S w e e p signal is required. This is also referred to a s an X - Y meas- urement, where the Y input provides vertical deflection and X input provides horizontal deflection. -
Page 20: Single Sweep Operation
S e t the unit to the C H O P mode in this c a s e . [B] READOUT OPERATION (CS-5130 only) 1 C R T surface readout By rotating the INTEN ( R E A D O U T ) controller @ clock- w i s e up to the very e n d , characters are displayed on the C R T . -
Page 21: Application
APPLICATIONS PROBE COMPENSATION 3 . Set the AC-GND-DC s w i t c h to the D C position to observe the input w a v e f o r m , including its D C component. If an For accurate measurement, perform appropriate probe cor- appropriate reference level or V O L T S / D I V setting w a s not rection prior to measurement. -
Page 22: Measurements Of The V O L T A G Ebetween Two Points On A W A V E F O R M
Substituting the given value: Voltage between two points=4.5 (div) x 0.2(V/div) x 10=9.0V | 2 ! Cursor measurement (CS-5130 only) 2. MEASUREMENT OF THE VOLTAGE BETWEEN 1) Make w a v e f o r m to be observed be displayed on the TWO POINTS ON A WAVEFORM screen in ordinary procedure 1). -
Page 23: Elimination Of Undesired Signal Components
4. VOLTAGE RATIO MEASUREMENT USING CURSORS (CS-5130 only) Overshoot of square w a v e s , e t c . can be measured in the following procedures: 1) Supply signal into the INPUT terminal. -
Page 24: Time Measurements
|2) Cursor measurement (CS-5130 only). 5. TIME MEASUREMENTS 1 . In the same w a y as the ordinary measurement, adjust 11! Ordinary measurement the w a v e f o r m to be measured to an easy-to-observe point. -
Page 25: Pulse Width Measurements
Fig. 26 with • POSITION Cursor measurement (CS-5130 only) 1. In the same w a y a s the ordinary measurement, adjust w a v e f o r m s to be measured to an easy-to-observe position. 2. Set the cursor mode to A T . - Page 26 12! Cursor measurement (CS-5130 only) urements. Using the formula: 1 . In the same w a y as the ordinary measurement, adjust Risetime = Horizontal distance (div) x ( S W E E P T I M E / D I V w a v e f o r m s to be measured to an easy-to-observe setting) x "...
-
Page 27: Phase Difference Measurements
Risetime = ( 1 . 6 + 1 . 4 ) ( d i v ) x 2 (^ts/div) = 6 jxs Reference signal (2) Cursor measurement (CS-5130 only) 1 . In the same w a y as the ordinary measurement, adjust... -
Page 28: Time Ratio Measurement Using C U R S O R S
Fig. 3 5 Measured value (2) Cursor measurement {CS-5130 only) 1. In ordinary procedures 1 and 2, adjust w a v e f o r m s to be measured to an easy-to-observe position. 2. Adjust 1 c y c l e ' s waveform to 5 divisions with the S W E E P T I M E / D I V . -
Page 29: 1 . Frequency Measurements
[EXAMPLE] A period of 4 0 /ts is observed and measured. (See Fig. 3 8 ) Cursor measurement (CS-5130 only) 1 . Apply the signal to INPUT jack, setting the vertical MODE Assuming that S W E E P T I M E / D I V indicates 5 jis/div,... -
Page 30: Relative Measurements
Adjusted reference signal Reference signal Unknown signal Fig. 4 0 12. RELATIVE MEASUREMENTS If the frequency and amplitude of some reference signal are k n o w n , an unknown signal may be measured for level and frequency without use of the V O L T S / D I V or S W E E P T I M E / D I V for calibration. -
Page 31: Pulse Jitter Measurements 3
[EXAMPLE] 2. The S w e e p (horizontal) calibration coefficient is then the S W E E P T I M E / D I V is 0.1 ms and apply 1.75 kHz reference period of the reference signal divided by the product of signal. -
Page 32: S W E E P Magnifications
1 4 . S W E E P M U L T I P L I C A T I O N (MAGNIFI- With the above magnification, if the magnification ratio is CATION) increased, delay jitter will occur. T o achieve a stable display, s e t the B M O D E to T R I G and The apparent magnification of the delayed s w e e p is deter- used the triggered mode of operation. - Page 33 S I N E <t> = — Where 0 = phase angle Fig. 4 6 Phase shift calculation Amplitude distortion, No amplitude distor- 1 8 0 ° out of phase no out of phase tion, no out of phase Amplitude distortion, No amplitude distor- 9 0 °...
-
Page 34: Maintenance
MAINTENANCE A c a u t i o n : Read this page carefully to keep your safety. For Electric Shock Protection: Be sure to disconnect the power cable from the socket before conducting the following operation. REPLACING THE FUSE CHANGING THE SUPPLY V O L T A G E Remove the fuse holder in the rear panel using a standard In case the fuse has blown, locate the cause. -
Page 35: Accessories
ACCESSORIES S T A N D A R D A C C E S S O R I E S I N C L U D E D OPTIONAL A C C E S S O R I E S C S - 5 1 3 0 Probe Pouch ( M C - 7 8 ) Y 8 7 - 1 6 0 0 - 0 0... - Page 36 A product of KENWOOD CORPORATION 17-5, 2 - c h o m e , S h i b u y a , S h i b u y a - k u , T o k y o 1 5 0 , J a p a n...