Advertisement
Quick Links
Advertisement

Related Manuals for DeWalt DCN890P2


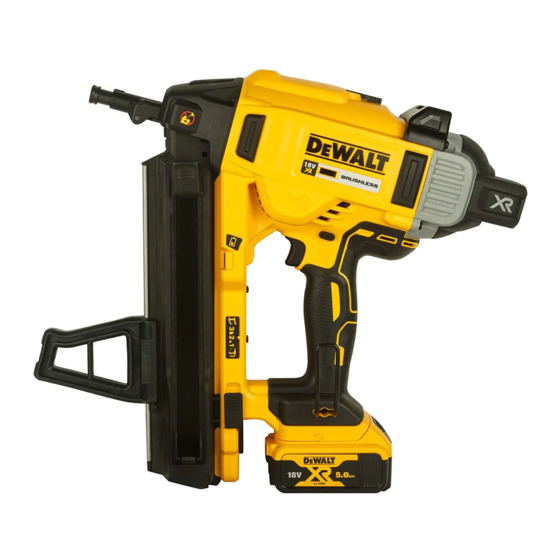
Summary of Contents for DeWalt DCN890P2
- Page 1 DCN890 Disassembling Procedure and General Information...
- Page 2 Refer to stall release Hot Tool Let the tool cool down before continuing use Error Reset the tool by removing and reinstalling battery pack, or cycling trigger lock off. If error code persist, take the tool to an authorized DEWALT service center...
- Page 3 FORCED ENTRY USERS 1. DRYWALL TRACK Range : 25-40mm 15mm Penetration for hard material 32mm Penetration for soft material Track to Concrete (600mm) Range : 15-40mm 7mm Penetration Track to Structural Steel (600mm) 40-150mm 25-16Ga (0.45 – 1.29mm)
- Page 4 XR Li-ion System 5 Amp Tool Free Stall Release Angled Magazine DeWALT Proprietary pins 13-57mm Easy Access Probe REMOVAL FOOT...
- Page 5 HOW WE WIN Quick Release Nose Piece Brushless Motor Stall Indicator (Underside of Magazine) Battery Indicator Speed Control Single or Rapid Mode...
- Page 6 ACCESSORIES 1. PINS • 3 TYPES OF PIN • Std – Collation colour – Yellow • HD- High Shear – Collation colour – Black • XH Extra Hard – Collation Colour Red • COLLATION • Std – 15 Pins per strip •...
- Page 7 ACCESSORIES - PINS STD PINS CAT No Length (mm) Dia (mm) Collation Qty Box Qty M Carton Qty * BAR CODE APPLICATIONS DCN8901015 1005 6030 5054905022334 CONCRETE DCN8901020 1005 6030 5054905022341 CONCRETE DCN8901025 1005 6030 5054905022358 CONCRETE DCN8901030 1005 6030 5054905022365 CONCRETE DCN8901035...
- Page 8 ACCESSORIES - PINS • PINS • 13 – 57mm • Diameter 2.6-3.7mm • Angle 15 degrees • Machine Capacity 33 Pins...
- Page 9 MECHANICAL, ELECTRICAL & PLUMBING ACCESSORIES DDF6755012 TILW-PULSA-LW DDF6770000 Eye Clip DDF6755315 ST-COND-24-DBL DDF6720000 25mm cable tie DDF6775320 *ST-COND-28-DBL DDF6755402 QKCLPII14-18 DDF6710000 COND-16-DBL DDF6755404 QKCLPII20-25 DDF6710050 COND-20-DBL DDF6755406 QKCLPII26-32 DDF6710100 COND-24-DBL DDF6753200 TICOND20MM metal conduit Clip DDF6750000 25mm Lathing Washer DDF6753205 TICOND22MM metal conduit Clip DDF6750050 36mm Insulated Washer...
- Page 10 Magnetic Stick E Tip DCN8902-XJ APPLICATIONS...
- Page 11 Non Magnetic Stick E Tip DCN8903-XJ APPLICATIONS...
- Page 12 CONTACT TRIPS REMOVAL & REPLACEMENT Magnetic Contact Trip DCN8902 DEWALT DCN8903-XJ NON- MAGNETIC CONTACT...
- Page 13 ACCESSORIES REPLACEMENT DRIVER DCN8901-XJ...
- Page 14 TRACK IT POLE DCN8905-XJ SIMILAR TO POWERS 55048...
- Page 15 SKUS Core Naked SKU Core Kitted SKU 1 x DCN890P2 2 x 5.0Ah Batteries 1 x DCN890 1 x M/V Charger 1 x cardboard carton 1 x Kitbox 1 x Contact Trip Only 2 x Contact Trips DCN8904 DCN8903 DCN8904...
- Page 16 ENGINEERING – ENERGY Single Flywheel System • Quantify Key Design Parameters • Inertia, Flywheel Speed, Driver Mass, Pinch Force, V Angle • Performance Verification - Prototype • Penetration in 4000 psi concrete / A36 steel • Pin retention force in steel and concrete •...
- Page 17 ENGINEERING – DRIVER SYSTEM (REASSEMBLED) Material Induction Hardened AISI 6150 Profile / Driver Design - Hot forging with Return Rack GUIDE RODS...
- Page 18 ENGINEERING – DRIVER SYSTEM FRICTION SURFACE VIEW FROM TOP CONTACT TIP BUMPER INTERFACE FRICTION SURFACE RETURN RACK VIEW FROM UNDERSIDE...
- Page 19 ENGINEERING – RETURN SYSTEM Return System – Multi Stroke Solenoid Ratchet Operation Solenoid/Plunger • Return in < 0.3 s • 4 Strokes Profile / Rack • Basic Engineering Analysis / Testing •Dynamic simulations •Rig test at 55K… running Return Paw •Extreme temp, low voltage •End-user validation on framer...
- Page 20 ENGINEERING – BUMPERS LOWER BUMPERS UPPER BUMPERS...
- Page 21 ENGINEERING – MOTOR Speed Control SPEED 1: 13,000 RPM Fastening Steel/Wood to low strength Masonry or Block (<4000 PSI) Typically 19-25mm SPEED 2: 14,000 RPM Fastening Steel/Wood to high strength Masonry or Block (>4000 PSI) Typically 19-29mm SPEED 3: 15,000 RPM Fastening Structural Steel/Concrete 13-57mm...
- Page 22 ENGLISH GERMAN ITALIAN FRENCH SPANISH PORTUGUESE DUTCH CHECK ÜBERPRÜFEN CONTROLLARE CONTROLER COMPROBAR VERIFIQUE CONTROLEREN ATTENTION ! ACHTUNG ! ATTENZIONE ! ATTENTION ! ATENCION ! ATENÇÃO! ATTENTIE ! TOURNEZ DANS LE GIRAR SENTIDO ANTI- TURN COUNTER DREHEN GEGEN GIRARE IN SENSO SENS INVERSE DES GIRO IZQUIERDA HORARIO...
- Page 23 ENGLISH GERMAN ITALIAN FRENCH SPANISH PORTUGUESE DUTCH PUSH DRÜCKEN PREMERE APPUYEZ APRETAR EMPURRAR DUWEN DISCONNECT TRENNEN SCOLLEGARE DEBRANCHEZ DESCONECTADO DESLIGAR ONTKOPPELEN ATTENTION ! OPGELET ! ATTENTION! ACHTUNG NÄGEL ATTENZIONE ATENCION! ATENÇÃO! RETIREZ LES VERWIJDER DE REMOVE NAILS ENTNEHMEN RIMUOVERE I CHIODI QUITAR LOS CLAVOS RETIRAR OS PREGOS PROJECTILES...
- Page 24 ENGLISH GERMAN ITALIAN FRENCH SPANISH PORTUGUESE DUTCH LUBRICATION BEFETTEN LUBRIFICAZIONE LUBRIFICATION ENGRASE LUBRIFICAÇÃO SMERING GRÖSSE TAMANHO CHAVE DIMENSIONE VITE TAMAÑO LLAVE AFMETING VAN DE HEX KEY SIZE INNENSECHSKANT- TAILLE SIX PAN …mm ESAGONALE EXAGONAL INBUSSLEUTEL SCHLÜSSEL TAMANHO DE ROSCA SCHRAUBENKOPF FILETAGE DE LA VIS, ROSCA DEL SCREW THREAD...
- Page 25 ENGLISH GERMAN ITALIAN FRENCH SPANISH PORTUGUESE DUTCH ACTIVATE SCHIESSEN SPARARE ACTIVEZ ACTIVAR ACTIVAR SCHIETEN CLEANING WASCH MAQUINA DE MÁQUINA DE LAVAPEZZI BAC DE LAVAGE WASMACHINE MACHINE MASCHINE LIMPIEZA LIMPEZA FUNKTIONSTEST PRUEVA DE TESTE DE FUNCTION TEST ESEGUIRE IL TEST TEST FONCTIONNEL FUNCTIETEST DURCHFÜHREN FUNCIONAMIENTO...
- Page 26 Before dismantling The CCN does have the blinking LED’s to signal 1k shots. Hold the trigger for 10 - 15 seconds before the blinking will start.
- Page 27 Before dismantling...
- Page 28 Before dismantling...
- Page 29 Before dismantling 2017 33-59...
- Page 30 Magazine Removal...
- Page 31 ENGINEERING – DRY FIRE LOCK OUT TAB IS EXPOSED WHEN NO NAILS ARE IN MAGAZINE TAB ENGAGES INTO CONTACT TRIP AND STOPS MOVEMENT...
- Page 32 Profile Removal 4.5x19 Tx20...
- Page 33 Profile Removal...
- Page 34 Profile Removal 1.Klick...
- Page 35 Profile Removal...
- Page 36 Profile Removal...
- Page 37 Disassembling procedure 4.5 x 19 Tx20...
- Page 38 Disassembling procedure...
- Page 39 Disassembling procedure Wiring and connection...
- Page 40 Disassembling procedure Wiring and connection...
- Page 41 Disassembling procedure...
- Page 42 Disassembling procedure...
- Page 43 Disassembling procedure 4x18 Tx20...
- Page 44 Disassembling procedure...
- Page 45 Disassembling procedure 3 x 19 Tx10 4.5 x 12.5 Tx20...
- Page 46 Disassembling procedure...
- Page 47 Disassembling procedure...
- Page 48 Disassembling procedure...
- Page 49 Disassembling procedure...
- Page 50 Disassembling procedure...
- Page 51 Disassembling procedure...
- Page 52 Disassembling procedure 6x12 Tx20...
- Page 53 Disassembling procedure...
- Page 54 Disassembling procedure...
- Page 55 Disassembling procedure...
- Page 56 Disassembling procedure 4 x 12 Tx20...
- Page 57 Disassembling procedure...
- Page 58 Disassembling procedure...
- Page 59 Disassembling procedure 5x8 Tx20...
- Page 60 Disassembling procedure...
- Page 61 Disassembling procedure...
- Page 62 Disassembling procedure...
- Page 63 Disassembling procedure...
- Page 64 Disassembling procedure...
- Page 65 Disassembling procedure...
- Page 66 Disassembling procedure...
- Page 67 Disassembling procedure...
- Page 68 Disassembling procedure...
- Page 69 Disassembling procedure...
- Page 70 Disassembling procedure 6x12 Tx25...
- Page 71 Disassembling procedure...
- Page 72 Disassembling procedure...
- Page 73 Disassembling procedure...
- Page 74 Disassembling procedure...
- Page 75 Disassembling procedure...
- Page 76 Disassembling procedure...
- Page 77 Disassembling procedure...
- Page 78 Disassembling procedure...
- Page 79 Disassembling procedure...
- Page 80 Disassembling procedure...
- Page 81 Disassembling procedure...
- Page 82 Disassembling procedure...
- Page 83 Assembling Hints...
- Page 84 Assembling procedure...
- Page 85 Assembling procedure...
- Page 86 Assembling procedure...
- Page 87 Assembling procedure...
- Page 88 Assembling...
- Page 89 Good to know...
- Page 90 Good to know The picture shows a CCN profile that has passed conformance tests. If the return teeth showing wear, replace the profile under a non warranty case...
- Page 91 Functionally Check...
- Page 93 Remember: the next check will be made by your customer...