Advertisement
Quick Links
INSTRUCTIONS
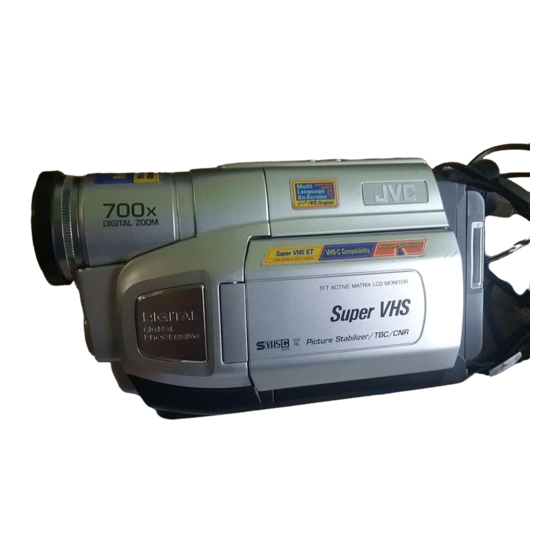
COMPACT VHS CAMCORDER
GR-SXM195AS
®Registered Trademark owned by VICTOR COMPANY OF JAPAN, LTD.
COPYRIGHT© 2003 VICTOR COMPANY OF JAPAN, LTD.
Dear Customer,
Thank you for purchasing the JVC Compact VHS camcorder. Before use, please read
"PRECAUTIONS" (
Automatic Demonstration takes place when "DEMO MODE" is set to "ON"
(factory-preset).
• Available when the Power Switch
on the switch.
• Performing any operation during the demonstration stops the demonstration temporarily. If no operation
is performed for more than 1 minute after that, the demonstration will resume.
• "DEMO MODE" remains "ON" even if the camcorder power is turned off.
• To cancel Automatic Demonstration, set the Power Switch
while the demo is in progress. This takes you directly to the demo mode's Setting Menu (so you will not
have to go through the main Menu Screen). Rotate the MENU Wheel
NOTES:
• When a tape whose Erase Protection tab is in the position that allows recording is loaded in the
camcorder, demonstration is not available.
• If you do not detach the Lens Cap, you cannot see the actual changes of the Automatic Demonstration
activated on the LCD monitor or viewfinder.
pg. 3, 4) to ensure safe use of this product.
AUTOMATIC DEMONSTRATION
@
is set to "
ENGLISH
" or "
" while pressing down the Lock Button
@
to "
" and press the MENU Wheel
1
Printed in Japan
AS
0103-MK-UN-SN
1
to select "OFF" and press it.
LYT1133-001A
VHS
PAL
625
!
located
1
in
Advertisement

Related Manuals for JVC GR-SXM195


Summary of Contents for JVC GR-SXM195
- Page 1 Printed in Japan 0103-MK-UN-SN COPYRIGHT© 2003 VICTOR COMPANY OF JAPAN, LTD. Dear Customer, Thank you for purchasing the JVC Compact VHS camcorder. Before use, please read “PRECAUTIONS” ( pg. 3, 4) to ensure safe use of this product. AUTOMATIC DEMONSTRATION Automatic Demonstration takes place when “DEMO MODE”...
- Page 2 PROVIDED ACCESSORIES • AC Adapter AP-V13A • Power Cord • Shoulder Strap • Cassette Adapter • Lens Cap • Battery Pack C-P7U BN-V11U • AA (R6) Battery (for Cassette Adapter) • A/V (Audio/Video) Cable NOTE: In order to maintain optimum performance of the camcorder, provided cables may be equipped with one or more core filter.
- Page 3 AC adapter under these conditions THIS UNIT TO RAIN OR could lead to fire or electric shock. Contact your MOISTURE. JVC dealer. Do not attempt to repair the malfunction yourself. • To prevent shock, do not open the cabinet. No CAUTIONS user serviceable parts inside.
- Page 4 When the equipment is installed in a cabinet or on a shelf, make sure that it has sufficient space on all sides to allow for ventilation (10 cm or more on both sides, on top and at the rear). Do not block the ventilation holes. (If the ventilation holes are blocked by a newspaper, or cloth etc.
- Page 5 INDEX AC Adapter ..............pg. 6 ND Effect Mode ............pg. 24 Animation Recording ..........pg. 21 Nega/Posi Mode ............pg. 24 Auto Date Record ............ pg. 21 Auto Focus ............... pg. 12 Picture Stabiliser ............pg. 18 Auto Shut Off ............pg. 11 Playback ..............
- Page 6 GETTING STARTED USING THE BATTERY PACK Perform step 1) of “CHARGING THE BATTERY Hook on. PACK”. Approximate recording time (unit: min.) Battery pack Viewfinder on LCD monitor on BN-V11U Push in. BN-V12U (optional) BN-V20U (optional) Power Switch BATTERY RELEASE BN-V400U Switch (optional) Battery pack...
- Page 7 • Using the optional AA-V15 AC Power Adapter/ built-in clock battery runs out. Consult an Charger, you can charge the BN-V11U/V12U/ authorised JVC dealer for replacement, or set the V20U/V400U battery pack without the camcorder. date/time as necessary before you start shooting.
- Page 8 Grip Adjustment Tripod Mounting 1) Separate the Velcro strip. Align the screw and camera direction stud on the 2) Pass your right hand through the loop and grasp tripod with the tripod mounting socket . Then the grip. tighten the screw. 3) Adjust so that your thumb and fingers can easily CAUTION operate the Recording Start/Stop Button...
- Page 9 CONTROLS, CONNECTORS AND INDICATORS Eyepiece Refer to this diagram while reading the instructions. During shooting & Keep the lens cap attached to the camcorder. ( ) q Cassette holder LCD monitor Turn the gear to 90° 90° 180° take up slack. Viewfinder Speaker Erase...
- Page 10 • MENU Wheel [–, +] ........ pg. 18 Tape Remaining Time ......pg. 21 • BRIGHT Wheel [–, +] ......pg. 11 Recording Mode Indicator ....... pg. 20 • Speaker Volume Control [VOL.] ..... pg. 11 • Digital Effect Indicator ......pg.
- Page 11 RECORDING PLAYBACK Set REC MODE, S-VHS (S-VHS ET), TAPE Load a tape ( pg. 8, “Loading/Unloading A LENGTH and DATE/TIME in SYSTEM MENU. Cassette”). pg. 18 – 22, “MENU SETTINGS”) Set the Power Switch to “ ” while pressing down the Lock Button located on the Remove the lens cap.
- Page 12 BASIC FEATURES Backlight Compensation To quickly increase the brightness of the subject 5Sec. Rec (5-sec. Recording) relative to the background. To record a scene for 5 seconds, providing quick 1) Press BACK LIGHT during recording. “ ” is scene transitions like those seen in TV displayed and the subject is brightened.
- Page 13 Zooming Quick Review To produce the zoom in/out effect. Digital circuitry To check the end of the last recording. extends the maximum magnification offered by 1) Make sure the camcorder is in the Record– optical zoom. This system is called Digital Zoom. Standby mode.
- Page 14 Tracking Counter Memory Eliminates noise bars that appear on-screen during Makes it easier to locate a specific tape segment. playback. To activate Manual Tracking: 1) Press COUNTER R/M and hold for more than 1) Press the TRACKING Wheel for approx. 1 second.
- Page 15 Connections To A TV/VCR Tape Dubbing 1) Make sure all units are turned off. 1) Connect the camcorder and the VCR 2) Connect the camcorder to a TV or VCR. If using “Connections To A TV/VCR”). Set the Power both TV and VCR, connect the VCR output to Switch to “...
- Page 16 Using The Cassette Adapter Use this to play back an S-VHS-C/VHS-C video cassette recorded with this camcorder on a S-VHS/ VHS VCR. 1) Slide the battery cover up to remove it, install one “AA (R6)” size battery, then reattach the cover.
- Page 17 INSTRUCTIONS Refer to this diagram while reading the instructions. Eyepiece During shooting & Keep the lens cap attached to the camcorder. ( ) q Cassette holder LCD monitor Turn the gear to 90° 90° 180° take up slack. Viewfinder Speaker Erase protection tab 180°...
- Page 18 MENU SETTINGS CAMERA MENU EXPOSURE Set the Power Switch to “ ” while pressing Manual exposure adjustment is recommended in down the Lock Button located on the switch. the following situations: Press the MENU Wheel in. The Menu • When shooting using reverse lighting or when the Screen appears.
- Page 19 M.W.B. TITLE If the white balance is correct, all other colours will Allows you to superimpose one of eight preset be accurately reproduced. titles in 11 different languages. Change the language in LANGUAGE in TITLE SETUP in AUTO : White balance is adjusted CAMERA MENU ( pg.
- Page 20 • If the recording mode is switched during sette. recording, the playback picture will be blurred at • JVC EHG (Extra High Grade) tapes are recom- the switching point. mended for superior results. Use S-VHS tape for storing recordings for an D.
- Page 21 TAPE LENGTH INT. TIME Allows you to set the tape length depending on the You can record sequentially at preset time spans. tape used: T30=30 minutes, T45=45 minutes, Leaving the camcorder aimed at a specific subject, T50=50 minutes, T60=60 minutes. you can record subtle changes over an extended •...
- Page 22 MENU LANG. DATE/TIME Allows you to select the language (ENGLISH, Allows you to set the current date and time. CHINESE or ARABIC) used in all messages pg. 7) displayed on screen. LCD BRIGHT DEMO MODE To adjust the brightness of the LCD monitor, Demonstrates certain functions automatically.
- Page 23 ADVANCED FEATURES Fade/Wipe Effects Fade- or wipe-in works at recording start, and fade- FADER: Fades in/out to a black screen. or wipe-out works at recording end. MOSAIC (Fader): Gradually turns/returns the 1) Set the Power Switch to “ ” while pressing picture into/from a mosaic pattern.
- Page 24 Programme AE With Special Effects Digital Effects 1) Set the Power Switch to “ ” while pressing 1) Set the Power Switch to “ ” while pressing down the Lock Button located on the switch. down the Lock Button located on the switch. 2) Press P.AE repeatedly until the desired mode 2) Press DIGIFECT...
- Page 25 TROUBLESHOOTING Before consulting your JVC dealer, please check the following to see if you can correct the problem yourself. Vertical white lines appear when shooting a very Playback picture is blurred or interrupted. bright object. • The video heads are dirty or worn out. Consult your •...
- Page 26 CAUTIONS General Battery Precautions Cassettes If the cassette adapter is not functioning even if it is being To properly use and store your cassettes, be sure to read the operated correctly, the batteries are exhausted. Replace them following cautions: with fresh ones. 1.
- Page 27 If malfunctioning occurs, stop using the unit immediately • Cleaning should be done only after the battery pack has and consult your local JVC dealer. been removed or other power units have been disconnected. • Mould may form if the lens is left dirty.
- Page 28 : 0°C to 40°C Some accessories are not available in some areas. Operating humidity : 35% to 80% Please consult your nearest JVC dealer for details on Storage temperature : –20°C to 50°C accessories and their availability. Weight : Approx. 840 g...