Table of Contents
Advertisement
INSTRUCTIONS
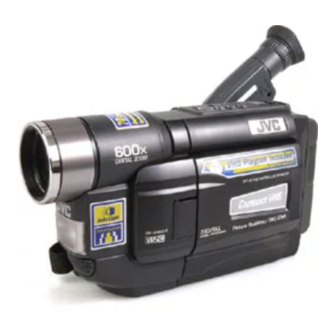
COMPACT VHS CAMCORDER
GR-AXM541
GR-AXM341
For Customer Use:
Enter below the Model No. and Serial No. which is
located on the bottom of the camcorder. Retain this
information for future reference.
Model No.
Serial No.
Dear Customer,
Thank you for purchasing the JVC Compact VHS camcorder. Before use, please read
"PRECAUTIONS" (
Automatic Demonstration takes place when "DEMO MODE" is set to "ON"
(factory-preset).
• Available when the Power Switch
• Performing any operation during the demonstration stops the demonstration temporarily. If no operation
is performed for more than 1 minute after that, the demonstration will resume.
• "DEMO MODE" remains "ON" even if the camcorder power is turned off.
• To cancel Automatic Demonstration, set the Power Switch
while the demo is in progress. This takes you directly to the demo mode's Setting Menu (so you will not
have to go through the main Menu Screen). Rotate the MENU Wheel
NOTES:
• When a tape whose Erase Protection tab is in the position that allows recording is loaded in the
camcorder, demonstration is not available.
• If you do not detach the Lens Cap, you cannot see the actual changes of the Automatic Demonstration
activated on the LCD monitor or viewfinder.
pg. 3, 4) to ensure safe use of this product.
AUTOMATIC DEMONSTRATION
0
is set to "
ENGLISH
COPYRIGHT© 2001 VICTOR COMPANY OF JAPAN, LTD
" or "
".
0
to "
" and press the MENU Wheel
1
Printed in Malaysia
U
1101MKV
1
to select "OFF" and press it.
LYT0898-001A
*
UN
*
PJ
1
in
Advertisement
Table of Contents

Related Manuals for JVC GR-AXM341U


Summary of Contents for JVC GR-AXM341U
-
Page 1: Automatic Demonstration
Model No. Serial No. Dear Customer, Thank you for purchasing the JVC Compact VHS camcorder. Before use, please read “PRECAUTIONS” ( pg. 3, 4) to ensure safe use of this product. Automatic Demonstration takes place when “DEMO MODE” is set to “ON”... -
Page 2: Provided Accessories
• AC Adapter AP-V12U, AP-V11U or AP-V10U • Remote Control Unit RM-V715U (GR-AXM541 only) • AAA (R03) Battery x 2 (for Remote Control Unit, GR-AXM541 only) NOTE: In order to maintain optimum performance of the camcorder, provided cables may be equipped with one or more core filter. -
Page 3: Safety Precautions
However, live recording and LCD monitor/viewfinder playback are possible any- where. • Use the JVC BN-V11U/V12U/V20U/V400U battery packs and, to recharge them or to supply power to the camcorder from an AC outlet, use the provided multi-voltage AC Adapter. -
Page 4: Important Safety Instructions
Please call 1-800-8-BATTERY™ for information on Ni-Cd battery recycling and disposal bans/restrictions in your area. JVC’s involvement in this program is part of our commitment to preserving our environment and conserving our natural resources. -
Page 5: Table Of Contents
AC Adapter ... pg. 6 Animation Recording ... pg. 21, 24 Audio Dubbing ... pg. 24 Auto Date Record ... pg. 19 Auto Focus ... pg. 18 Auto Shut Off ... pg. 11 Battery Pack ... pg. 6, 26 Blue Filter Effect ... pg. 23 Brighten The Image ... -
Page 6: Ac Adapter
GETTING STARTED Hook on. BATTERY RELEASE Switch Battery pack Power Switch AC Adapter To AC outlet CHARGING THE BATTERY PACK 1) Hook the end of the battery pack to the camcorder and push the battery in until it locks in place. •... -
Page 7: Date/Time Settings
TV, see DATE/TIME DISP. ( • The date/time cannot be stored in memory if the built-in clock battery runs out. Consult an authorized JVC dealer for replacement, or set the date/time as necessary before you start shooting. to “ ”. -
Page 8: Diopter Adjustment
Grip Adjustment 1) Separate the Velcro strip. 2) Pass your right hand through the loop and grasp the grip. 3) Adjust so that your thumb and fingers can easily operate the Recording Start/Stop Button Power Zoom Lever . Refasten the Velcro strip. Viewfinder Adjustment 1) Set the Power Switch to “... - Page 9 CONTROLS, CONNECTORS AND INDICATORS Eyepiece Viewfinder Speaker Microphone Video light During Recording – – – – – – Refer to this diagram while reading the instructions. During shooting Keep the lens cap attached to the camcorder. LCD monitor Transmitted beam effetive area 16 ft LCD Monitor/Viewfinder Indications...
- Page 10 • MENU Wheel [–, +] ... • BRIGHT Wheel [–, +] ... • TRACKING Wheel [–, +] ... 5-Second Recording Button [5 SEC. REC] ... • Power Zoom Lever [T/W] ... • Speaker Volume Control [VOL.] ... • Picture Stabilizer Button [P.STABILIZER] ...
-
Page 11: Playback
RECORDING Set REC MODE, TAPE LENGTH and DATE/TIME in SYSTEM MENU. pg. 18 – 21, “MENU SETTINGS”) Remove the lens cap. Set the Power Switch to “ ” or “ ”. Shooting while using the viewfinder: Make sure the LCD monitor is closed and locked. Shooting while using the LCD monitor: Make sure the LCD monitor is fully open. -
Page 12: Picture Stabilizer
BASIC FEATURES Picture Stabilizer To compensate for unstable images caused by camera-shake, particularly at high magnification. 1) Press P. STABILIZER 2) To switch off the Picture Stabilizer, press P. STABILIZER • Accurate stabilization may not be possible in certain conditions including excessive hand shake. -
Page 13: Quick Review
• Do not use near flammable or explosive moves during materials. • It is recommended that you consult your nearest JVC dealer for replacing the video light. Quick Review To check the end of the last recording. 1) Make sure the camcorder is in the Record–... -
Page 14: Counter Memory
Auto Tracking mode and “AT” appears. • Manual Tracking may not work with tapes recorded on other VCRs or camcorders. TBC (Time Base Corrector) Removes jitter from fluctuating video signals to deliver a stable picture even with old tapes. -
Page 15: Tape Dubbing
Connections To A TV/VCR 1) Make sure all units are turned off. 2) Connect the camcorder to a TV or VCR using optional video and audio cables. If using both TV and VCR, connect the VCR output to the TV input. -
Page 16: Cassette Adapter
Using The Cassette Adapter Playpak) Use this to play back an VHS-C video cassette recorded with this camcorder on a VHS VCR. 1) Slide the battery cover up to remove it, install one “AA (R6)” size battery, then reattach the cover. - Page 17 INSTRUCTIONS Eyepiece Viewfinder Speaker Microphone Video light During Recording – – – – – Refer to this diagram while reading the instructions. During shooting Keep the lens cap attached to the camcorder. LCD monitor Transmitted beam effetive area 16 ft LCD Monitor/Viewfinder Indications &...
-
Page 18: Auto Focus
MENU SETTINGS Set the Power Switch to “ Press the MENU Wheel Screen appears. Rotate the MENU Wheel select the desired function. • To go from CAMERA MENU to SYSTEM MENU, rotate the MENU Wheel to select “ SYSTEM MENU” and press it. SYSTEM MENU is composed of 2 pages. - Page 19 M.W.B. If the white balance is correct, all other colors will be accurately reproduced. AUTO : White balance is adjusted automatically. FINE : Outdoors on a sunny day. CLOUD : Outdoors on a cloudy day. HALOGEN : A video light or similar type of lighting is used.
-
Page 20: Recording Mode
SYSTEM MENU This Menu Screen cannot be accessed while recording. REC MODE Allows you to set the recording mode. “EP” (Extended Play) is more economical, providing three times the recording time. • If the recording mode is switched during recording, the playback picture will be blurred at the switching point. -
Page 21: Tele Macro
TAPE LENGTH Allows you to set the tape length depending on the tape used: T20=20 minutes, T30=30 minutes, T35=35 minutes, T40=40 minutes. • Tape remaining time is correct only if the correct tape length has been selected. DISPLAY FULL: Makes all of the indications appear on the LCD monitor/viewfinder during playback or recording. -
Page 22: Fade-In/Out
ADVANCED FEATURES Fade/Wipe Effects Fade- or wipe-in works at recording start, and fade- or wipe-out works at recording end. 1) Set the Power Switch to “ 2) Press FADE/WIPE repeatedly until the desired mode appears. 3) Press the Recording Start/Stop Button activate fade-in/out or wipe-in/out. -
Page 23: Digital Effects
Program AE With Special Effects 1) Set the Power Switch to “ 2) Press P.AE repeatedly until the desired mode appears. • To cancel the effect, press P.AE until “OFF” appears. • Only one mode can be engaged at a time. •... -
Page 24: Audio Dubbing
USING THE REMOTE CONTROL UNIT Make sure the remote control is pointed at the remote sensor Animation And Time-Lapse The remote control lets you set/release interval time and recording time without setting REC TIME/ INT. TIME ( pg. 21) in SYSTEM MENU. Animation Each time ANIM. -
Page 25: Troubleshooting
Before consulting your JVC dealer, please check the following to see if you can correct the problem yourself. Vertical white lines appear when shooting a very bright object. • This sometimes occurs when the contrast between the back-ground and the object is great. It is not a defect of the camcorder. - Page 26 • When operating, keep a distance of about 30 cm (11-13/16”) between the video light and people or object. • Do not use near flammable or explosive materials. • It is recommended that you consult your nearest JVC dealer for replacing the video light. General Battery Precautions If the remote control or cassette adapter is not functioning even if it is being operated correctly, the batteries are exhausted.
- Page 27 Serious malfunctioning If malfunctioning occurs, stop using the unit immediately and consult your local JVC dealer. For Your Maintenance 1. After Use Set the Power Switch to “OFF” to turn off the camcorder.
-
Page 28: Specifications
• A/V (Audio/Video) Cable • Compact VHS ( • Active Carrying Bag CB-V7U Some accessories are not available in some areas. Please consult your nearest JVC dealer for details on accessories and their availability. : Auto/Manual adjustment : 3.5" diagonally measured, LCD... - Page 29 Esta cámara de video posee un sistema de alimentación de 2 vías que le permite seleccionar la fuente de alimentación más apropiada. No utilice las unidades de alimentación suministradas con otro equipo. Enganche. Batería Conmutador de alimentación A la toma de corriente Adaptador alterna...
- Page 30 • Durante la carga o descarga, la cámara de video no puede ser operada. • No es posible efectuar la carga o descarga si se utiliza un tipo de batería equivocado. • Cuando efectúe la carga de la batería por primera vez o después de un largo periodo de almacenamiento, la lámpara CHARGE no se encender.
- Page 31 ESPAÑOL — GUIA PARA OPERACION RAPIDA Si la unidad comienza a funcionar mal, deje de usarla inmediatamente y consulte a su concesionario local de JVC. Colocación/Extracción de un cassette 1) Abra completamente el monitor LCD. Deslice EJECT hasta que el compartimiento de cassete se abra.
- Page 32 REPRODUCCIÓN 1) Cargue una cinta. 2) Ajuste el conmutador de alimentación . Para iniciar la reproducción, presione 4/6 Para interrumpir momentáneamente (reproducción de imágenes fijas), presione 4/6 . Para interrumpir la reproducción, presione 5 . Presione 2 para avanzar rápido la cinta. La búsqueda de imagen a alta velocidad (Búsqueda rápida) es posible presionando 2 durante la reproducción...