Table of Contents
Advertisement
Available languages
Available languages
Advertisement
Table of Contents

Related Manuals for DeWalt DW33


Summary of Contents for DeWalt DW33
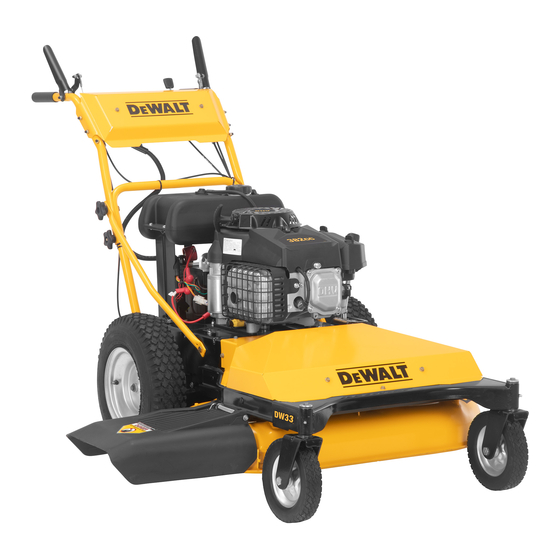
- Page 1 Instruction Manual Manual de instrucciones 33” Wide Cut Mower Rear Wheel Drive If you have questions or comments, contact us. Si tiene dudas o comentarios, contáctenos. 1-855-971-1123 Form No. 769-26028 (April 1, 2021)
- Page 2 The yellow and black color scheme is a trademark for DEWALT Power Tools and Accessories. © 2021 DEWALT. DEWALT® y GUARANTEED TOUGH son marcas registradas de DEWALT Industrial Tool Co. usadas bajo licencia. Todos los derechos reservados. El esquema de color negro y amarillo es una marca registrada de DEWALT Power Tools and Accessories.
- Page 3 ENGLISH Definitions: Safety Alert Symbols and Words This instruction manual uses the following safety alert symbols and words to alert you to hazardous situations and your risk of personal injury or property damage. DANGER: Indicates an imminently hazardous situation which, if not avoided, will result in death or serious injury. WARNING: Indicates a potentially hazardous situation which, if not avoided, could result in death or serious injury.
-
Page 4: Safe Operation Practices
ENGLISH SAFE OPERATION PRACTICES DANGER: This machine was built to be operated according to the safe OPERATING operation practices in this manual. As with any type of power equipment, 1. Data indicates that operators, age 65 years and above, are involved in a large carelessness or error on the part of the operator can result in serious injury. - Page 5 ENGLISH SAFE OPERATION PRACTICES, cont'd 9. Never over fill fuel tank. Fill tank to no more than 1” (25mm) below bottom of filler neck CHILDREN to allow space for fuel expansion. 1. Tragic accidents can occur if the operator is not alert to the presence of children. 10.
-
Page 6: Safety Symbols
ENGLISH SAFETY SYMBOLS NOTICE REGARDING EMISSIONS This page depicts and describes safety symbols that may appear on this product. Read, understand, and follow all instructions on the machine before attempting to assemble Engines which are certified to comply with California and federal EPA emission regulations and operate. -
Page 7: Slope Gauge
ENGLISH SLOPE GAUGE... - Page 8 ENGLISH ASSEMBLY Mower Set-Up Unfolding the Handle 1. Remove the star knobs (a) and carriage screws (b) from the lower handle. See Figure 3. Shipping Brace Removal WARNING: Make sure the lawn mower’s engine is OFF. Remove the ignition key (if equipped) before removing the shipping brace. 1.
- Page 9 ENGLISH ASSEMBLY, cont'd Attaching the Shift Lever 3. Position the upper shift lever into a vertical position aligning the holes in the lever with the holes in the shift plate. See Figure 6. 1. Remove the screw (a) and the lock nut (b) that secures the shift lever to the shift lever plate.
-
Page 10: Run Position
ENGLISH CONTROLS & OPERATION, cont'd Lawn Mower controls and features are illustrated in Figure 9 and described on the Drive Control following pages. The drive control is used to engage and disengage drive to the WARNING: Read and follow all safety rules and instructions in this manual, wheels. -
Page 11: Starting The Engine
ENGLISH CONTROLS & OPERATION, cont'd LCD Service Minder and Hour Meter Stopping the Engine (Electric Start Models Only) WARNING: If you strike a foreign object, stop the engine and remove the When the ignition key is rotated out of the STOP ignition key (if so equipped). - Page 12 ENGLISH CONTROLS & OPERATION, cont'd Using the Deck Height Lever Installing / Removing Mulch Baffle To raise or lower the cutting deck, move the deck height lever to the left, then place it in WARNING: Before installing or removing the mulch plug, disengage blades, the notch best suited for your application.
-
Page 13: Product Care
ENGLISH PRODUCT CARE Maintenance Schedule Each use or every Every Every season or Every season or Every season or Prior 5-10 Hrs. 10 Hours 25 Hours 50 Hours 100 Hours to Storing Clean Mower Check Engine Oil Level Check Air Filter Replace Air Filter Element * Change Engine Oil ** Clean Battery Terminals... -
Page 14: Tire Pressure
ENGLISH PRODUCT CARE, cont'd Tire Pressure Lubrication WARNING: Under any circumstance do not exceed manufacturer’s WARNING: Before lubricating, repairing, or inspecting, always disengage recommended psi. Equal tire pressure should be maintained at all times. Refer PTO, set parking brake, stop engine and remove key (if equipped) to prevent to sidewall of tire for recommended pressure. -
Page 15: Cutting Deck Removal
ENGLISH PRODUCT CARE, cont'd SERVICE 2. The top of each spindle pulley is marked with an arrow. See Figure 13. The arrows should be perpendicular (at a 90˚ angle) to each other. Cutting Deck Removal WARNING: Before performing any maintenance or repairs, disengage blades, stop engine and remove key (if equipped) to prevent unintended starting. -
Page 16: Cutting Blades
ENGLISH PRODUCT CARE, cont'd 7. Looking at the cutting deck from the left side, locate and carefully remove the hairpin Cutting Blades clips (a) that secure the deck supports on the rear left side and front left side of the WARNING: Shut the engine OFF and remove ignition key (if so equipped) deck. -
Page 17: Trail Shield
ENGLISH PRODUCT CARE, cont'd Changing the Deck Engagement Belt Trail Shield WARNING: Never operate the mower without the trail shield in place and WARNING: Shut the engine OFF and remove key (if equipped) before working. Failure to do so can result in personal injury. removing the cutting blade(s) for sharpening or replacement. -
Page 18: Customer Support
ENGLISH PRODUCT CARE, cont'd Problem Cause Remedy Engine fails to start 1. Choke not activated. 1. Place throttle/choke control in CHOKE position. 2. Fuel tank empty, or stale fuel. 2. Fill tank with clean, fresh (less than 30 days old) gas. 3. - Page 19 ENGLISH WALT ® -- LIMITED WARRANTY The limited warranty set forth herein is given by D WALT ® with respect to a new D WALT ® product (hereinafter “Product”) purchased and used in the United States and/or Canada to the Initial Purchaser (as defined herein). This limited warranty does not cover Emission Control Systems and is not a Federal Emission Control Warranty Statement, as defined by U.S.
- Page 20 ENGLISH How to Get Service Under This Limited Warranty In order to qualify for the limited warranty, as set forth herein, the repairs made under Limitations this warranty must be performed by an authorized D WALT ® service provider. To locate a 1.
- Page 21 Instruction Manual Manual de instrucciones Cortadora de césped de 33 pulgadas de área amplia Tracción trasera If you have questions or comments, contact us. Si tiene dudas o comentarios, contáctenos. 1-855-971-1123...
- Page 22 The yellow and black color scheme is a trademark for DEWALT Power Tools and Accessories. © 2021 DEWALT. DEWALT® y GUARANTEED TOUGH son marcas registradas de DEWALT Industrial Tool Co. usadas bajo licencia. Todos los derechos reservados. El esquema de color negro y amarillo es una marca registrada de DEWALT Power Tools and Accessories.
- Page 23 ESPAñOL Es Est t e manual de instru e manual de instruc c ciones utiliza los siguie ciones utiliza los siguien n t t es s es sí í mbolos y palab mbolos y palabr r as de ale as de aler r ta de segu ta de segur r idad pa idad par r a ale a aler r ta tar r lo sob...
-
Page 24: Medidas Importantes De Seguridad
ESPAñOL MEDIDAS IMPORTANTES DE SEGURIDAD PELIGRO: Esta máquina está diseñada para ser utilizada respetando las 7. Nunca llene en exceso el depósito de combustible. Llene el depósito no más de 1” (2.5 normas de seguridad contenidas en este manual. Al igual que con cualquier cm) por debajo de la base del cuello de llenado dejando espacio para la expansión del tipo de equipo motorizado, un descuido o error por parte del operador puede combustible. -
Page 25: Servicio Y Mantenimiento
ESPAñOL MEDIDAS IMPORTANTES DE SEGURIDAD (continuación) 19. El silenciador y el motor están a temperatura muy alta y pueden provocar lesiones 6. Nunca guarde la cortadora de césped o el recipiente de combustible en un espacio cerrado donde haya una llama abierta, chispas o luz piloto, como por ejemplo de graves por quemaduras. - Page 26 ESPAñOL MEDIDAS IMPORTANTES DE SEGURIDAD (continuación) 14. Los componentes del colector de césped y la cubierta de descarga están sujetos a SÍMBOLOS DE SEGURIDAD desgaste y daños que podrían dejar expuestas piezas que se mueven o permitir que se Esta página representa y describe la seguridad los símbolos que pueden parecer en este arrojen objetos.
- Page 27 ESPAñOL...
-
Page 28: Montaje Y Configuración
ESPAñOL MONTAJE Y CONFIGURACIÓN CONTENIDO DEL CAJÓN • Una cortadora de césped • Un tubo de drenaje de aceite • Un acoplador de manguera para lavado de plataforma • Un Manual del operador de la cortadora de césped • Un Manual del operador del motor Despliegue de la manija CONFIGURACIÓN DE LA CORTADORA DE CÉSPED 1. -
Page 29: Controles Y Características
ESPAñOL MONTAJE Y CONFIGURACIÓN (continuación) Colocación de la palanca de cambios 1. Extraiga el tornillo y la tuerca de seguridad que sujetan la palanca de cambios a la placa de la palanca de cambios. Vea Figura 5. Figura 6 4. Asegure la palanca a la placa usando los dos tornillos y las dos tuercas extraidos anteriormente. - Page 30 ESPAñOL CONTROLES Y CARACTERÍSTICAS (continuación) Los controles y características de la cortadora de césped se ilustran en Figura 7 y se Para encender el motor, inserte la llave en el interruptor de encendido y gírela en el START describen en las páginas siguientes. sentido de las agujas del reloj hacia la posición (encendido).
-
Page 31: Encendido Del Motor
ESPAñOL CONTROLES Y CARACTERÍSTICAS (continuación) Servicio LCD Minder y Cronómetro Detención del motor ¡ADVERTENCIA! Si golpea un objeto extraño, detenga el motor y saque (Modelos de Arranque Eléctrico Sólo) la llave de encendido (si está equipado). Inspeccione minuciosamente la Cuando la llave de encendido se rota fuera de la máquina para ver si está... -
Page 32: Corte De Césped
ESPAñOL FUNCIONAMIENTO (continuación) Uso de la palanca de altura de la plataforma Instalación / Extracción de la tolva de abono Para subir o bajar la plataforma de corte, mueva la palanca de altura de la plataforma hacia ¡ADVERTENCIA! Antes de instalar o extraer la clavija de abono, desenganche la izquierda y colóquela en la muesca que mejor se adapte a la aplicación deseada. -
Page 33: Calendario De Mantenimiento
ESPAñOL MANTENIMIENTO Y AJUSTES (continuación) Calendario de mantenimiento Antes de almacenar Cada uso o cada Cada temporada o cada Cada temporada o cada Cada temporada o cada Cada 10 horas 5-10 Horas 25 horas 50 horas 100 horas Limpie las cortadoras Inspeccione el nivel de aceite del motor Controle el filtro de aire... -
Page 34: Ruedas Delanteras
ESPAñOL MANTENIMIENTO Y AJUSTES (continuación) PRESIÓN DE LOS NEUMÁTICOS LUBRICACIÓN ¡ADVERTENCIA! La presión máxima de los neumáticos en cualquier ¡ADVERTENCIA! Antes de lubricar, reparar o inspeccionar, desconecte la circunstancia es de 30 psi. Se debe mantener una presión uniforme para potencia de arranque (PTO), coloque el freno de mano, apague el motor y todos los neumáticos en todo momento. - Page 35 ESPAñOL MANTENIMIENTO Y AJUSTES (continuación) Figura 13 Figura 15 3. Si las flechas en la superficie de cada polea de husillo no están perpendiculares (a un ¡ADVERTENCIA! No haga funcionar la unidad sin tener la cubierta de la ángulo de 90˚ grados) entre sí, consulte un servicio de un distribuidor autorizado para correa instalada.
-
Page 36: Cuchillas De Corte
ESPAñOL SERVICIO 12. Use la palanca de altura de la plataforma para levantar el montaje a su posición 4. Para afilar las cuchillas de corte de forma adecuada, extraiga cantidades iguales de más alta. metal de ambos extremos de las cuchillas a lo largo de los bordes cortantes, paralelo al borde de caída y a un ángulo de 25°... - Page 37 ESPAñOL SERVICIO (continuación) Batería 1. Extraiga la plataforma de corte de la cortadora como se ha indicado antes en esta sección.. ¡ADVERTENCIA! PROPOSICIÓN 65 DE CALIFORNIA: Los bornes de la batería y ¡ADVERTENCIA! Evite las lesiones por compresión. Al extraer la correa, los accesorios afines contienen plomo y compuestos de plomo, sustancias no coloque nunca los dedos en el resorte intermedio o entre la correa y químicas que según lo establecido por el Estado de California causan cáncer y...
-
Page 38: Solución De Problemas
ESPAñOL SOLUCIÓN DE PROBLEMAS Problema Causa Solución El motor no arranca 1. No se ha activado el cebador 1. Coloque el control del regulador/cebador en la posición CHOKE (cebador). 2. El depósito de combustible está vacío o el combustible se ha echado 2. - Page 39 ESPAñOL WALT ® : GARANTÍA LIMITADA WALT ® WALT ® La garantía limitada que se extiende en el presente documento es otorgada por en relación a un nuevo producto (en adelante, “Producto”) adquirido y utilizado en los Estados Unidos y/o Canadá al Comprador Inicial (como se define en este documento). La presente garantía limitada no cubre los Sistemas de control de emisiones y no constituye una Declaración de garantía del control de las emisiones federal, según lo definido por las leyes federales de los Estados Unidos.
- Page 40 ESPAñOL Cómo obtener servicios de reparación bajo la presente garantía limitada La presente garantía no cubre y D WALT® rechaza todo tipo de responsabilidad A fin de reunir los requisitos para la garantía limitada según lo establecido respecto a: en el presente documento, las reparaciones realizadas conforme a esta Pérdida de tiempo o pérdida de uso del Producto.