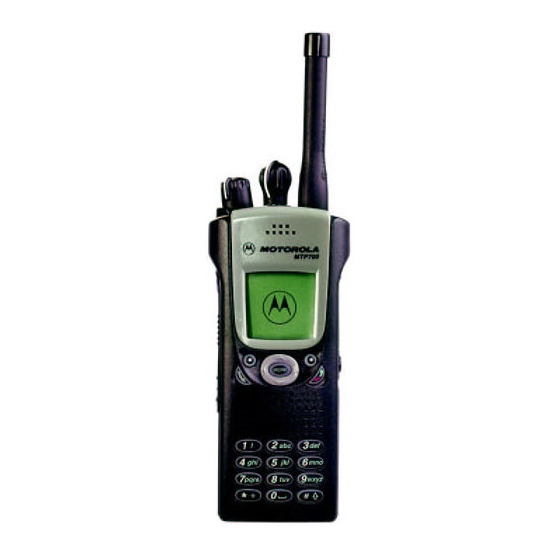
Motorola MTP700 Basic User's Manual
Tetra terminal
Hide thumbs
Also See for MTP700:
- Instruction booklet (4 pages) ,
- Detailed service manual (250 pages) ,
- Basic service manual (74 pages)
Table of Contents
Advertisement
Quick Links
Advertisement
Chapters
Table of Contents

Related Manuals for Motorola MTP700


Summary of Contents for Motorola MTP700
- Page 1 MTP700 TETRA Terminal Basic User Guide...
- Page 2 10(a) 16(a,b) 10(b,c)
-
Page 3: Table Of Contents
Powering On with Transmit Inhibit Active ....18 Unlocking the MTP700 ....... 18 Selecting TMO or DMO Operation . - Page 4 Quick Reference Guide ......27 © Motorola Inc., 2005 MOTOROLA and the stylized M Logo are registered in the U.S. Patent and Trademark Office. All other product or service names are...
-
Page 5: Safety Information
Accordingly, any copyrighted Motorola computer programs contained in the Motorola products described in this manual may not be copied or reproduced in any manner without the express written permission of Motorola. Furthermore, the purchase of Motorola... -
Page 6: Mtp700 Overview
Description LED (Indicator) Talkgroup Knob. Changes the talkgroup. On/Off-Volume Knob Used to turn the MTP700 On/Off and to adjust volume level. Earpiece. Four-Way Navigation Key. Press up, down, left or right for list scrolling while moving around the menu hierarchy or for alphanumeric text editing. - Page 7 Emergency Key (on top of the MTP700). Used to send Emergency Alarms (press and hold). Before using your MTP700 for the first time, remove the plastic lens pro- tector from the display, and charge the battery overnight to ensure battery...
-
Page 8: Audio Signal Tones
• Back to coverage • Back to full service Clear-to-send. Once • Bad key press Once • Good key press Once • MTP700 self-test fails at power up • From out-of-service to in-service In Call Call clear warning Once Call waiting tone while... - Page 9 Status message sent to Twice the dispatcher or failed. Incoming Calls Status message Four times acknowledged by the dispatcher. Your MTP700 received a Once Group Call without gateway. (setup only) High Priority Group Call Once received Emergency Alarm sent or...
- Page 10 Description Type Repeated Private Call received Until the call is answered Private Call ringing to the Until the call is caller answered Half-duplex Private PPC Every 4 seconds ring. until the call is answered or rejected. Full-duplex Private PPC Every 4 seconds ring.
-
Page 11: Key, Knob, And Button Overview
Key, Knob, and Button Overview Mode Key The MTP700 has four call modes when operating in Trunked Mode (TMO): • Group mode — to send and receive Group Calls. • Private mode — to send and receive Private Calls. • Phone mode — to send and receive Phone Calls. -
Page 12: Emergency Button
Numeric Keys The MTP700 supports the one-touch feature that allows you to select or activate commonly used features by pressing and holding a numeric key. The required time you need to press the Side or Numeric keys to activate a one-touch function is set as default to 1 second. -
Page 13: To Enter The Menu Options
3. Alternatively, key the numbers of the required option, typically 2 2 4 to reach 4 Mem Usage. To exit the Menu Options Press Back or Your MTP700 may exit if no key presses are detected for a time-out period. -
Page 14: List Of Menu Options
List of Menu Options 1 Messages 1 Send Status 2 Inbox 1 New 2 Templates 3 Send Msg 3 Predefined 1 Add ID 2 Address Book 1 Private 1 Add Phone 1 Add Ext. 2 Phone 3 PABX 2 abc Order 3 By Locat’n 4 Mem Usage 1 Select... - Page 15 List of Menu Options (Cont’d) 1 Manual 7 Backlight 2 Semi-Auto 3 Auto 4 Disable 1 On 2 Off 1 Keypad Tone 8 Tones 8 Tones 2 All Tones 1 On 9 Flip Display 2 Off 3 Talk Permit 5 Own Number 1 No Tone 1 Private Num 2 Short Tone...
-
Page 16: The Display
The Display Display Icons When you turn on your MTP700, icons appear along the top of the display to indicate the following conditions: Display Icon Description Trunked Mode Operation Signal Strength (TMO) Allows you to check signal strength. More bars indicate a stronger signal. -
Page 17: Displaying Long Numbers Or Messages
Your Inbox could not open due to an on-going activity. The icon remains to remind you of new messages in your Inbox. Low Audio Indicates that the MTP700 is in Low Audio mode. During Private Calls, the audio will sound through the earpiece. Battery Strength Shows the charge in your battery. -
Page 18: Getting Started
Motorola battery or may reduce the life of the battery. Prior to charging a terminal with a battery, turn the MTP700 Off. 1. Plug the charger end of the power cord into the AC receptacle located at the back of the charger. -
Page 19: Removing The Battery
3. Slide the top of the battery away from the terminal. Attaching the Antenna Turn the MTP700 off before installing or removing the antenna. Insert the bottom of the antenna into the screw-in base on the top of the MTP700. Turn clockwise until snug. Do not force. -
Page 20: Powering The Mtp700 On/Off
Ensure you have left the restricted area before deactivating Transmit Inhibit. Warning Press the Yes soft key to deactivate the TXI Mode. If the MTP700 was previously used in Trunked Mode (TMO), it will register to the network. If the MTP700 was previously used in Direct Mode it will remain in Direct Mode. -
Page 21: Selecting Tmo Or Dmo Operation
Selecting TMO or DMO Operation Entering TMO or DMO Enter TMO or DMO in one of the following ways: • Press 6 2 1 (TMO) if the MTP700 is in DMO. • Press 6 2 2 (DMO) if the MTP700 is in TMO. •... -
Page 22: Receiving A Tmo Group Call
At the end of a call received through the earpiece, a low pitch tone is emitted alerting you that the next incoming Group call will be received through the speaker. At this alert, you are advised to hold the MTP700 at a comfortable distance away from the speaker. -
Page 23: Making A Dmo Group Call
Release the PTT button to listen. Receiving a DMO Group Call You can receive a DMO Group Call only when your MTP700 is in DMO. Your MTP700 will display the caller’s private number or alias, and the talkgroup name. -
Page 24: Calls (Private And Phone Calls)
While Transmit Inhibit is activated, an incoming Private Call is indicated, but it is not possible to answer the call. Receiving a Private Call If the Service Provider configured the MTP700 to Automatic Mode Switch: 1. The MTP700 automatically switches to Private Mode. The display shows the caller’s identity. -
Page 25: Phone And Pabx Calls
If the Service Provider configured the MTP700 to Manual Mode Switch: 1. If the MTP700 is NOT in Private Mode, a Prvt Call message and the caller ID is displayed momentarily. The display returns to the mode it was in before the incoming call arrived. -
Page 26: Emergency Mode
Emergency mode. This is sent: • automatically, upon entering Emergency mode • if you press the Emergency key again while the MTP700 is in Emergency mode. After sending the alarm, the screen will show one of the following delivery reports: •... -
Page 27: Hot Microphone Feature
Some systems do not support the Emergency Alarm feature when the user is in a “Local Area Service” area. Pressing the Emergency button, even if Transmit Inhibit is activated, causes the MTP700 to radiate immediately. The MTP700 must NOT be within the Warning RF sensitive area when entering Emergency mode... -
Page 29: Quick Reference Guide
MTP700 Making a Phone/PABX/Private Full- Making a Group or Direct Mode Call Duplex Call Quick Reference Guide Press Select Talkgroup/ Press Dial No. Phone Mode Group Mode Range or select from PABX Mode Or, press Direct address book Private Mode... - Page 30 To answer the call, enter the incoming Sending a User-Defined Message Handling Old Messages call mode, and Scroll Through Press Optns Select and Select Templates and Scroll Select 2 • press for a Phone or PABX call, or Optns Read/Erase/Erase All message Send Templates...
- Page 31 Èíôîðìàöèÿ ïî òåõíèêå áåçîïàñíîñòè ..Îáçîð ðàäèîñòàíöèè MTP700 ....Ñðåäñòâà óïðàâëåíèÿ è èíäèêàòîðû ....
-
Page 32: Motorola Inc., 2005
Îñíîâíûå ñâåäåíèÿ ......27 © Motorola Inc., 2005 Íàçâàíèå Motorola è ëîãîòèï ñ èçîáðàæåíèåì ñòèëèçîâàííîé ëèòåðû «M» çàðåãèñòðèðîâàíû... -
Page 33: Èíôîðìàöèÿ Ïî Òåõíèêå Áåçîïàñíîñòè
âîñïðîèçâîäèòü, ïîäâåðãàòü èíæåíåðíîìó àíàëèçó äëÿ ñîçäàíèÿ àíàëîãà èëè äèñòðèáóòèðîâàòü êàêèì áû òî íè áûëî ñïîñîáîì áåç ÿâíîãî ïèñüìåííîãî ðàçðåøåíèÿ ôèðìû Motorola. Êðîìå òîãî, ïîêóïêà èçäåëèé Ìîòîðîëà íå äàåò íèêàêèõ ÿâíûõ èëè ïîäðàçóìåâàåìûõ ïðàâ èëè ïðàâ íà ëèöåíçèè, íàïðèìåð, íå ïîäðàçóìåâàåò îòêàçà... -
Page 34: Îáçîð Ðàäèîñòàíöèè Mtp700
Ñâåòîäèîäíûé èíäèêàòîð Ïîâîðîòíàÿ ðó÷êà ðàçãîâîðíîé ãðóïïû. Èñïîëüçóåòñÿ äëÿ èçìåíåíèÿ ðàçãîâîðíîé ãðóïïû. Ïîâîðîòíàÿ ðó÷êà âêëþ÷åíèÿ/âûêëþ÷åíèÿ. Èñïîëüçóåòñÿ äëÿ âêëþ÷åíèÿ/âûêëþ÷åíèÿ ðàäèîñòàíöèè MTP700 è äëÿ íàñòðîéêè óðîâíÿ ãðîìêîñòè. Íàóøíèê. Íàâèãàöèîííàÿ êëàâèøà íà ÷åòûðå íàïðàâëåíèÿ. Íàæèìàéòå íà âåðõíþþ, íèæíþþ, ëåâóþ èëè ïðàâóþ ÷àñòü äëÿ ïðîêðóòêè ñïèñêà ïðè ïåðåìåùåíèè ïî... - Page 35 Ýêñòðåííàÿ êíîïêà (íàõîäèòñÿ â âåðõíåé ÷àñòè ðàäèîñòàíöèè MTP700). Èñïîëüçóåòñÿ äëÿ îòïðàâëåíèÿ ýêñòðåííûõ òðåâîæíûõ ñîîáùåíèé (íàæìèòå è óäåðæèâàéòå åå). Ïåðåä òåì êàê ïðèñòóïèòü ê ïåðâîìó èñïîëüçîâàíèþ ðàäèîñòàíöèè MTP700, ñíèìèòå ñ ýêðàíà ïëàñòèêîâóþ çàùèòó è ïîñòàâüòå àêêóìóëÿòîð íà çàðÿäêó íà íî÷ü, ÷òîáû ïîëíîñòüþ åãî çàðÿäèòü.
-
Page 36: Çâóêîâûå Òîíàëüíûå Ñèãíàëû
Ñáðîñ ïîñûëêè Îäèí ðàç • Íàæàòà íåïðàâèëüíàÿ Îäèí ðàç êíîïêà • Íàæàòà ïðàâèëüíàÿ Îäèí ðàç êíîïêà • Ñáîé ñàìîòåñòèðîâàíèÿ ðàäèîñòàíöèè MTP700 ïðè âêëþ÷åíèè ïèòàíèÿ • Ïðè ïåðåõîäå èç íåðàáî÷åãî ðåæèìà ê ðàáî÷åìó ðåæèìó Ïðè âûçîâå Ïðåäóïðåæäåíèå î ñáðîñå Îäèí ðàç âûçîâà... - Page 37 Äâà ðàçà îòïðàâëåíî äèñïåò÷åðó èëè ïðîèçîøåë ñáîé ïåðåäà÷è ñòàòóñíîãî ñîîáùåíèÿ. Âõîäÿùèå âûçîâû Ïðèåì ñòàòóñíîãî ×åòûðå ðàçà ñîîáùåíèÿ ïîäòâåðæäåí äèñïåò÷åðîì Ðàäèîñòàíöèÿ MTP700 Îäèí ðàç ïðèíÿëà ãðóïïîâîé âûçîâ áåç øëþçà (òîëüêî íàñòðîéêà) Ïðèíÿò ãðóïïîâîé âûçîâ ñ Îäèí ðàç âûñîêèì ïðèîðèòåòîì Ïîñëàíî èëè ïðèíÿòî...
- Page 38 Îïèñàíèå Òèï Ïîâòîðû Ñáîé ýêñòðåííîãî ×åòûðå ðàçà òðåâîæíîãî ñîîáùåíèÿ Ïðèíÿò ýêñòðåííûé âûçîâ Îäèí ðàç Òåëåôîííûé çâîíîê (ïðèåì) Äî òåõ ïîð, ïîêà âû íå Äóïëåêñíûé îòâåòèòå èëè ïîêà èíäèâèäóàëüíûé âûçîâ âûçîâ íå áóäåò îòêëîíåí Ïðèíÿò èíäèâèäóàëüíûé Äî òåõ ïîð, ïîêà âûçîâ âûçîâ...
-
Page 39: Îáçîð Êëàâèø, Ðó÷Åê È Êíîïîê
• Ðåæèì ÀÒÑ — îòïðàâêà è ïðèåì ëîêàëüíûõ (îôèñíûõ) äîáàâî÷íûõ âûçîâîâ. Ãðóïïîâîé ðåæèì – óñòàíîâëåííûé ïî óìîë÷àíèþ ðåæèì, ê êîòîðîìó âîçâðàùàåòñÿ âàøà ðàäèîñòàíöèÿ MTP700, åñëè â òå÷åíèå íåñêîëüêèõ ñåêóíä îíà íå çàäåéñòâóåòñÿ. Äëÿ ïåðåêëþ÷åíèÿ ãðóïïîâîãî, èíäèâèäóàëüíîãî, òåëåôîííîãî ðåæèìà è ðåæèìà ÀÒÑ íàæèìàéòå êëàâèøó... -
Page 40: Êíîïêà Ýêñòðåííîãî Âûçîâà
óìîë÷àíèþ íà 1 ñåêóíäó. Îäíàêî ýòî âðåìÿ ìîæåò áûòü èçìåíåíî âàøèì ñåðâèñ-ïðîâàéäåðîì. Ïîæàëóéñòà, çà èíôîðìàöèåé î ôóíêöèÿõ êàæäîé áîêîâîé è öèôðîâîé êëàâèøè îáðàùàéòåñü ê ñâîåìó ñåðâèñ-ïðîâàéäåðó. Ñâåòîäèîäíûé èíäèêàòîð ñòàòóñà Ñâåòîäèîäíûé èíäèêàòîð ïîêàçûâàåò ñîñòîÿíèå ðàäèîñòàíöèè MTP700. Èíäèêàòîð Ñòàòóñ Ïîñòîÿííî Èñïîëüçóåòñÿ ãîðÿùèé çåëåíûé... -
Page 41: Âõîä Â Ïóíêò Ìåíþ
Ââåäèòå ÷èñëà íóæíîãî ïóíêòà, îáû÷íî 2 2 4, ÷òîáû âîéòè â ïóíêò 4 Ðåñóðñû ïàìÿòè. Âûõîä èç ïóíêòà ìåíþ Íàæìèòå êëàâèøó Íàçàä èëè Åñëè â òå÷åíèå çàäàííîãî ïåðèîäà íå áóäåò íàæàòî íè îäíîé êëàâèøè, ðàäèîñòàíöèÿ MTP700 àâòîìàòè÷åñêè âûéäåò èç ïóíêòà ìåíþ. -
Page 42: Ñïèñîê Ïóíêòîâ Ìåíþ
Ñïèñîê ïóíêòîâ ìåíþ 1 Ñîîáùåíèÿ 1 Îòïðàâêà ñòàòóñà 2 Âõîäÿùèå 1 Íîâîå ñîîáùåíèå 3 Èñõîäÿùèå 2 Øàáëîíû 3 Ïðåäóñòàíîâëåííîå 1 Äîáàâëåíèå èäåíòèôèêàòîðà 2 Àäðåñíàÿ êíèãà 1 Èíäèâèäóàëüíûé 1 Äîáàâëåíèå òåëåôîíà 1 Äîáàâëåíèå äîïîëíèòåëüíîãî íîìåðà 2 Òåëåôîí 3 ÓÀÒÑ 2 Àëôàâèòíûé ïîðÿäîê 3 Ïî... - Page 43 Ñïèñîê ïóíêòîâ ìåíþ (ïðîäîëæåíèå) 1 Ðó÷íîé 7 Ïîäñâåòêà 2 Ïîëóàâòîìàòè÷åñêèé 3 Àâòîìàòè÷åñêèé 4 Îòêëþ÷åíèå 1 Âêë. 2 Âûêë. 1 Òîí êëàâèàòóðû 8 Òîíû 2 Âñå òîíû 1 Âêë. 2 Âûêë. 9 Ïîâåðíóòü äèñïëåé 3 Ðàçðåøåíèå 5 Ñîáñòâåííûé 1 Áåç ñèãíàëîâ íà...
-
Page 44: Äèñïëåé
Äèñïëåé Ïèêòîãðàììû äèñïëåÿ Êîãäà âû âêëþ÷àåòå ðàäèîñòàíöèþ MTP700, ââåðõó äèñïëåÿ ïîÿâëÿþòñÿ ïèêòîãðàììû, îáîçíà÷àþùèå ñëåäóþùèå ôóíêöèè: Ïèêòîãðàììà Îïèñàíèå äèñïëåÿ Ðàáîòà â òðàíêèíãîâîì ðåæèìå Óðîâåíü ñèãíàëà (TMO) Ïîçâîëÿåò ïðîâåðèòü óðîâåíü ñèãíàëà. ×åì áîëüøå ñåêöèé, òåì ñèëüíåå ñèãíàë Ïðèîðèòåòíîå ñêàíèðîâàíèå Óêàçûâàåò íà òî, ÷òî ïðèîðèòåòíîå ñêàíèðîâàíèå... -
Page 45: Îòîáðàæåíèå Äëèííûõ Íîìåðîâ Èëè Ñîîáùåíèé
Âû íå îòêðûâàëè ñâîé ïî÷òîâûé ÿùèê èç-çà âûïîëíåíèÿ òåêóùåé ðàáîòû. Ïèêòîãðàììà íàïîìèíàåò âàì î òîì, ÷òî â âàøåì ïî÷òîâîì ÿùèêå åñòü íîâûå ñîîáùåíèÿ. Íèçêèé àóäèîñèãíàë Óêàçûâàåò íà òî, ÷òî ðàäèîñòàíöèÿ MTP700 íàõîäèòñÿ â ðåæèìå íèçêîãî àóäèîñèãíàëà. Âî âðåìÿ ÷àñòíûõ âûçîâîâ àóäèîñèãíàë èäåò íà íàóøíèê. Èíäèêàòîð çàðÿäà àêêóìóëÿòîðà... -
Page 46: Ïðåäâàðèòåëüíîå Îçíàêîìëåíèå
Çàðÿäêà àêêóìóëÿòîðà Çàðÿäíûå óñòðîéñòâà, îäîáðåííûå êîìïàíèåé Motorola, îáåñïå÷èâàþò îïòèìàëüíóþ ïðîèçâîäèòåëüíîñòü. Äðóãèå çàðÿäíûå óñòðîéñòâà ìîãóò íå îáåñïå÷èòü ïîëíóþ çàðÿäêó àêêóìóëÿòîðà Motorola èëè ìîãóò ñíèçèòü ñðîê ñëóæáû àêêóìóëÿòîðà. Ïåðåä çàðÿäêîé òåðìèíàëà ñ àêêóìóëÿòîðîì âûêëþ÷èòå ðàäèîñòàíöèþ MTP700. Âñòàâüòå øòåêåð ñåòåâîãî øíóðà â ãíåçäî ïåðåìåííîãî òîêà, ðàñïîëîæåííîå... -
Page 47: Óäàëåíèå Àêêóìóëÿòîðà
àêêóìóëÿòîðà. Âûíüòå âåðõíþþ ÷àñòü àêêóìóëÿòîðà èç òåðìèíàëà. Óñòàíîâêà àíòåííû Âûêëþ÷èòå ðàäèîñòàíöèþ MTP700 ïåðåä óñòàíîâêîé èëè èçâëå÷åíèåì àíòåííû. Âñòàâüòå íèæíèé êîíåö àíòåííû â ðåçüáîâîå îòâåðñòèå îñíîâàíèÿ, ðàñïîëîæåííîå íàâåðõó ðàäèîñòàíöèè MTP700. Ïîâîðà÷èâàéòå ïî ÷àñîâîé ñòðåëêå äî äîñòàòî÷íî ïëîòíîé çàòÿæêè. Íå äåëàéòå ýòî... -
Page 48: Âêëþ÷Åíèå/Âûêëþ÷Åíèå Ïèòàíèÿ Mtp700
Âêëþ÷åíèå/âûêëþ÷åíèå ðàäèîñòàíöèè MTP700 Äëÿ âêëþ÷åíèÿ ïèòàíèÿ ïîâåðíèòå ðó÷êó âêëþ÷åíèÿ/ âûêëþ÷åíèÿ ãðîìêîñòè ïî ÷àñîâîé ñòðåëêå. Ðàäèîñòàíöèÿ MTP700 âûïîëíèò ñàìîïðîâåðêó è ðåãèñòðàöèþ â ñåòè. Ïîñëå óñïåøíîé ðåãèñòðàöèè ðàäèîñòàíöèÿ MTP700 áóäåò íàõîäèòüñÿ â ðàáî÷åì ðåæèìå. Äëÿ âûêëþ÷åíèÿ ïèòàíèÿ ïîâîðà÷èâàéòå ðó÷êó âêëþ÷åíèÿ/ âûêëþ÷åíèÿ ãðîìêîñòè ïðîòèâ ÷àñîâîé ñòðåëêè äî òåõ ïîð, ïîêà íå... -
Page 49: Âûáîð Ðåæèìà Tmo (Òðàíêèíãîâûé) Èëè
Âîéòè â ðåæèì ÒÌÎ èëè DMO ìîæíî îäíèì èç ñëåäóþùèõ ñïîñîáîâ: • Íàæìèòå êëàâèøó ìåíþ 6 2 1 (TMO), åñëè òåðìèíàë MTP700 íàõîäèòñÿ â ðåæèìå DMO. • Íàæìèòå êëàâèøó ìåíþ 6 2 2 (DMO), åñëè òåðìèíàë MTP700 íàõîäèòñÿ â ðåæèìå TMO. -
Page 50: Ïðèåì Ãðóïïîâîãî Âûçîâà Â Ðåæèìå Tmo
êîòîðûé îïîâåñòèò âàñ î òîì, ÷òî ñëåäóþùèé âõîäÿùèé ãðóïïîâîé âûçîâ áóäåò ïîëó÷åí ÷åðåç äèíàìèê.  ýòîì îïîâåùåíèè âàñ ïðîèíôîðìèðóþò î òîì, ÷òîáû âû äåðæàëè ðàäèîñòàíöèþ MTP700 íà äîñòàòî÷íîì ðàññòîÿíèè îò äèíàìèêà. Êîãäà âû ïîëó÷èòå ãðóïïîâîé âûçîâ, âû óñëûøèòå çâóê «íîâûé... -
Page 51: Âûïîëíåíèå Ãðóïïîâîãî Âûçîâà Â Ðåæèìå Dmo
Âûïîëíåíèå ãðóïïîâûõ âûçîâîâ DMO Âîéäèòå â ïðÿìîé ðåæèì ïóòåì âûáîðà ïóíêòà ïðÿìîé ðåæèì ÷åðåç ìåíþ. Óáåäèòåñü â ïðàâèëüíîñòè âûáîðà ãðóïïû è ïàïêè. Íàæìèòå è óäåðæèâàéòå òàíãåíòó ÐÒÒ. Äîæäàâøèñü òîíàëüíîãî ñèãíàëà ðàçðåøåíèÿ ðàçãîâîðà, ãîâîðèòå â ìèêðîôîí. Äëÿ ïðîñëóøèâàíèÿ îòïóñòèòå òàíãåíòó ÐÒÒ. Ïðèåì... -
Page 52: Âûçîâû (Èíäèâèäóàëüíûå È Òåëåôîííûå Âûçîâû)
Ïðè àêòèâíîé áëîêèðîâêå ïåðåäà÷è èíäèâèäóàëüíûé âûçîâ îòîáðàæàåòñÿ, îäíàêî îòâåòèòü íà íåãî íåëüçÿ. Èíäèâèäóàëüíîãî Ïðèåì âûçîâà Åñëè ñåðâèñ-ïðîâàéäåð íàñòðîèë ðàäèîñòàíöèþ MTP700 íà àâòîìàòè÷åñêîå ïåðåêëþ÷åíèå ðåæèìîâ: Ðàäèîñòàíöèÿ MTP700 àâòîìàòè÷åñêè ïåðåêëþ÷èòñÿ íà èíäèâèäóàëüíûé âûçîâ. Íà äèñïëåå ïîÿâèòñÿ èäåíòèôèêàöèÿ âûçûâàþùåãî àáîíåíòà. Äëÿ îòâåòà íà ïîñòóïàþùèé âûçîâ íàæìèòå òàíãåíòó ÐÒÒ. -
Page 53: Òåëåôîííûå Âûçîâû È Âûçîâû Ó÷Ðåæäåí÷Åñêèõ Àòñ
Åñëè ñåðâèñ-ïðîâàéäåð íàñòðîèë ðàäèîñòàíöèþ MTP700 íà ðó÷íîå ïåðåêëþ÷åíèå ðåæèìîâ: Åñëè ðàäèîñòàíöèÿ MTP700 ÍÅ íàõîäèòñÿ â ðåæèìå èíäèâèäóàëüíîãî âûçîâà, òî ìãíîâåííî îòîáðàæàåòñÿ ñîîáùåíèå Èíäèâèäóàëüíûé âûçîâ è èäåíòèôèêàòîð âûçûâàþùåãî àáîíåíòà. Äèñïëåé âîçâðàùàåòñÿ ê ðåæèìó, â êîòîðîì îí áûë äî îòâåòà íà âõîäÿùèé âûçîâ. -
Page 54: Ýêñòðåííûé Ðåæèì
Ýêñòðåííûé ðåæèì Âû ìîæåòå âûïîëíÿòü ýêñòðåííûå ãðóïïîâûå âûçîâû â òðàíêèíãîâîì ðåæèìå (TMO) è â ðåæèìå ïðÿìîé ñâÿçè (DMO). Åñëè âàø òåðìèíàë íàñòðîåí íà ðàáîòó ÷åðåç øëþç, òî ýêñòðåííûå âûçîâû áóäóò âûïîëíÿòüñÿ ÷åðåç øëþç. Ìîæíî âûïîëíÿòü ýêñòðåííûé ãðóïïîâîé âûçîâ è ïðèíèìàòü åãî èç... -
Page 55: Ôóíêöèÿ Ãîðÿ÷Èé Ìèêðîôîí
Íàæàòèå ýêñòðåííîé êíîïêè äàæå ïðè àêòèâíîé ôóíêöèè áëîêèðîâêà ïåðåäà÷è ïðèâîäèò ê íåìåäëåííîìó âêëþ÷åíèþ ïåðåäà÷è ïðåäóïðåæäåíèå ðàäèîñòàíöèè MTP700. Ïðè âêëþ÷åíèè ýêñòðåííîãî ðåæèìà íàõîæäåíèå òåðìèíàëà MTP700 â çîíå, ÷óâñòâèòåëüíîé ê Ð×- èçëó÷åíèþ, ÍÅ ÄÎÏÓÑÊÀÅÒÑß. Ôóíêöèÿ ãîðÿ÷èé ìèêðîôîí Åñëè ñåðâèñ-ïðîâàéäåð çàïðîãðàììèðîâàë â òåðìèíàë ÌÒÐ700 ôóíêöèþ... -
Page 57: Îñíîâíûå Ñâåäåíèÿ
MTP700 Âûïîëíåíèå òåëåôîííîãî âûçîâà/ Âûïîëíåíèå ãðóïïîâîãî èëè ÀÒÑ-âûçîâà/èíäèâèäóàëüíîãî ïðÿìîãî âûçîâà Îñíîâíûå ñâåäåíèÿ äóïëåêñíîãî âûçîâà Íàæìèòå êëàâèøó Âûáåðèòå Ðåæèì Âûáåðèòå òåëåôîííûé âûçîâ, ðàçãîâîðíóþ Íàæìèòå Íàáåðèòå ¹ èëè äèàïàçîí Ðåæèì ÀÒÑ-âûçîâ ãðóïïó/ Ãðóïïîâîé ðåæèì èëè Ðåæèì âûáåðèòå íîìåð èíäèâèäóàëüíûé èç àäðåñíîé èëè íàæìèòå êëàâèøó ïðÿìîé... - Page 58 Ïîñûëêà ñîîáùåíèÿ, Îáðàáîòêà ñòàðûõ ñîîáùåíèé • Íàæìèòå äëÿ òåëåôîííîãî âûçîâà èëè ñôîðìèðîâàííîãî ïîëüçîâàòåëåì Íàæìèòå ðàçäåëû ..ÀÒÑ âûçîâà èëè ..1 2 Íàæìèòå ..Âûáðàòü Ïðî÷åñòü/Ñòåðåòü/ • Íàæìèòå òàíãåíòó PTT äëÿ âñåõ äðóãèõ âûçîâîâ. Ïðîêðóòêà ðàçäåëû 1 3 Ïðîñìîòðèòå îïöèè Ñòåðåòü âñå Íàæìèòå...
- Page 60 6866539D36-A @6866539D36@ www.motorola.com/tetra...