Advertisement
Quick Links
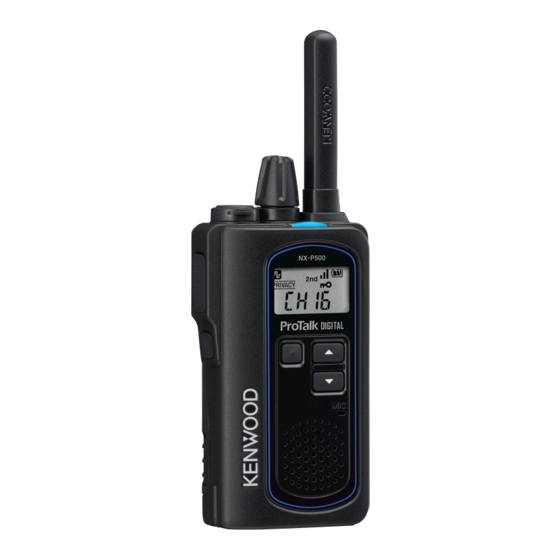
NX-P500
UHF DIGITAL TRANSCEIVER
USER GUIDE
B5A-2554-00 (K,P)
THANK YOU
We are grateful you have chosen KENWOOD for your Digital Transceiver
applications.
This User guide covers only the basic
operations of your radio. For a detailed
instruction manual, refer to the following
URL or QR code.
http://manual.kenwood.com/files/B5K-0516-00.pdf
Firmware Copyrights
The title to and ownership of copyrights for fi rmware embedded in
KENWOOD product memories are reserved for JVC KENWOOD
Corporation.
FEATURES
•
Lightweight compact design using a lithium-ion battery pack, with a
sturdy, polycarbonate body.
•
LED with 7-selectable colors enables transceiver identifi cation at start-up.
•
Digital Encryption / Analog Scrambling masks voice messages for privacy.
•
Battery saver function improves battery life.
•
Button Lock / Super Lock prevent accidental changes to transceiver settings.
•
Equipped with Mixed Mode allowing for simple migration from analog to
digital communications.
•
Audio accessory connector conforms to IP54/55/67.
COMMUNICATION DISTANCE
Open locations (no obstructions)
Up to 5.6 miles (9 km)
Residential areas (near buildings)
Up to 0.6 miles (1 km)
Note:
◆ The listed ranges are based on fi eld testing and may vary with your
operating conditions.
PRECAUTIONS
Observe the following precautions to prevent fi re, personal injury, and trans-
ceiver damage.
• Do not charge the transceiver and battery pack when they are wet.
• Ensure that there are no metallic items located between the transceiver and the
battery pack.
• Do not use options not specifi ed by KENWOOD.
• If the die-cast chassis or other transceiver part is damaged, do not touch the
damaged parts.
• If a headset or headphone is connected to the transceiver, reduce the transceiver
volume. Pay attention to the volume level when turning the squelch off.
• Do not place the microphone cable around your neck while near machinery that
may catch the cable.
• Do not place the transceiver on unstable surfaces.
• Ensure that the end of the antenna does not touch your eyes.
• When the transceiver is used for transmission for many hours, the radiator and chassis
will become hot. Do not touch these locations when replacing the battery pack.
• Always switch the transceiver power off before installing optional accessories.
• The charger is the device that disconnects the unit from the AC mains line. The
AC plug should be readily accessible.
• To dispose of batteries, be sure to comply with the laws and regulations in your
country or region.
WARNING
Turn the transceiver power off before entering the following
locations:
• Near explosives or blasting sites.
• In aircraft. (Any use of the transceiver must follow the instructions and
regulations provided by the airline crew.)
• Where restrictions or warnings are posted regarding the use of radio devices,
including but not limited to medical facilities.
• Near persons wearing pacemakers.
• In explosive atmospheres (infl ammable gas, dust particles, metallic powders,
grain powders, etc.).
• While pumping fuel or while parked at gasoline service stations.
CAUTION
• Do not disassemble or modify the transceiver for any reason.
• Do not place the transceiver on or near airbag equipment while the vehicle is
running. When the airbag infl ates, the transceiver may be ejected and strike the
driver or passengers.
• Do not transmit while touching the antenna terminal or if any metallic parts are
exposed from the antenna covering. Transmitting at such a time may result in a
high-frequency burn.
• If an abnormal odor or smoke is detected coming from the transceiver, switch
the transceiver power off immediately, remove the battery pack from the
transceiver, and contact your KENWOOD dealer.
• Use of the transceiver while you are driving may be against traffi c laws. Please
check and observe the vehicle regulations in your area.
• Do not expose the transceiver to extremely hot or cold conditions.
• Do not carry the battery pack (or battery case) with metal objects, as they may
short the battery terminals.
• Danger of explosion if the battery is incorrectly replaced; replace only with the same type.
INFORMATION CONCERNING THE BATTERY PACK
The battery pack includes fl ammable objects such as organic solvent.
Mishandling may cause the battery to rupture producing fl ames or extreme
heat, deteriorate, or cause other forms of damage to the battery. Please
observe the following prohibitive matters.
DANGER
• Do not disassemble or reconstruct battery.
• Do not short-circuit the battery.
• Do not incinerate or apply heat to the battery.
• Do not leave the battery near fi res, stoves, or other heat generators (areas
reaching over 80°C/ 176°F).
• Do not immerse the battery in water or get it wet by other means.
• Do not charge the battery near fi res or under direct sunlight.
• Use only the specifi ed charger and observe charging requirements.
• Do not pierce the battery with any object, strike it with an instrument, or
step on it.
• Do not jar or throw the battery.
• Do not use the battery pack if it is damaged in any way.
• Do not solder directly onto the battery.
• Do not reverse the battery polarity (and terminals).
• Do not reverse-charge or reverse-connect the battery.
• Do not touch a ruptured and leaking battery.
If the electrolyte liquid from the battery gets into your eyes, wash your eyes
out with fresh water as soon as possible, without rubbing your eyes. Go to the
hospital immediately. If left untreated, it may cause eye-problems.
WARNING
• Do not charge the battery for longer than the specifi ed time.
• Do not place the battery pack into a microwave or high pressure container.
• Keep ruptured and leaking battery packs away from fi re.
• Do not use an abnormal battery.
• Do not change or charge the battery in hazardous locations.
UNPACKING AND CHECKING EQUIPMENT
Carefully unpack the transceiver. We recommend that you identify the items
listed in the following list before discarding the packing material. If any items
are missing or have been damaged during shipment, fi le a claim with the
carrier immediately.
When not using an optional speaker/ microphone or headset, to keep the
transceiver water resistant, you must cover the speaker/ microphone jack
with the cap.
SUPPLIED ACCESSORIES
•
Charger Pocket......................................................................................1
•
AC adapter ............................................................................................1
•
Li-ion Battery pack ................................................................................1
•
Beltclip Holster ......................................................................................1
•
Warranty card ........................................................................................1
•
User guide .............................................................................................1
ORIENTATION
a
Antenna
h
b
f
Display
g
e
c
d
Microphone
Speaker
a Power switch/ Volume control
Turn clockwise to switch ON the transceiver. To switch OFF the
transceiver, turn counterclockwise until a click sounds. Rotate to adjust
the volume level.
b LED indicator
Indicates the transceiver status.
c
(UP) button
Press to change the operating channel, to select a menu in Setting
Mode, and to perform other functions.
d
(DOWN) button
Press to change the operating channel, to select a menu in Setting
Mode, and to perform other functions.
e MENU button
Select the various functions. Press and hold while switching the power
ON to enter Setting Mode and to perform other functions.
f PTT (Push to Talk) switch
Press and hold, then speak into the microphone to transmit.
g SIDE button
Press before making a call to alert the other party members, or press to
select a unit ID to make a call and to perform other functions.
h SP/MIC jack
Insert the speaker/ microphone or headset plug into this jack.
INSTALLING THE BATTERY PACK
CAUTION
• Do not short the battery terminals or dispose of the battery by fi re.
• Never attempt to remove the casing from the battery pack.
1 Insert the battery pack into the battery
battery cover
cover.
•
Pay attention to the position of notch
of the battery pack.
battery pack
2 Align the battery cover with the groove on
the back of the transceiver.
a
b
3 Slide the Lock lever (both side) to lock it.
•
Slide the lock lever to the position
where the red seal will not be visible.
(There will be feedback in the form of
a click.)
lock Lever
BASIC OPERATION
Switch the Power ON
Switch the transceiver power ON by turning the Power
switch/ Volume control clockwise.
•
A confi rmation tone sounds, the LCD lights up
momentarily, then the current channel number is
displayed.
Channel number
To switch the transceiver power OFF, turn the Power switch/ Volume control
fully counterclockwise, until a click sounds.
Adjust the Volume
Set your desired volume level by rotating the Power
switch/ Volume control.
•
Clockwise increases the volume and counterclockwise
decreases the volume.
Note:
◆ To adjust the volume using background noise as a
reference, use the Squelch off Function.
Select a Channel
Select a channel by pressing the
or
button.
•
A confi rmation tone sounds each time you press the
or
button.
Make a Call
1 To make a call, press and hold the PTT switch,
then speak around the microphone area using
your normal speaking voice.
•
Hold the microphone approximately 1.5
inches (3 to 4 cm) from your lips.
2 Release the PTT switch to receive.
Advertisement

Related Manuals for Kenwood ProTalk NX-P500


Summary of Contents for Kenwood ProTalk NX-P500
- Page 1 THANK YOU high-frequency burn. Microphone We are grateful you have chosen KENWOOD for your Digital Transceiver • If an abnormal odor or smoke is detected coming from the transceiver, switch Adjust the Volume the transceiver power off immediately, remove the battery pack from the applications.
- Page 2 Forms website at http://www.fcc.gov/formpage.html place the radio in a KENWOOD recommended clip or carrying case meant for this product. The use of other than recommended or approved body- Before fi lling out your Form 601 application Technical Data section, you must worn accessories may result in RF exposure levels which exceed the FCC’s...