Table of Contents
Advertisement
Advertisement
Table of Contents

Related Manuals for Kenwood NX-P500


Summary of Contents for Kenwood NX-P500
- Page 1 NX-P500 UHF DIGITAL TRANSCEIVER USER MANUAL B5A-2558-00/00 (K)
-
Page 2: Table Of Contents
CONTENTS PREPARATION ........................5 INSTALLING/ REMOVING THE BATTERY PACK ................5 INSTALLING THE BATTERY PACK ....................5 REMOVING THE BATTERY PACK ....................5 CHARGING THE BATTERY PACK ....................6 INSTALLING / REMOVING THE BELT CLIP HOLSTER ..............8 INSTALLING THE OPTIONAL SPEAKER/ MICROPHONE (OR HEADSET) .........9 ORIENTATION ........................ - Page 3 SCAN ........................... 34 SCAN BUTTON SETUP .......................34 SCAN OPERATION ........................34 REVERT CHANNEL ........................35 LOCK FUNCTION ....................... 36 BUTTON LOCK ...........................36 SUPER LOCK ..........................36 SETTING MODE ........................37 CHANNEL FREQUENCY SETUP ....................39 PROFILE NUMBER ........................40 INDIVIDUAL CALL ALERT TONE ....................40 GROUP CALL ALERT TONE ......................41 INDIVIDUAL CALL ALERT LED COLOR ..................41 GROUP CALL ALERT LED COLOR ....................42 INCOMING CALL NOTIFICATION ....................43...
- Page 4 VOX SETUP ..........................59 VOX GAIN LEVEL .........................59 VOX DELAY TIME .........................60 TRANSMIT INHIBIT WHILE RECEIVING ..................60 VOX PROCEED TONE .........................61 EARPHONE MODE ........................62 SELECTABLE POWER ON LED ....................63 SELECTABLE POWER ON TONE ....................64 BACKGROUND OPERATIONS ................... 65 BATTERY LEVEL INDICATOR .....................65 RESETTING THE TRANSCEIVER ..................
-
Page 5: Preparation
PREPARATION Shows how to use supplied accessories of this transceiver. For options not supplied, sold separately, refer to the list {p.66}. INSTALLING/ REMOVING THE BATTERY PACK The battery pack is not charged at the factory; charge it before use. CAUTION ◆... -
Page 6: Charging The Battery Pack
CHARGING THE BATTERY PACK The battery pack is not charged at the factory; charge it before use. Average battery pack life: Transmit Power HIGH Transmit Power LOW Battery Saver on: 16.5 hours Battery Saver on: 15.5 hours Battery Saver off: 15 hours Battery Saver off: 14 hours •... - Page 7 ◆ Do not use the charger if it has a damaged AC adapter or adapter cable, or if the charger has been damaged in any way. Contact your KENWOOD dealer to replace or repair the damaged part. When charging is completed, the indicator flashing green. Remove the battery pack or the transceiver from the charging slot of the charger.
-
Page 8: Installing / Removing The Belt Clip Holster
INSTALLING / REMOVING THE BELT CLIP HOLSTER Installing the transceiver on the belt clip holster. • Insert the transceiver until sound is heard "click". Push the upper part of the holster to the rear side, remove the lock and pull out the transceiver. -
Page 9: Installing The Optional Speaker/ Microphone (Or Headset)
INSTALLING THE OPTIONAL SPEAKER/ MICROPHONE (OR HEADSET) Turn the transceiver power OFF. • For transceivers that are able to adjust the volume level, adjust the volume to the minimum setting before turning the transceiver power OFF. Insert the plug into the SP/MIC jack on the transceiver, then fix it with a nut. •... -
Page 10: Orientation
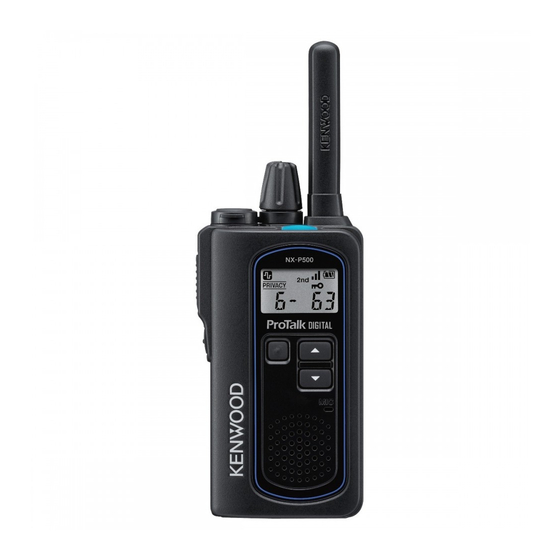
ORIENTATION BUTTONS AND CONTROLS Antenna (Not detachable) Loop hole for strap Display Microphone Speaker a Power switch/ Volume control Turn clockwise to switch ON the transceiver. To switch OFF the transceiver, turn counterclockwise until a click sounds. Rotate to adjust the volume level. b LED indicator For the LED indicator status, refer to {p.14}. -
Page 11: Display
DISPLAY PRIVACY Indicator Description When receiving : Displays the signal strength. When transmitting : Displays the transmit power. Receiving: : Sufficient : Weak : Strong Transmitting : : Low Power (1.0 W) : High Power (2.0 W) Displays the battery power. :High :Sufficient :Low... - Page 12 Font Pattern Because the display is segmented, alphabets and numbers are displayed as shown below. "X" and "Z" are not used in this transceiver. >...
-
Page 13: Basic Operation
BASIC OPERATION SWITCHING POWER ON Switch the transceiver power ON by turning the Power OFF / Volume DOWN Power switch/ Volume control clockwise. • A confirmation tone sounds, the LCD lights up momentarily, then the current channel number is displayed. Power ON / Volume UP RAN number Channel number... -
Page 14: Make A Call
MAKE A CALL To make a call, press and hold the PTT switch, then speak around the microphone area using your normal speaking voice. • Hold the microphone approximately 1.5 inches (3 to 4 cm) from your lips. RECEIVE VOICE Release the PTT switch to receive. -
Page 15: Channel Setup Mode
CHANNEL SETUP MODE This mode changes the setting of Analog and Digital functions that can be set for each channel. Press the Menu button . • Displays the setting items of Channel setup mode. Press the button to select your desired setting items. -
Page 16: Channel Type
CHANNEL TYPE It is possible to set the channel to Analog operation or Digital operation, or Mixed mode which can wait for both Analog and Digital reception. Enter the Channel setup mode {p.15}. Press the button to select “ ”. Press the Menu button then press the button to select your desired value. -
Page 17: Transmit Power
TRANSMIT POWER You can adjust the transmit power on all channels. Selecting low power will allow longer use of the battery pack. Selecting high power will allow you to transmit further, in case the other party is too far away for low power usage. To change the transmit power: Enter the Channel setup mode {p.15}. - Page 18 Encryption (Digital) When the Channel Type is Digital (NXDN), encryption can be performed by using the encryption key during voice call, and further communication with enhanced confidentiality can be performed. Enter the Setting mode {p.37}. Press the button to select “ ”.
-
Page 19: Ptt Id (Analog Fleetsync)/ Selcall On Ptt (Digital Nxdn)
PTT ID (Analog FleetSync)/ SELCALL ON PTT (Digital NXDN) The transceiver can send a PTT ID signal when pressing the PTT switch (beginning of transmission) or when pressing and releasing (beginning of transmission and end of transmission) the PTT switch. When you use the Caller ID Display function {p.50}, when the transceiver receives a PTT ID signal, the caller ID of that signal appears on the display, so you know who is making the call. -
Page 20: Monitor
The Compander function is deactivate. The Compander function is activate. • icon appears on the display when “ON ” is selected. Press the Menu button to confirm the selection, then press the PTT switch or the Side button to return to the operation mode. Note: ◆... -
Page 21: Squelch Off
SQUELCH OFF When no signals are present, the squelch on the transceiver automatically mutes the speaker so you will not hear background noise. Using the SQUELCH OFF button, you can open the squelch to unmute the speaker. This allows you to: •... -
Page 22: Signaling
SIGNALING QUIET TALK/ DIGITAL QUIET TALK (Analog) QT (Quiet Talk) and DQT (Digital Quiet Talk) are functions that reject signals from undesired parties that are using the same channel as you. You will hear audio from the speaker only when you receive a signal that contains a tone or code matching the one set up on the channel you are using. - Page 23 DQT Code DQT Code DQT Code DQT Code DQT Code D116I D226I D351I D506I D712I D125I D243I D364I D516I D723I D131I D244I D365I D532I D731I D132I D245I D371I D546I D732I D134I D251I D411I D565I D734I D143I D261I D412I D606I D743I D152I D263I D413I...
-
Page 24: Ran (Radio Access Number)
RAN (RADIO ACCESS NUMBER) RAN is a signaling system designed for Digital transceiver communications. When a channel is set up with a RAN, squelch will only open when a call containing a matching RAN is received. If a call containing a different RAN is made on the same channel you are using, you will not hear the call. -
Page 25: Fleetsync: Alphanumeric 2-Way Paging Function
FleetSync: ALPHANUMERIC 2-WAY PAGING FUNCTION FleetSync is an Alphanumeric 2-way Paging Function, and is a protocol owned by JVC KENWOOD Corporation. Note: ◆ This function is available only in analog operation. SELCALL MODE (SELECTIVE CALLING) A Selcall is a voice call to a particular station or group of stations. - Page 26 Press the Menu button then press the button to select List ID type. • List ID type has the following settings. List ID type “ ” represents an Individual Call ID. “ ” represents a Group Call ID. “ ” represents a Broadcast Call ID. “...
- Page 27 GROUP CALLS: For example, transceiver A is calling transceivers D, E, and F. Press and hold the Side button. or press the button Transceiver A programmed as [ID List]. • The ID List you called last is displayed. Press the button to select an Group ID number (12- Transceiver A GRP in this example).
- Page 28 BROADCAST CALLS: For example, transceiver A is calling transceivers B ~ F. Press and hold the Side button. or press the button Transceiver A programmed as [ID List]. • The ID List you called last is displayed. Press the button to select an Broadcast ID number Transceiver A (ALL-15 in this example).
-
Page 29: Nxdn
NXDN NXDN is a general term for the NXDN wireless communication protocol which uses 4 Level FSK. Various digital communications, including individual and group voice communications are possible. SELCALL MODE (SELECTIVE CALLING) The basic operation is the same as Selcall in FleetSync. Step 1: Set up your own ID (ID List Setting mode for Selcall) With the transceiver power OFF, press and hold while turning the transceiver power ON. - Page 30 GROUP CALLS: This function to make calls by calling group parties. Select an ID from a pre- registered list and call another group parties. List 2 : own List 3 : own List 21 : None List 21 : None List 4 : own List 21 : Group Group 25...
- Page 31 INDIVIDUAL CALLS: It is a function to make calls by calling individual parties. Select an ID from a pre- registered list and call another parties. Send: List 1 : None List 1 : Individual 03-IND List 2 : own List 2 : None List 3 : None List 3 : own Can not receive.
- Page 32 ALL GROUP CALLS (BROADCAST CALLS) : BROADCAST 15 Group 21 Group 25 15-ALL To operation the ALL Group Call: Press and hold the Side button, or press the button Transceiver A programmed as [ID List]. • The ID List you called last is displayed. Press the button to select an ALL Group ID number.
-
Page 33: Voice Operated Transmission (Vox)
VOICE OPERATED TRANSMISSION (VOX) Using the VOX feature, you can operate the transceiver hands-free. In order to use this feature, however, you must use an optional headset; VOX will not function with the built-in microphone. For best operation conditions, we recommend you use an optional headset with both an ear piece and a microphone on a boom that rests in front of your mouth. -
Page 34: Scan
SCAN Scan is useful for monitoring signals on the transceiver channels. When scanning, the transceiver checks for a signal on each channel and only stops if a signal is present. If the QT/ DQT/ RAN matches, the transceiver stops at the channel and opens the squelch so you can listen to the call. -
Page 35: Revert Channel
To end the scan at any time, press the button programmed as Scan button. • The transceiver returns to the channel you were using before you started scanning. REVERT CHANNEL The revert channel is the channel from which you start scanning. So, for example, if you are on channel 1 when you begin to scan, your revert channel is channel 1. -
Page 36: Lock Function
LOCK FUNCTION BUTTON LOCK You can lock the Menu, , and buttons to prevent accidentally changing the operating mode and channel settings. The Power switch/ Volume control and PTT still function normally. Press and hold the Menu button for 1 seconds to lock or unlock the transceiver buttons. -
Page 37: Setting Mode
SETTING MODE Many functions on this transceiver are selected or configured through the Menu instead of physical controls. With the transceiver power OFF, press and hold the Menu button while turning the transceiver power ON. Press the button to select your desired Setting menu. - Page 38 Ref. Display Name Settings Default Analog Digital Call Alert Tone 1 ~ 16 Home Channel OFF/ 1 ~ 16 Second Channel OFF/ 1 ~ 16 Transmit Tone Level -20 dB ~ 0 dB 0 dB PTT ID Side Tone OFF/ ON Caller ID Display OFF/ ON (FleetSync/ NXDN)
-
Page 39: Channel Frequency Setup
CHANNEL FREQUENCY SETUP You can change the default frequency of each channel. Enter the Setting mode {p.37}. Press the button to select a channel. • The current frequency table number appears beside the channel number. Press the Menu button then press the button to select the frequency table number for the channel. -
Page 40: Profile Number
PROFILE NUMBER Profile number is a calling method that enables multiple users to hear only the voice of a users that has the same Profile number when multiple users are using the same channel. Enter the Setting mode {p.37}. Press the button to select “... -
Page 41: Group Call Alert Tone
GROUP CALL ALERT TONE Sets the alert tone when called on the Group Call or Broadcast Call (All Call). Enter the Setting mode {p.37}. Press the button to select “ ”. Press the Menu button then press the button to select your desired value. -
Page 42: Group Call Alert Led Color
GROUP CALL ALERT LED COLOR This function is set color of the blinking LED when transmitting and receiving with the group call. Enter the Setting mode {p.37}. Press the button to select “ ”. Press the Menu button then press the button to select your desired value. -
Page 43: Incoming Call Notification
INCOMING CALL NOTIFICATION Note: ◆ To use Incoming Call Notification, you must set up a QT tone or a DQT code {page 18}. Incoming Call Notification is used to inform you of when a call is being received. When activated, a tone is emitted when a busy signal is received and the QT/ DQT/ RAN signaling matches. -
Page 44: Button Assignment
BUTTON ASSIGNMENT The Side and Menu buttons can be programmed with the functions listed below. Functions LIST Function name Display Press Hold None None None Press to lock/unlock the transceiver Button Lock None buttons. Refer to {p.36}. Calling Alert Calling Alert None Hold down this button Decreases the Channel number in... - Page 45 Function name Display Press Hold When you receive a Group Call, etc., while you are displaying the ID of the caller, you can call Individual Individual Reply Call to the caller by pressing None the button that programmed this function and then pressing PTT switch.
-
Page 46: Calling Alert Tone
CALLING ALERT TONE Call alert tones are used to identify yourself to your party members. You can set up a call alert tone to one of 16 types. If each party member uses a different call alert tone, it is easy to know who is making the call. This function is activate when Channel type is Analog. -
Page 47: Second Channel
SECOND CHANNEL Apart from the channel you normally select, you can set up another channel as the main channel with a dedicated PTT switch. The PTT for the second channel is set with the key that registered the "second PTT" function using button assignment function in the setting mode. -
Page 48: Second Channel Operation
SECOND CHANNEL OPERATION: Enter the Setting mode {p.37}. Press the button to select “ ”. Press the Menu button then press the button to select your desired value. The Second function is deactivate. 1~16 Select a Second channel. When the Second PTT function is activated. " "... -
Page 49: Transmit Tone Level
TRANSMIT TONE LEVEL Adjust the volume on the sender's side if the volume of the alert tone etc. he hears is too loud. Enter the Setting mode {p.37}. Press the button to select “ ”. Press the Menu button then press the button to select your desired value. -
Page 50: Caller Id Display
CALLER ID DISPLAY When the transceiver receives a PTT ID signal, the caller ID of that signal appears on the display, so you know who is making the call. Enter the Setting mode {p.37}. Press the button to select “ ”. -
Page 51: Mode Reset Timer
MODE RESET TIMER This function returns the transceiver to the channel display after a preset timer expires while in channel menu mode or selcall mode. To set the mode reset timer: Enter the Setting mode {p.37}. Press the button to select “ ”. -
Page 52: Busy Channel Lockout
BUSY CHANNEL LOCKOUT This function is used in order to prevent transmitting on a channel that somebody else is currently using. When turned ON, a beep sounds when you press the PTT switch while another party is using the channel, and you cannot transmit. To turn Busy Channel Lockout on or off: Enter the Setting mode {p.37}. -
Page 53: Display Backlight
DISPLAY BACKLIGHT You can set the display backlight to remain off, remain on, or turn on when you press any button other than the PTT switch (auto). When set to “ ”, the backlight remains on for 5 seconds after pressing a button, before turning off again. To select the backlight setting: Enter the Setting mode {p.37}. -
Page 54: Battery Saver
BATTERY SAVER This transceiver has been designed to give you the most out of your battery power. The battery saver function decreases the amount of power used when a signal is not being received and no operations are being performed. While using the transceiver, battery saver will automatically switch ON after 5 seconds have elapsed with no operations or received calls. -
Page 55: Beep Tone
BEEP TONE When you press a button, a beep will emit from the transceiver. To turn the beep tone on or off: Enter the Setting mode {p.37}. Press the button to select “ ”. Press the Menu button then press the button to select your desired value. -
Page 56: Microphone Sense
MICROPHONE SENSE You can adjust the sensitivity level of the transceiver microphone. It can be changed every in 2 dB steps. To select the Microphone Sense: Enter the Setting mode {p.37}. Press the button to select “ ”. Press the Menu button then press the button to select your desired value. -
Page 57: Microphone Type
MICROPHONE TYPE Optional external microphones connected to the transceiver have different audio characteristics. By using this function, you can make the audio characteristics uniform and set for optimum conditions for Digital processing. Enter the Setting mode {p.37}. Press the button to select “ ”. -
Page 58: Audio Equalizer (Rx Audio Response)
AUDIO EQUALIZER (RX AUDIO RESPONSE) This setting item is function for Digital communications. Received sound quality will change depending on the characteristics of the other side's use environment, voice quality, microphone, external connection equipment and so on. By using this function, you can adjust the received sound quality according to usage and preferences. -
Page 59: Encryption Key Data
ENCRYPTION KEY DATA Set the encryption key to be used with the Encryption function. Refer to operate private talk using Encryption key data. {p.17} Enter the Setting mode {p.37}. Press the button to select “ ”. Press the Menu button then press the button to select your desired value. -
Page 60: Vox Delay Time
VOX DELAY TIME If the transceiver returns to receive mode too quickly after you stop speaking, the end of your message may not be transmitted. To avoid this, select an appropriate delay time that allows your entire message to be transmitted. However, do not make the delay overly long. -
Page 61: Vox Proceed Tone
VOX PROCEED TONE You can set the transceiver to sound an alert tone when you are able to transmit. This tone is used to prevent missing the beginning of the audio to be transmitted. Enter the Setting mode {p.37}. Press the button to select “... -
Page 62: Earphone Mode
If you set the earphone mode to ON, you can transmit using the PTT switch of the transceiver. Note: ◆ Please use KENWOOD recommended product for monaural earphones. Enter the Setting mode {p.37}. Press the button to select “... -
Page 63: Selectable Power On Led
SELECTABLE POWER ON LED Setting the color of the LED that lights up when the power is on, groups can be color coded when grouping is necessary. Once you have decided on the color of group, you can judgment which group immediately after turning on the power. You can set the colors of the LED that light up at power on from 7 types. -
Page 64: Selectable Power On Tone
SELECTABLE POWER ON TONE You can set up a tone to sound during power on to one of 4 types. To set the power on tone type: Enter the Setting mode {p.37}. Press the button to select “ ”. Press the Menu button then press the button to select your desired value. -
Page 65: Background Operations
BACKGROUND OPERATIONS BATTERY LEVEL INDICATOR When turned ON, the battery level indicator on the display lets you know approximately how much battery life is remaining. When turned OFF, the battery level indicator will not be displayed. When the battery voltage becomes too low while transmitting, the transceiver stops transmitting, a tone sounds, and the LED blinks red until you release the PTT switch. -
Page 66: Options
OPTIONS The following options are available for use with this transceiver. Model Name Name KSC-50CR Charger Pocket KNB-81L Battery pack KSC-506 Multiple Charger (6 units) KBH-22 Belt Clip Holster KPG-D5 Programming software KSC-44SL AC Adapter (Single) KSC-44ML AC Adapter (Multiple) KBH-14 Belt Clip KBH-20... -
Page 67: Troubleshooting Guide
TROUBLESHOOTING GUIDE Problem Solution Cannot turn the transceiver power • The battery pack may be dead. Recharge or replace the battery pack. • The battery pack may not be installed correctly. Remove the battery pack and install it again. Battery power dies shortly after •... - Page 68 © 2018...