
Related Manuals for Kenwood Nexedge NX-320E


Summary of Contents for Kenwood Nexedge NX-320E
- Page 1 INSTRUCTION MANUAL VHF DIGITAL TRANSCEIVER NX-220 UHF DIGITAL TRANSCEIVER NX-320 © B62-2320-20 (C)
- Page 3 THANK YOU We are grateful you have chosen KENWOOD for your land mobile radio applications. This instruction manual covers only the basic operations of your NEXEDGE portable radio. Ask your dealer for information on any customized features they may have added to your radio.
- Page 4 Ensure that there are no metallic items located between the transceiver and the battery pack. • Do not use options not specifi ed by KENWOOD. • If the die-cast chassis or other transceiver part is damaged, do not touch the damaged parts.
- Page 5 • If an abnormal odor or smoke is detected coming from the transceiver, switch the transceiver power off immediately, remove the battery pack from the transceiver, and contact your KENWOOD dealer. • Use of the transceiver while you are driving may be against traffi c laws.
- Page 6 Information concerning the battery pack: The battery pack includes fl ammable objects such as organic solvent. Mishandling may cause the battery to rupture producing fl ames or extreme heat, deteriorate, or cause other forms of damage to the battery. Please observe the following prohibitive matters.
- Page 7 • Do not charge the battery near fi re or under direct sunlight! If the battery’s protection circuit is damaged, the battery may charge at extreme current (or voltage) and an abnormal chemical reaction may occur. The battery may generate heat or smoke, rupture, or burst into fl...
- Page 8 • Do not reverse-charge or reverse-connect the battery! The battery pack has positive and negative poles. If the battery pack does not smoothly connect with a charger or operating equipment, do not force it; check the polarity of the battery. If the battery pack is reverse-connected to the charger, it will be reverse- charged and an abnormal chemical reaction may occur.
-
Page 9: Table Of Contents
ADVANCED OPERATIONS ............... 21 BACKGROUND OPERATIONS ............26 UNPACKING AND CHECKING EQUIPMENT Note: These unpacking instructions are for use by your KENWOOD dealer, an authorized KENWOOD service facility, or the factory. Carefully unpack the transceiver. If any items are missing or damaged, fi... -
Page 10: Preparation
PREPARATION INSTALLING/ REMOVING THE (OPTIONAL) BATTERY PACK 1 Match the guides of the battery pack with the grooves on the upper rear of the transceiver, then fi rmly press the battery pack in place. 2 Lock the safety catch to prevent accidentally releasing the battery pack. - Page 11 Note: ◆ If you do not plan to use the transceiver for a long period, remove the batteries from the battery case. ◆ This battery case has been designed for transmitting at a power of approximately 1 W (the low power setting on your transceiver).
- Page 12 INSTALLING THE BELT CLIP Note: When fi rst installing the belt clip, you must remove the battery pack from the rear of the transceiver. 1 Remove the 2 screws from the Plastic rear of the transceiver, then covering remove the small plastic black covering that was held in place.
- Page 13 2 While holding the cap in place, push it towards the bottom of the transceiver until the tabs on the cap click into place. • To remove the cap, hold the top of the cap in place with your fi nger while inserting a 3 mm or smaller fl...
-
Page 14: Orientation
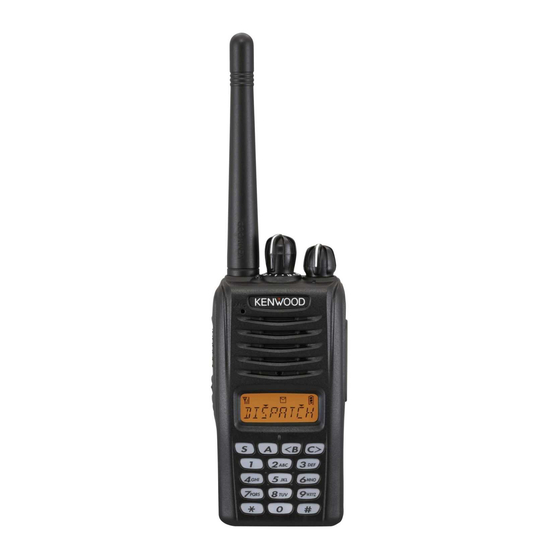
ORIENTATION Type I Antenna Microphone Battery pack Speaker Type II Antenna Microphone Battery pack Speaker... - Page 15 Transmit/ Receive/ Battery low indicator If enabled by your dealer, lights red while transmitting, green while receiving a call (Conventional channels only), and orange when receiving an optional signaling call. Blinks red when the battery power is low while transmitting. Selector knob Rotate to select a zone or channel/group ID (default).
- Page 16 DISPLAY (TYPE I ONLY) Indicator Description Signal strength indicator {page 27}. Monitor or Squelch Off is activated. Blinks when an incoming call matches your Optional Signaling. Talk Around is activated. Scan is in progress. Blinks while scan is paused. A message is stored in memory. Blinks when a new message has arrived.
-
Page 17: Programmable Auxiliary Functions
PROGRAMMABLE AUXILIARY FUNCTIONS The Selector, Auxiliary (orange), Side 1, Side 2, S, A, <B, and C> keys, as well as the Keypad, can be programmed with the functions listed below. Please contact your dealer for further details on these functions. 1, 8 •... - Page 18 • • Zone Select • Zone Delete/Add • Zone Up • Zone Down Available only for Type I. Available only for Analog Trunking operation. Available only for Type II. Available only for NXDN Trunking operation. Can be programmed only on the Selector. Available only for NXDN Conventional operation.
-
Page 19: Basic Operations
BASIC OPERATIONS SWITCHING POWER ON/OFF Turn the Power switch/ Volume control clockwise to switch the transceiver ON. Turn the Power switch/ Volume control counterclockwise fully to switch the transceiver OFF. ■ Transceiver Password (Type I Only) If your transceiver is password protected, you must fi rst enter the password before you can use the transceiver. - Page 20 TRANSMITTING 1 Select the desired zone and channel/group ID. 2 Press the key programmed as [Monitor] or [Squelch Off] to check whether or not the channel is free. • If the channel is busy, wait until it becomes free. 3 Press the PTT switch and speak into the microphone. Release the PTT switch to receive.
- Page 21 RECEIVING Select the desired zone and channel. If signaling has been programmed on the selected channel, you will hear a call only if the received signal matches your transceiver settings. Note: Signaling allows your transceiver to code your calls. This will prevent you from listening to unwanted calls.
-
Page 22: Scan
SCAN Scan monitors for signals on the transceiver channels. While scanning, the transceiver checks for a signal on each channel and only stops if a signal is present. To begin scanning, press the key programmed as [Scan]. • indicator appears (type I only). •... - Page 23 SCAN REVERT The Scan Revert channel is the channel selected when you press the PTT switch to transmit during scan. Your dealer can program one of the following types of Scan Revert channels: • Selected: The last channel selected before scan. •...
-
Page 24: Fleetsync: Alphanumeric 2-Way Paging Function
FleetSync: ALPHANUMERIC 2-WAY PAGING FUNCTION FleetSync is an Alphanumeric 2-way Paging Function, and is a protocol owned by JVC KENWOOD Corporation. Note: This function is available only in analog operation. SELCALL (SELECTIVE CALLING) A Selcall is a voice call to a station or group of stations. - Page 25 STATUS MESSAGE (TYPE I ONLY) You can send and receive 2-digit Status messages which may be decided in your talk group. Messages can contain up to 16 alphanumeric characters. Status messages range from 10 to 99 (80 ~ 99 are reserved for special messages). A maximum of 15 received messages (combined status messages and short messages) can be stored in the stack memory of your transceiver.
- Page 26 ■ Reviewing Messages in the Stack Memory 1 Press the key programmed as [Stack], or press and hold the key programmed as [Selcall], [Status], or [Selcall + Status] to enter Stack mode. • The last received message is displayed. 2 Press the <B or C> key to select the desired message. •...
-
Page 27: Trunking Calls (Analog)
TRUNKING CALLS (ANALOG) PLACING A DISPATCH CALL 1 Select the desired zone and group ID using the selector and the Zone or CH/GID keys. 2 Press and hold the PTT switch. 3 If the “PTT Proceed” tone sounds, communication is possible;... - Page 28 4 When the called party responds, press the PTT switch and speak into the microphone. Release the PTT switch to receive. • Only one person can speak at a time. 5 To end the call, press and hold the PTT switch, then press the # key or the key programmed as [Telephone Disconnect].
-
Page 29: Advanced Operations
ADVANCED OPERATIONS DTMF (DUAL TONE MULTI FREQUENCY) CALLS ■ Making a DTMF Call (Type I Only) Manual Dialing 1 Press and hold the PTT switch. 2 Enter the desired digits using the DTMF keypad. • If you release the PTT switch, transmit mode will end even if the complete number has not been sent. - Page 30 ■ Stun Code This function is used when a transceiver is stolen or lost. When the transceiver receives a call containing a stun code, the transceiver becomes disabled. The stun code is cancelled when the transceiver receives a call with a revive code.
- Page 31 Note: ◆ When Activity Detection has been turned off, and the transceiver power is then turned off and back on, Activity Detection is automatically enabled. ◆ When using this function, verify that it operates before taking the transceiver. ■ Activity Reset While Activity Detection is active, press the key programmed as [Activity Reset] to reset the Activity Detection countdown timer.
- Page 32 5 When you have fi nished operating using OST, press the [OST] key again to turn the OST function OFF. ■ Radio Access Number (RAN) RAN is a new signaling system designed for digital radio communications. When a channel is set up with a RAN, squelch will only open when a call containing a matching RAN is received.
- Page 33 ■ VOX Gain Level (Type I Only) 1 Connect the headset to the transceiver. 2 Press the key programmed as [VOX]. • The current VOX Gain level appears on the display. 3 Press the <B or C> key to increase or decrease the VOX Gain level.
-
Page 34: Background Operations
BACKGROUND OPERATIONS Your dealer can activate a variety of transceiver functions to perform without any additional operation on your part. TIME-OUT TIMER (TOT) The Time-out Timer prevents you from using a channel for an extended duration. If you continuously transmit for a preset time, the transceiver will stop transmitting and an alert tone will sound. - Page 35 ■ Battery Indicator (Type II Only) Press the key programmed as [Battery Indicator]. The LED lights for 2 seconds, displaying the battery power remaining, as described in the table below. When the battery power is very low, recharge or replace the battery pack. Lights Green Lights Orange Lights Red...
- Page 36 CONTROL CHANNEL HUNT On digital Trunking channels, the transceiver automatically searches for a control channel. • While searching for a control channel, the antenna icon will fl ash (type I only) and no signals can be received. PTT ID PTT ID is the transceiver unique ID code which is sent each time the PTT switch is pressed and/or released.
- Page 37 使用说明书 VHF 数字模拟双模手持对讲机 NX-220 UHF 数字模拟双模手持对讲机 NX-320...
- Page 39 鸣谢惠购 感谢您选择 KENWOOD 产品用于您的陆地移动无线电应用。 本使用说明书仅包含该 NEXEDGE 便携式无线电设备的基本操作。 对于设备上可能添加的定制化功能, 请咨询经销商。 NXDN 是使用 4 级 FSK 技术的新型数字通信系统的一个协议 NXDN 名称,由 JVC KENWOOD 和 Icom 共同开发。 用户注意事项 ◆ 政府法律禁止在政府控制的区域内使用未经当局许可的无线电 发射机。 ◆ 非法使用将会受到罚款或监禁处罚。 ◆ 只能由有资格的技术人员进行维修。 安全性 : 操作人员应该知道并了解对讲机操作的一般危险。 本产品所采用的 A M B E +2 语音编码技术受 D i g i t a l V o i c e S y s t e m s , I n c .
- Page 40 产品中有毒有害物质或元素的名称及含量 有毒有害物质或元素 部件名称 铅 汞 镉 六价铬 多溴联苯 多溴二苯醚 (Pb) (Hg) (Cd) (Cr(VI)) (PBB) (PBDE) × ○ ○ × ○ ○ 框架 × ○ ○ ○ ○ ○ 安装基板 ○ ○ ○ ○ ○ ○ 电缆 ○ ○ ○ × ○...
- Page 41 注意事项 对讲机和电池潮湿时请勿对其充电。 • 对讲机和电池之间应确保无金属物品。 • 请勿使用非 KENWOOD 指定的选件。 • 如果压铸底盘和对讲机的其他部件损坏, 请勿接触损坏的部件。 • 如果头戴式耳麦或头戴耳机连接到对讲机上, 请减小对讲机的音 • 量。 当打开静噪时, 一定要注意音量。 靠近各种机械和电器时, 请勿将麦克风电缆挂在颈部周围, 因为 • 机械和电器可能会使电缆缠住。 请勿将对讲机放置在不稳定的表面上。 • 应确保天线的末端不会碰到您的眼睛。 • 对讲机长时间用于发射时, 散热器和底座会变热。 更换电池时, • 请勿接触这些位置。 请勿将对讲机浸入水中。 • 安装选件前, 一定要关闭对讲机的电源。 • 充电器是将装置与交流电源线断开的设备。 应随时提供交流插头。 •...
- Page 42 在使用心脏起搏器的人员附近。 • 请勿因任何理由拆卸或改装对讲机。 • 汽车正在行驶时, 请勿将对讲机放在安全气囊上或其附近。 安 • 全气囊打开时, 对讲机可能会弹出, 击中驾驶员或乘客。 当接触天线端时或天线罩露出任何金属部件时, 请勿发射。 此 • 时发射可能会引起高频灼伤。 如果对讲机发出异常气味或冒烟, 请立即关闭对讲机的电源, • 从对讲机中取出电池, 并与 KENWOOD 经销商联系。 驾车时使用对讲机可能违反交通方面的法律。 请查阅并遵守您 • 所在地区的驾车法规。 请勿将对讲机暴露于极热或极冷的气候条件下。 • 请勿将电池 (或电池盒) 与金属物体放在一起携带, 因为金 • 属物体可能会使电池端子短路。 如果更换的电池不正确, 会有爆炸的危险。 请务必更换相同类 • 型的电池。...
- Page 43 有关电池组的信息 : 电池含有有机溶剂等易燃物体。 错误操作可能会造成电池裂开, 从而 着火或产生过热, 使电池失效或造成电池其它形式的损坏。 请勿拆卸或改造电池! • 电池具有保护功能以及一个保护电路, 防止危险。 若遭受严重 损坏, 电池可能会产生热量或烟雾、 破裂、 或起火。 请勿造成电池短路! • 请勿使用任何金属 (如回形针或电线) 连接 + 极和 – 极。 请 勿用装金属物体 (如电线、 链式项链或发夹) 的容器放置或 储存电池。 如果电池短路, 将会产生过大电流, 电池可能会 发热或冒烟、 破裂或着火。 还将造成金属物体发热。 请勿焚烧或加热电池! • 若绝缘体熔化, 则气体排放出口或安全功能会受损, 或者若电 解液点燃,...
- Page 44 请勿震动或抛扔电池! • 一次冲击可能会造成电池泄露、产生热量或烟雾、破裂或起火。 如果电池保护电路受损, 电池可能会在过大电流 (或电压) 下充电, 可能会发生异常化学反应。 若电池损坏, 请勿使用! • 电池可能会产生热量或烟雾、 破裂或起火。 请勿直接在电池上焊接! • 如果绝缘体熔化、 或气体排放出口或安全功能受损, 电池可能 会产生热量或烟雾、 破裂或起火。 请勿颠倒电池极性 (和端子) ! • 当反向给电池充电时, 可能会发生异常化学反应。 在某些情况 下, 放电时可能会有大的意想不到的电流流过。 电池可能会产 生热量或烟雾、 破裂或起火。 请勿反向给电池充电或反向连接! • 电池具有正负极。 如果电池未能轻易地与充电器或操作设备连 接, 请勿强迫连接 ; 检查电池极性。 如果电池反向连接到充电 器上,...
-
Page 45: 拆开包装箱并检查设备
基本操作 ..................... 11 扫描 ....................14 FleetSync : 数字字母双向寻呼功能 ............ 16 集群呼叫(模拟) ................. 19 高级操作 ..................... 21 后台操作 ..................... 26 拆开包装箱并检查设备 注 : 以下拆箱说明供 KENWOOD 经销商、经授权的 KENWOOD 服务 机构或工厂使用。 小心拆开通信机的包装。如果有物品缺失或损坏,请立即向承运 人提出书面要求。 随机附件 皮带夹.......................1 扬声器 / 麦克风插孔盖 ...................1 扬声器 / 麦克风锁定架 ...................1 止动器(仅限... -
Page 46: 准备工作
准备工作 安装 / 拆卸电池组(选件) 1 使电池组导向装置对准通信机 背面上部的凹槽,然后将电池 组牢牢地按压到位。 2 锁定安全锁,以防电池组意外 松脱。 3 若要取出电池组,请上提安全 锁,按压释放闩,然后将电池 组从通信机中抽出。 注 : ◆ 有关电池组的充电过程及用法,请参阅电池充电器的使用说明书。 ◆ 电池组在出厂时未充电。使用前请为其充电。 ◆ 在为通信机中安装的电池组充电之前,请确保安全锁已锁紧。 安装 / 取出碱性电池(电池盒为选件) ◆ 请勿在危险环境中安装电池,以免因火星引起爆炸。 ◆ 切勿将电池丢弃在火中 ; 超高温可导致电池爆炸。 ◆ 请勿短接电池盒端子。 ◆ 请勿使用充电电池。 注 : ◆ 如果打算很长时间不使用通信机,请将电池从电池盒中取出。 ◆... - Page 47 1 若要打开电池盒,请按压电池盒 后端上部的两个突起,然后将两 部分拉开。 2 将 6 节 AA (LR6) 碱性电池装入 电池盒。 确保电池的极性与电池盒底端标 • 记的极性相符。 3 让盒盖的突起与底座对齐,然后 下压盒盖,直至其锁定到位。 安装天线(选件) 握住天线底座并顺时针转动,直至 拧紧,以此将天线固定到通信机顶 端的连接器上。...
- Page 48 安装皮带夹 注 : 初次安装皮带夹时,必须先从通信机的背面将电池组取出。 1 将通信机背面的两颗螺丝拧下,然 后取下上面的小黑色塑料盖条。 2 将皮带夹卡座插入通信机背面的空 位内。 3 利用两颗螺丝将皮带夹固定就位。 未安装皮带夹时,请保持塑料盖条不动。 • 安装皮带夹时,切勿使用胶水来防止螺丝松脱,否则可能导致通 • 信机损坏。胶水中所含的丙烯酸酯会引起通信机的后面板开裂。 安装扬声器 / 麦克风插孔盖 不使用扬声器 / 麦克风选件时,请安装扬声器 / 麦克风插孔盖。 注 : 为保持通信机的防水效果,请务必用随带的插孔盖将扬声器 / 麦 克风插孔盖好。 1 盖好插孔盖,使锁定突起插入通信机凹槽内。...
- Page 49 2 将插孔盖放好,然后向通信机底端方向按压, 直至插孔盖上的突起咔哒一声就位。 若要取下插孔盖,请用手指握住插孔盖的顶端 • ,同时在插孔盖的底部插入一把厚度不超过 3 mm 的平刃螺丝刀。将螺丝刀缓慢滑入,直 至其尖端触及插孔盖内的突起,然后轻轻将 插孔盖上撬(螺丝刀的手柄向通信机外移动) , 从而将插孔盖取下。 安装扬声器 / 麦克风(选件) 注 : 使用扬声器 / 麦克风或头戴式耳机时,通信机不具备完全防水性能。 1 将扬声器 / 麦克风插头插入通信机的扬声器 / 麦克风插孔中。 2 将锁定架置于扬声器 / 麦克风插头上,使锁 定突起插入通信机凹槽内。 3 将锁定架放好,然后向通信机底端方向按压, 直至锁定架上的突起咔哒一声就位。 若要取下锁定架,请沿底座上推锁定架。 •...
- Page 50 介绍 I 型 天线 麦克风 电池组 扬声器 II 型 天线 麦克风 电池组 扬声器...
- Page 51 发射 / 接收 / 电池不足指示灯 在经销商启用的情况下,发射时将亮红色,接收呼叫时将亮 绿色(仅限常规信道) ,而接收可选信令呼叫时则亮橙色。若 在发射时出现电池电量不足的情况,则闪烁红色。 选择器旋钮 旋转可选择区域或信道 / 组 ID(默认) 。 电源开关 / 音量控制 旋转可开 / 关通信机及调节音量。 辅助(橙色)键 按下可启动其可编程功能 { 第 9 页 }。 PTT(按下通话)开关 按住此开关,然后对着麦克风讲话,可呼叫某个电台。 侧面按键 1 按下可启动其可编程功能 { 第 9 页 }。 默认为 [ 瞬时静噪打开 ]。 侧面按键...
- Page 52 显示屏(仅限 I 型) 指示 说明 信号强度指示 { 第 27 页 }。 启动监听或静噪打开。 在来电与可选信令匹配时闪烁。 启动脱网通信。 正在扫描。暂停扫描时闪烁。 存储器中存有信息。 当有新信息到达时闪烁。 当前信道为优先信道。 信道使用的是低发射功率。 启动扰频器 / 加密功能。 电池电量指示 { 第 26 页 }。 当前区域(左侧图标)或信道 / 组 ID(右侧 图标)被添加到扫描中。 启动 VOX。 未用。...
-
Page 53: 可编程辅助功能
可编程辅助功能 选择器、辅助(橙色) 、侧面按键 1、侧面按键 2、S 键、A 键、 <B 键和 C> 键以及键盘可设置为以下所列的功能。有关这些功 能的详情,请向经销商咨询。 无 单呼 1, 8 • • 2音 1, 10 单呼 + 短信息 1, 8 • • 1, 8 活动检测 单呼 + 状态 • • 活动复位 键盘锁定 • • 自动拨号... - Page 54 电话挂断 区域下调 • • 通信机密码 区域选择 • • 声控发射 区域上调 • • 区域删除 / 添加 • 仅可用于 I 型。 仅可用于模拟集群操作。 仅可用于 II 型。 仅可用于 NXDN 集群操作。 只能设置在选择器上。 仅可用于 NXDN 常规操作。 只能设置在辅助(橙色)键上。 仅可用于 NXDN 常规操作和 NXDN 集群操作。 仅可用于模拟常规操作、模拟集群操作和 NXDN 常规操作。 仅可用于模拟常规操作。 仅可用于模拟常规操作和...
-
Page 55: 基本操作
基本操作 切换电源开 / 关 顺时针转动电源开关 / 音量控制可打开通信机电源。 逆时针将电源开关 / 音量控制转到底可关闭通信机电源。 ■ 通信机密码(仅限 I 型) 如果通信机有密码保护,则在使用通信机之前,必须先输入 密码。 1 旋转选择器,选择密码的第一个数字。 2 按 S 键确认输入并移到下一数字。 或 按 A 或 # 键可删除错误的数字。 • 3 重复步骤 1 和 2,输入完整密码。 密码最多可包含 6 位数字。 • 4 按 S 键,确认输入的密码。... - Page 56 发射 1 选择想要的区域和信道 / 组 ID。 2 按下设置为 [ 监听 ] 或 [ 静噪打开 ] 的键,检查信道是否空闲。 如果信道繁忙,请等待直至信道空闲。 • 3 按 PTT 开关并对着麦克风讲话。松开 PTT 开关则转换到接 收状态。 为获得最佳的音质, 嘴和麦克风之间应保持约 3 ~ 4 厘米的距离。 • ■ 组呼(数字) (仅限 I 型) 如果某个键设置为 [ 组呼 ],则可从列表中选择一个组呼 ID, 并在常规信道上向它们发出呼叫。...
- Page 57 接收 选择想要的区域和信道。如果在所选信道上设置了信令,则只有 在接收到符合通信机设置的信令时,您才能听到呼叫。 注 : 信令允许通信机对呼叫进行编码。这样可以避免听到不想要的呼 叫。详情请参阅第 23 页上的“信令” 。 ■ 接收组呼(数字) 在常规信道上接收到组呼且接收到的组 ID 与通信机设置的 ID 匹配时,即可听到呼叫者的声音。 在集群信道上接收到组呼时,通信机会自动切换至通信信道 来接收呼叫。 ■ 接收单呼(数字) 接收到单呼时,会响起振铃,呼叫者的 ID 会出现在显示屏 上(仅限 I 型) 。若要响应呼叫,请按住 PTT 开关并像在常 规发射期间那样对着通信机讲话。...
- Page 58 扫描 扫描功能可监听通信机信道上的信号。扫描时,通信机将检查每 个信道的信号,并仅在某个信号存在的情况下才会停止。 若要开始扫描,请按下设置为 [ 扫描 ] 的键。 将出现 指示(仅限 I 型) 。 • LED 将闪烁绿色(仅限 II 型) 。 • 当在某个信道上检测到信号时,扫描就会暂停在该信道上。通信机 • 将处在繁忙信道上,直至信号消失,之后扫描继续。 若要停止扫描,请再次按 [ 扫描 ] 键。 注 : 若要使用扫描功能,在扫描序列中至少要有 2 个信道。 信道暂时锁定 在扫描过程中, 您可以选择特定的信道并按下设置为 [ 扫描删除 / 添加 ] 的键,以此将特定的信道从扫描序列中删除。 相应的信道将不再予以扫描。但是,当扫描停止,然后重新开始时,...
- Page 59 扫描返回 扫描返回信道就是扫描期间按下 PTT 开关进行发射时所选的信 道。经销商能够在以下扫描返回信道类型中设置一种信道 : 选择 : 扫描前所选的最后一个信道。 • 选择 + 当前通话 : 同“选择” ,此外还可以在扫描暂停的信 • 道上响应呼叫。 优先 : 优先信道。 • 优先 + 当前通话 : 同“优先” ,此外还可以在扫描暂停的信 • 道上响应呼叫。 最后呼叫 + 选择 : 您收到呼叫的最后一个信道。 • 扫描删除 / 添加 用户可以向扫描列表中增删区域和 / 或信道 / 组 ID。 1 选择想要的区域和...
-
Page 60: Fleetsync : 数字字母双向寻呼功能
FleetSync : 数字字母双向寻呼功能 FleetSync 是一种数字字母双向寻呼功能,它是一个所有权归属 的协议。 注 : 该功能仅可用于模拟操作。 选择呼叫 选择呼叫是对某一无线电台或一组无线电台的语音呼叫。 ■ 发射(仅限 I 型) 1 选择想要的区域和信道。 2 按下设置为 [ 选择呼叫 ] 的键,进入选择呼叫模式。 3 按 <B 或 C> 键,选择要呼叫的无线电台。 如果启用了手动拨号,则可以直接输入该无线电台的 ID。 • 4 按 PTT 开关并开始对话。 ■ 接收 此时会响起提示音,通信机将进入选择呼叫模式。当接到选 择呼叫时,会显示来电无线电台的 ID(仅限 I 型) 。若要响 应呼叫,请按... - Page 61 状态信息(仅限 I 型) 您可以发射和接收 2 位的状态信息,该状态信息可在您的通话群 组中确定。信息最多可包含 16 个字母数字字符。状态信息的取 值范围为 10 到 99(80 ~ 99 是为特殊信息而保留的) 。 通信机的堆栈存储器最多可存储 15 个收到的信息(包括状态信 息和短信息) 。 ■ 发射 1 选择想要的区域和信道。 2 按下设置为 [ 状态 ] 的键进入状态模式(转到步骤 5) ,或 按下设置为 [ 选择呼叫 + 状态 ] 的键进入选择呼叫模式 (转 到步骤...
- Page 62 ■ 查看堆栈存储器中的信息 1 按下设置为 [ 堆栈 ] 的键, 或按住设置为 [ 选择呼叫 ]、 [ 状态 ] 或 [ 选择呼叫 + 状态 ] 的键,进入堆栈模式。 显示最后收到的信息。 • 2 按 <B 或 C> 键,选择所需的信息。 信息类型如下 : • ID : 呼叫方 ID ; ST : 状态信息 ; ME : 短信息 按住...
-
Page 63: 集群呼叫(模拟
集群呼叫(模拟) 进行调度呼叫 1 用选择器和区域或信道 / 组 ID 键选择想要的区域和组 ID。 2 按住 PTT 开关。 3 如果发出“PTT Proceed”PTT 进行音,说明可以进行通信。 请对着麦克风讲话。松开 PTT 开关转换到接收状态。 为使接收电台获得最佳的音质,嘴和麦克风之间应保持约 3 ~ 4 • 厘米的距离。 必要时,经销商可以停用“Proceed PTT”PTT 进行音。详情请 • 向经销商咨询。 接收调度呼叫 1 收到调度呼叫时,通信机会自动切换到正确的组 ID,此时会 听到呼叫。 2 必要时可重新调整音量。 进行电话呼叫 1 用选择器和区域或信道 / 组 ID 键选择想要的区域和组 ID。 也可以按下设置为... - Page 64 4 当被叫方响应时,请按 PTT 开关并对着麦克风讲话。松开 PTT 开关转换到接收状态。 同一时间只能一个人说话。 • 5 若要结束呼叫,请按住 PTT 开关,然后按 # 键或按下设置为 [ 电话挂断 ] 的键。 接收电话呼叫 1 收到电话呼叫时,通信机会自动切换到正确的组 ID,此时会 听到呼叫。 收到呼叫时,会响起振铃。 • 2 按住 PTT 开关讲话,松开开关则接收呼叫。 同一时间只能一个人说话。 • 3 若要结束呼叫,请按住 PTT 开关,然后按 # 键或按下设置为 [ 电话挂断 ] 的键。...
-
Page 65: 高级操作
高级操作 DTMF(双音多频)呼叫 ■ 进行 DTMF 呼叫(仅限 I 型) 手动拨号 1 按住 PTT 开关。 2 用 DTMF 键盘输入想要的数字。 如果松开 PTT 开关, 即使未发送完数字, 发射模式也将终止。 • 如果经销商已启用键盘自动 PTT 功能,则无需按 PTT 开关 • 进行发送 ; 您只需按下 DTMF 键即可进行呼叫。 存储并发送 1 按下设置为 [ 自动拨号 ] 的键。 2 用... - Page 66 ■ 遥毙码 本功能用于通信机被盗或丢失时。当通信机接收到包含了遥 毙码的呼叫时,通信机即变为不可用。当收到含有恢复码的 呼叫时,遥毙才会被取消。 紧急呼叫 如果通信机对紧急报警功能已进行了编程,则可进行紧急呼叫。 1 按住设置为 [ 紧急报警 ] 的键。 咨询经销商在通信机进入紧急报警模式前,需按住该键的时间长 • 度。 进入紧急报警模式后,通信机将切换到紧急报警信道,并根据经 • 销商的设置情况开始发射。 2 若要退出紧急报警模式,请再次按 [ 紧急报警 ] 键。 当紧急报警模式完成预设次数的循环后,紧急报警模式会自动终 • 止,通信机将自动返回在进入紧急报警模式之前正在使用的区域 和信道。 注 : ◆ 经销商可以对通信机进行设置,使其在紧急报警模式下发射时发 出某种提示音。 ◆ 经销商可以对通信机进行设置,使其在紧急报警操作中像平常一 样发出提示音和接收信号,或使扬声器静音。 ■ 活动检测 按下设置为 [ 活动检测 ] 的键可以打开 / 关闭活动检测功能。 如果在启用活动检测的情况下有事件发生,通信机就会进入...
- Page 67 ■ 活动复位 当启用活动检测时,按下设置为 [ 活动复位 ] 的键可复位活 动检测的倒数计时器。这样即可保持倾斜或静止状态,而不 会启动紧急报警模式。 扰频器(语音加密) 按下设置为 [ 扰频器 / 加密 ] 的键可以将通信机切换到安全 (加密) 发射状态。 扰频器(语音加密)功能打开后,按下 PTT 开关可对发出的信号进 • 行加密。 信令 ■ 亚音频 (QT)/ 数字亚音频 (DQT) 经销商可能已将 QT 或 DQT 信令预编程在通信机信道上。 QT 亚音 /DQT 代码是一种亚音频 / 代码,使您可以忽略(听 不到)来自正在使用同一信道的其他人的呼叫。...
- Page 68 ■ 无线电接入号 (RAN) RAN 是一种设计用于数字无线电通信的新信令系统。 当信道设置 RAN 时,只有在收到包含匹配 RAN 的呼叫时才 会打开静噪。如果在所用的同一信道上进行含有不同 RAN 的呼叫,则不会听到此呼叫。这样即可忽略(听不到)来自 正在使用同一信道的其他人的呼叫。 ■ 可选信令 经销商也可能为通信机信道编程了若干类型的可选信令。 2- 音信令 :只有当通信机收到包含匹配的 2 音的呼叫时, 2- 音信令才会打开静噪。 DTMF 信令 : 只有当通信机收到包含匹配的 DTMF 代码的呼 叫时,DTMF 信令才会打开静噪。 FleetSync 信令 : 请参阅第 16 页上的“选择呼叫” 。 NXDN ID 信令 : NXDN ID 是一个可选信令系统,仅可用于 数字通信。...
- Page 69 ■ VOX(声控)操作 1 将头戴式耳机连接至通信机。 2 按住设置为 [VOX] 的键 2 秒钟。 3 若要进行发射,只需对着麦克风讲话。 通信机会根据 VOX 增益电平来识别声级。如果它非常灵敏 • ,就会在背景有噪音的情况下进行发射。如果它还不够灵敏 ,则在开始讲话时不会拾取您的声音。 4 讲完话时,发射即告结束。 5 若要关闭 VOX 功能,请再次按住 [VOX] 键 2 秒钟。 注 : 在打开 VOX 功能的情况下,如果通信机上连接有扬声器 / 麦克风,而且 VOX 增益电平设为灵敏水平,则过大声音的接收 信号可导致通信机开始发射。...
-
Page 70: 后台操作
后台操作 无需您的额外操作,经销商可激活通信机的许多功能。 超时定时器 (TOT) 超时定时器可以防止一个用户过久地使用某一信道。如果用户连 续发射超过了规定时间,通信机将停止发射并发出警告提示音。 此时请松开 PTT 开关。 电池省电 只有在常规信道上才能启动电池省电功能。该功能可以减少未接 收信号及未执行操作时的耗电量。 键盘锁定 按下设置为 [ 键盘锁定 ] 的键可锁定和解锁通信机上的按键。 在启用键盘锁定的情况下,仍可以使用以下按键功能 :紧急报警、 • 背光照明、监听、瞬时监听、静噪打开、瞬时静噪打开、功能、键 盘锁定及 PTT。 低电池警告 ■ 电池电量图标(仅限 I 型) 经销商可以设置在电池电量不足时发出警告提示音并使 LED 指示灯闪烁红色。电池电量图标显示了电池的剩余电量,如 下表所述。当电池电量非常低时,请为电池组充电或更换电 池组。 高 中 低 非常低... - Page 71 ■ 电池指示灯(仅限 II 型) 按下设置为 [ 电池指示灯 ] 的键。LED 将点亮 2 秒钟,上面显 示电池的剩余电量,如下表所述。 当电池电量非常低时,请 为电池组充电或更换电池组。 亮绿色 亮橙色 亮红色 闪烁红色 高 中 低 非常低 信号强度指示(仅限 I 型) 信号强度指示显示了接收到的呼叫的强度。无信号时没有图标出 现。 强 中 弱 非常弱 超出服务区时, 会闪烁(仅限 NXDN 集群) 。 压扩器 如果经销商针对某一信道进行了编程,压扩器将从发射的信号中 去除多余的噪音,从而提供更清晰的信号。 注...
- Page 72 控制信道搜索 在数字集群信道上,通信机会自动搜索控制信道。 搜索控制信道时,天线图标将闪烁(仅限 I 型) ,这时不能接收任何 • 信号。 PTT ID PTT ID 是通信机特有的 ID 代码,每次按下和 / 或松开 PTT 开关 时将发送该代码。 注 : PTT ID 仅可用于模拟操作。 语音通告 当更改区域、信道和 / 或组时,有一个语音将播报新的区域、信 道和组号。...