Kenwood NEXEDGE NX-240 Instruction Manual
Vhf digital transceiver; uhf digital transceiver
Hide thumbs
Also See for NEXEDGE NX-240:
- Instruction manual (84 pages) ,
- Function reference (235 pages)

Related Manuals for Kenwood NEXEDGE NX-240


Summary of Contents for Kenwood NEXEDGE NX-240
-
Page 1: Instruction Manual
INSTRUCTION MANUAL VHF DIGITAL TRANSCEIVER NX-240 UHF DIGITAL TRANSCEIVER NX-340 © B62-2581-00 (M) 09 08 07 06 05 04 03 02 01 00... - Page 3 THANK YOU We are grateful you have chosen KENWOOD for your land mobile radio applications. NOTICES TO THE USER ◆ Government law prohibits the operation of unlicensed radio transmitters within the territories under government control. ◆ Illegal operation is punishable by fine and/or imprisonment.
- Page 4 • Ensure that there are no metallic items located between the transceiver and the battery pack. • Do not use options not specified by KENWOOD. • If the die-cast chassis or other transceiver part is damaged, do not touch the damaged parts.
- Page 5 If an abnormal odor or smoke is detected coming from the transceiver, switch the transceiver power off immediately, remove the battery pack from the transceiver, and contact your KENWOOD dealer. • Use of the transceiver while you are driving may be against traffic laws.
- Page 6 Information concerning the battery pack: The battery pack includes flammable objects such as organic solvent. Mishandling may cause the battery to rupture producing flames or extreme heat, deteriorate, or cause other forms of damage to the battery. Please observe the following prohibitive matters.
- Page 7 Use only the specified charger and observe charging • requirements! If the battery is charged in unspecified conditions (under high temperature over the regulated value, excessive high voltage or current over regulated value, or with a remodeled charger), it may overcharge or an abnormal chemical reaction may occur.
- Page 8 Do not touch a ruptured and leaking battery! • If the electrolyte liquid from the battery gets into your eyes, wash your eyes with fresh water as soon as possible, without rubbing your eyes. Go to the hospital immediately. If left untreated, it may cause eye-problems.
-
Page 9: Table Of Contents
CONTENTS UNPACKING AND CHECKING EQUIPMENT ......1 PREPARATION ............2 ORIENTATION ............7 PROGRAMMABLE AUXILIARY FUNCTIONS ......8 BASIC OPERATIONS ..........11 VOICE OPERATED TRANSMISSION (VOX) ......14 NXDN ..............15 BACKGROUND OPERATIONS ........16 UNPACKING AND CHECKING EQUIPMENT Carefully unpack the transceiver. If any of the items listed below are missing or damaged, file a claim with the carrier immediately. -
Page 10: Preparation
PREPARATION INSTALLING THE CHANNEL STOPPER You can set the channel stopper position for channels 2, 4, 6, 8, 10, 12, and 14. Inserting the Channel stopper prevents unnecessarily selecting channels which do not exist. • Selecting a channel which does not exist causes a continuous error tone to sound. - Page 11 INSTALLING/ REMOVING THE BATTERY PACK Do not short the battery terminals or dispose of the battery by fire. ◆ Never attempt to remove the casing from the battery pack. ◆ 1 Align the battery pack with the back of the transceiver, then press the battery pack and transceiver firmly together until the release latch on the base of the transceiver locks.
- Page 12 CHARGING THE BATTERY PACK (KSC-43) The battery pack is not charged at the factory; charge it before use. ATTENTION: Always switch OFF a transceiver equipped with a battery pack before inserting the transceiver into the charger. 1 Plug the AC adapter cable into the jack located on the rear of the charger.
-
Page 13: Microphone Jacks
5 When charging is completed, the indicator lights green. Remove the battery pack or the transceiver from the charging slot of the charger. • It takes approximately 3 hours to charge the battery pack. • When the charger will not be used for a long time, unplug the AC adapter from the AC outlet. - Page 14 INSTALLING THE OPTIONAL SPEAKER/ MICROPHONE (OR HEADSET) Note: The transceiver is not fully water resistant when using a speaker/ microphone or headset. 1 Insert the speaker/ microphone (or headset) plugs into the speaker/ microphone jacks of the transceiver. Place the locking bracket over the speaker/ microphone (or headset) plugs so that the locking tabs insert into the transceiver grooves.
-
Page 15: Orientation
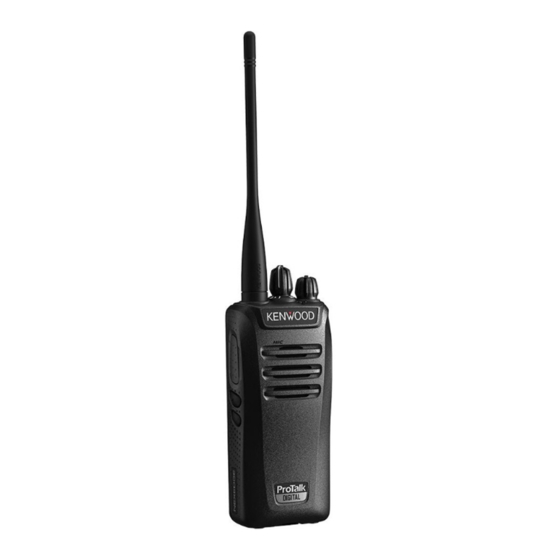
ORIENTATION Microphone Speaker Antenna Battery pack a Channel selector Rotate to change the operating channel. b LED indicator For the LED indicator status, refer to page 13. c Power switch/ Volume control Turn clockwise to switch ON the transceiver. To switch OFF the transceiver, turn counterclockwise until a click sounds. -
Page 16: Programmable Auxiliary Functions
PROGRAMMABLE AUXILIARY FUNCTIONS Your dealer can program the Side 1 and Side 2 keys each with one of the functions listed below. Note: The duration of pressing a key to activate a function is dependent on your dealer setting. Your dealer may have set some keys to be held down for a short duration instead of being momentarily pressed. -
Page 17: Paging Call
■ Key Lock with Status Memory This operates the same as Key Lock except that when the transceiver power is turned OFF and then ON again, the keys remains locked. ■ Lone Worker Lone Worker Mode is a safety feature built into the transceiver. -
Page 18: Squelch Off
■ Scan Temporary Delete When scan pauses at an undesired channel, you can remove that channel from the scanning sequence by pressing or holding this key. ■ Scrambler/Encryption The Scrambler (analog) and Encryption (NXDN) function allows you to hold a conversation in complete privacy. When activated, any other party listening in on your channel will be unable to understand your conversation. -
Page 19: Basic Operations
BASIC OPERATIONS SWITCHING POWER ON/OFF Turn the Power switch/ Volume control clockwise to switch the transceiver ON. Turn the Power switch/ Volume control counterclockwise fully to switch the transceiver OFF. ■ Transceiver Password If your transceiver is password protected, the LED will light blue when you turn the transceiver ON. - Page 20 SELECTING A ZONE AND CHANNEL 1 Select the desired zone using the key programmed as [Zone Up] or [Zone Down]. • Each zone contains a group of channels. 2 Select the desired channel using the Channel selector. • Each channel is programmed with settings for transmitting and receiving.
- Page 21 LED INDICATOR STATUS Indicator Color Meaning Lights red Transmitting Lights green Receiving a call Blinks red Battery power is low while transmitting Blinks green Scanning Blinks orange Receiving an encoded call (FleetSync or blue * signaling, etc.) The selected channel has not been Blinks red/orange programmed and cannot be used.
-
Page 22: Voice Operated Transmission (Vox)
VOICE OPERATED TRANSMISSION (VOX) VOX operation allows you to transmit hands-free. This feature must first be activated by your dealer, and can only be used if you are using a supported headset. VOX can be turned off for specific channels by your dealer. To activate VOX and set the VOX Gain level, perform the following steps: 1 Connect a headset to the transceiver. -
Page 23: Nxdn
NXDN NXDN is a general term for the NXDN wireless communication protocol which uses 4 Level FSK. Various data communications, including individual and group voice communications, Status calls, and GPS data transmission, are possible. INDIVIDUAL/GROUP CALLS Each channel is set up with an individual or group ID list number. To make a call, select the channel with the ID list number you wish to call, then press the PTT switch to start the call. -
Page 24: Background Operations
BACKGROUND OPERATIONS TIME-OUT TIMER (TOT) The Time-out Timer prevents callers from using a channel for an extended duration. If you continuously transmit for the duration programmed by your dealer (default is 1 minute), transmission will stop and a warning tone will sound. To stop the tone, release the PTT switch. - Page 25 If BCL Override has been programmed, you can transmit over the current signal: Press and hold the PTT switch. • If the channel is already in use, a warning tone will sound. Quickly release and then press the PTT switch again. Speak into the transceiver as you would during a normal call.
- Page 26 2-tone Signaling opens the squelch only when your transceiver receives a call containing matching 2 tones. ■ FleetSync Utilizing JVC KENWOOD’s FleetSync digital signaling protocol, this transceiver has PTT ID and Selective Calling capabilities for managed dispatch operations. For hazardous/hostile duty environments, the Side1 or Side 2 key can be programmed for Emergency status to alert the dispatcher and/or operator in distress.