Table of Contents
Advertisement
Quick Links
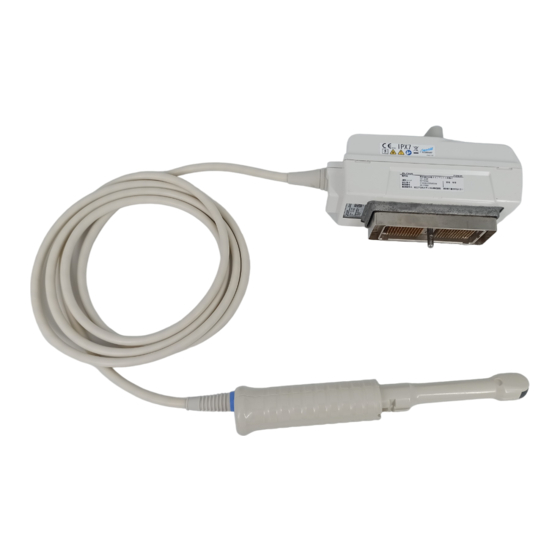
Transrectum Puncture Electronic Convex Probe
UST-676P
Instruction Manual
MN1-5029 Rev.22
Notes for operators and responsible maintenance personnel
★ Please read through this Instruction Manual carefully prior to use.
★ Keep this Instruction Manual together with the ultrasound diagnostic instru-
ment for any future reference.
© Hitachi, Ltd. 2013, 2017. All rights reserved.
i
Advertisement
Table of Contents

Related Manuals for Hitachi UST-676P


Summary of Contents for Hitachi UST-676P
- Page 1 Notes for operators and responsible maintenance personnel ★ Please read through this Instruction Manual carefully prior to use. ★ Keep this Instruction Manual together with the ultrasound diagnostic instru- ment for any future reference. © Hitachi, Ltd. 2013, 2017. All rights reserved.
- Page 2 MN1-5029 Rev.22...
- Page 3 MN1-5029 Rev.22 Introduction This is an instruction for model UST-676P, an ultrasound probe. Read the manual carefully before using the instrument. Take special note of the items in section 1, "Safety Precautions". Keep this manual securely for future reference. The CE mark on the probe indicates that this probe is valid when it is connected to equipment bearing the CE mark that is specified as available in section 2 of this document.
-
Page 4: Table Of Contents
MN1-5029 Rev.22 CONTENTS 1. Safety Precautions ............................1 1-1. Intended use ...................................1 1-2. Usage precautions ................................1 1-2-1. Warnings and safety information ........................2 1-2-2. Option usage precautions ..........................4 1-2-3. Puncturing precautions ...........................5 1-2-4. Cleaning, disinfection and sterilization precautions ..................7 1-2-5. Labels ................................8 2. - Page 5 MN1-5029 Rev.22 4-9-1. Ensuring safety of patients ...........................32 4-9-2. Handling the instrument ..........................32 5. Cleaning, disinfection and sterilization ....................33 5-1. Precautions for cleaning, disinfection and sterilization ....................34 5-2. Reprocessing instruction according to ISO 17664 .....................35 5-3. Point of use (Pre-cleaning) ............................37 5-4.
- Page 6 MN1-5029 Rev.22 9. Configuration ............................57 9-1. Standard configuration ..............................57 9-2. Options ..................................57 10. Disposal of the Device..........................59 This Instruction Manual contains the main body of 60pages and 6pages until the CONTENTS.
-
Page 7: Safety Precautions
MN1-5029 Rev.22 1. Safety Precautions 1-1. Intended use This probe is intended for use by a doctor or other qualified operator for inserting into a human rectum and making ultrasonic observations of the prostate and surrounding organs. It also enables the doctor to guide the puncture needle under an ultrasonic guide into the patient's body. Caution Do not use this equipment for other than its intended purpose. -
Page 8: Warnings And Safety Information
MN1-5029 Rev.22 1-2-1. Warnings and safety information Warning Follow the information in this manual and the documentation supplied with any equipment used together with this probe. Use that is not in accordance with the supplied documentation can result in a serious or moderate injury, equipment breakdown, or physical damage that impairs operation. - Page 9 MN1-5029 Rev.22 Do not use this probe with other equipment except for those specifically approved in the manual. Use with unapproved equipment can result in an electric shock, burn, or other injury to the patient or operator and damage to the probe and the other equipment. Scan for the minimum length of time necessary for the diagnosis and at the lowest suitable output.
-
Page 10: Option Usage Precautions
Use Hitachi-approved rubber boots only. Use of an item lacking biocompatibility can cause an adverse reaction of the human body. Check that the rubber boot is sterilized. -
Page 11: Puncturing Precautions
MN1-5029 Rev.22 1-2-3. Puncturing precautions Warning Puncturing must be performed by a skilled doctor. Improper puncturing can injure the patient. Puncturing operations must be performed by a doctor who fully understands the characteristics of ultrasound diagnostics and who is skilled and has a thorough knowledge of puncture operations under an ultrasonic guide. - Page 12 MN1-5029 Rev.22 Check beforehand any areas not displayed on the ultrasound image that are along the puncturing path. If other tissues are in the area not displayed on the ultrasound image, there is a risk of puncturing an unintended body part and causing an injury to the patient. Check that no other organs lie in the puncture path.
-
Page 13: Cleaning, Disinfection And Sterilization Precautions
MN1-5029 Rev.22 1-2-4. Cleaning, disinfection and sterilization precautions Warning Wear protective gloves and other protective gear during cleaning, disinfection and sterilization. Handling of the probe and the puncture guide tube with your bare hands before disinfection or sterilization can result in an infection. After soaking in cleaning agents, thoroughly wash the probe and the puncture guide tube with running water. -
Page 14: Labels
MN1-5029 Rev.22 1-2-5. Labels (1) Probe unit Label 1 Label 2 Label 3 Label 1 Electronic convex probe mark Frequency... - Page 15 MN1-5029 Rev.22 Label 2 This instrument complies with Directive 93/42/EEC relating to Medical Device and Directive 2011/65/EU relating to RoHS. IPX7 mark IPX7 See section 2-2, “Specifications”. Type BF applied part Do not waste the instrument as general waste. Comply with a local regulation.
- Page 16 MN1-5029 Rev.22 (2) Storage case Label B Label A Label D Label C -10-...
- Page 17 MN1-5029 Rev.22 Label A Model Label B Serial No. Label C Hitachi Medical Systems GmbH Otto-von-Guericke-Ring 3 D-65205 Wiesbaden, Germany 2016-09 P-3258F This instrument complies with Directive 93/42/EEC relating to Medical Device and Directive 2011/65/EU relating to RoHS. DATE OF MANUFACTURE...
- Page 18 MADE IN JAPAN Label for 10 pieces 10 pieces Rx Only RUBBER BOOT RB-665P-NS MADE IN JAPAN Hitachi Medical Systems GmbH Otto-von-Guericke-Ring 3 D-65205 Wiesbaden, Germany Non sterile LATEX Contains or presence natural rubber latex Use by Do not reuse...
-
Page 19: Specifications And Parts Name
MN1-5029 Rev.22 2. Specifications and Parts name 2-1. Principles of operation This probe and the ultrasound diagnostic instrument enable image diagnosis using ultrasonic waves. These instruments operate under the principles described below. (1) When an electric pulse signal is applied from the transmitter to the transducer of the probe, the transducer operates by converting electrical vibrations to mechanical vibration energy for emitting pulse-shaped ultrasonic waves into the body part contacting the transducer or into liquid or other medium. -
Page 20: Specifications
MN1-5029 Rev.22 2-2. Specifications 2-2-1. Specifications of the probe Application regions: Urological applications Form of application to patient: Transrectum Connectable instruments: SSD-3500, SSD-4000, Prosound 6, Prosound α6, F37,F31 Field of view: 180 ° Frequency: 3.0 to 8.5MHz Cable length: 2.5 m Weight: 1,000 g Service life:... - Page 21 MN1-5029 Rev.22 2-2-2. Specifications of the puncture guide tube Material Stainless steel Usable puncture needle sizes and diameter 18G(1.26±0.02mm) Service life Three years External dimensions As shown in the figure below. Remarks Unit: mm The dimensions are within ±10% of the indicated values. -15-...
-
Page 22: Performance
MN1-5029 Rev.22 2-3. Performance For measurement tolerances, operating tolerances and other data, refer to the instruction manual for the ultrasound diagnostic instrument. 2-4. Name of each parts Puncture guide tube Rear guide This tube is attached to the Front guideFront guide probe to help insert the probe needle. -
Page 23: Environmental Conditions
MN1-5029 Rev.22 2-5. Environmental conditions Use and store the probe under the following conditions. 2-5-1. Operating environmental conditions Ambient temperature: 10°C to 40°C 50°F to 104°F Relative humidity: 30% to 75% Atmospheric pressure: 700 hPa to 1060 hPa Altitude: 3,000 m or less 2-5-2. - Page 24 MN1-5029 Rev.22 -18-...
-
Page 25: Preparations For Use
MN1-5029 Rev.22 3. Preparations for Use 3-1. Start up check of the probe 3-1-1. Visual check Visually check the ultrasonic irradiation area, insertion portion, handle, cable, connector and rubber boots. If any holes, indentations, abrasion, cracks, deformation, looseness, discoloration, or other abnormalities are found, do not use the equipment. -
Page 26: Start Up Check Of The Puncture Guide Tube
MN1-5029 Rev.22 3-2. Start up check of the puncture guide tube 3-2-1. Visual check Make sure the puncture guide tube is not in the abnormal condition listed below. Visual abnormalities such as deformation, cracking, abnormal gaps, damage, foreign matter adhering, •... -
Page 27: Checking The Needle Echo
MN1-5029 Rev.22 3-3. Checking the needle echo 3-3-1. Check preparation (1) Required items (Depth of 20 cm or more) Warm water 40°C (104°F) Thermometer Puncture guide tube MP-2452-G**G18 (standard configuration) or others (user’s selection of the options) Puncture needle Size: 18G (standard configuration) or others (depend on a user’s selection) Length: up to 250 mm (2) Setup procedure 1. -
Page 28: Checking The Needle Echo
MN1-5029 Rev.22 3-3-2. Checking the needle echo (1) Dip the probe tip into the warm water so that the needle echo is displayed. Probe Puncture guide tube Water of 40℃ (2) Check the following points. • The needle echo matches with the puncture guide line. •... -
Page 29: Usage
MN1-5029 Rev.22 4. Usage 4-1. Operation Check that the rubber boot is mounted and insert the probe into the rectum. An image of the region of interest is displayed on the monitor of the ultrasound diagnostic instrument. For details on displaying and adjusting the screens, see the documentation supplied with the ultrasound diagnostic instrument. - Page 30 Use Hitachi-approved rubber boots only. Use of an item lacking biocompatibility can cause an adverse reaction of the human body. Check that the rubber boot is sterilized.
- Page 31 MN1-5029 Rev.22 4-3. Removal of rubber boot 1. Wrap the rubber boots in tissue paper and remove it from the probe. 2. Dispose used tissue paper and rubber boots using infection prevention procedures based on the rules of your facility. Caution Before disposing the equipment, disinfect or take other infection-prevention measures.
- Page 32 MN1-5029 Rev.22 4-4. Ataching of the puncture guide tube 4-4-1. Selecting the guide tube Select a puncture guide tube that matches the size of the puncture needle that is used. Needle size is indicated G** 4-4-2. Ataching of the puncture guide tube After covering the probe insertion portion with the rubber boot, use the procedure below to attach the puncture guide tube onto the probe.
- Page 33 MN1-5029 Rev.22 (5) Move the rear guide and check that puncture guide tube is attached firmly on probe. Before inserting into the patient, check for air bubbles on the acoustic irradiation area again. Confirm that there are Move and check no air bubbles on the the fixing condition.
-
Page 34: Connecting To The Ultrasound Diagnostic Instrument
MN1-5029 Rev.22 4-6. Connecting to the ultrasound diagnostic instrument RELEASE LOCK The lock lever of the connector moves over the range shown in the figure at right. Align the ○ mark with the LOCK or RELEASE position and lock or release the connector. -
Page 35: Removing From The Ultrasound Diagnostic Instrument
MN1-5029 Rev.22 4-7. Removing from the ultrasound diagnostic instrument RELEASE LOCK The lock lever of the connector moves over the range shown in the figure at right. ○ mark Align the ○ mark with the LOCK or RELEASE position and lock or release the connector. -
Page 36: Puncturing Precautions
MN1-5029 Rev.22 4-8. Puncturing precautions Warning Puncturing must be performed by a skilled doctor. Improper puncturing can injure the patient. Puncturing operations must be performed by a doctor who fully understands the characteristics of ultrasound diagnostics and who is skilled and has a thorough knowledge of puncture operations under an ultrasonic guide. - Page 37 MN1-5029 Rev.22 Warning Check beforehand any areas not displayed on the ultrasound image that are along the puncturing path. If other tissues are in the area not displayed on the ultrasound image, there is a risk of puncturing an unintended body part and causing an injury to the patient. Check that no other organs lie in the puncture path.
-
Page 38: Actions To Be Taken When An Abnormal State Is Detected
MN1-5029 Rev.22 4-9. Actions to be taken when an abnormal state is detected 4-9-1. Ensuring safety of patients Immediately move the probe away from the patient and quit operation. Keep the patient in safe condition and administer the required medical treatment. 4-9-2. -
Page 39: Cleaning, Disinfection And Sterilization
Applicable cleaning, disinfection and sterilization methods for each product are listed in the Table 1. The detail of each method is described in Chapter 5-2. Table 1 Applicable cleaning, disinfection and sterilization methods Cleaning Disinfection Sterilization Model UST-676P Accessories Washing brush Size(M)L-Ki-266, Size(L)L-Ki-265 Note: X means “Applicable” : Automated Need waterproof cover... -
Page 40: Precautions For Cleaning, Disinfection And Sterilization
MN1-5029 Rev.22 5-1. Precautions for cleaning, disinfection and sterilization The following warnings and cautions must be observed when cleaning, disinfecting and sterilizing the probe and accessories. Warning Wear protective gloves and other protective gear during cleaning, disinfection and sterilization. Handling of the probe with your bare hands before sterilization can result in an infection. After finishing soaking the probe in cleaning agents, thoroughly wash it with running water. -
Page 41: Reprocessing Instruction According To Iso 17664
MN1-5029 Rev.22 5-2. Reprocessing instruction according to ISO 17664 Take care about clean circumstances before using the probe on the next patients. If processors reprocess this equipment, refer to these instructions. Table 1 ・ The probe is delivered unsterile. Prior to the first use, reprocess the probe. ・... - Page 42 MN1-5029 Rev.22 Flowchart of reprocessing process of this probe and accessories is as follows: Point of use (Pre-cleaning) Containment and transportation Manual cleaning and disinfection Washer disinfector (WD) Manual cleaning Rinsing after manual cleaning Automated cleaning Drying Automated disinfection Manual disinfection Rinsing after manual disinfection Drying Maintenance, inspection and testing...
-
Page 43: Point Of Use (Pre-Cleaning)
MN1-5029 Rev.22 5-3. Point of use (Pre-cleaning) In the operating room after use of the probe A). Probe 1) Remove any accessories from the probe like puncture guide tube and rubber boot. 2) Flush patient’s blood or fluid by tap water directly after use until the surface looks visually clean. 3) Wipe the whole surface of the probe by gauze pad and remove superficial visible impurities until the surface looks visually clean. -
Page 44: Manual Cleaning And Disinfection
MN1-5029 Rev.22 5-5. Manual cleaning and disinfection Prepare following items before manual cleaning and disinfection. A). Probe 1) Detergent: ENZOL /Cidezyme (Johnson & Johnson, #2258) or another cleaning agent with approved ® ® material compatibility for this medical device. 2) Disinfectant: Cidex OPA (Johnson &... -
Page 45: Manual Cleaning
MN1-5029 Rev.22 5-5-1. Manual cleaning A). Probe 1) The temperature of the detergent solution should be between 15-30 °C [59-86 °F], concentration is 1.6%. Please note the minimum contact time of the detergent in the manufacturer’s instruction. If a differing detergent is used, please also consider the approved material compatibility for this probe. -
Page 46: Manual Disinfection
MN1-5029 Rev.22 5-5-2. Manual disinfection A). Probe 1) Before immersing the equipment, it is recommended to test the concentration of disinfectant solution before each usage. The solution Cidex OPA is ready for use and does not need to be diluted. ®... -
Page 47: Cable And Connector
MN1-5029 Rev.22 5-5-3. Cable and connector Wipe the cable in 20 cm intervals with gauze dipped in ethyl alcohol or water, and dry it after wiping. Clean the connector with gauze dipped in ethyl alcohol, and dry it after cleaning. Clean the other parts of the probe which must not be soaked in liquid in the same manner as the connector. -
Page 48: Applicable Cleaners And Disinfectants / Suppliers List
MN1-5029 Rev.22 5-7. Applicable cleaners and disinfectants / Suppliers List The applicable chemical solutions are listed below. General name Trade name Manufacturer ® ADVANCED STERILIZATION PRODUCTS ENZOL /Cidezyme ® ® Enzyme cleaning agent A Johnson & Johnson company Practical liquid 0.8V/V% Division of Ethicon, Inc. - Page 49 MN1-5029 Rev.22 High-level disinfection General name Trade name Manufacturer PERASAFE Hydrogen peroxide ANTEC INTERNATIONAL Practical liquid 1.62W/V% Acecide ® Peracetic acid Saraya Co., Ltd. Solution 6% ® WAVICIDE -01 * Glutaraldehyde Medical Chemical Corporation Solution 2.65% STERANIOS * Glutaraldehyde Laboratoires ANIOS Solution 2.0% ®...
-
Page 50: Drying
MN1-5029 Rev.22 5-8. Drying A). Probe 1) Wipe the probe with single use, fluff free wipe or towel for removing moisture on the surface of the equipment. 2) If using drying heater for medical equipment, the temperature limit is a maximum of 60 °C [140 °F]. Dry until no visible moisture is left. -
Page 51: Sterilization
MN1-5029 Rev.22 5-11. Sterilization See “Table 1. Applicable cleaning disinfection and sterilization methods” for available sterilization methods Follow the instructions of the sterilizer manufacturer regarding usage, temperature and sterilization-time etc. Handling and maximum input to chamber of sterilizer should be according to operation manual of the sterilizer. -
Page 52: Sterrad ® Sterilization
MN1-5029 Rev.22 5-11-2. STERRAD sterilization ® Sterile conditions of applicable sterilization methods are as follows. The applicable gas is listed below. General name Trade name Manufacturer STERRAD ® ADVANCED STERILIZATION PRODUCTS ® Hydrogen peroxide Sterilization system A Johnson & Johnson company (58% density) (STERRAD 50, 100S, 200,... -
Page 53: Liquid Sterilization (Usa Only)
MN1-5029 Rev.22 5-11-3. Liquid sterilization (USA only) • Applicable chemical solution for sterilization The applicable sterilants are listed below. General name Trade name Manufacturer PERASAFE ® Hydrogen peroxide ANTEC INTERNATIONAL Practical liquid 1.62W/V% Acecide ® Peracetic acid Saraya Co., Ltd. Solution 6% WAVICIDE -01 *... - Page 54 MN1-5029 Rev.22 -48-...
-
Page 55: Storage
MN1-5029 Rev.22 6. Storage 6-1. Actions before storage 6-1-1 Actions before storing the probe When the probe will not be used for an extended period of time, perform the procedures described in section 5 “Cleaning, disinfection and sterilization" and then store it in its storage case. 6-1-2 Actions before storing the puncture guide tube Clean, disinfect and sterilize the puncture guide tube and store it in the sterilized storage tray. - Page 56 MN1-5029 Rev.22 -50-...
-
Page 57: Moving And Transporting
MN1-5029 Rev.22 7. Moving and Transporting 7-1. Moving and transporting In this section, moving refers to "carrying of the probe within a facility" and transporting refers to "transferring using a vehicle or sending the probe for repairs". 7-2. Preparing the probe and accessories for moving Store in the storage case and the storage tray after performing the procedure in section 5 “Cleaning, disinfection and sterilization". - Page 58 MN1-5029 Rev.22 -52-...
-
Page 59: Periodic Inspection
MN1-5029 Rev.22 8. Periodic Inspection 8-1. Safety tests of the probe The safety tests should be conducted at least once a year by a qualified technician. The test record should be stored for future reference. Remarks 1 Qualified technician: personnel for conducting safety tests of medical electrical equipment. If the user requires an appropriate qualified technician, service personnel trained by us can conduct a test at the user’s expense. -
Page 60: Testing Of Measurement Tolerances
MN1-5029 Rev.22 8-2. Testing of measurement tolerances Perform the measurements specified below using an ultrasonic phantom* at least once per year. The test record should be stored for future reference. • Sensitivity • Resolution Remarks Make a copy of the Measurement accuracy inspection data sheet provided in the instruction manual for the ultrasound diagnostic instrument. -
Page 61: Safety Tests Of The Puncture Guide Tube
MN1-5029 Rev.22 8-3. Safety tests of the puncture guide tube Conduct a periodic safety tests at least once a year by referring to section 3-2 "Start up check of the puncture guide tube," and section 3-3 "Checking the needle echo." Also conduct the safety tests for the probe that is used. - Page 62 MN1-5029 Rev.22 -56-...
- Page 63 MN1-5029 Rev.22 9. Configuration 9-1. Standard configuration Probe UST-676P ................1 set Puncture guide tube MP-2452-G18 ..............2 Washing brush (M) L-Ki-266 ................2 Storage tray MP-2724 ................1 set Instruction manual MN1-5029 ................1 copy Storage case STB-45-PA1 ...............1 set 9-2. Options • Puncture guide tube The following puncture guide tubes are provided for various puncture needle sizes.
- Page 64 MN1-5029 Rev.22 -58-...
- Page 65 MN1-5029 Rev.22 10. Disposal of the Device Recycle or dispose this equipment properly in compliance with the Waste Management and Public Cleansing Law. Caution Before disposing the equipment, disinfect or take other infection-prevention measures. Disposal of the equipment without taking the proper preventative measures can lead to infection. Waste Electrical and Electronic Equipment (WEEE) Directive The illustration on the right is required by the EU WEEE Directive to appear on all electrical and electronic equipment.
- Page 66 Hitachi, Ltd. 2-16-1, Higashi-Ueno, Taito-ku, Tokyo, 110-0015, Japan ■Contact +81-3-6284-3668 http://www.hitachi.com/businesses/healthcare/index.html Overseas Offices: Hitachi Medical Systems GmbH Otto-von-Guericke-Ring 3 D-65205 Wiesbaden, Germany EU Importer: Hitachi Medical Systems Europe Holding AG Address: Sumpfstrasse 13 CH-6300 Zug, Switzerland Distributor -60- MN1-5029 Rev.22 ’17.01.11...