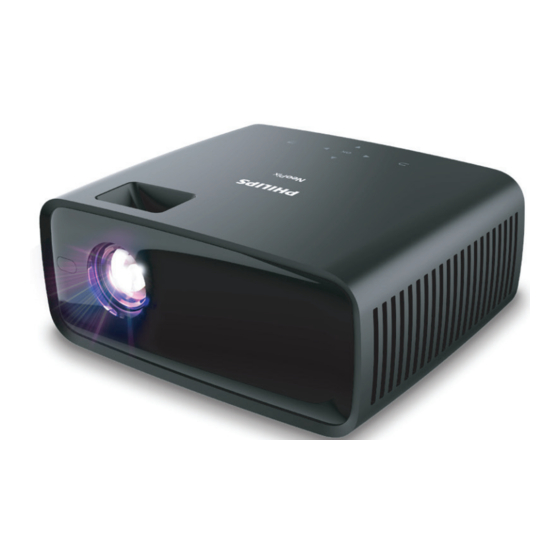
Summary of Contents for Philips NeoPix 120
- Page 1 User Manual NeoPix 120 Home Projector Register your product and get support at www.philips.com/support...
-
Page 2: Table Of Contents
Table of contents Introduction �������������������������������������������������3 5 Connect to external speakers or headphones �����������������������������������������10 Dear customer ...............3 6 Play media from USB storage devices About this user manual ..........3 �����������������������������������������������������������������11 What’s in the box ............3 Connect a USB storage device .......11 Customer service centre ..........3 Play videos ..............11 General safety information ���������������... -
Page 3: Introduction
Introduction What’s in the box NeoPix 120 projector (NPX120/INT) Remote control with 2 AAA batteries Dear customer Quick Start Guide with Warranty Card Thank you for purchasing this projector. AC adapter We hope you enjoy this product and the many... -
Page 4: General Safety Information
If the product gets too hot or emits smoke, shut it down immediately and unplug the power cable. Have your product checked by an authorised service centre. Keep the product away from open flames (e.g. candles). Philips · NeoPix 120... -
Page 5: Power Supply
Navigation buttons (Up, Down, Left, Right) • Navigate items on the screen. • Press / to change the value for the current setting. Return to the previous screen or exit the current screen. Left speaker Philips · NeoPix 120... -
Page 6: Front View
LED lights up in red. Rear IR sensor Connect to a USB storage device/dongle. 3.5 mm audio output; connect to external speakers or headphones. HDMI Connect to an HDMI™ output port on a playback device. Philips · NeoPix 120... -
Page 7: Initial Setup
Select a supplied power cable with the correct plug (EU/UK/US). Connect the power cable to the AC adapter. Connect the AC adapter to the DC power jack at the bottom of the projector. Philips · NeoPix 120... -
Page 8: Prepare The Remote Control
Digital Zoom. with correct polarity (+/-) indicated. Press / or the OK button to adjust the Close the battery compartment. screen size. OSD Language English Restore Factory Default HDMI CEC Panel Flip Rotation Digital Zoom Info Philips · NeoPix 120... -
Page 9: Connect To Playback Devices
To adjust the image shape, turn the keystone to the correct input source. If not, press adjustment knob above the projection lens. on the remote control to bring up the input source list, and then select HDMI. INPUT SOURCE Keystone HDMI Media Player Philips · NeoPix 120... -
Page 10: Connect To A Dongle
Or connect the jack on the projector to headphones. HDMI After connecting the speakers or headphones, press the volume control buttons on the remote control to adjust the volume to the desired level. Philips · NeoPix 120... -
Page 11: Play Media From Usb Storage Devices
While the control bar is visible, press / on the remote control to select an option and then press OK to confirm the action or change the value. To close the dialog box of an option, press Philips · NeoPix 120... -
Page 12: View Images
If you select an image file and wait list of all video files in the current folder more than 3 seconds, the projector will in order to switch to another video or show a preview of the image. Philips · NeoPix 120... - Page 13 100%. Press the navigation buttons on the remote control to move the image. To stop the slide show and return to the list of files in the current folder, press on the remote control. Philips · NeoPix 120...
-
Page 14: Change Settings
(120 Hz, 500 Hz, 1.2 kHz, 3 Info kHz and 12 kHz). • Balance: Adjust the volume of the left and right speakers. • Auto Volume: Turn this on to reduce sudden changes in volume. Philips · NeoPix 120... - Page 15 CEC enabled devices. Device List: Press the OK button to • search for and view the list of connected CEC enabled devices. OSD Language English Restore Factory Default HDMI CEC Panel Flip Rotation Digital Zoom Info Philips · NeoPix 120...
-
Page 16: Maintenance
• Press on the remote control, select Info , and then press the OK button � OSD Language English Restore Factory Default HDMI CEC Panel Flip Rotation Digital Zoom Info Philips · NeoPix 120... -
Page 17: Troubleshooting
• Check that the power cable is connected correctly. The projector cannot read the USB storage • The projector does not support the exFAT file device. system. • Format the USB storage device in FAT32 or NTFS format, then use it. Philips · NeoPix 120... - Page 18 Please clean the lens with a gentle specific glass tissue. You can also push dry air into the product by the side holes in order to clean the optical engine inside. Philips · NeoPix 120...
-
Page 19: Appendixes
......Output: DC 24.0 V, 3.0 A, 72.0 W Multimedia player Supported video formats: MP4, RMVB, AVI, RM, Supported audio formats: MP3, WMA, OGG, AAC, FLAC, APE, WAV Supported photos formats: BMP, PNG, JPEG Dimensions and weight Philips · NeoPix 120... -
Page 20: Ce Statement
Directive 2014/53/EU. FCC ID: 2ASRT-NPX120 Canada regulatory compliance The Declaration of Compliance can be consulted on the site www.philips.com. This device complies with Industry Canada CAN ICES-3 (B)/NMB-3(B) FCC statement RSS-Gen & RSS-247 statement: This device 15�19 Labeling requirements�... -
Page 21: Other Notice
Screeneo Innovation SA/PHILIPS products or environmental performances in the life cycle Screeneo Innovation SA/PHILIPS approved of these products, from manufacturing to products. - Page 22 Route de Lully 5c - 1131 Tolochenaz - Switzerland Philips and the Philips Shield Emblem are registered trademarks of Koninklijke Philips N.V. and are used under license. Screeneo Innovation SA is the warrantor in relation to the product with which this booklet was packaged.


