Advertisement
Quick Links
Getting Started!
* 856-180581-501-00 *
Getting Started describes the procedures necessary for running the server after you
unpack the product. Follow these steps to complete your installation successfully.
SAFETY INDICATION
Refer to Safety Precautions and Regulatory Notices included with the server and follow
the instructions for your safety to setup the server.
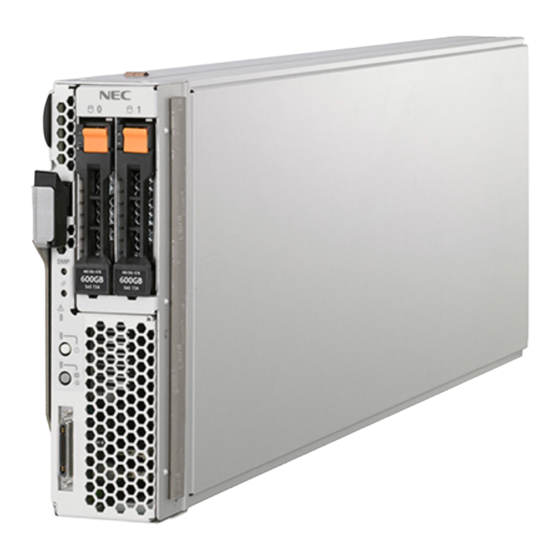
CPU Blade
The CPU blade can be equipped with memory module and additional board.
Note:
See User's Guide in EXPRESSBUILDER for details.
Eject lever
DUMP switch
RESET switch
STATUS LED
(green/amber/red)
POWER LED
(green/amber)
POWER switch
ID LED (blue)
ID/BMC RESET switch
SUV connector
Important:
Make sure that the blade enclosure does not contain any CPU blade. Install
the blade enclosure in the rack. Then, install the CPU blade in the blade
enclosure.
Step 1
Check the accessories.
Unpack the carton box and make sure that you have everything
and that individual components are not damaged.
Note:
See the attached packing list.
Important:
Keep the EXPRESSBUILDER disc and other attached CD/DVD(s) carefully.
Step 2
Install internal optional devices.
Install internal optional devices.
(Go to Step 3 if you have not purchased options.)
Note:
See Installing Internal Optional Devices in the User's Guide and the guide provided
with the optional device.
Step 3
The blade enclosure is the rack mount chassis exclusively used to be equipped with
CPU blades and power supply unit. The blade enclosure is installed in the NEC rack
or NEC-recommended rack conforming to the EIA standard.
Note:
Refer to Blade Enclosure User's Guide for details.
First edition, October 2014
Install a CPU blade in blade enclosure according to the following procedure
(1)
If an optional slot cover is installed on the slot on which the
CPU blade is to be installed, remove it. Unlock the CPU blade
by holding the lever at the front, pull out the CPU blade, and
then remove the slot cover.
Keep the removed slot cover for future use.
Important:
Do not remove the slot cover from any other slot.
(2)
Gently place the server on a clean, rigid, and flat desk. Unlock
the eject lever.
HDD Access LED
(green)
(3)
Hold the frame of the server so that its MP connector faces the
blade enclosure and the side on which the eject lever is placed
is on the left.
HDD Access LED
(amber)
Important:
Do not hold the eject lever to install the CPU blade in the blade enclosure. The
eject lever may be disengaged from the CPU blade that causes the CPU blade
to fall down. Or, the eject lever may be bent that causes damage to the CPU
blade.
(4)
Align the frame of the CPU blade with the guide rails of the
blade enclosure, and insert the CPU blade into the end of
blade enclosure slowly and carefully.
Important:
Make sure that the eject lever hook is hit to the frame of
the blade enclosure, as shown in the figure.
(5)
Firmly push the eject lever, holding the frame at the front of the
blade enclosure, and then insert the CPU blade into the blade
enclosure until the eject lever is completely locked.
Install in blade enclosure.
Eject lever
Frame
Eject lever hook
Step 4
Connect cables.
The keyboard, mouse, display unit, and network devices are connected to the
Connector board in the blade enclosure that is connected with the MP connector at
the rear of the blade enclosure.
Monitor
Keyboard
The SUV connector on the front of the CPU blade is not used in normal operation.
Use the SUV connector in the following cases:
Using a Flash FDD with the server installed in the blade enclosure
(N8405-016F/016AF/016BF/040F/040AF)
Performing maintenance work
Updating BIOS and firmware
Connect a floppy disk drive, external DVD-ROM drive, keyboard, and mouse
according to the figure shown below. Use the separately priced K410-150(00) SUV
Push down the lock
cable (or a standard accessory for the blade enclosure (SIGMABLADE).
However, when using a display unit, keyboard, and mouse connected to the blade
enclosure by using the KVM selection feature of the blade enclosure, do not
connect those devices by way of a SUV cable.
*1 Use the USB hub and external DVD-ROM drive supported by this CPU blade.
Note:
See User's Guide in EXPRESSBUILDER and Blade Enclosure User's Guide for
details.
Finally, connect the power cord coming with the power supply unit to the AC inlet of
power supply unit at the rear of the blade enclosure and the AC outlet for 200 to 240
VAC.
Important:
The power cord supplied with the power supply unit N8405-017/023(A)/044/055
is exclusively for 200 VAC power. The power cord supplied with the power
supply unit N8405-039(A)/048/054 is exclusively for 240 VAC power. Connect
the power cord only to an AC outlet for 200-240 VAC.
Mouse
Monitor
USB Flash FDD
USB
Self-powered
*1
USB hub
External DVD-ROM
*1
drive
USB
Keyboard
Mouse
Go on to the next page.
Advertisement

Related Manuals for NEC Express5800/B120f


Summary of Contents for NEC Express5800/B120f
- Page 1 The keyboard, mouse, display unit, and network devices are connected to the CPU blades and power supply unit. The blade enclosure is installed in the NEC rack Connector board in the blade enclosure that is connected with the MP connector at or NEC-recommended rack conforming to the EIA standard.
- Page 2 When applying a Windows Service Pack to this server, see Service Pack Support in Installation Follow the dialog box to install the bundled software. This document may not be copied or altered without the permission of NEC Corporation. Guide (Windows).
- Page 3 步骤 * 856-180581-501-00 * 安装到刀片服务器机箱 显示器 本指南说明从在打开包装箱,到可以使用本产品的步骤。 刀片服务器机箱是可装载 CPU 刀片服务器以及电源组件等的专用机箱。 请务必遵守本开始指南的指示操作。 鼠标 键盘 将刀片服务器机箱安装到 NEC 的机架或符合 EIA 规格的 NEC 所推荐的机架中。 安全注意事项 另外,日常运作时,并不使用服务器前面备有的 SUV 连接器。 提示: 有关详情请参阅刀片服务器机箱附带的“用户指南”。 在下述情况下使用 SUV 连接器。 在安装服务器之前, 请务必仔细阅读“Safety Precautions and Regulatory Notices”的“使 按照以下步骤,将 CPU 刀片服务器安装到刀片服务器机箱中。 用时的注意事项”,并遵守注意事项正确地进行安装。 ● 在刀片服务器机箱中已安装服务器的状态下使用 Flash FDD 时...
- Page 4 Express Report Service 管理用PC 可将服务器发生故障时的信息通报给维护服务中心。 (MG) 可通过 autorun 菜单安装 Windows 版的绑定软件。 提示: 可从 POST 启动 EXPRESSBUILDER。显示 NEC 标识时,请按下 F3 键。 请遵循如下步骤: (5) 从 Boot 菜单中选择“OS installation”。选择语言后稍等片刻,会显示出 Home 菜单。 (1) 在服务器中安装绑定的软件时,请启动服务器中已安装的 Windows。在管理 PC 中 安装绑定软件时,请启动任意的 PC 中已安装的 Windows。 (2) 以享有管理员权限的用户账号登录 Windows。...