Siemens sinamics g120 Hardware Installation Manual
Hide thumbs
Also See for sinamics g120:
- List manual (1256 pages) ,
- Manual (732 pages) ,
- Operating instructions manual (550 pages)
Table of Contents
Advertisement
Quick Links
Advertisement
Table of Contents

Related Manuals for Siemens sinamics g120


Summary of Contents for Siemens sinamics g120
- Page 3 Fundamental safety ___________________ Power Module PM230, IP20 / instructions Push-through technology (PT) ___________________ Introduction ___________________ SINAMICS Installing/mounting ___________________ Connecting SINAMICS G120P Power Module PM230, IP20 / ___________________ Push-through technology (PT) Service and maintenance ___________________ Technical specifications Hardware Installation Manual ___________________ Accessories ___________________ Appendix...
- Page 4 Note the following: WARNING Siemens products may only be used for the applications described in the catalog and in the relevant technical documentation. If products and components from other manufacturers are used, these must be recommended or approved by Siemens. Proper transport, storage, installation, assembly, commissioning, operation and maintenance are required to ensure that the products operate safely and without any problems.
-
Page 5: Table Of Contents
Table of contents Fundamental safety instructions ......................7 General safety instructions ....................... 7 Safety instructions for electromagnetic fields (EMF) .............. 10 Handling electrostatic sensitive devices (ESD) ..............11 Industrial security ........................12 Residual risks of power drive systems ..................13 Introduction ............................ - Page 6 Table of contents Technical specifications ........................57 General technical data (400 V inverters) ................58 Specific technical data ......................62 Restrictions for special ambient conditions ................68 6.3.1 Current de-rating depending on the operating temperature ..........68 6.3.2 Current and voltage derating dependent on the installation altitude ........69 6.3.3 Current and power limiting depending on the line voltage .............
-
Page 7: Fundamental Safety Instructions
Fundamental safety instructions General safety instructions DANGER Danger to life due to live parts and other energy sources Death or serious injury can result when live parts are touched. • Only work on electrical devices when you are qualified for this job. •... - Page 8 Fundamental safety instructions 1.1 General safety instructions WARNING Danger to life when live parts are touched on damaged devices Improper handling of devices can cause damage. For damaged devices, hazardous voltages can be present at the enclosure or at exposed components;...
- Page 9 Fundamental safety instructions 1.1 General safety instructions WARNING Danger to life through unexpected movement of machines when using mobile wireless devices or mobile phones Using mobile wireless devices or mobile phones with a transmit power > 1 W closer than approx.
-
Page 10: Safety Instructions For Electromagnetic Fields (Emf)
Fundamental safety instructions 1.2 Safety instructions for electromagnetic fields (EMF) NOTICE Device damage caused by incorrect voltage/insulation tests Incorrect voltage/insulation tests can damage the device. • Before carrying out a voltage/insulation check of the system/machine, disconnect the devices as all converters and motors have been subject to a high voltage test by the manufacturer, and therefore it is not necessary to perform an additional test within the system/machine. -
Page 11: Handling Electrostatic Sensitive Devices (Esd)
Fundamental safety instructions 1.3 Handling electrostatic sensitive devices (ESD) Handling electrostatic sensitive devices (ESD) Electrostatic sensitive devices (ESD) are individual components, integrated circuits, modules or devices that may be damaged by either electric fields or electrostatic discharge. NOTICE Damage through electric fields or electrostatic discharge Electric fields or electrostatic discharge can cause malfunctions through damaged individual components, integrated circuits, modules or devices. -
Page 12: Industrial Security
Siemens recommends strongly that you regularly check for product updates. For the secure operation of Siemens products and solutions, it is necessary to take suitable preventive action (e.g. cell protection concept) and integrate each component into a holistic, state-of-the-art industrial security concept. -
Page 13: Residual Risks Of Power Drive Systems
Fundamental safety instructions 1.5 Residual risks of power drive systems Residual risks of power drive systems The control and drive components of a drive system are approved for industrial and commercial use in industrial line supplies. Their use in public line supplies requires a different configuration and/or additional measures. - Page 14 Fundamental safety instructions 1.5 Residual risks of power drive systems 3. Hazardous shock voltages caused by, for example, – Component failure – Influence during electrostatic charging – Induction of voltages in moving motors – Operation and/or environmental conditions outside the specification –...
-
Page 15: Introduction
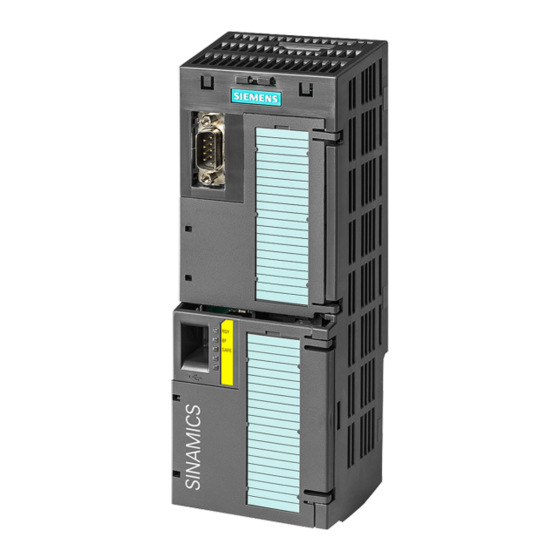
Introduction PM230 Power Module The PM230 Power Module is part of the modular family of SINAMICS G120 inverters. PM230 Power Modules have been specifically designed for pump and fan drives in HVAC applications. They are available with class A filter or no filter in a power range from 0.37 kW … 75 kW and a line voltage range from 3 AC 380 V …... - Page 16 Introduction Power Module PM230, IP20 / Push-through technology (PT) Hardware Installation Manual, 06/2014, A5E34331322B AA...
-
Page 17: Installing/Mounting
Installing/mounting Installation conditions When installing the Power Modules carefully observe the conditions listed below in order to guarantee reliable, continuous and disturbance-free operation. ● The Power Module is designed for installation in a control cabinet. ● It provides protection against the ingress of solid foreign objects ≥ 12.5 mm. ●... -
Page 18: Power Losses And Air Cooling Requirements
Installing/mounting 3.2 Power losses and air cooling requirements Power losses and air cooling requirements Cooling requirements Depending on the power loss of the individual components, the control cabinet will require a cooling airflow to prevent the components from overheating. Formula for calculating the cooling airflow: Total of the power losses of the individual components. - Page 19 Installing/mounting 3.2 Power losses and air cooling requirements Figure 3-1 Air barriers for avoiding cooling air short circuits The power loss values specified in the technical data refer to the values specified for an output frequency of 50 Hz. Special features of Power Modules with push-through technology (PT Power Modules) When you use PT Power Modules, the majority of the power loss is dissipated through the heatsink located outside the control cabinet.
-
Page 20: Mounting The Power Modules
Installing/mounting 3.3 Mounting the Power Modules Mounting the Power Modules 3.3.1 Installing Power Modules Mounting Power Modules with degree of protection IP20 Procedure Proceed as follows to correctly mount the Power Module: 1. Mount the Power Module in a control cabinet. 2. - Page 21 Installing/mounting 3.3 Mounting the Power Modules Mounting Power Modules using push-through technology We recommend that you use the optionally available mounting frame to mount the push- through unit in a control cabinet. This mounting frame includes the necessary seals and frame to ensure compliance with degree of protection IP54.
-
Page 22: Dimension Drawings And Drilling Dimensions For Ip20 Power Modules
Installing/mounting 3.3 Mounting the Power Modules 3.3.2 Dimension drawings and drilling dimensions for IP20 Power Modules 3.3.2.1 Build-in Power Modules - IP20 Drilling patterns, dimensions and clearances for PM230 Power Modules, IP20 Table 3- 1 Dimensions of the PM230, without/with integrated filter Frame size Dimensions (mm) Drilling dimensions... - Page 23 Installing/mounting 3.3 Mounting the Power Modules Table 3- 2 Mounting hardware and clearances to other devices for PM230 Frame size Hardware Tightening torque Cooling air clearances (mm) (Nm) Bottom Lateral Front FSA, FSB M4 screws M5 screws FSD, FSE M6 screws M8 screws mounting without lateral clearance is permissible.
- Page 24 Installing/mounting 3.3 Mounting the Power Modules Mounting the shielding plate Figure 3-2 Mounting the shielding plate, FSA … FSC Figure 3-3 Mounting the shielding Plate, FSD ... FSF Power Module PM230, IP20 / Push-through technology (PT) Hardware Installation Manual, 06/2014, A5E34331322B AA...
-
Page 25: Dimension Drawings And Drilling Dimensions For Pt Power Modules
Installing/mounting 3.3 Mounting the Power Modules 3.3.3 Dimension drawings and drilling dimensions for PT Power Modules Dimensions and drilling patterns for Power Modules with push-through technology Mounting cutout in the control cabinet for PM230 Power Modules; holes to attach the mounting frame FSA, FSB Table 3- 3 Dimensions for PM230 in push-through technology... - Page 26 Installing/mounting 3.3 Mounting the Power Modules Total depth of the inverter • Power Module PM230 FSA + CU240 211 mm, of which 158 mm in the cabi- + CU240 + BOP-2 + CU240 + IOP 223 mm, of which 170 mm in the cabi- 233 mm, of which 180 mm in the cabi- + CU230 229 mm, of which 176 mm in the cabi-...
-
Page 27: Control Unit Installation
Installing/mounting 3.4 Control Unit installation Control Unit installation The Control Unit is snapped onto the Power Module as shown in the figure. To dis- connect the CU push the release button on top of the The process of fitting the Control Unit onto the Power Module is the same tech- nique independent of the... -
Page 29: Connecting
Connecting Preconditions You can establish the line and motor connections once the inverter has been properly installed. In addition to the "Basic safety instructions (Page 7)", it is absolutely essential that you comply with the following notes. DANGER Danger to life through electric shock due to the residual charge of the DC link capacitors Because of the DC link capacitors, a hazardous voltage is present for up to 5 minutes after the power supply has been switched off. - Page 30 Connecting WARNING Danger to life for an excessively high line voltage If the line voltage is excessively high, this can destroy the inverter and there is a risk of electric shock. Ensure that the line voltage is in compliance with the inverter supply voltage. It is not permissible to connect higher line voltages! Note Operating displays for inverter operation...
- Page 31 – You are using a super-resistant RCD/RCM, type B with a tripping current of 300 mA. e.g. a SIQUENCE circuit breaker from Siemens. – Only one inverter is supplied from each RCD/RCM – The motor cables are shielded and are not longer than 50 m. You can find additional...
-
Page 32: Mains And Motor Connection
Connecting 4.1 Mains and Motor Connection Mains and Motor Connection Inverter terminal layout see Line and motor terminals (Page 39). For all connections, carefully observe the regulations relating to electromagnetic compatibility, also see EMC-compliant installation (Page 41). 4.1.1 Permissible line supplies The inverter is designed for the following power distribution systems according to IEC 60364- 1 (2005). - Page 33 Connecting 4.1 Mains and Motor Connection Examples for Power Modules connected to a TN line supply Figure 4-1 TN line supply with separate transfer of N and PE and with a grounded neutral point Power Module PM230, IP20 / Push-through technology (PT) Hardware Installation Manual, 06/2014, A5E34331322B AA...
- Page 34 Connecting 4.1 Mains and Motor Connection TT system In a TT line system, the transformer grounding and the installation grounding are independent of one another. There are TT line supplies where the neutral conductor N is either transferred – or not. Preconditions and restrictions when connecting an inverter to a TT line system ●...
- Page 35 Connecting 4.1 Mains and Motor Connection IT system In an IT line system, all of the conductors are insulated with respect to the PE protective conductor – or connected to the PE protective conductor through an impedance. There are IT line supplies where the neutral conductor N is either transferred – or not. Preconditions and restrictions when connecting an inverter to an IT line system ●...
-
Page 36: Connection Overview Pm230
Connecting 4.1 Mains and Motor Connection 4.1.2 Connection overview PM230 Figure 4-4 Connecting the PM230 IP20 and push-through Power Module The line filter of Power Module PM230 fulfills Class A. For higher EMC requirements, you need an external Class B line filter. Power Module PM230, IP20 / Push-through technology (PT) Hardware Installation Manual, 06/2014, A5E34331322B AA... -
Page 37: Line Connection
Connecting 4.1 Mains and Motor Connection 4.1.3 Line connection Special issues when connecting inverters, frame sizes FSA, FSB and FSC equipped with Profinet Control Units to the line supply If you are using a PROFINET Control Unit, then you must connect the line supply via two ferrite cores;... -
Page 38: Motor Cable Length
Connecting 4.1 Mains and Motor Connection 4.1.4 Motor cable length The following cable lengths are permissible for operation, and do not diminish the performance: Table 4- 1 Permissible cable lengths taking into account the connection type and EMC category Connection type and permissible cable length Permissible EMC category Devices with integrated filter (Class A), the motor is connected using... -
Page 39: Motor Connection
Connecting 4.1 Mains and Motor Connection 4.1.5 Motor connection Star and delta connection Siemens motors have a diagram inside the terminal box showing both connection meth- ods: • Star connection (Y) • Delta connection (Δ) The motor rating plate provides data about the correct connection. - Page 40 Connecting 4.1 Mains and Motor Connection Connection terminals for the line supply and motor, FSD … FSF Access to line and motor termi- nals The connecting terminals for the line and motor have covers to prevent them from being touched. To connect the cable, lift up the covers until they latch into place as shown in the diagram.
-
Page 41: Emc-Compliant Installation
Connecting 4.2 EMC-compliant installation EMC-compliant installation Only the concurrent use of filtering, grounding and shielding ensure an installation in accordance with the EMC requirements. The next sections cover all of the most important rules for the installation of inverter and drive systems. - Page 42 Connecting 4.2 EMC-compliant installation Cable routing and shielding ● Route all inverter power cables (line supply cables, connecting cables between the braking module and the associated braking resistance as well as the motor cables) separately away from signal and data cables. Maintain a minimum clearance of 25 cm. If cables can be separately routed, use metal partitions that have a good electrical connection to the mounting plate.
-
Page 43: Installing The Converter In Compliance With Emc Rules
Connecting 4.2 EMC-compliant installation 4.2.2 Installing the converter in compliance with EMC rules Rules for EMC-compliant cable routing Preconditions ● The inverter is mounted on a metal mounting plate. The mounting plate is unpainted and has good electrical conductivity. ● Use shielded cables for the following connections: –... -
Page 44: Emc-Compliant Cabinet Design
Connecting 4.2 EMC-compliant installation You have wired the inverter in an EMC-compliant fashion. EMC-compliant wiring shown using the example of a frame size A inverter ① Unshielded line supply cable ② EMC clamps (serrated rails) on the shield plate of the Power Module ③... - Page 45 Connecting 4.2 EMC-compliant installation • Zone A: Line supply connection Limit values for conducted interference emission and interference immunity must not be exceeded. • Zone B: Power electronics Sources of interference • Zone C: Controller and sensors Interference sinks Zone D: Motor, braking resistor and corresponding cables Sources of interference...
-
Page 46: Cabling
Connecting 4.2 EMC-compliant installation Radio interference suppression ● Connect interference suppressors to all contactors, relays, solenoid valves and motor holding brakes directly at the coil in order to dampen high-frequency radiation when these devices are switched off. Use RC elements or varistors for AC-operated coils and freewheeling diodes or varistors for DC-operated coils. - Page 47 Connecting 4.2 EMC-compliant installation Cables outside the control cabinet ● Route the power cables of the drive so that there is a minimum clearance of 25 cm to signal and data cables. ● Use shielded motor cables. ● Use shielded signal and data cables. Cable shields ●...
-
Page 48: Equipotential Bonding
Connecting 4.2 EMC-compliant installation 4.2.5 Equipotential bonding Grounding measures Proceed as follows to ground the drive system: ● For several cabinets, install a common PE bar for all cabinet elements ● Connect all of the drive system components to the PE conductor ●... - Page 49 4.2 EMC-compliant installation Diagrams for grounding and high-frequency equipotential bonding measures The following diagram illustrates all grounding and high-frequency equipotential bonding measures using the example of a cabinet with a SINAMICS G120. Grounding measures ① Conventional grounding without any special HF properties High-frequency equipotential bonding measures ②...
- Page 50 Connecting 4.2 EMC-compliant installation The following diagram shows the additional measures for high-frequency equipotential bonding Figure 4-6 Additional measures for high frequency equipotential bonding of the drive system Power Module PM230, IP20 / Push-through technology (PT) Hardware Installation Manual, 06/2014, A5E34331322B AA...
-
Page 51: Emc-Compliant Wiring
Connecting 4.2 EMC-compliant installation 4.2.6 EMC-compliant wiring EMC compliant wiring of the Power Module The terminal cover is not shown in the diagram, so that it is easier to see how the cable is connected. ① Line connection cable (unshielded) for Power Modules with integrated line filter. If you use an external line filter, you will need a shielded cable between the line filter and the Power Module. - Page 52 Connecting 4.2 EMC-compliant installation Figure 4-8 Shield connection - detail Power Module PM230, IP20 / Push-through technology (PT) Hardware Installation Manual, 06/2014, A5E34331322B AA...
-
Page 53: Service And Maintenance
Maintenance Repair WARNING Repairs on equipment may only be carried out by Siemens Service, by repair centers authorized by Siemens or by authorized personnel who are thoroughly acquainted with all the warnings and operating procedures contained in this manual. Any defective parts or components must be replaced using parts contained in the relevant spare parts list. -
Page 54: Replacing The Cooling Fan
Defective parts must be replaced immediately. Note The actual maintenance intervals depend on the installation and operating conditions. Siemens offers its customers support in the form of service contracts. For further information, contact your Siemens regional office or sales office. Replacing the cooling fan Service life of the fan The average service life of the fan is 40,000 hours. - Page 55 Service and maintenance 5.2 Replacing the cooling fan Fan replacement FSA … FSC Procedure when replacing fan modules FSA … FSC Proceed as follows to replace a fan module: 1. Switch the inverter off. 2. Withdraw the line and motor cable connectors and, if available, remove the braking resistor from the Power Module.
- Page 56 Service and maintenance 5.2 Replacing the cooling fan Fan replacement FSD … FSF Procedure when replacing fans FSD … FSF Proceed as follows to replace a fan: 1. Switch the inverter off. 2. Disconnect all the cables from the Power Module. ①②...
-
Page 57: Technical Specifications
Technical specifications Converters for Canadian installations (cUL): FSA … FSC In order that the system is cUL-compliant, use cUL-certified fuses type J or Siemens fuses of the 3NE1 type. Use only copper wire approved for 75°C . Install the converter with any external recommended suppressor with the following features: ●... -
Page 58: General Technical Data (400 V Inverters)
Technical specifications 6.1 General technical data (400 V inverters) General technical data (400 V inverters) Feature Specification Input data Line voltage 3 AC 380 V … 480 V ± 10 % up to 2000 m installation alti- tude. For higher installation altitudes, see "Restrictions for special ambient conditions (Page 68)"... - Page 59 Technical specifications 6.1 General technical data (400 V inverters) Feature Specification Shock and vibration Long-term storage in the transport packaging according to 1M2 to EN 60721-3-1: 1997 Transport in the transport packaging according to 2M3 to EN 60721-3-2: 1997 Vibration in operation according to 3M2 to EN 60721-3-3: 1995 Overvoltage category The inverter insulation is designed for surge voltages ac-...
- Page 60 Technical specifications 6.1 General technical data (400 V inverters) Permissible converter overload The converters have different power ratings "High Overload" and "Low Overload" depending on the expected load. Figure 6-1 Duty cycles, "High Overload" and "Low Overload" Note Please note that the base load (100% power or current) for "Low Overload" is higher than the base load for "High Overload".
- Page 61 Technical specifications 6.1 General technical data (400 V inverters) Definitions ● LO base load input current 100% of the permissible input current for a load cycle according to Low Overload. ● LO base load output current 100% of the permissible output current for a load cycle according to Low Overload. ●...
-
Page 62: Specific Technical Data
Technical specifications 6.2 Specific technical data Specific technical data Note The values for Low Overload (LO) are identical with those of the rated values. Table 6- 1 PM230, IP20, Frame Sizes A, 3 AC 380 V … 480 V Order No. - without filter 6SL3210…... - Page 63 Technical specifications 6.2 Specific technical data Table 6- 3 PM230, IP20, Frame Sizes A, 3 AC 380 V … 480 V Order No. - without filter 6SL3210… …1NE17-7UL1 Order No. - with filter 6SL3210… …1NE17-7AL1 LO base load power 3 kW LO base load input current 8.0 A LO base load output current...
- Page 64 Technical specifications 6.2 Specific technical data Table 6- 5 PM230, IP20, Frame Sizes B, 3 AC 380 V … 480 V Order No. - without filter 6SL3210… …1NE21-0UL1 …1NE21-3UL1 …1NE21-8UL1 Order No. - with filter 6SL3210… …1NE21-0AL1 …1NE21-3AL1 …1NE21-8AL1 LO base load power 4 kW 5.5 kW 7.5 kW...
- Page 65 Technical specifications 6.2 Specific technical data Table 6- 7 PM230, IP20, Frame Sizes C, 3 AC 380 V … 480 V Order No. - without filter 6SL3210… …1NE22-6UL1 …1NE23-2UL1 …1NE23-8UL1 Order No. - with filter 6SL3210… …1NE22-6AL1 …1NE23-2AL1 …1NE23-8AL1 LO base load power 11 kW 15 kW 18.5 kW...
- Page 66 Technical specifications 6.2 Specific technical data Table 6- 9 PM230, IP20, Frame Sizes D, 3 AC 380 V … 480 V Order No. - without filter 6SL3210… …1NE24-5UL0 …1NE26-0UL0 Order No. - with filter 6SL3210… …1NE24-5AL0 …1NE26-0AL0 LO base load power 22 kW 30 kW LO base load input current...
- Page 67 Technical specifications 6.2 Specific technical data Table 6- 11 PM230, IP20, Frame Sizes F, 3 AC 380 V … 480 V Order No. - without filter 6SL3210… …1NE31-1UL0 …1NE31-5UL0 Order No. - with filter 6SL3210… …1NE31-1AL0 …1NE31-5AL0 LO base load power 55 kW 75 kW LO base load input current...
-
Page 68: Restrictions For Special Ambient Conditions
Technical specifications 6.3 Restrictions for special ambient conditions Restrictions for special ambient conditions 6.3.1 Current de-rating depending on the operating temperature Current de-rating depending on the ambient operating temperature NOTICE Restrictions for the permissible ambient operating temperature as a result of the Control Unit or operator panel For the permissible ambient operating temperature, also observe possible restrictions as a result of the Control Unit or an operator panel. -
Page 69: Current And Voltage Derating Dependent On The Installation Altitude
Technical specifications 6.3 Restrictions for special ambient conditions 6.3.2 Current and voltage derating dependent on the installation altitude Current derating depending on the installation altitude Above 1000 m above sea level you must re- duce the inverter output current corresponding to the adjacent curve as a result of the lower cooling power of the air. -
Page 70: Current Reduction Depending On Pulse Frequency
Technical specifications 6.4 Permissible shock and vibration values 6.3.4 Current reduction depending on pulse frequency Table 6- 12 Current reduction depending on the pulse frequency LO base Output base-load current at a pulse frequency of load 2 kHz 4 kHz 6 kHz 8 kHz 10 kHz... -
Page 71: Electromagnetic Compatibility Of The Inverter
Technical specifications 6.5 Electromagnetic compatibility of the inverter Electromagnetic compatibility of the inverter The SINAMICS G120 drives have been tested in accordance with the EMC Product Standard EN 61800-3:2004. Details see declaration of conformity The electromagnetic compatibility refers to both the immunity and the emitted interference of a device. - Page 72 Technical specifications 6.5 Electromagnetic compatibility of the inverter Categories Category C4 Drive systems with a rated voltage ≥ 1000 V, with an LO output current ≥ 400 A, or for use in complex systems in the second environment Drive systems which correspond to category C4 may only be installed in the second environment.
-
Page 73: Assigning The Inverter To Emc Categories
The inverters have been tested in accordance with the EMC product standard EN 61800-3. You can find precise information in the Declaration of Conformity on the Internet at: Declaration of Conformity (http://support.automation.siemens.com/WW/view/en/58275445) Requirements for electromagnetic compatibility To comply with the requirements of EN 61800-3, all drives must be installed in accordance with the manufacturer's instructions and EMC directives. - Page 74 Contact your local supply system operator in this case. You can find the Configuration Manual "EMC installation guideline" here (http://support.automation.siemens.com/WW/view/en/60612658) Power Module PM230, IP20 / Push-through technology (PT) Hardware Installation Manual, 06/2014, A5E34331322B AA...
-
Page 75: Emc Limit Values In South Korea
Technical specifications 6.5 Electromagnetic compatibility of the inverter 6.5.2 EMC limit values in South Korea The EMC limit values to be complied with for South Korea correspond to the limit values of the EMC product standard for variable-speed electric drives EN 61800-3, Category C2 or limit value class A, Group 1 according to EN55011. - Page 76 Technical specifications 6.5 Electromagnetic compatibility of the inverter Power Module PM230, IP20 / Push-through technology (PT) Hardware Installation Manual, 06/2014, A5E34331322B AA...
-
Page 77: Accessories
Accessories Mounting Frames Order numbers ● FSA: 6SL3260-6AA00-0DA0 ● FSB: 6SL3260-6AB00-0DA0 ● FSC: 6SL3260-6AC00-0DA0 The option package contains all necessary nuts and gaskets. Tightening torque for fixing mounting frame and converter for all frame sizes: 3 … 3.5 Nm. Dimensonal drawings Power Module PM230, IP20 / Push-through technology (PT) Hardware Installation Manual, 06/2014, A5E34331322B AA... - Page 78 Accessories 7.1 Mounting Frames Power Module PM230, IP20 / Push-through technology (PT) Hardware Installation Manual, 06/2014, A5E34331322B AA...
-
Page 79: Line Filters
Accessories 7.2 Line filters Line filters Dimensions for mounting the line filter Table 7- 1 Technical data of the line filter (Class B) Order number 6SL3203-0BE17-7BA0 6SL3203-0BE21-8BA0 6SL3203-0BE23-8BA0 Power loss 13 W 22 W 49.4 W Line/load connection 2.5 mm / 14 AWG 6 mm / 10 AWG... - Page 80 Accessories 7.2 Line filters Table 7- 2 Assignment table Line filter (Class B) Power Module 6SL3203-0BE17-7BA0 6SL3210-1NE11-3UL1 6SL3210-1NE11-7UL1 6SL3210-1NE12-2UL1 6SL3210-1NE13-1UL1 6SL3210-1NE14-1UL1 6SL3210-1NE15-8UL1 6SL321☐-1NE17-7UL1 6SL3203-0BE21-8BA0 6SL3210-1NE21-0UL1 6SL3210-1NE21-3UL1 6SL321☐-1NE21-8UL1 6SL3203-0BE23-8BA0 6SL3210-1NE22-6UL1 6SL3210-1NE23-2UL1 6SL321☐-1NE23-8UL1 ☐ Stands for 1 or 2: 1: Chassis device 2: Push-through device Power Module PM230, IP20 / Push-through technology (PT) Hardware Installation Manual, 06/2014, A5E34331322B AA...
-
Page 81: Appendix
Italian, (http://support.automation.sie CU240B-2; CU240E-2 French, Span- mens.com/WW/view/en/2233 9653/133300) Getting Started Installing the Power Module SINAMICS Manual Collection SINAMICS G120 Power Module Documentation on DVD, order number Operating Instructions Installing and commissioning 6SL3097-4CA00-0YG0 the converter, Control Units adapting fieldbus interfaces, CU230P-2 •... -
Page 82: Configuring Support
Manual or tool Contents Available Download or order number languages Catalog D 31 Ordering data and technical English, Ger- All about SINAMICS G120 information for the standard man, Italian, (www.siemens.com/sinamics-g120) SINAMICS G inverters French, Span- Online catalog (Industry Ordering data and technical... -
Page 83: Standards
A.2 Standards Standards European Low Voltage Directive The SINAMICS G120 product series meets the requirements of the Low-Voltage Directive 2006/95/EU. The units are certified for compliance with the following standards: ● EN 61800-5-1 - Electrical power drive systems with adjustable speed European Machinery Directive The inverters are suitable for installation in machines. -
Page 84: Abbreviations
Appendix A.3 Abbreviations Abbreviations Abbreviation State Alternating current Communauté Européenne Control Unit Direct current Digital input DIP switch Digital output Equivalent circuit diagram European Economic Community ELCB Earth leakage circuit breaker Electromagnetic compatibility (EMC) Electromagnetic interference FS… Frame size ... Getting Started Guide High overload Input/Output... -
Page 85: Index
Index Air barrier, 18 Industrial systems, 71 Industry Mall, 82 Installation altitude, 69 IP20 degree of protection, 17 IT system, 32 Catalog, 82 Category C1, 72 Category C2, 72 Category C3, 72 Category C4, 72 Line supply type, 32 Classification of EMC behavior, 71 Configuring support, 82 Cooling, 18 cUL-compliant installation, 57, 57... - Page 86 Index Public systems, 71 Pulse frequency, 70 Questions, 82 Safety notes Electrical installation, 29 Second environment, 71 Service life of the fan, 54 SIZER, 82 Standards EN 61800-3, 71, 73 EN 61800-3, 71, 73 EN 61800-3:2004, 71 Star/delta connection, 39 Support, 82 TN line system, 32 TT system, 32...