Table of Contents
Advertisement
Quick Links
Advertisement
Table of Contents

Related Manuals for NEC Express5800/T71h


Summary of Contents for NEC Express5800/T71h
- Page 1 Express5800/T71h User’s Guide...
-
Page 2: Disclaimer
DIFFERENT part number code to those given in the FRU list of this printed Service Guide. You MUST use the list provided by your regional NEC office to order FRU parts for repair and service of customer machines. -
Page 3: Conventions
Conventions The following conventions are used in this manual : Denotes actual messages that appear Screen messages on screen. NOTE Gives bits and pieces of additional information related to the current topic. WARNING Alerts you to any damage that might result from doing or not doing specific actions. -
Page 4: Safety, Care And Regulatory Information
Safety, Care and Regulatory Information Before installing a server, be sure that you understand the following warnings and cautions. WARNING: To reduce the risk of electric shock or damage to the equipment: Do not disable the power cord grounding plug. The grounding plug is an important safety feature. Plug the power cord into a grounded (earthed) electrical outlet that is easily accessible at all times. - Page 5 CAUTION: Do not operate the server for long periods with the access panel open or removed. Operating the server in this manner results in improper airflow and improper cooling that can lead to thermal damage. Danger of explosion if battery is incorrectly replaced. ...
-
Page 6: Regulatory Notices
CE Statement This is a Class A product. In domestic environment this product may cause radio interference in which case the user may be required to take adequate measures (EN55022). NEC France S.A.S. 29 rue des Hautes Patures 92737 Nanterre Cedex Vietnam RoHS information relevant for Vietnam market Complying with “CIRCULAR,No.30/2011/TT-BCT(Hanoi, August 10 2011),... -
Page 7: Table Of Contents
Table of Contents PREFACE REVISION HISTORY COPYRIGHT DISCLAIMER CONVENTIONS SAFETY, CARE AND REGULATORY INFORMATION PREVENTING ELECTROSTATIC DISCHARGE SERVER WARNINGS AND CAUTIONS REGULATORY NOTICES TABLE OF CONTENTS SYSTEM COMPONENTS SYSTEM SPECIFICATIONS Hardware specification Environmental specification Mechanical specification Power supply specification APPEARANCE OF SYSTEM Front view Rear view Internal Component... - Page 8 System Block Diagram MOTHERBOARD PLACEMENT AND JUMPER SETTING Motherboard Component Connector Icon Description Motherboard Jumper Setting Installing/Removing System Hardware Chassis Cover Removal and Installation Removing the side cover Cooling Fan Installation / Removal Memory Installation / Removal PCI Expansion Card Installation / Removal Install the expansion card How to set up RAID with Intel Software RAID (RSTe) Configuring a RAID array in RAID BIOS...
-
Page 9: System Components
System components Item Description Front Bezel door Power supply Cooling fan System side cover Motherboard Hard disk drive cage... -
Page 10: System Specifications
System Specifications Hardware specification System unit Items Description Processor Socket LGA1151 Processor Support Intel® Xeon® Processor E3-1220 v5 processor Chipset Intel® C232 Chipset LAN Controller Intel® Ethernet Controller I210 Storage 4 x 3.5-inch SATA HDD ... - Page 11 Memory Items Description Number of DIMM slots Four Maximum Memory Capacity 64GB (16GB in each of the four DIMM slots) Memory Modes Single DIMM, non-interleaving (DIMM_P0_A0 or DIMM_P0_B0) Two DIMM, interleaving (DIMM_P0_A0, DIMM_P0_B0) Four DIMM, full memory configuration DIMM specifications Size 8GB &...
-
Page 12: Environmental Specification
Environmental specification Item Description Temperature range Operating 10–35°C (50–95°F) Non-operating -0–50°C (32–122°F) Humidity (non-condensing) Operating 20-80% RH Non-operating 20-80% RH Acoustic noise (sound Pressure) Idle Sound pressure level in idle mode on bystander position <34 dBA Sound pressure level in operating mode on Operating bystander position <39 dBA * All temperature ratings shown are for sea level. -
Page 13: Mechanical Specification
Mechanical specification Item Description System board platform uATX (Micro Advanced Technology Extended) System board dimensions Length 244mm Width 244mm System Dimensions Height 360.00mm Depth 386.00mm Width 175.00mm Server weight (maximum configuration, approximate) Fully loaded configuration 12.5KG (including the keyboard, mouse, and kits) -
Page 14: Power Supply Specification
Power supply specification Express5800/T71h supports 500-watts power supply module. Item Description Model FSP500-70EP Type 500W Dimensions Height 86 mm (3.38 in.) Depth 140 mm (5.51 in.) Width 150 mm (5.9 in.) Weight (approximate) 1.483 kg (3.26 lb) Input requirements Rated input voltage 100–240 VAC... -
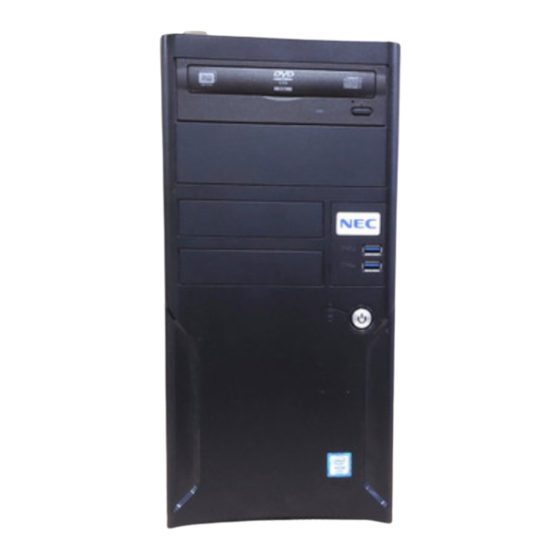
Page 15: Appearance Of System
Appearance of System Front view Item Icon Component Description USB 3.0 connectors Connects to USB devices. Power button Press the button to power on system. HDD LED indicator Indicates the HDD access/health status. -
Page 16: Rear View
Rear view Item Icon Component Description Power supply module cord Connect the system power cord here. socket Monitor port Connects to monitors. USB 2.0 ports Connects to USB devices. USB 3.0 connectors Connects to USB devices. Gigabit LAN port Connects to an Internet or intranet network. Audio connectors : Connects this audio jack for line in devices.. -
Page 17: Internal Component
Internal Component Item LED indicator HDD cages Power module bay Cooling fan assemblies PCI slot bracket Motherboard... -
Page 18: Switch And Led Indicators Introduction
Switch and LED Indicators Introduction This section discusses the different LED indicators located on the: Front panel LAN port Knowing what each LED indicator signifies can aid in problem diagnosis and troubleshooting. Front Panel LED Description Number Color Status Description Power... -
Page 19: Lan Port Led Description
LAN Port LED Description Indicator Color Status Description 1. Network speed Amber GbE link network access (Gigabit LAN port only) Green 100 Mbps link network access 10 Mbps link network access 2. Network Green Active network link connection Green Blinking Ongoing network data activity Off-line network... -
Page 20: System Block Diagram
System Block Diagram... -
Page 21: Motherboard Placement And Jumper Setting
Motherboard Placement and Jumper Setting Motherboard Component This section provides general information on changing jumper settings as well as specific jumper configuration for individual boards in the system. -
Page 22: Connector Icon Description
Connector Icon Description Item Code Description Item Code Description HD_AUDIO1 Audio connectors USB3_LAN1 LAN port #1 (top) / USB 3.0 ports (bottom) USB2_LAN2 USB 2.0 ports VGA_1 VGA port BUZZER1 Buzzer SYS_FAN1 System fan connector#1 PMBUS PMBus connector 8 pin power connector (for CPU) DIMM_P0_B1 Channel 2 slot 1... -
Page 23: Motherboard Jumper Setting
Motherboard Jumper Setting Item Description 3 Power On Select Jumper (S3_MASK) 1-2 Close: Stop an initial power on when BMC is not ready. 2-3 Close: Keep initial power on. (Default setting) ME Update Jumper (ME_UPDATE) 1-2 Close: Normal mode. (Default) 2-3 Close: Force ME update. -
Page 24: Installing/Removing System Hardware
This chapter contains step-by-step procedures on how to disassemble the server system for maintenance and troubleshooting. To disassemble the NEC Express5800/T71h Server, please pay attention to each section’s instruction and tools needed. NOTE: The screws for the different components vary in size. During the disassembly process, group the... -
Page 25: Chassis Cover Removal And Installation
Chassis Cover Removal and Installation Removing the side cover CAUTION! Before you remove or install the system cover: Make sure the system is not turned on or connected to AC power. Remove the two screws located on the rear edge of the side panel. Slide the side panel toward the rear of the chassis to disengage it. -
Page 26: Cooling Fan Installation / Removal
Cooling Fan Installation / Removal Disconnect the processor cooling fan cable from motherboard. Use a long-nosed screwdriver to loosen the four cooling fan mounting pins. Lift the cooling fan away from the motherboard. Lay down the cooling fan in an upright position - with the thermal patch facing upward. Do not let the thermal patch touch the work surface. -
Page 27: Memory Installation / Removal
Memory Installation / Removal The motherboard supports DDR4 memory modules, whereby BIOS will automatically detect memory capacity and specifications. Memory modules are designed so that they can be inserted only in one direction. The memory capacity used can differ with each slot. Installation step: Insert the DIMM memory module vertically into the DIMM slot, and push it down. -
Page 28: Pci Expansion Card Installation / Removal
PCI Expansion Card Installation / Removal NEC Express5800/T71h has two bus slots: PCIE_1 -- PCI Express x8 slot • PCIE_2 -- PCI Express x16 slot • Install the expansion card Remove the securing screw on the slot bracket. Pull out the slot bracket and store it for reassembly later. -
Page 29: How To Set Up Raid With Intel Software Raid (Rste)
How to set up RAID with Intel Software RAID (RSTe) Power on system and press <DEL> during POST. Select Advanced→ SATA Configuration→SATA Mode Selection, set this item to RAID Mode. Save Changes and Exit. -
Page 30: Configuring A Raid Array In Raid Bios
Configuring a RAID array in RAID BIOS Enter the RAID BIOS setup utility to configure a RAID array. Skip this step and proceed with the installation of Windows operating system for a non-RAID configuration. NOTE: POST screen runs fast. If you miss the message of <CTRL-I> during POST, please press <Ctrl>... - Page 31 Create RAID Volume If you want to create a RAID array, select Create RAID Volume in MAIN MENU and press Enter. Entering the CREATE VOLUME MENU screen, enter a volume name with 1~16 letters (letters cannot be special characters) under the Name item and press <Enter>. Then, select a RAID level RAID levels supported include RAID 0, RAID 1, RAID 10, and RAID 5 (the selections available depend on the number of the hard drives being installed).
- Page 32 Under Disks item, select the hard drives to be included in the RAID array. If only two hard drives are installed, they will be automatically assigned to the array. Set the stripe block size if necessary. The stripe block size can be set from 4 KB to 128 KB. Once you have selected the stripe block size, press Enter. Enter the array capacity and press Enter.
- Page 33 When completed, you can see detailed information about the RAID array in the DISK/VOLUME INFORMATION section, including the RAID level, stripe block size, array name, and array capacity, etc. To exit the RAID BIOS utility, press Esc or select 4. Exit in MAIN MENU. Now, you can start to install the SATA RAID/AHCI driver and operating system.
-
Page 34: Hard Disk Drive Installation / Removal
Hard Disk Drive Installation / Removal Below is the instruction of HDD installation and removal SOP. Open the side cover. Remove the securing screws. Pull the HDD cage out of the system. Slide hard disk into the HDD cage and secure the HDD with screws. .Make sure the HDD is seated securely in the HDD cage. -
Page 35: Hdd Installation Sequence
HDD Installation Sequence... - Page 36 BIOS Setup System BIOS BIOS setup is a hardware configuration program built into the system’s Basic Input/Output System (BIOS). Since most systems are already properly configured and optimized, there is no need to run this utility. You will need to run this utility under the following conditions. When changing the system configuration settings •...
- Page 37 Entering BIOS Setup Turn on the server and the monitor. If the server is already turned on, close all open applications, then restart the server. During POST, press DEL If you fail to press DEL before POST is completed, you will need to restart the server. The Setup Main menu will be displayed showing the Setup’s menu bar.
- Page 38 Main Menu Parameter Description BIOS Information Displays the related information of the system BIOS. Project Name Project Version Build Date Onboard LAN Information Technical specifications for onboard LAN device and MAC address . LAN1 MAC Address Memory Information Determines how much total memory is present during the POST. Total Memory System Date Set the date following the weekday-month-day- year format.
- Page 39 Advanced Menu The Advanced menu display submenu options for configuring the function of various hardware components. Select a submenu item, then press Enter to access the related submenu screen.
- Page 40 CPU Configuration...
- Page 41 Parameter Description Option CPU Type Displays the technical specifications of the installed Signature processor. Microcode Patch Max CPU Speed Min CPU Speed CPU Speed/Processor Cores Intel HT Technology Intel VT-x Technology Intel SMX Technology Intel SMX Technology 64-bit Display the supported information of installed CPU. EIST Technology Display Intel EIST Technology function support information.
- Page 42 Overclocking lock Enable/Disable processor overcllocking lock function. Enabled [Disabled] Intel Virtualization Select whether to enable the Intel Virtualization [Enabled] Technology Technology function. VT allows a single platform to run Disabled multiple operating systems in independent partitions. Hardware Prefetcher Select whether to enable the speculative prefetch unit of [Enabled] the processor.
- Page 43 C-State Un-demotion Configure state for the C-State un-demotion. [C1 and C3] Disabled Package C state demotion Configure state for the C-State package demotion Enabled [Disabled] Package C state demotion Configure state for the C-State package demotion [Enabled] Disabled Package C state undemotion Configure state for the C-State package un-demotion [Enabled] Disabled...
- Page 44 SATA Configuraton Parameter Description Option SATA Mode Selection Select the on chip SATA type. RAID RAID: When set to RAID, the SATA controller [ACHI] enables both its RAID and AHCI functions. You will be allows access the RAID setup utility at boot time. ACHI: When set to AHCI, the SATA controller enables its AHCI functionality.
- Page 45 S5 RTC Wake Settings...
- Page 46 Parameter Description Option Wake system from S5 Enable or disable System wake on alarm event. Enabled When enabled, System will wake on the hr:min:sec [Disabled] specified. Wake up hour Press <+> and <-> to define the wake up hour. Wake up minute Press <+>...
- Page 47 PCI Subsystem Settings...
- Page 48 Parameter Description Option PCI Express Slot #1/2 I/O ROM When enabled, This setting will initialize the device [Enabled] expansion ROM for the related PCI-E slot. Disabled Slot configuration Press [Enter] for configuration of advanced items. PCI Device Common Settings: PCI Latency Timer Value to be programmed into PCI Latency Timer [32 PCI Bus Clocks] Register.
- Page 49 Serial Port Console Redirection (Optional)
- Page 50 Network Stack Parameter Description Option Network stack Enable/Disable UEFI network stack. [Enabled] When this item is enabled, advanced items show up. Disabled Ipv4 PXE Support Enable/Disable Ipv4 PXE feature. [Enabled] Disabled Ipv6 PXE Support Enable/Disable Ipv6 PXE feature. [Enabled] Disabled Media detect count Press numeric keys to define the desired values.
- Page 51 Trusted Computing Parameter Description Option Security Device Support Select Enabled to activate TPM support feature. Enabled [Disabled] Current Status Information Display current TPM status information.
- Page 52 Intel TXT Information Parameter Description Option Chipset Displays the technical specifications BiosAcm for the Intel TXT information. Chipset Txt Cpu Txt Error Code Clasee Code/Major Code Minor Code...
- Page 53 CSM Configuration Parameter Description Option CSM Support Enable/Disable Compatibility Support Module [Enabled] (CSM) support. Disabled Gate20 Active Upon Request: GA20 can be disabled using BIOS [Upon Request] services. Always Always: Do not allow disabling GA20; this option is useful when any RT code is executed above 1MB. Option ROM Messages [Force BIOS] Keep Current...
- Page 54 NVMe Configuration (Optional)
- Page 55 Main Board Configuration Parameter Description Option CPIE Runtime Error Enable/Disable Runtime Error settings. Enabled [Disabled] WHEA Support Enable/Disable Windows Hardware Error [Enabled] Architecture support. Disabled Chassis Opened Warning Configure chassis opening intrusion alert function. Enabled [Disabled] SATA Signal Mode Configure SATA signal mode. [iEMT mode] Rx mode...
- Page 56 Intel(R) I210 Gigabit Network Connection...
- Page 57 Parameter Description Option NIC Configuration Press [Enter] for configuration of advanced items. Blink LEDs (range 0-15 seconds) Blink LEDs for the specified duration (u to 15 seconds). Press the numeric keys to input the desired value. UEFI Driver Display the UEFI driver information. Adapter PBA Display the Adapter PBA information.
- Page 58 Chipset The Chipset menu display submenu options for configuring the function of main chipset. Select a submenu item, then press Enter to access the related submenu screen. Parameter Description Option Onboard Audio Enable/Disable onboard audio device. [Enabled] Disabled VT-d Enable/Disable Intel Virtualization Technology for [Enabled] Directed I/O (VT-d) feature.
- Page 59 Intel Server Platform Services Parameter Description Option Intel Server Platform Services Enable/Disable Intel Server Platform [Enabled] Services Help. Disabled...
- Page 60 System Agent (SA) Configuration Parameter Description Option Graphics Configuration Press [Enter] for configuration of advanced items. PEG Port Configuration Press [Enter] for configuration of advanced items. Memory Configuration Press [Enter] for configuration of advanced items.
- Page 61 Graphics Configuration Parameter Description Option Active Video Select active video type. On board Device [Offboard Device]...
- Page 62 PEG Port Configuration Parameter Description Option PEG 0:1:0 Display PEG configuration information. Enable Root Port [Auto] Enabled Disabled Max Link Speed [Auto Gen1 Gen2 Gen3 PEG 0:1:1 Display PEG configuration information. Enable Root Port [Auto] Enabled Disabled Max Link Speed [Auto Gen1 Gen2...
- Page 63 Memory Configuration Parameter Description Option Memory Frequency Display the frequency information of installed memory. Total Memory Determines how much total memory is present during the POST. Display the voltage information of installed memory. DIMM Information: The size of memory installed on each of the DIMM_P0_A0 DDR4 slots.
- Page 64 2.25 GB 2 GB 1.75 GB 1.5 GB 1.25 GB 1 GB Memory Scrambler Enable/Disable Memory Scrambler support. [Enabled] Disabled Channel A DIMM Control Configure DIMM for Channel A. [Enable both DIMMs] Disable DIMM0 Disable DIMM1 Disable both DIMMs. Channel B DIMM Control Configure DIMM for Channel B.
- Page 65 Power Policy Parameter Description Option Power Policy Quick Settings Configure Power Policy Quick Settings [Standard] Best Performance Energy Efficient Intel (R) SpeedStep(tm) (Enhanced Conventional Intel SpeedStep Technology [Enabled] Intel SpeedStep Technology) switches both voltage and frequency in tandem Disabled between high and low levels in response to processor load.
- Page 66 processing cores to improve its performance. When this item is disabled, the processor will not overclock any of its core. Closed Loop Therm Manage Enabled [Disabled] VT-d Enable/Disable Intel Virtualization Technology for [Enabled] Directed I/O (VT-d) feature. Disabled...
- Page 67 Security Menu The Security menu allows you to safeguard and protect the system from unauthorized use by setting up access passwords.
- Page 68 There are three types of passwords that you can set: Administrator password • Entering this password will allow the user to access and change all settings in the Setup Utility. User password • Entering this password will restrict a user’s access to the Setup menus. To enable or disable this field, a Administrator Password must first be set.
- Page 69 Setting a System Password Use the up/down keys to select a password parameter (Set Administrator Password or Set User Password), then press Enter. A password box will appear. Type a password then press Enter. The password may consist of up to six alphanumeric characters (A-Z, a-z, 0-9). Retype the password to verify the first entry then press Enter again.
- Page 70 Key Management Parameter Description Option Provision Factory Default keys Force the system to Setup Mode. This will clear all Secure Enabled Boot Variables such as Platform Key (PK), Key-exchange [Disabled] Key (KEK), Authorized Signature Database (db), and Forbidden Signaures Database (dbx). Enroll all Factory Default keys Press [Enter] to install default Secure Boot Keys.
- Page 71 OsRecovery Signatures Press [Enter] to configure OsRecovery Signatures.
- Page 72 Boot Option Menu The Boot menu allows you to set the drive priority during system boot-up. BIOS setup will display an error message if the drive(s) specified is not bootable. Parameter Description Option Bootup NumLock State Enable or Disable Bootup NumLock function. [On] Fill Screen LOGO Show Enable/Disable showing the manufacturer's...
- Page 73 Save & Exit Menu The Exit menu displays the various options to quit from the BIOS setup. Highlight any of the exit options then press Enter. Parameter Description Option Save Changes and Exit Saves changes made and close the BIOS setup. Discard Changes and Exit Discards changes made and close the BIOS setup.
- Page 74 Driver Installation Installation Procedures The DVD auto run program starts, click on specified driver item to start the installation. CAUTION! Please install Intel ME SPS driver first. Then, a series of installation wizards appear. Follow up the wizards to install the drivers. System will restart automatically when the setup is completed.
-
Page 75: Cable Routing
Cable Routing Cable Routing image Item Suggest Cable Item Suggest Cable SATA HDD cable Power cable SATA cable (onboard SATA to ODD) Front switch cable/Front LED cable... -
Page 76: Troubleshooting
Troubleshooting Error Symptoms List NOTE: To diagnose a problem, first find the error symptom in the left column. If directed to a check procedure, replace the FRU indicated in the check procedure. If no check procedure is indicated, the first Action/FRU listed in right column is the most likely cause. - Page 77 Hard disk drive has write error. Enter BIOS Setup and Load default settings. Hard disk drive. Hard disk drive LED fails to light, but With the system power on, measure the voltage of hard disk LED system operates normally. connector. Hard drive LED cable.
- Page 78 Parallel/Serial Ports Execute “Load Default Values” in BIOS Setup to confirm ports presence before diagnosing any parallel/serial ports problems. Serial or parallel port loop-back test Make sure that the LPT# or COM# you test is the same as the failed. setting in BIOS Setup.
-
Page 79: Bios Beep Codes
BIOS Beep Codes BIOS Beep Codes Table PEI Beep Codes # of Beeps Description Invalid password Recovery started Recovery failed S3 Resume failed No Console Input/Output Devices are found Flash update is failed BIOS Recovery Instruction AMI has an embedded recovery technique. In the event that the BIOS becomes corrupt the boot block can be used to restore the BIOS to a working state. - Page 80 6. BIOS updated.
-
Page 81: Bios Post Error Messages List
BIOS POST Error Messages List BIOS POST error message list PEI Phase Status Code Description Progress Code 0x10 PEI Core is started 0x11 Pre-memory CPU initialization is started 0x12 Pre-memory CPU initialization (CPU module specific) 0x13 Pre-memory CPU initialization (CPU module specific) 0x14 Pre-memory CPU initialization (CPU module specific) 0x15... -
Page 82: Dxe Phase
0x5A Internal CPU error 0x5B Reset PPI is not available 0x5C-0x5F Reserved for future AMI error codes S3 Resume Progress Codes 0xE1=0 S3 Resume is stared (S3 Resume PPI is called by the DXE IPL) 0xE1 S3 Boot Script execution 0xE2 Video repost 0xE3... - Page 83 0x7A – 0x7F Reserved for future AMI DXE codes 0x80 – 0x8F OEM DXE initialization codes 0x90 Boot Device Selection (BDS) phase is started 0x91 Driver connecting is started 0x92 PCI Bus initialization is started 0x93 PCI Bus Hot Plug Controller Initialization 0x94 PCI Bus Enumeration 0x95...
-
Page 84: Undetermined Problems
8. Check all cables and connectors for proper installation. 9. If the jumpers, switches and voltage settings are correct, remove or disconnect the following, one at a time: 10. Non-NEC devices External devices Any adapter card (modem card, LAN card or video card, if installed) ...