Sharp SMD2499FS Service Manual
Convection microwave drawer model
Hide thumbs
Also See for SMD2499FS:
- Operation manual (25 pages) ,
- Wi-fi connect manual (8 pages) ,
- Installation manual (8 pages)
Table of Contents
Advertisement
Quick Links
CONVECTION MICROWAVE DRAWER MODEL
In the interest of user-safety the unit should be restored to its original condition and only parts identical to those specified should
be used.
WARNING TO SERVICE PERSONNEL:
This service manual is intended for use by persons having electrical and mechanical training and a level
of knowledge of these subjects generally considered acceptable in the appliance repair trade. SHARP
ELECTRONICS CORPORATION cannot be responsible, nor assume any liability, for injury or damage of any
kind arising from the use of this manual.
BEFORE SERVICING ....................................................................................................... INSIDE FRONT COVER
WARNING TO SERVICE PERSONNEL ................................................................................................................. 3
MICROWAVE MEASUREMENT PROCEDURE ..................................................................................................... 4
FOREWORD AND WARNING ............................................................................................................................... 5
PRODUCT SPECIFICATIONS ............................................................................................................................... 6
SCHEMATICS ...................................................................................................................................................... 12
REMOTE CONNECTION PROBLEMS.................................................................................................................13
TROUBLE SHOOTING GUIDE.............................................................................................................................14
TEST PROCEDURES .......................................................................................................................................... 16
MICROWAVE DRAWER DISASSEMBLY ............................................................................................................. 27
WIRING DIAGRAMS ............................................................................................................................................ 41
PARTS LIST ......................................................................................................................................................... 43
PACKING AND ACCESSORIES .......................................................................................................................... 50
SHARP ELECTRONICS CORPORATION
This document has been published to be used for after sales service only. The contents are subject to change without notice.
SERVICE MANUAL
TABLE OF CONTENTS
1
S11M442SMD249
SMD2499FS
SMD2499FS
Page
Advertisement
Table of Contents

Related Manuals for Sharp SMD2499FS


Summary of Contents for Sharp SMD2499FS
-
Page 1: Table Of Contents
This service manual is intended for use by persons having electrical and mechanical training and a level of knowledge of these subjects generally considered acceptable in the appliance repair trade. SHARP ELECTRONICS CORPORATION cannot be responsible, nor assume any liability, for injury or damage of any kind arising from the use of this manual. -
Page 2: Precautions To Be Observed Before And During Servicing To Avoid Possible Exposure To Excessive Microwave Energy
Before servicing an operative unit, perform a microwave emission check as per the Microwave Measure- ment Procedure outlined in this service manual. If microwave emissions level is in excess of the specified limit, contact SHARP ELECTRONICS CORPORATION immediately @1-800-237-4277. TO ACCESS INTERNET: http://www.sharpusa.com/Support.aspx... -
Page 3: Warning To Service Personnel
SMD2499FS WARNING TO SERVICE PERSONNEL Microwave Oven units contain circuitry capable of producing very high voltage and current, contact with following parts may result in a severe, possibly fatal, electrical shock. (Example) High Voltage Capacitor, High Voltage Power Transformer, Magnetron, High Voltage Rectifier Assembly, High Voltage Harness, Heating Elements, etc.. -
Page 4: Microwave Measurement Procedure
SMD2499FS MICROWAVE MEASUREMENT PROCEDURE A. Requirements: 1) Microwave leakage limit (Power density limit): The power density of microwave radiation emitted by a microwave oven should not exceed 1mW/cm at any point 5cm or more from the external surface of the oven, measured prior to... -
Page 5: Foreword And Warning
SMD2499FS FOREWORD This Manual has been prepared to provide Sharp Electronics Corp. Service Personnel and Service Information for the CONVECTION MICROWAVE DRAWER. It is recommended that service personnel carefully study the entire text of this manual so that they will be qualified to render satisfactory customer service. -
Page 6: Product Specifications
Popcorn, Reheat, Cook, More Menus, Defrost, Open/Close, Stop/Clear, Start/+30 sec, Power Level, Timer/Settings, Number Keys with Convection Temp settings. Oven Cavity Light LED x 2 Remote Start Wi-Fi connect by way of "Sharp Kitchen" App. Weight 128 lbs Safety Standard UL Listed FCC Authorized... - Page 7 SMD2499FS GENERAL INFORMATION GROUNDING INSTRUCTIONS This oven is equipped with a three prong grounding plug. It must be plugged into a wall receptacle that is properly installed and grounded in accordance with the National Electrical Code and local codes and ordinances.
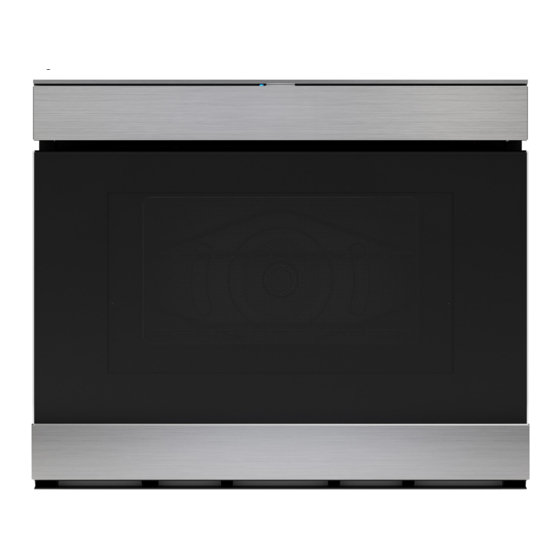
- Page 8 SMD2499FS OVEN DIAGRAM 1 Easy Wave Open indicator 8 Convection Microwave Drawer guides 2 Wi-Fi indicator 9 Hand holes 3 Hidden control panel door 10 Vent 4 Easy Wave Open sensor 11 Menu labels 5 Nameplate: Open the Convection Microwave Drawer fully.
- Page 9 OPERATION SMD2499FS DESCRIPTION OF OPERATING SEQUENCE The following is a description of component functions during 6. When the door is opened during a cook cycle, third door oven operation. switch (only Canada model), monitor switch, door sensing switch, the secondary interlock relay and the primary OFF CONDITION interlock switch are activated with the following results.
- Page 10 SMD2499FS HEATER (BAKE/ROAST/GRILL) COOKING CONDITION 5. At the end of the convection cook cycle, shut-off relay "PREHEATING CONDITION" (RY11/RY12) is energized turning on the damper motor. Program desired convection temperature by touching the The damper is returned to the open position, opening BAKE/ROAST/GRILL pad and touch “1”...
- Page 11 SMD2499FS Cooking Sequence. EASY WAVE OPEN 1. Touch SENSOR COOK pad. NOTE: Below are criteria for wave sensor to open drawer. The oven should not be operated on SENSOR COOK immediately after plugging in the unit. 1. Motion sensor function requires 2 consecutive hand Wait two minutes before cooking on SENSOR COOK.
-
Page 12: Schematics
SMD2499FS SCHEMATIC (OFF CONDITION) -
Page 13: Remote Connection Problems
1) Reinstall if missing and follow steps to connect to the Convection Microwave Drawer oven. b) Open the "Sharp Kitchen" App and verify that you see the Convection Microwave Drawer oven connection. 1) Reconnect if you do not see the Convection Microwave Drawer oven c) Check the Wi-Fi modem status is ok and that there is internet connection. -
Page 14: Troubleshooting Guide
SMD2499FS TROUBLESHOOTING GUIDE Never touch any part in the circuit with your hand or an uninsulated tool while the power supply is connected. When troubleshooting the microwave oven, it is helpful to follow the Sequence of Operation in performing the checks. Many of the possible causes of trouble will require that a specific test be performed. - Page 15 SMD2499FS during DISPLAY UNIT...
-
Page 16: Test Procedures
SMD2499FS TEST PROCEDURES PROCEDURE COMPONENT TEST LETTER A MAGNETRON ASSEMBLY TEST HIGH VOLTAGES ARE PRESENT DURING THE COOK CYCLE, SO EXTREME CAUTION SHOULD BE OBSERVED. DISCHARGE THE HIGH VOLTAGE CAPACITOR BEFORE TOUCHING ANY OVEN COMPONENTS OR WIRING. To test for an open filament, isolate the magnetron from the high voltage circuit. A continuity check across the magnetron filament leads should indicate less than 1 ohm. - Page 17 SMD2499FS TEST PROCEDURES PROCEDURE COMPONENT TEST LETTER SENSOR 1. Make sure the Easy Wave Open (motion sensor function) is activated. When activated, the blue LED indicator light unit turns ON when drawer door is closed. 2. Check sensor lens for foreign material.
- Page 18 SMD2499FS INDICATORS LENS AND COLOR LEGEND HIGH VOLTAGE CAPACITOR TEST DISCHARGE THE HIGH VOLTAGE CAPACITOR BEFORE TOUCHING ANY OVEN COMPONENTS OR WIRING. If the capacitor is open, no high voltage will be available to the magnetron. Disconnect input leads and check for short or open between the terminals using an ohmmeter.
- Page 19 TEST PROCEDURES SMD2499FS PROCEDURE COMPONENT TEST LETTER MONITOR SWITCH Disconnect the oven from power supply. Before performing this test, make sure that the primary interlock switch and the secondary interlock relay are operating properly, according to the above Test Procedures. Disconnect the wire lead from the monitor switch (NC) terminal.
- Page 20 SMD2499FS TEST PROCEDURES PROCEDURE COMPONENT TEST LETTER BLOWN MONITOR FUSE F20A If the fuse 20A is blown when the door is opened, check the primary interlock sw itch secondary interlock relay and monitor switch. If the monitor fuse (FUSE 20A) is blown by improper switch operation, the monitor fuse and monitor switch must be replaced even if the monitor switch operates normally CAUTION: Only replace fuse with the correct value replacement.
- Page 21 SMD2499FS TEST PROCEDURES PROCEDURE COMPONENT TEST LETTER MOTOR WINDING TEST Disconnect the leads from the motor. Using an ohmmeter, check the resistance between the two terminals as described in the table below. Table: Resistance of Motor Motors Resistance Antenna motor Approximately 3.6 –...
- Page 22 SMD2499FS TEST PROCEDURES PROCEDURE COMPONENT TEST LETTER TEST MODE (TOUCH KEY CHECK) OPERATION (PRESS) DISPLAY STOP/CLEAR TIMER/SETTINGS (CLOCK SETTING MODE) Touch POWER LEVEL within POWER LEVEL 20 sec. START/+30SEC MORE MENUS (MICROWAVE) 0000000 NOTE: TOUCH EACH KEY VALUES WILL CHANGE AND YOU WILL HEAR A TONE If you do not "KEY OK"...
- Page 23 SMD2499FS TEST PROCEDURES PROCEDURE COMPONENT TEST LETTER AH SENSOR TEST Checking the sensor cooking condition WARNING: The oven should be fully assembled before following procedure. (1) The oven should be plugged in at least two minutes before sensor cooking. (2) Room temperature should not exceed 95°F (35°C).
- Page 24 SMD2499FS TEST PROCEDURES PROCEDURE COMPONENT TEST LETTER RELAY TEST Disconnect the power supply cord and follow Drawer Disassembly Instructions. Open the door and block it open. Discharge high voltage capacitor. Disconnect the leads to the primary of the power transformer. Ensure that these leads remain isolated from other components and oven chassis by using insulation tape.
- Page 25 SMD2499FS TEST PROCEDURES PROCEDURE COMPONENT TEST LETTER Damper motor switch test 1. Disconnect the power supply cord, and then remove outer case. 2. Open the door and block it open. 3. Discharge high voltage capacitor. 4. Disconnect the leads to the primary of the power transformer.
- Page 26 SMD2499FS TEST PROCEDURES PROCEDURE COMPONENT TEST LETTER CAVITY LED LAMP 1. Check for foreign material on cavity lamp hole and LED lens 2. When door is OPEN, check for approx. 24VDC across the connector terminal connected to LED with the LED unplugged. This confirms that the PSU unit DPWB-B696DRKZ is working.
-
Page 27: Microwave Drawer Disassembly
SMD2499FS COMPONENT REPLACEMENT AND ADJUSTMENT PROCEDURE WARNING AGAINST HIGH VOLTAGE: Microwave ovens contain circuitry capable of producing very high voltage and current. Contact with the following parts may result in severe, possibly fatal, electric shock. (Example) High Voltage Capacitor, Power Transformer, Magnetron, High Voltage Rectifier Assembly, High Voltage Harness etc.. - Page 28 SMD2499FS CONVECTION MICROWAVE DRAWER DISASSEMBLY WARNING: Follow all safety precautions as stated at the beginning of this Service Manual before proceeding! Fig. 1 1. Open the Drawer to access the (4) mounting screws holding the unit on to the wall or cabinet opening. (Fig 1).
- Page 29 SMD2499FS CONTROL PANEL (C/P) REMOVAL 1. Remove the (6) screws from the right & left Side Angles. 2. Remove the (7) C/P Cover screws behind the Control Fig. 3 panel (Fig 3) 3. Open the Cavity door 4. Remove (2) C/P screws from the black C/P Bracket under the C/P Cover (Fig 4).
- Page 30 SMD2499FS NOISE FILTER BOARD REPLACEMENT 1. You will need to remove the left side Outercase (13) screws. 2. Un-hook all the terminals from the Noise Filter PWB (make note of wiring and molex size), then remove (1) screw from PWB. (Fig 4) 3.
- Page 31 SMD2499FS DOOR SENSING SWITCH, PRIMARY INTERLOCK SWITCH AND MONITOR SWITCH REMOVAL 1. Re-install each switch in its place. The primary interlock 1. Remove either the left or right O/C. Open the drawer and keep it open. switch is in the lower position and the monitor switch is 3.
- Page 32 SMD2499FS DRAWER/SLIDE RAIL/CHOKE/DOOR FRAME & RACK GEAR REMOVAL DOOR FRAME ASSY REMOVAL Fig. D-3 Fig. D-1 Fig. D-2 Open the drawer and keep it open. 2. Remove (2) Drawer Support Covers (both sides) from Choke Cover as shown in (Fig. D-1).
- Page 33 SMD2499FS DOOR LATCH REMOVAL AND RACK STAY REPLACEMENT 1. Follow "DRAWER ASSEMBLY AND CHOKE REMOVAL" (steps 1-3) 2. At this point, you can change Latch Hooks/Springs without removing the Door Frame. 3. Unhook Latch Spring, then remove Latch Screw (Fig. L-1).
- Page 34 SMD2499FS AUTO DRAWER GEAR REMOVAL / INSTALLATION (This procedure can be performed without removing the outercase) 1. If you are just replacing the Auto drawer Gear, it will not be necessary to follow the "Convection Microwave Drawer Disassembly" as previously stated.
- Page 35 SMD2499FS DAMPER MOTOR ASSY (SWITCH, MOTOR ASSY OR INTAKE DAMPER PACKING) REMOVAL DAMPER SWITCH and/or MOTOR ASSY REMOVAL RIGHT SIDE Remove either left or right Outercase cabinet. 2. Remove (2) screws holding Damper Motor Assy ( ) to Intake Duct Assy (Fig. D-1 & Fig. D-2).
- Page 36 SMD2499FS MAGNETRON AND FAN REMOVAL MAGNETRON REMOVAL Remove the right Outercase cabinet. 2. Unhook wires from the Magnetron Temp Fuse and Magnetron. (Fig. M-1). 3. Remove the (4) screws holding the Magnetron to the cavity and carefully pull out (Fig. M-1).
- Page 37 SMD2499FS SENSOR ASSY AND PSU UNIT / POWER UNIT / RELAY REMOVAL SENSOR ASSY REMOVAL Remove the left Outercase cabinet. 2. Remove (2) screws holding Sensor Assy to Damper Assy (Fig. S-1). 3. Unlock Purse Locks holding the Sensor wire to harness.
- Page 38 SMD2499FS PSU UNIT/POWER UNIT/RELAY REMOVAL Remove the left Outercase cabinet. 2. Remove (2) screws from Baseplate holding PSU Unit and push back to unhook tabs from the Baseplate. (Fig. P-1 & Fig. P-2). 3. Before pulling PSU Unit out, undo Purse Lock and unplug the Stirrer Motor and the Auto Drawer Gear Assy molex.
- Page 39 SMD2499FS FAN MOTOR REMOVAL Remove the Rear Outercase cabinet. 2. Unplug wires to Fan Motor. 3. There are two ways to remove the Fan Motor screws (6): (Fig. F-1) a. Use an angled Phillips screw driver to remove (2) screws under the Rear Conv Assy, remove other (4) screws.
- Page 40 SMD2499FS GRILL REMOVAL Remove the left Outercase cabinet. 2. Unscrew the screws holding the wires to the defective Grill (Fig. G-1) 3. Remove the (3) nuts holding the Grill to the cavity using a 9/32 or 7mm deep socket. 4. Unhook the defective Grill and take out.
-
Page 41: Wiring Diagrams
SMD2499FS MAIN WIRE HARNESS MGT FM AC(L)IN AC(N)IN AC(L)OUT FM(BLOW) IN DAMPER M EX DAMPER M STIRRER MOTOR REAR CONV. M... - Page 42 SMD2499FS CPU HARNESS CN-H TO C/P MOTOR HARNESS CN-N DC MOTOR (Door motor)
-
Page 43: Parts List
SMD2499FS PARTS LIST REF. NO. PART NO. DESCRIPTION Q'TY CODE ELECTRICAL PARTS RC-QZA411WRZZ HV CAPACITOR RH-DXA014WRZZ H.V RECTIFIER DPWB-B696DRKZ PSU UNIT RTRN-A861WRZZ HV TRANSFORMER FMOTDA119WRKZ TT MOTOR ASSY FANGTB020MRK2 AUTO DRAWER GEAR ASSY FHLD-A033WRKZ LED HOLDER ASSY RV-MZA427WRZZ MAGNETRON FMOTEA629WRKZ... - Page 44 SMD2499FS REF. NO. PART NO. DESCRIPTION Q'TY CODE OVEN PARTS DOVN-A865WRKZ OVEN ASSY PPAC-A224WREZ INTAKE DAMPER PACKING PPAC-A225WREZ EXHAUST DAMPER PACKING LANGTA622WRWZ DRIVE GEAR MOUNT AG GCOVPA087WRWZ FP-OC ENCLOSE COVER LANG-A159WRWZ REAR SEPARATE AG LANGQA956WRWZ BLOWER MOTOR TO-AG LANGQA960WRPZ MG THERMO TO AG...
- Page 45 SMD2499FS REF. NO. PART NO. DESCRIPTION Q'TY CODE DOOR DDORFB793WRKZ DOOR ASSY PPACGA302WREZ DRAWER PACKING LHLD-A419WRFZ RACK STAY HOLDER LSTPPB072MRF0 LATCH HEAD R LSTPPB073MRF0 LATCH HEAD L LSTYPA008WRFZ RACK STAY LX-HZB001MRE0 SPECIAL SCREW MSPRTB035MRE0 LATCH SPRING PPACGA300WRFZ HOLE COVER 6-10...
- Page 46 SMD2499FS CONTROL PANEL...
- Page 47 SMD2499FS DRAWER...
- Page 48 SMD2499FS DRAWER CAVITY 1-38 Knockout for Auto Drawer Gear Replacement 1-37 1-41 1-36 Actual wire harness may be different from illustration. CONVECTION MICROWAVE HARNESSES...
- Page 49 SMD2499FS DRAWER CABINET 2-13 1-20 8 -1 8 -1 2-11 2-10 2-12...
-
Page 50: Packing And Accessories
SMD2499FS PACKING PARTS Non-replaceable items OPERATION MANUAL RACK-U INSTALLATION SHEET RACK-L 7-12 WOOD SCREWS 7-5 & 7-6 & 7-12 IN ENVELOPE COOKING TRAY SUPPORT CORNERS CROSS SUPPORTS SUPPORT CORNERS TOP FOAM TOP FOAM SUPPORT CORNERS DRAWER SUPPORTS SUPPORT CORNERS BOTTOM FOAM... - Page 51 SMD2499FS NOTES...
- Page 52 SMD2499FS COPYRIGHT © 2021 BY SHARP CORPORATION ALL RIGHTS RESERVED. No part of this publication may be reproduced, stored in retrieval systems, or transmitted in any form or by any means, electronic, mechanical, photocopying, recording, or otherwise, without prior written permission...