AEG BPE748380T User Manual
Hide thumbs
Also See for BPE748380T:
- User manual (356 pages) ,
- User manual (36 pages) ,
- User manual (328 pages)
Table of Contents
Advertisement
Quick Links
Advertisement
Table of Contents

Related Manuals for AEG BPE748380T


Summary of Contents for AEG BPE748380T
- Page 1 EN User Manual | Oven BPE748380T BPK748380B BPK748380M BPK748380T...
-
Page 2: Installation
INSTALLATION (*mm) min. 550 min. 578 max. 590 min. 560 min. 1500 H05 V V - F (*mm) min. 550 min. 560 min. 1500 H05 V V - F... - Page 3 In our drive to be sustainable, we are reducing paper assets and provide full user manuals online. Access your full user manual at aeg.com/manuals Get usage advice, brochures, trouble shooter, service and repair information at aeg.com/support For more recipes, hints, troubleshooting download My AEG Kitchen app. My AEG Kitchen app ENGLISH...
-
Page 4: Safety Information
• Children should be supervised to ensure that they do not play with the appliance and mobile devices with My Electrolux Kitchen / My AEG Kitchen (if applicable). • Keep all packaging away from children and dispose of it appropriately. -
Page 5: Safety Instructions
• WARNING: The appliance and its accessible parts become hot during use. Care should be taken to avoid touching heating elements. • Always use oven gloves to remove or put in accessories or ovenware. • Always cook with the oven door closed. •... -
Page 6: Use And Maintenance
Do not use multi-plug adapters and extension If the appliance is installed behind a furniture cables. panel (e.g. a door) make sure the door is never closed when the appliance operates. This appliance is supplied without a main Heat and moisture can build up behind a plug and a main cable. -
Page 7: Pyrolytic Cleaning
Clean regularly the appliance to prevent the • any excess food residues, oil or grease deterioration of the surface material. spills / deposits. • any removable objects (including shelves, Before maintenance, deactivate the appliance side rails etc., provided with the product) and disconnect from the mains. -
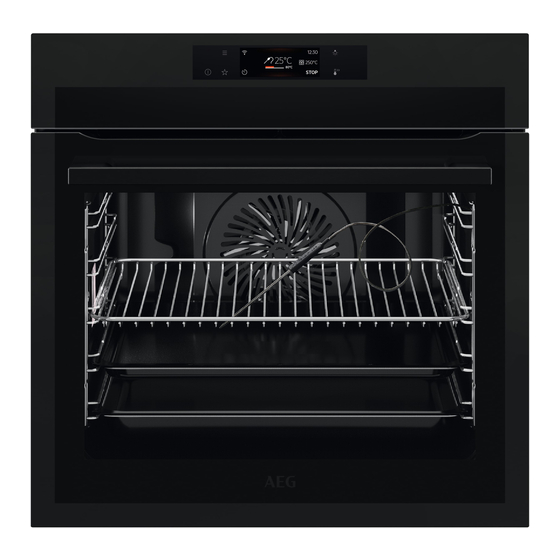
Page 8: Product Description
3. PRODUCT DESCRIPTION 3.1 General overview Control panel Display Socket for the food sensor Heating element Lamp Shelf support, removable Shelf positions 4. CONTROL PANEL 4.1 Control panel overview ON / OFF Press and hold to turn the appliance on and off. Menu Lists the appliance functions. -
Page 9: Display Indicators
4.2 Display Display with key functions set. Wi-Fi Time of day 12:30 START/STOP 150°C Temperature 85°C Heating functions Timer START 15min G. Food sensor (selected models only) Display indicators Basic indicators - to navigate on the display. To go one level To undo the last To confirm the selection / setting. -
Page 10: First Connection
Step 1 To download My AEG Kitchen app: Scan the QR code on the rating plate with the camera on your mobile device to be redirected to AEG Homepage. The rating plate is on the front frame of the ap‐... -
Page 11: Daily Use
Step 2 Set the maximum temperature for the function: Let the oven operate for 1 h. Step 3 Set the maximum temperature for the function: Let the oven operate for 15 min. The oven can emit an odour and smoke during preheating. Make sure that the room is ventilated. 6. -
Page 12: Clock Functions
Heating function Application Heating function Application Conventional Cooking: Keep Warm: Keeping Traditional baking food warm Pizza Function: Baking Moist Fan Baking: Bak‐ pizza Bottom Heat: Baking 6.4 Notes on: Moist Fan Baking cakes This function was used to comply with the Bread Baking: Bread, energy efficiency class and ecodesign bread rolls... -
Page 13: Using The Accessories
8. USING THE ACCESSORIES WARNING! Refer to Safety chapters. 8.1 Food Sensor Food Sensor - measures the temperature inside the food. You can use it with every heating function. There are two temperatures to be set: The oven temperature: minimum 120 °C. The core temperature. -
Page 14: Care And Cleaning
9. CARE AND CLEANING WARNING! Refer to Safety chapters. 9.1 Notes on cleaning Clean the front of the appliance only with a microfibre cloth with warm water and a mild de‐ tergent. Use a cleaning solution to clean metal surfaces. Clean stains with a mild detergent. -
Page 15: Troubleshooting
Pyrolytic cleaning, intense Thorough cleaning When the cleaning starts, the oven door is locked and the lamp is off. The cooling fan works at a higher speed. - press to stop the cleaning before it is completed. Do not use the oven until the door lock symbol disappears from the display. When the cleaning ends: Turn off the oven and wait until it Clean the cavity with a soft cloth. - Page 16 Problems with Wi-Fi signal Possible cause Remedy Trouble with wireless network signal. Check if your mobile device is connected to the wire‐ less network. Check your wireless network and router. Restart the router. New router installed or router configuration changed. To configure appliance and mobile device again, refer to "Before first use"...
-
Page 17: Service Data
......... Product number (PNC) ......... Serial number (S.N.) ......... 11. ENERGY EFFICIENCY 11.1 Product Information and Product Information Sheet Supplier's name BPE748380T 944188809 BPK748380B 944188806 Model identification BPK748380M 944188803 BPK748380T 944188807 Energy Efficiency Index 61.2 Energy efficiency class Energy consumption with a standard load, conventional mode 1.09 kWh/cycle... -
Page 18: Energy Saving
For UK: BS EN 60350-1 - Household electric cooking appliances - Part 1: Ranges, ovens, steam ovens and grills - Methods for measuring performance. 11.2 Energy saving The fan and lamp continue to operate. When you turn off the appliance, the display shows the residual heat. -
Page 19: Submenu For: Cleaning
12.2 Submenu for: Cleaning Submenu Application Pyrolytic cleaning, quick Duration: 1 h. Pyrolytic cleaning, normal Duration: 1 h 30 min. Pyrolytic cleaning, intense Duration: 3 h. 12.3 Submenu for: Options Submenu Application Light Turns the lamp on and off. Child Lock Prevents accidental activation of the appliance. -
Page 20: Submenu For: Service
Submenu Description Time of day Sets the current time and date. 12.6 Submenu for: Service Submenu Description Demo mode Activation / deactivation code: 2468 Software version Information about software version. Reset all settings Restores factory settings. 13. IT'S EASY! Before first use you have to set: Language Display brightness Key tones... - Page 21 the household waste. Return the product to your local recycling facility or contact your municipal office. ENGLISH...
- Page 24 867380205-B-082023...