LG LWD3081ST Training Manual
Hide thumbs
Also See for LWD3081ST:
- User manual (80 pages) ,
- User's manual and cooking manual (42 pages) ,
- Manual de usuario (42 pages)
Table of Contents
Advertisement
Quick Links
LWD3081ST
IMPORTANT SAFETY NOTICE
The information in this training manual is intended for use by persons possessing an adequate background in electrical
equipment, electronic devices, and mechanical systems. In any attempt to repair a major appliance, personal injury and
property damage can result. The manufacturer or seller maintains no liability for the interpretation of this information,
nor can it assume any liability in conjunction with its use. When servicing this product, under no circumstances should
the original design be modified or altered without permission from LG Electronics. Unauthorized modifications will not
only void the warranty, but may lead to property damage or user injury. If wires, screws, clips, straps, nuts, or washers
used to complete a ground path are removed for service, they must be returned to their original positions and properly
fastened.
CAUTION
To avoid personal injury, disconnect the power before servicing this product. If electrical power is required for
diagnosis or test purposes, disconnect the power immediately after performing the necessary checks. Also be aware
that many household appliances present a weight hazard. At least two people should be involved in the installation or
servicing of such devices. Failure to consider the weight of an appliance could result in physical injury.
ESD NOTICE
Some of the electronics in appliances are electrostatic discharge (ESD) sensitive. ESD can weaken or damage the
electronics in these appliances in a manner that renders them inoperative or reduces the time until their next failure.
Connect an ESD wrist strap to a ground connection point or unpainted metal in the appliance. Alternatively, you can
touch your finger repeatedly to a ground connection point or unpainted metal in the appliance. Before removing a
replacement part from its package, touch the anti-static bag to a ground connection point or unpainted metal in the
appliance. Handle the electronic control assembly by its edges only. When repackaging a failed electronic control
assembly in an anti-static bag, observe these same precautions.
REGULATORY INFORMATION
This equipment has been tested and found to comply with the limits for a Class B digital device, pursuant to Part 15 of
the FCC Rules. These limits are designed to provide reasonable protection against harmful interference when the
equipment is operated in a residential installation. This equipment generates, uses, and can radiate radio frequency
energy, and, if not installed and used in accordance with the instruction manual, may cause harmful interference to
radio communications. However, there is no guarantee that interference will not occur in a particular installation. If this
equipment does cause harmful interference to radio or television reception, which can be determined by turning the
equipment off and on, the user is encouraged to try to correct the interference by one or more of the following
measures: Reorient or relocate the receiving antenna; Increase the separation between the equipment and the receiver;
Connect the equipment to an outlet on a different circuit than that to which the receiver is connected; or consult the
dealer or an experienced radio/TV technician for help.
DISCLAIMER
The information in this training manual was accurate at the time of publication. Every effort has been made to ensure
accuracy. Updates, changes, etc. are available via GCSC and LGCSacademy. The information in this manual is intended
for persons with adequate backgrounds in electronics, mechanical, and electronic servicing. The manufacturer and
seller are not to be held responsible for any liability incurred from its use.
COMPLIANCE
The responsible party for this device's compliance is LG Electronics Alabama, Inc.; 201 James Record Road, Huntsville,
AL, 35813.
LWD3081ST
Page 1
TRAINING MANUAL
TRAINING MANUAL
Advertisement
Table of Contents

Related Manuals for LG LWD3081ST


Summary of Contents for LG LWD3081ST
- Page 1 The manufacturer and seller are not to be held responsible for any liability incurred from its use. COMPLIANCE The responsible party for this device’s compliance is LG Electronics Alabama, Inc.; 201 James Record Road, Huntsville, AL, 35813. LWD3081ST...
-
Page 2: Table Of Contents
WALL OVEN TRAINING MANUAL LWD3081ST (Double Wall Oven) The Small Print Page Contents Introduction Special Warnings and Information Specifications Warranty Controls Component Location Chart Replacing the Control Panel and Related Parts Controller LVT (Low Voltage Transformer) Relay PCB Door Locking Mechanism... - Page 3 WALL OVEN TRAINING MANUAL LWD3081ST (Double Wall Oven), continued Component Tests (continued) Broil Element Bake Element Convection Element Vent Motor Test Mode Error Codes (F-Codes) Diagnostic Flow Charts Dead Oven Oven Does Not Heat (F-9 or F-19 Error Codes) Control Panel Failure (F-3 Error Code)
-
Page 4: Introduction
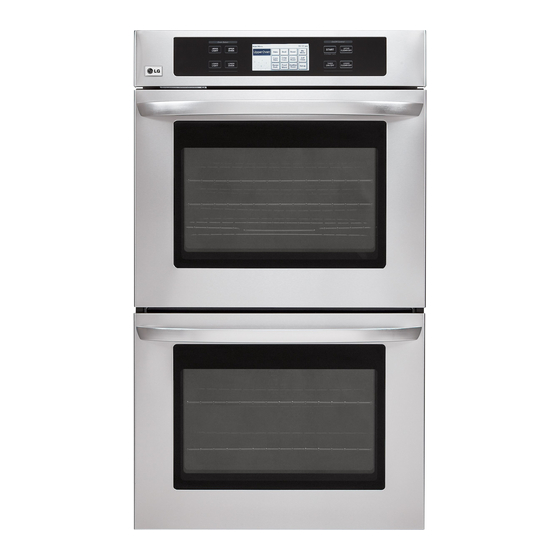
TRAINING MANUAL INTRODUCTION The LWD3081ST built-in double wall oven, and its smaller sibling, the single oven, are LG’s recent entries in the appliance arena. The double oven is actually two single ovens bolted together, with the chief difference being that the lower oven does not have the accessory probe socket or the healthy roast feature. -
Page 5: Special Warnings And Information
It circulates the hot air in the oven for faster and more even cooking. All functions are available via the touchpad menus. The menus are displayed in the window of the control panel and change as necessary. LWD3081ST Page 5 TRAINING MANUAL... -
Page 6: Specifications
WALL OVEN TRAINING MANUAL SPECIFICATIONS LWD3081ST Page 6 TRAINING MANUAL... -
Page 7: Warranty
This warranty sheet is provided for instructional purposes only. Warranties vary from time to time, model to model, year to year, and country to country. Refer to the warranty certificate that was provided with your customer’s product for accurate warranty coverage information. LWD3081ST Page 7 TRAINING MANUAL... -
Page 8: Controls
Shows the time of day, menus, oven temperatures and cycles, timer, and automatic functions. This panel will go into a sleep mode if there is no activity for 10 minutes. To wake it, touch it and make your selections. Continued on next page. LWD3081ST Page 8 TRAINING MANUAL... - Page 9 CLEAR / OFF. Allow the oven to cool for at least an hour, and then try the cooking cycle again. If the error code repeats itself, have the customer disconnect the power and call for service. LWD3081ST Page 9 TRAINING MANUAL...
-
Page 10: Component Location Chart
These will be listed in the service procedures contained within this manual. WARNING! ELECTRIC SHOCK HAZARD The oven must be disconnected from the power supply while repairs, replacements, and adjustments are carried out. Failure to do so can result in electric shock or death by electrocution. LWD3081ST Page 10 TRAINING MANUAL... -
Page 11: Replacing The Control Panel And Related Parts
Connectors include CN 01, CN 02, CN 03, CN 04, CN 05, CN 08, CN 11, and CN 12. Remove the control panel and set it aside on a soft cloth to prevent damage and scratches. LWD3081ST Page 11 TRAINING MANUAL... -
Page 12: Controller Lvt (Low Voltage Transformer)
PCB, door lock motor, halogen lamp LVT, and surge filter. Controller LVT (Low Voltage Transformer) Remove the screw that secures the transformer base to the bracket. Remove the entire bracket and transformer as a unit. LWD3081ST Page 12 TRAINING MANUAL... -
Page 13: Relay Pcb
Slide the board out from the control area. Disconnect all thirteen plastic connectors from the relay board. Connectors include CN 01, CN 02, CN 03, CN 04, BL, YL, WH, VI, VI (again), RD, YL, RY 19, and RY 20. LWD3081ST Page 13 TRAINING MANUAL... -
Page 14: Door Locking Mechanism
A cam on the lock motor operates a microswitch attached to the lock mechanism which reports its position to the main board. The main board will not allow the self-clean cycle to operate unless the lock is engaged. LWD3081ST Page 14 TRAINING MANUAL... -
Page 15: Manual Unlocking Procedure
Pay attention to the sticker on the top of the transformer. It shows which wires are connected to which terminals. A mistake here will destroy the transformer and the control boards. LWD3081ST Page 15 TRAINING MANUAL... -
Page 16: Surge Filter
Remove the screw and ground wire. Be sure to pull the bracket out toward the left to clear the bracket at the top right corner. Disconnect the two leads and remove the board from the oven. LWD3081ST Page 16 TRAINING MANUAL... -
Page 17: Replacing Oven Cavity Components
Be careful to avoid damaging the wires on the edges when you pull them through the hole. Some terminals may be equipped with a release tab which must be pressed to release the connector. LWD3081ST Page 17 TRAINING MANUAL... -
Page 18: Convection Element
Remove the nut securing the fan blade. (It is a left-hand thread.) Pull the fan blade off the shaft. Do not lose the bushing (spacer) or washer. Be careful to avoid bending the fan blade. LWD3081ST Page 18 TRAINING MANUAL... -
Page 19: Halogen Lamps
Remove the two screws securing the sensor bracket to the back of the oven. Pull the sensor forward into the oven cavity. Be careful to avoid damaging the wires on the edges when you pull them through the hole. LWD3081ST Page 19 TRAINING MANUAL... -
Page 20: Replacing Other Electrical Components
Remove the 13 screws that secure the three sections of the top cover. The vent motor, the thermal limiter for the cooling fan, and the door switch (top oven) can be serviced here. LWD3081ST Page 20 TRAINING MANUAL... -
Page 21: Vent (Cooling Fan Blower) Motors
14° F (-10° C). The lower thermostat is next to the lower oven’s bake element. It opens at 320° F (160° C) and closes when the oven cools to 14° F (-10° C). LWD3081ST Page 21 TRAINING MANUAL... -
Page 22: Door Switch
Disconnect the wires from the terminals. The connectors may include a release tab that must be pressed to remove the lead. (Be sure the wires don’t jump back in through the hole or disassembly will be necessary.) LWD3081ST Page 22 TRAINING MANUAL... -
Page 23: Upper Oven Repair
The serial number sticker is on the lower oven cover. Close photo of the hanging tab of the back cover. (See above.) LWD3081ST Page 23 TRAINING MANUAL... -
Page 24: Back Cover
(180° C) and closes at -31° F (-35° C). To replace the thermal limiter, remove the wire leads. The connectors may include a release tab that must be pressed to remove the lead. Remove the screw that holds the limiter in place. LWD3081ST Page 24 TRAINING MANUAL... -
Page 25: Convection Fan Motor
Disconnect the two wire leads from the fan motor. The connectors may include a release tab that must be pressed to remove the lead. Remove the three screws that secure the fan motor to the oven body. LWD3081ST Page 25 TRAINING MANUAL... -
Page 26: Hidden Bake Element
Fold the insulation material out of the way and remove the screw securing the element. LWD3081ST Page 26 TRAINING MANUAL... - Page 27 Be sure to take care of the points on the oven as well as those on the cover for safety. LWD3081ST Page 27 TRAINING MANUAL...
-
Page 28: Lower Oven Repair
The only major differences are that the lower oven will not accept a probe and the probe receptacle is blocked. To replace the thermal limiter, remove the screw that secures it and lift it of the tab. LWD3081ST Page 28 TRAINING MANUAL... - Page 29 The top view of the oven shows the door switch, the vent motor, and the door lock mechanism. The repair procedures are the same as for the upper oven. The lower vent fan motor can be serviced without separating the ovens. LWD3081ST Page 29 TRAINING MANUAL...
-
Page 30: Oven Doors
Open the door all the way. If it will not open all the way, it is not properly seated. Fold the hinge lock back into place in the locked position. The door should open and close normally. LWD3081ST Page 30 TRAINING MANUAL... -
Page 31: Repairing The Oven Door Handle And Glass
Remove the two screws that secure the handle. Slide the door trim up and off the door. Remove the hinge hanger screw, which is on each side of the door. Lift the hinge hanger out of its place in the door. LWD3081ST Page 31 TRAINING MANUAL... - Page 32 The inner and outer glasses are identical. Either glass can be replaced separately. The bracket holds both pieces of glass in place. Reassembly is the reverse of disassembly. LWD3081ST Page 32 TRAINING MANUAL...
-
Page 33: Replacing The Door Gasket
You might need to use a pencil to poke them in. Be very careful handling the gasket because it is delicate. LWD3081ST Page 33 TRAINING MANUAL... -
Page 34: Component Tests
Replace if it is open or shorted. DOOR LOCKING MOTOR Unplug the lock motor from its circuit and measure the resistance across the terminals. (R x 1000) 2,550 Ω ±10% Normal Replace if it is open or shorted. LWD3081ST Page 34 TRAINING MANUAL... -
Page 35: Door Locking Microswitch
Replace if open or shorted. LOW VOLTAGE TRANSFORMER (Halogen Lamps) Remove the transformer from its circuit. (See page 15.) Measure the resistance across the terminals as shown. (R x 1) 9.8Ω ±10% Normal Replace if open or shorted. LWD3081ST Page 35 TRAINING MANUAL... -
Page 36: Oven Thermistor
Plunger out should be continuity; plunger in should be infinite resistance. HALOGEN LAMPS Often you can tell the bulb is bad by looking at it. Check the continuity with an ohmmeter if you have any doubt. LWD3081ST Page 36 TRAINING MANUAL... -
Page 37: Broil Element
Be very careful to avoid damaging the glass tube that encases the element. Measure the resistance across the terminals at 77° F (25° C). (R x 1) Normal 32.5Ω ± 10% Replace if open or shorted. LWD3081ST Page 37 TRAINING MANUAL... -
Page 38: Vent Motor
Disconnect the leads from the element. Measure the resistance across the terminals at 77° F (25° C). (R x 1) High ~ Common 16Ω ± 10% Low ~ Common 20Ω ± 10% Replace if open or shorted. LWD3081ST Page 38 TRAINING MANUAL... -
Page 39: Test Mode
An alternate method allows you to enter the TEST mode without turning the power off. • Start at the Main Menu • Press SET-UP MENU, START, HIDDEN KEY 1, HIDDEN KEY 2, HIDDEN KEY 3, and START. • To cancel the TEST MODE, press UPPER CLEAR / OFF. LWD3081ST Page 39 TRAINING MANUAL... -
Page 40: Error Codes (F-Codes)
The temperature in the lower oven has not achieved 150° F (66° C) within five minutes. F-20 Door lock fail (lower) The door lock on the lower oven failed to lock for a self-cleaning cycle. LWD3081ST Page 40 TRAINING MANUAL... -
Page 41: Diagnostic Flow Charts
WALL OVEN TRAINING MANUAL DIAGNOSTIC FLOW CHARTS DEAD OVEN No power, no display. • Check the power to the wall oven at the fuse or breaker. • Check the thermostat. • Check the transformer. LWD3081ST Page 41 TRAINING MANUAL... - Page 42 WALL OVEN TRAINING MANUAL DEAD OVEN No Display. POWER OFF continued on next page LWD3081ST Page 42 TRAINING MANUAL...
- Page 43 WALL OVEN TRAINING MANUAL DEAD OVEN, continued continued on next page LWD3081ST Page 43 TRAINING MANUAL...
- Page 44 WALL OVEN TRAINING MANUAL DEAD OVEN, continued continued on next page LWD3081ST Page 44 TRAINING MANUAL...
- Page 45 WALL OVEN TRAINING MANUAL DEAD OVEN, continued LWD3081ST Page 45 TRAINING MANUAL...
-
Page 46: Oven Does Not Heat (F-9 Or F-19 Error Codes)
• Check the electric wiring and all PCB connectors. • Check the thermostats (thermistors). (See page 36.) • Check the elements. (See page 37.) • Check the thermal limiters. (See page 36.) continued on next page LWD3081ST Page 46 TRAINING MANUAL... - Page 47 WALL OVEN TRAINING MANUAL OVEN DOES NOT HEAT (F-9 or F-19 Error Code), continued continued on next page LWD3081ST Page 47 TRAINING MANUAL...
- Page 48 WALL OVEN TRAINING MANUAL OVEN DOES NOT HEAT (F-9 or F-19 Error Code), continued continued on next page LWD3081ST Page 48 TRAINING MANUAL...
- Page 49 WALL OVEN TRAINING MANUAL OVEN DOES NOT HEAT (F-9 or F-19 Error Code), continued LWD3081ST Page 49 TRAINING MANUAL...
-
Page 50: Control Panel Failure (F-3 Error Code)
WALL OVEN TRAINING MANUAL CONTROL PANEL FAILURE (Including F-3 Error Code) LWD3081ST Page 50 TRAINING MANUAL... -
Page 51: Lock System Failure (F-10 And F-20 Error Codes)
When the self-cleaning cycle starts, the door lock motor rotates. If the door lock switch fails to detect a locked condition after cycling twice, the supervising circuit detects a lock failure and the display will indicate the appropriate error code (F-10 or F-20.) continued on next page LWD3081ST Page 51 TRAINING MANUAL... - Page 52 WALL OVEN TRAINING MANUAL LOCK SYSTEM FAILURE (Including F-10 and F-20 Error Codes), continued LWD3081ST Page 52 TRAINING MANUAL...
-
Page 53: Oven Thermistor Failure (F-1, F-2, F-4, And F-5 Error Codes)
WALL OVEN TRAINING MANUAL OVEN THERMISTOR FAILURE (Error Codes F-1, F-2, F-4, and F-5) LWD3081ST Page 53 TRAINING MANUAL... -
Page 54: Oven Too Hot (F-6 And F-16 Error Codes)
WALL OVEN TRAINING MANUAL OVEN TOO HOT (Error Codes F-6 and F-16) LWD3081ST Page 54 TRAINING MANUAL... -
Page 55: Communication Error (F-10 Error Code)
WALL OVEN TRAINING MANUAL COMMUNICATION ERROR (F-10 Error Code) LWD3081ST Page 55 TRAINING MANUAL... -
Page 56: Schematic
WALL OVEN TRAINING MANUAL SCHEMATIC LWD3081ST Page 56 TRAINING MANUAL... -
Page 57: Strip Circuits
• Check for loose or improper connections within the oven before beginning work. • The diagrams in the STRIP CIRCUIT section are drawn in the ON position. • UP indicates the upper oven; LO indicates the lower oven. FULL BROIL MODE LWD3081ST Page 57 TRAINING MANUAL... -
Page 58: Center Broil Mode
WALL OVEN TRAINING MANUAL CENTER BROIL MODE LWD3081ST Page 58 TRAINING MANUAL... -
Page 59: Crisp Convection Mode
WALL OVEN TRAINING MANUAL CRISP CONVECTION MODE LWD3081ST Page 59 TRAINING MANUAL... -
Page 60: Convection Bake And Convection Roast Modes
WALL OVEN TRAINING MANUAL CONVECTION BAKE and CONVECTION ROAST MODES In BAKE mode, the convection fan operates for only the PREHEAT portion of the cycle. LWD3081ST Page 60 TRAINING MANUAL... -
Page 61: Bake And Roast Modes
WALL OVEN TRAINING MANUAL BAKE and ROAST MODES LWD3081ST Page 61 TRAINING MANUAL... -
Page 62: Self Clean Mode
WALL OVEN TRAINING MANUAL SELF-CLEAN MODE continued on next page LWD3081ST Page 62 TRAINING MANUAL... -
Page 63: Warm And Proof Modes
WALL OVEN TRAINING MANUAL SELF-CLEAN MODE, continued WARM and PROOF MODES LWD3081ST Page 63 TRAINING MANUAL... -
Page 64: Serial Number Information
Manufactured January 2008 Newer Style With Barcode New Serial Code (ETA Mid 2008) 12345 KR 406 YP 000002 + Options Sequential number Internal code Year and month of production (YMM) Production site (2 Letters) Model ID LWD3081ST Page 64 TRAINING MANUAL... -
Page 65: Exploded Views
WALL OVEN TRAINING MANUAL EXPLODED VIEWS LWD3081ST Page 65 TRAINING MANUAL... -
Page 66: Controller
WALL OVEN TRAINING MANUAL EXPLODED VIEWS, continued LWD3081ST Page 66 TRAINING MANUAL... -
Page 67: Upper Oven
WALL OVEN TRAINING MANUAL EXPLODED VIEWS, continued LWD3081ST Page 67 TRAINING MANUAL... -
Page 68: Lower Oven
WALL OVEN TRAINING MANUAL EXPLODED VIEWS, continued LWD3081ST Page 68 TRAINING MANUAL... -
Page 69: Racks, Trim, And Covers
WALL OVEN TRAINING MANUAL EXPLODED VIEWS, continued LWD3081ST Page 69 TRAINING MANUAL... -
Page 70: Parts List
Window, Glass (Side lights) (X 4) (U & L) 548902 MKC51214801 Window, Glass (Top lights) (X2) (U & L) 549801 MJH41754201 Supporter 549802 4980W1A111B Supporter (Surge protector) 549803 4980W1N013B Supporter 549804 MJH40420202 Supporter 549805 MJH40420201 Supporter 550121 MEV40416103 Insulator 550122 MEV40416104 Insulator LWD3081ST Page 70 TRAINING MANUAL... - Page 71 Heater Assembly (Convection element) 36640B 6640000045A Connector, Terminal Block 50FZZA 3B74133K Fuse, Time Delay 53446A MGJ40415002 Plate, Front 53504A MBR40414102 Chamber (X 2) (U & L) 53504B MBR40415301 Chamber 53550H MCK54158201 Cover, Hole 53550V MCK40416601 Cover, Vent LWD3081ST Page 71 TRAINING MANUAL...
- Page 72 1NZZW1N002B Nut, Customized WSZ003 1SBF0402618 Screw, Taptite WSZ219 1SZZW5N001A Screw, Customized WSZ221 1SZZW1N006A Screw, Customized WSZ242 1SZZW5N001J Screw, Customized WSZ246 1SZZW5N001D Screw, Customized WSZ247 1SZZW5N001F Screw, Customized WTC008 FAB30103101 Screw, Tapping WTP002 1TPL0302018 Screw, Tapping LWD3081ST Page 72 TRAINING MANUAL...
- Page 73 Screw, Tapping WTT021 1TTL0402418 Screw, Tapping WTT022 1TTL0402422 Screw, Tapping WTT024 1TTL0402618 Screw, Tapping WTT028 1TTL0402818 Screw, Tapping WTT037 1TTL0403418 Screw, Tapping WTT056 1TTL0403018 Screw, Tapping WWZ081 1WZZW3Z003B Washer, Customized WWZ085 1WZZ81N001A Washer, Customized (Convection fan) LWD3081ST Page 73 TRAINING MANUAL...
-
Page 74: Supplementary Information
Ohms = Volts / Watts Volts = Watts / Amperes Ohms = Watts / Amperes Volts = Amperes x Ohms CONVERSION FORMULAE °F = (9/5) °C + 32 °C = (5/9) x (°F – 32) LWD3081ST Page 74 TRAINING MANUAL... - Page 75 WALL OVEN TRAINING MANUAL SERVICE BULLETINS LWD3081ST Page 75 TRAINING MANUAL...
- Page 76 WALL OVEN TRAINING MANUAL LWD3081ST Page 76 TRAINING MANUAL...
- Page 77 WALL OVEN TRAINING MANUAL LWD3081ST Page 77 TRAINING MANUAL...
- Page 78 WALL OVEN TRAINING MANUAL NOTES LWD3081ST Page 78 TRAINING MANUAL...