
Related Manuals for Toshiba RAS-18E2KVG-E


Summary of Contents for Toshiba RAS-18E2KVG-E
- Page 1 R32 or R410A INSTALLATION MANUAL ENGLISH AIR CONDITIONER (SPLIT TYPE) Indoor unit RAS-B05, 07, 10, 13, 16E2KVG-E RAS-18E2KVG-E Outdoor unit RAS-05, 07, 10, 13, 16, 18E2AVG-E 1 144 180 101...
-
Page 2: Table Of Contents
CONTENTS PRECAUTIONS FOR SAFETY ............................1 ACCESSORY PARTS .................................5 INSTALLATION DIAGRAM OF INDOOR AND OUTDOOR UNITS ...................6 Optional Installation Parts ..............................6 INDOOR UNIT ..................................7 Installation Place................................7 Cutting a Hole and Mounting Installation Plate ........................7 How to Connect Remote Controller for Wire Operation....................8 Piping and Drain Hose Installation ..........................9 Indoor Unit Fixing................................10 Drainage ..................................10... -
Page 3: Precautions For Safety
PRECAUTIONS FOR SAFETY PRECAUTIONS FOR SAFETY Read the precautions in This appliance is fi lled with this manual carefully before R32. operating the unit. Warning indications on the air conditioner unit Warning indication Description CAUTION CAUTION BURST HAZARD BURST HAZARD Open the service valves Open the service valves before the operation, before the operation,... - Page 4 DANGER • FOR USE BY QUALIFIED PERSONS ONLY. • TURN OFF MAIN POWER SUPPLY BEFORE ATTEMPTING ANY ELECTRICAL WORK. MAKE SURE ALL POWER SWITCHES ARE OFF. FAILURE TO DO SO MAY CAUSE ELECTRIC SHOCK. • CONNECT THE CONNECTING CABLE CORRECTLY. IF THE CONNECTING CABLE IS CONNECTED WRONGLY, ELECTRIC PARTS MAY BE DAMAGED.
- Page 5 • Do not use any refrigerant different from the outdoor unit specifi ed for complement or replacement. Otherwise, abnormally high pressure may be generated in the refrigeration cycle, which may result in a failure or explosion of the product or an injury to your body.
- Page 6 CAUTION • Exposure of unit to water or other moisture before installation could result in electric shock. Do not store it in a wet basement or expose to rain or water. • After unpacking the unit, examine it carefully for possible damage. •...
-
Page 7: Accessory Parts
Part name Drain nipple × 1 Cap water proof × 2* * Not require to use for RAS-05, 07, 10, 13E2AVG-E ** Not require to use for RAS-18E2KVG-E Air fi lters Clean every 2 weeks. 1. Open the air inlet grille. -
Page 8: Installation Diagram Of Indoor And Outdoor Units
28 mm Air inlet Air inlet 97 mm (RAS-B05, 07, 10, 13E2KVG-E) each : Ø12.70 mm (RAS-B16E2KVG-E) (RAS-18E2KVG-E) Pipe insulating material Air outlet (polyethylene foam, 6 mm thick) Air outlet Drain outlet 90 mm For RAS-B05, 07, 10, 13E2KVG-E 600 mm... -
Page 9: Indoor Unit
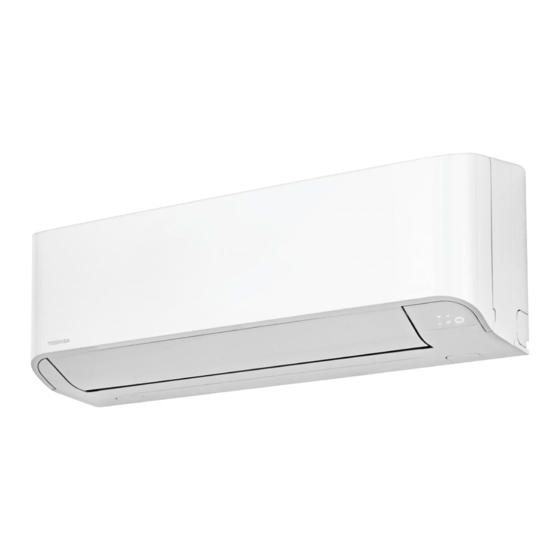
Thread Pipe hole Indoor unit Weight Mounting screw (Side view) (Top view) For RAS-B16E2KVG-E Indoor unit RAS-18E2KVG-E When the installation plate is directly mounted Remote on the wall Reception Remote control range control 1. Securely fi t the installation plate onto the wall by screwing it in the upper and lower parts to hook up the indoor unit. -
Page 10: How To Connect Remote Controller For Wire Operation
For remote controller How to Connect Remote Controller for Wire Operation 1. Remove cover of remote controller by sliding down and take it out. 2. If batteries are exist, please take them out. The combination of using wire controller and batteries may cause of batteries explosion. 3. -
Page 11: Piping And Drain Hose Installation
*Remark : 1. Recommend to use double insulation lead wire for connect In case of right or left piping remote control and air conditioner. 2. For wire operation, 1 remote control can control only 1 indoor • After scribing slits inside of the unit. -
Page 12: Indoor Unit Fixing
Drainage Indoor Unit Fixing 1. Pass the pipe through the hole in the wall and hook the indoor unit on the 1. Run the drain hose sloped downwards. installation plate at the upper hook. NOTE 2. Swing the indoor unit to right and left to confi rm that it is fi rmly hooked up on the installation plate. -
Page 13: Draining The Water
Refrigerant Piping Connection CAUTION 1. Install the outdoor unit without anything blocking the air discharging. 2. When the outdoor unit is installed in a place always exposed to strong Flaring wind like a coast or on a high storey of a building, secure the normal fan operation using a duct or a windshield. -
Page 14: Evacuating
Packed valve handling precautions Evacuating • Open the valve stem all the way out, but do not try to open it beyond the After the piping has been connected to the indoor unit, you can perform the stopper. air purge together at once. Pipe size of Packed Valve Size of Hexagon wrench AIR PURGE... -
Page 15: Electrical Works
ELECTRICAL WORKS ELECTRICAL WORKS Model RAS-B05E2KVG-E RAS-B07E2KVG-E RAS-B10E2KVG-E RAS-B13E2KVG-E RAS-B16E2KVG-E RAS-18E2KVG-E Power source 50Hz, 220 – 240V Single phase Maximum running current 5.0A 5.4A 7.2A 7.4A 9.00A 9.25A Circuit breaker rating Power supply cable H07RN-F or 60245 IEC66 H07RN-F or 60245 IEC66 (1.25 mm or more) (1.5 mm... -
Page 16: In Case Of Indoor Unit Connect With 1:1 Outdoor Unit
In Case of Indoor Unit Connect With 1:1 Outdoor Unit Power Supply Input at Outdoor Unit Terminal Block (Recommend) Indoor Unit Outdoor Unit Stripping length of the Connecting cable Connecting cable 1 2 3 connect to 1 2 3 connecting cable Terminal block (L N 1 2 3) Earth line 50 mm... - Page 17 Power supply input Wiring Diagram for 1:1 Outdoor Unit Power input at Outdoor Terminal Block (Recommend) Indoor Terminal Block Outdoor Terminal Block Power input Power input at Indoor Terminal Block (Optional) Indoor Terminal Block Power input Outdoor Terminal Block CAUTION 1.
-
Page 18: In Case Of Indoor Unit Connect With Inverter Multi System (Ims)
In Case of Indoor Unit Connect With Inverter Multi System (IMS) Indoor Unit Stripping length of the Connecting cable Connecting cable connect to 1 2 3 Connecting cable Terminal block (L N 1 2 3) Earth line 50 mm 10 mm 10 mm Earth line 70 mm... -
Page 19: Others
OTHERS OTHERS Gas Leak Test Test Operation To switch the TEST RUN (COOL) mode, press [RESET] button for 10 seconds. (The beeper will make a short beep.) Check places for the indoor unit. OPERATION / RESET Button Check places for the outdoor unit.