Table of Contents
Advertisement
Quick Links
Advertisement
Chapters
Table of Contents

Related Manuals for Kenwood DMX820WXS


Summary of Contents for Kenwood DMX820WXS
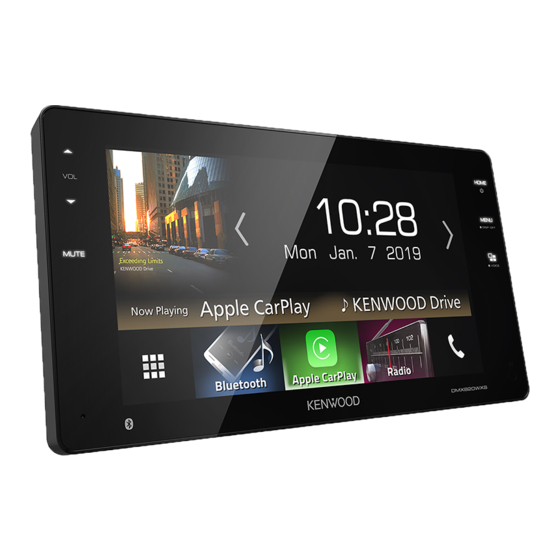
- Page 1 DMX820WXS MONITOR WITH RECEIVER INSTRUCTION MANUAL 接收器显示器 使用说明书 • Updated information (the latest Instruction Manual, etc.) is available from <http://www.kenwood.com/cs/ce/>. ・ 所更新的信息(最新的使用说明书、系统更新、新功能等)可在 <http://www.kenwood.com/cs/ce/> 中查看。 © 2019 JVCKENWOOD Corporation B5A-3372-11 (M)
-
Page 2: Table Of Contents
Contents Before Use Precautions ..............4 Connecting a USB device ........17 How to read this manual ......... 4 USB Basic Operation ..........17 Search Operation ............19 Basic Operations Radio Functions of the Buttons on the Front Panel ... 5 Turning on the Unit ........... 5 Radio Basic Operation ..........20 Initial Settings .............. - Page 3 Setting Up Monitor Screen Setup ..........33 System Setup .............33 User Interface Setup ..........34 Special Setup .............35 Display Setup .............35 AV Setup ..............37 Controlling Audio Speaker/ X’over setup ..........38 Controlling General Audio ........39 Equalizer Control ............40 Volume Offset ............41 Sound Effect ...............41 Listening Position/ DTA ..........42 Remote control Functions of the Remote control Buttons ..43...
-
Page 4: Before Use
USB device connected can damage • When you purchase optional accessories, the data stored in the USB device. For how to check with your KENWOOD dealer to make disconnect the USB device, see Disconnect the sure that they work with your model and in USB device (P.17). -
Page 5: Basic Operations
Basic Operations Basic Operations Functions of the Buttons on Turning on the Unit the Front Panel The method of turning on is different depending on the model. Press the [HOME] button. h The unit is turned on. ● To turn off the unit: Press the [HOME] button for 1 second. -
Page 6: Initial Settings
Basic Operations Initial Settings Camera ■ Set the parameters for the camera. 1 Touch [Camera]. Initial setup 2 Set each item and touch [ For detailed operation, see Camera Setup Perform this setup when you use this unit first time. (P.31). -
Page 7: Adjusting The Volume
Basic Operations Calendar/clock settings Adjusting the volume To adjust the volume (0 to 40), Press the [MENU] button. Press [R] to increase, and press [S] to decrease. h Popup menu appears. Holding [R] increases the volume continuously to level 15. Touch [SETUP]. -
Page 8: Home Screen Descriptions
Basic Operations HOME screen descriptions Source selection screen descriptions Most functions can be performed from the HOME screen. You can display all playback sources and options on the source selection screen. • Displays the control screen of current source. • Changes the playback source. •... - Page 9 [Apple CarPlay] is displayed. To select the Mirroring source, it is necessary Touch [ ] on the HOME screen. to connect Android device with “Mirroring OA for KENWOOD” application installed and Touch [STANDBY]. to set [Mode] to [Mirroring for Android™]. (P.14) English...
-
Page 10: Source Control Screen Descriptions
Basic Operations Customize Short-cut buttons on HOME screen Connected Bluetooth device information. You can arrange the position of the source icons All sources icon as you like. Displays all sources. Touch [ ] on the HOME screen. Secondary screen • [ ] [ ] : The Secondary screen changes every Touch and hold the icon which you want time you touch it. -
Page 11: List Screen
Basic Operations List screen The contents of the menu are as follows. • Displays the Screen Adjustment screen. There are some common function keys in the (P.33) list screens of most sources. • Turns the display off. (P.11) • Displays the view camera. (P.31) •... -
Page 12: Apps-Android Auto™/ Apple Carplay
APPS-Android Auto™/ Apple CarPlay APPS-Android Auto™/ Apple CarPlay Apple CarPlay Operation CarPlay is a smarter, safer way to use your iPhone in the car. CarPlay takes the things you want to do with iPhone while driving and displays them on the screen of the product. You can get directions, make calls, send and receive messages, and listen to the music from iPhone while driving. -
Page 13: Android Auto™ Operation
APPS-Android Auto™/ Apple CarPlay To enter Android Auto mode, touch [Android Android Auto™ Operation Auto] icon in the source selection screen. (P.9) Android Auto enables you to use functions of your Android device convenient for driving. You can easily access route guidance, make calls, listen to music, and access convenient functions on the Android device while driving. -
Page 14: Mirroring
Download Mirroring App from Google smartphone's. Play. Install the latest version of the Mirroring Ñ Connecting an Android device application “Mirroring OA for KENWOOD” on your Android. Connect an Android device via the USB terminal. Pair your smartphone with the unit via Bluetooth. -
Page 15: Ipod/Iphone
iPod/iPhone iPod/iPhone Connect the iPod/iPhone using KCA- iP103. (P.47) Press the [HOME] button. Preparation Touch [ Ñ Connectable iPod/iPhone Touch [iPod]. (P.9) The following models can be connected to this ● To disconnect the iPod/iPhone connected unit. with the cable: Made for Detach the iPod/iPhone. -
Page 16: Search Operation
iPod/iPhone Ñ Category search [Operation keys • 1] : Searches track/file. For details on search You can search a file by selecting category. operation, see Search Operation (P.16). Touch [Category List]. • E] [F] : Searches the previous/next track/ file. Touch and hold to fast forward or fast Touch the desired category. -
Page 17: Usb
Connecting a USB device USB Basic Operation Most functions can be controlled from the Connect the USB device with the USB source control screen and playback screen. cable. (P.46) Control screen Press the [HOME] button. Touch [ Touch [USB]. (P.9) Ñ... - Page 18 [Operation keys Key display area (Video file only) • 1] : Searches track/file. For details on search Touch to display the control screen. operation, see Search Operation (P.19). • E] [F] : Searches the previous/next track/ file. Touch and hold to fast forward or fast backward.
-
Page 19: Search Operation
Ñ Search Operation Link search You can search a file of same artist/album/genre You can search music or video files by the as the current track. following operations. Touch [Link Search]. Touch [1]. Touch the desired tag type. You can select Touch [S]. -
Page 20: Radio
Radio Radio Radio Basic Operation Operation keys • [E] [F] : Tunes in a station. The method of Most functions can be controlled from the frequency switching can be changed (see 2 source control screen. in table). To enter Radio source, touch [Radio] icon in the •... -
Page 21: Memory Operation
Radio Memory Operation Selecting Operation Ñ Ñ Auto memory Preset select You can store stations with good reception in You can list and select memorized station. memory automatically. Touch [ ] on the right side of the screen. Touch desired band key. Select a station from the list. -
Page 22: Traffic Information
Radio Traffic Information (FM only) Radio Setup You can listen and watch the traffic information You can set tuner related parameters. automatically when a traffic bulletin starts. Touch [ ] on the left side of the screen. However, this feature requires a Radio Broadcast Touch [SETUP]. -
Page 23: Bluetooth Control
Bluetooth Control Bluetooth Control Ñ About the cell-phone and Using the Bluetooth function, various functions Bluetooth audio player can be used: listening to the audio file, making/ receiving a call. This unit conforms to the following Bluetooth specifications: Information for using Bluetooth®... -
Page 24: Register From The Bluetooth Device
Bluetooth device. Turn on the Bluetooth function on your smartphone/cell-phone. h Bluetooth SETUP screen appears. See the following section for each Search the unit (“DMX820WXS”) from setting. your smartphone/cell-phone. • Connect the Bluetooth device (P.25) Operate your smartphone/cell-phone according to the displayed messages. -
Page 25: Playing Bluetooth Audio Device
Bluetooth Control Ñ Connect the Bluetooth device Playing Bluetooth Audio Device Touch [Select Device] in the Bluetooth SETUP screen. Most function can be controlled from the source control screen. To enter Bluetooth source, touch [Bluetooth] icon in the source selection screen. (P.9) Ñ... - Page 26 Bluetooth Control Touch the device name you want to Function panel connect. Touch on the left side of the screen to display the function panel. Touch again to close the panel. • BT DEVICE CHANGE] : Selects the device to connect via Bluetooth audio (A2DP) or APP (SPP).
-
Page 27: Using Hands-Free Unit
Bluetooth Control Using Hands-Free Unit ● Bluetooth SETUP 1) Touch [ Bluetooth SETUP screen appears. You can use telephone function by connecting the Bluetooth telephone to this unit. NOTE NOTE • The status icons such as battery and antenna displayed may differ from those displayed on the •... - Page 28 Bluetooth Control Ñ Call using the preset number Voice Recognition You can access the voice recognition function of Touch [ the cell-phone connected to this unit. You can search the cell-phone phonebook by voice. (The Touch the Name or phone number. functionality depends on the cell-phone.) Press the [ ] button for 1 second.
- Page 29 Bluetooth Control Ñ Receive a call ● Adjust the receiver volume Press the [S] or [R] button. Touch [ ] to answer a phone call or ] to reject an incoming call. ● Output the dial tone Touch [DTMF] to display the tone input screen. You can send tones by touching desired keys on the screen.
- Page 30 Bluetooth Control Ñ Ñ Phone number preset Phonebook transfer You can register frequently used phone You can transfer the phonebook in your numbers to this unit. Bluetooth smartphone via PBAP. Touch [ Touch [ Touch [Edit]. Touch [ h The phonebook data transmission starts. NOTE Select where to preset.
-
Page 31: Other External Components
Other External Components Other External Components Ñ Camera Setup View Camera Press the [MENU] button. NOTE h Popup menu appears. • To connect a camera, see P.46. Touch [SETUP]. • To use a rear view camera, a REVERSE lead h SETUP Menu screen appears. connection is required. -
Page 32: External Audio/Video Players-Av-In
Other External Components To adjust the parking guidelines External audio/video players— AV-IN NOTE • Install the rear view camera in the appropriate Connect an external component to the position according to the instructions supplied AV-IN input terminal. (P.46) with the rear view camera. •... -
Page 33: Setting Up
Setting Up Setting Up Monitor Screen Setup System Setup You can adjust image quality in video screen. NOTE Press the [MENU] button. • Each operation in this section can be started h Popup menu appears. from the multi function menu. Touch [Screen Adjustment]. -
Page 34: User Interface Setup
Setting Up User Interface Setup Touch the function you want to set. You can setup user interface parameters. Press the [MENU] button. h Popup menu appears. Touch [SETUP]. h SETUP screen appears. Touch [User Interface]. NOTE • You can have the unit learned all buttons at a time. -
Page 35: Special Setup
Setting Up Special Setup Display Setup You can setup Special parameters. Press the [MENU] button. h Popup menu appears. Press the [MENU] button. h Popup menu appears. Touch [SETUP]. h SETUP screen appears. Touch [SETUP]. h SETUP screen appears. Touch [Display]. Touch [Special]. - Page 36 Setting Up Ñ Change background image or To register original image color You can load an image from the connected USB device and set it for the background image. Touch [Background] in the Display screen. Before operating this procedure, it is necessary to connect the device which has the image to Select an image.
-
Page 37: Av Setup
Setting Up AV Setup You can set AV parameters. Press the [MENU] button. h Popup menu appears. Touch [SETUP]. h SETUP screen appears. Touch [AV]. h AV screen appears. Set each item as follows. AV-OUT ■ Specify whether to output the current source signal from the AV OUTPUT terminal. -
Page 38: Controlling Audio
Controlling Audio Controlling Audio Speaker/ X’over setup NOTICE • Each operation in this section can be started Press the [MENU] button. from the multi function menu. h Popup menu appears. You can adjust the various settings such as Touch [Audio]. audio balance or subwoofer level. -
Page 39: Controlling General Audio
Controlling Audio Tweeter (Only for Front) TW (Tweeter) Gain * ■ ■ You can set the tweeter when you are Adjusts the tweeter level. (When front is selecting front speakers. selected on Speaker Select screen) None, Small, Medium, Large Phase Inversion* ■... -
Page 40: Equalizer Control
Controlling Audio Equalizer Control SW Level ■ Adjusts the subwoofer volume. This setting is not available when subwoofer is set to You can adjust equalizer by selecting the “None”. See Speaker/ X’over setup (P.38). optimized setting for each category. Ñ Recall the EQ curve Press the [MENU] button. -
Page 41: Volume Offset
Controlling Audio Volume Offset Sound Effect Finely adjust the volume of the current source You can set sound effects. to minimize the difference in volume between Press the [MENU] button. different sources. h Popup menu appears. Press the [MENU] button. Touch [Audio]. -
Page 42: Listening Position/ Dta
Controlling Audio Listening Position/ DTA Position DTA control You can fine-adjust your listening position. Adjust the sound delay time as nearer speakers Touch [Adjust]. to the selected seat have more delay time, so that the sound from each speaker arrive a Touch [Delay]. -
Page 43: Remote Control
Remote control Remote control Functions of the Remote This unit can be operated using the remote control Buttons control KNA-RCDV331 (optional accessory). • Aim the remote control directly at the remote Ñ Switch the operation mode sensor on the faceplate. •... -
Page 44: Connection/Installation
Connection/Installation Connection/Installation Before Installation to a power source with a constant voltage supply, such as with battery wires, the battery may be drained. Before installation of this unit, please note the following precautions. • If the console has a lid, make sure to install the unit so that the front panel will not hit the lid # WARNINGS when closing and opening. -
Page 45: Installing The Unit
Connection/Installation Ñ Supplied accessories for Installing the unit installation 1 or 2 Car Bracket (M5 × 6 mm) (M5 × 8 mm) (2 m) (3 m) 1 or 2 Ñ Microphone unit Ñ 1) Check the installation position of the Installation procedure microphone (accessory 3). - Page 46 Connection/Installation Ñ Connecting wires to terminals USB terminal (1.0 m) Light Green (Parking sensor wire) 5V = 1.5A USB device Accessory 4: Parking Extention cable For best safety, be Connect to the vehicle’s sure to connect the parking brake detection parking sensor.
- Page 47 Connection/Installation Ñ Ñ Wiring harness connector Connecting an iPod/iPhone/ function guide Android Connector A Android smartphone Connector C Micro USB to USB cable iPod/iPhone Lightning connector KCA-iP103 (0.8 m) Connector E USB terminal (1.0 m) Connector D ■ Connecter A 5V = 1.5A Function SWC KEY2...
-
Page 48: Troubleshooting
Troubleshooting Troubleshooting Problems and Solutions Error Messages If any trouble occurs, first check the following When you fail to operate the unit correctly, the table for possible problems. cause of the failure appears as the message on the screen. NOTE No Device (USB device) •... -
Page 49: Appendix
Appendix Appendix Playable Media and Files You can play various kinds of media and files on this unit. Ñ About files The following audio and video files are supported. NOTE • Even if it is supported, the play may be impossible depending on the types or conditions of media or device. ■... -
Page 50: Specifications
Appendix Specifications ■ Bluetooth section Technology ■ Monitor section : Bluetooth Ver.4.1 Picture Size Frequency : 8.0 inches (diagonal) wide : 2.402 – 2.480 GHz : 176.6 mm (W) × 99.4 mm (H) RF Output Power (E.I.R.P.) Display System : +4dBm (MAX), Power Class2 : TN LCD panel Maximum Communication range Drive System... - Page 51 Appendix ■ FM tuner section ■ Audio section Frequency Range (step) Maximum Power Output (Front & Rear) : 87.5 MHz – 108.0 MHz (50 kHz) : 50 W × 4 Usable Sensitivity (S/N : 30 dB) Full Bandwidth Power (at less than 1% THD) : 13.2 dBf (1.3 μV/75 Ω) : 21 W ×...
-
Page 52: About This Unit
Appendix About this Unit MPEG-4 VIDEO. NO LICENSE IS GRANTED OR SHALL BE IMPLIED FOR ANY OTHER USE. ADDITIONAL INFORMATION INCLUDING THAT RELATING TO ■ Copyrights PROMOTIONAL, INTERNAL AND COMMERCIAL USES AND LICENSING MAY BE OBTAINED FROM MPEG LA, • The Bluetooth® word mark and logos are registered LLC. - Page 53 Appendix – Redistributions in binary form must reproduce the above copyright notice, this list of conditions and the following disclaimer in the documentation and/or other materials provided with the distribution. – Neither the name of the Xiph.org Foundation nor the names of its contributors may be used to endorse or promote products derived from this software without specific prior written permission.
- Page 54 目录 使用之前 USB 小心..................56 连接 USB 存储装置...........69 如何阅读本手册............56 USB.的基本操作............69 搜索操作................70 基本操作 收音机 面板上按钮的功能............57 接通本机电源..............57 收音机的基本操作............72 初始设置................58 存储的操作..............73 调整音量................59 选择操作................73 触控屏操作..............59 交通信息................74 HOME(主页)画面说明........60 无线电设置..............74 信号源选择画面说明..........60 蓝牙的控制 信号源控制画面描述..........62 弹出菜单................62 使用蓝牙 设备的信息..........75 列表画面................63 从蓝牙设备登录............76 蓝牙设置................76 应用程序 -AndroidAuto ™ / 播放蓝牙音频装置............77 AppleCarPlay 使用免提装置..............79 Apple.CarPlay.操作...........64 其他外部组件...
- Page 55 设置 显示器画面的设置............85 系统设置................85 用户界面设置..............86 特殊设置................87 显示的设置..............87 AV.设置................89 控制音频 扬声器 /.交迭点设置..........90 控制一般音频..............91 均衡器控制..............92 音量补偿................93 音响效果................93 聆听位置 /.DTA............94 遥控 遥控器按钮的功能............95 连接 / 安装 安装之前................96 安装本机................97 故障排除 问题和解决方法............100 错误消息..............100 附录 可播放的媒体和文件..........101 技术规格..............102 关于本机..............104 中文...
-
Page 56: 使用之前
列注意事项 : 为了防止短路事故,不得将金属物品(硬 • 币或金属工具)放入或遗留在本机内。 当长时间驾驶时,不要一直观看或一直盯 • 着设备显示器看。 重置按钮 如果在安装过程中出现问题,请咨询 • KENWOOD 经销商。 备注 Ñ • 按 < 重置 > 按钮之前, 请断开 USB 设备的连接。 本机的使用注意事项 在连接了 USB 设备的情况下按 < 重置 > 按钮 可能会损坏 USB 设备中存储的数据。 要了解 在购买选购附件时,请与 KENWOOD 经销 • 如何断开 USB 设备的连接,请参阅断开 USB 商进行确认,以确保其适用于您的机型及... -
Page 57: 基本操作
基本操作 基本操作 面板上按钮的功能 接通本机电源 根据机型,接通本机电源的方法有所不同。 按 [HOME] 键。 h 本机电源接通。 ● 切断本机电源 : 按住 [HOME] 键 1 秒。 备注 备注 • 如果是安装后首次开启设备,则需要进行初 • 本使用说明书中的面板是用于提供明确说明 始设置 (第 58 页) 。 操作的例子。因此,可能与实际的面板有所 不同。 名称 • 动作 S、R(音量) • 调节音量。 按住 R 时,音量会一直提高至 15。 [MUTE] • 静音 / 恢复声音。 重置... -
Page 58: 初始设置
基本操作 初始设置 摄像机 ■ 设定摄像机的参数。 1 触按 [Camera]。 初始设置 2 设置各项目,然后触按 [ ]。 有关详细操作,请参阅 摄像机的设置(第 首次使用本机时,请执行此设置。 83 页) 。 设定下列各项目。 演示 ■ 设定演示模式。初始值为“ON” 。 1 触按 [DEMO] 并设置为开或关。 触按 [Finish]。 语言 ■ 选择用于控制画面和设定项目的语言。默 认值为 “British English (en) ” (英式英语) 。 1 触按 [Language]。 备注... -
Page 59: 调整音量
基本操作 日历 / 时钟设置 调整音量 要调节音量(0 至 40) , 按 [MENU] 键。 按.[R].增加,按.[S].降低。 h 出现弹出菜单。 按住.[R].可将音量一直升高至.15。 触按 [SETUP]。 h 显示设置选单画面。 触按 [User Interface]。 触控屏操作 要在屏幕上进行操作,需要触按、长按、轻 拂或滑动以选择项目、显示设置菜单画面或 更改页面等操作。. ● 触摸 轻触屏幕以选择屏幕上的条 目。 h 显示用户界面画面。 ● 长按 触按 [Clock Adjust]。 触摸屏幕并保持手指不动, 直至显示改变或出现信息。 ● 轻拂 ... -
Page 60: Home(主页)画面说明
基本操作 HOME(主页)画面说明 信号源选择画面说明 大部分功能可通过 “HOME” (主页) 画面完成。 可在信号源选择画面上显示所有播放信号源 和选项。 • 显示当前信号源的控制画面。 • 更改播放信号源。 • 组件 关于播放信号源,请参阅 第 61 页。 – 您可以通过在组件区域触按 [ 或左右轻拂来更改组件。 • 更改页面。 (触按 [ 。 ) – 触按控件以显示详细画面。 也可以通过在屏幕上左右轻拂来更改页 面。 • 当前信号源信息 • 返回到前一画面。 • 显示信号源选择画面。 (第 61 页) •... - Page 61 ] 或左右轻 Android Auto 兼容的安卓设备并将 [Mode] 拂以显示信号源选择按钮,然后选择播放信 设为 [Android Auto]。 (第 66 页) 号源。 当 连接了与 CarPlay 兼容的 iPhone 时,显 将设备置于待机模式 示 [Apple CarPlay]。 要 选择镜像信号源,必须将安卓设备与已 安装的“Mirroring OA for KENWOOD”应 触按主页画面中的 [ ]。 用程序连接,并将 [Mode] 设为 [Mirroring for Android™]。 (第 66 页) 触按 [STANDBY]。 中文...
-
Page 62: 信号源控制画面描述
基本操作 在主页画面上自定义快捷按钮 所连接的蓝牙装置信息。 可按需排列信号源图标的位置。 全部信号源图标 触按主页画面中的 [ ]。 显示所有信号源。 触按并按住需要移动进入自定义模式的 副画面 图标。 ] : 每次触按辅助画面时其均会更改。 • 也可在屏幕上左右轻拂手指更改副画面。 将其拖动到要移动的位置。 指示灯 : 显示当前信号源情况等。 • – MUTE : 静音功能开启。 – LOUD : 响度控制功能开启。 快捷按钮 : 信号源更改为设置为快捷方式 • 的信号源。 关于快捷设置,请参阅 在主页 画面上自定义快捷按钮(第 62 页) 。 [Û] 触按以显示免提画面。... -
Page 63: 列表画面
基本操作 选单的内容如下所示。 列表画面 • 显示屏幕调整画面。 (第 85 页) 在大部分信号源列表画面上有某些共用功能 键。 • 关闭显示。 (第 63 页) • 显示观察摄像头。 (第 83 页) • 显示 SETUP(设置)菜单画面。 (第 85 页) • 显示音频控制菜单画面。 (第 90 页) • 显示当前信号源的控制画面。图标随 信号源而不相同。 • 关闭弹出菜单。 • 参阅 HOME(主页)画面说明(第 60 页) 。 ... -
Page 64: 应用程序 -Androidauto ™ /Applecarplay
应用程序 -AndroidAuto ™ /AppleCarPlay 应用程序 -AndroidAuto ™ /AppleCarPlay AppleCarPlay操作 在车内使用 iPhone 时,CarPlay.是一种智能 程度较高且更为安全的方式。.CarPlay 可代 您完成您在驾驶过程中想要通过 iPhone 完成 的各种操作并将其显示在产品屏幕上。.在驾 驶时,您可从.iPhone.规划路线、拨打电话、 发送及接收信息并聆听音乐。还可使用.Siri. 语音控制更轻松地操作.iPhone。 [ 要了解关于 CarPlay 的详情,请访问 https:// 显示 CarPlay 的主页画面。 • ssl.apple.com/ios/carplay/ 。 触按并按住以激活 Siri。 • 兼容的iPhone设备 应用程序按钮 CarPlay 可与下述型号的 iPhone 搭载使用。 启动应用程序。... -
Page 65: Android.auto ™.操作
应用程序 -AndroidAuto ™ /AppleCarPlay AndroidAuto ™操作 要进入 Android.Auto 模式,请触按信号源选 择画面中的 [Android Auto] 图标。 (第 9 页) 通过 Android.Auto 可使用安卓装置上各种方 便驾驶的功能。.在驾驶时,您可轻松进行路 线导航、拨打电话、聆听音乐并使用安卓装 置上的便利功能。 要了解有关 Android.Auto 的详情,请访 问. https://www.android.com/auto/ 和 https:// support.google.com/androidauto 。 兼容的安卓设备 应用程序 / 信息按钮 Android.Auto.可搭载安卓系统版本.5.0 启动应用程序或显示信息。 (Lollipop)或更高版本的安卓设备使用。 要退出AndroidAuto画面 备注 按 [HOME] 键。... - Page 66 蓝牙支持 • 在本机上显示和控制应用程序。 备注 Ñ 准备 • 本装置搭载某些安卓智能手机时可能无法正 常工作。 从 Google Play 下载镜像应用程序。 在安卓设备上安装最新版本的镜像应用程 Ñ 连接安卓设备 序“Mirroring OA for KENWOOD” 。 通过蓝牙将智能手机与本机配对。 通过 USB 端子连接安卓设备。 参阅 从蓝牙设备登录(第 24 页) 和 连 在安卓智能手机上启动镜像应用程序。 接蓝牙设备(第 25 页) 。 触按“OK”以启动镜像应用程序。 选择设备模式 触按“Start now”以开始捕获您的安卓画 面。 按 [MENU] 键。 h 出现弹出菜单。 开始享用镜像。...
-
Page 67: Ipod/Iphone
iPod/iPhone 使用 KCA-iP103 连接 iPod/iPhone。 (第 iPod/iPhone 99 页) 按 [HOME] 键。 准备 触按 [ ]。 Ñ 可连接的 iPod/iPhone 触按 [iPod]。 (第 9 页) 下列机型可以与本机连接。 ● 拆除使用连接线连接的 iPod/iPhone : 可连接 取下 iPod/iPhone。 iPhone 7 Plus • iPhone 7 • iPod/iPhone基本操作 iPhone SE • iPhone 6s Plus • 控制画面 iPhone 6s •... -
Page 68: 搜索操作
iPod/iPhone Ñ 分类搜索 [ 操作键 1] : 搜索音轨 / 文件 。有关搜索操作的详 • 可以通过选择分类搜索某个文件。 细内容,请参照 搜索操作(第 68 页) 。 触按 [Category List]。 E] [F] : 搜索前一个 / 下一个音轨 / 文件。 • 触按并按住进行快进或快退。 触按需要的分类。 [DH] : 播放或暂停。 • : 触按以静音或取消静音。 • 内容列表 触按画面右侧以显示内容列表。 再次触按以 关闭列表。 显示播放列表。触按列表上的音轨 / 文件名 时,会开始播放。... -
Page 69: Usb
USB的基本操作 连接 USB 存储装置 大部分功能可通过信号源控制画面和播放画 使用 USB 连接线连接 USB 装置。 (第 面控制。 98 页) 控制画面 按 [HOME] 键。 触按 [ ]。 打开抽屉 触按 [USB]。 (第 61 页) Ñ 断开USB设备 按 [HOME] 键。 触按除 [USB] 以外的信号源。 取下 USB 装置。 Ñ 可使用的 USB 装置 [ ] / [ 可在本机上使用海量存储等级的 USB 装置。 ] : 重复当前音轨 / 文件夹。每次触按 •... -
Page 70: 搜索操作
搜索操作 [ 操作键 1] : 搜索音轨 / 文件 。有关搜索操作的详 • 细内容,请参照 搜索操作(第 70 页) 。 可以通过以下操作搜索音乐或视频文件。 E] [F]: 搜索前一个 / 下一个音轨 / 文件。 • 触按 [1]。 触按并按住进行快进或快退。 触按 [S]。 [D]H : 播放或暂停。 • : 触按以静音或取消静音。 • 功能面板 触按画面左侧以显示功能面板。 再次触按以 选择列表类型。 关闭面板。 ] : 搜索上一个 / 下一个文件夹。 •... - Page 71 Ñ 链接搜索 可以搜索与当前音轨相同的艺术家 / 专辑 / 流派的某个文件。 触按 [Link Search]。 触按目标标签类型。可以从艺术家、专辑 及流派中选择。 h 显示对应选择的列表。 从内容列表中触按需要的项目。 Ñ 文件夹搜索 可以按照层级搜索某个文件。 触按 [Folder List]。 选择按音频文件 [ ] 或视频文件 [ 进行搜索。 触按需要的文件夹。 触按文件夹后显示其内容。 触按以在列表中选择所需项目。 重复本 步骤直到找到需要的文件。 中文...
-
Page 72: 收音机
收音机 收音机 收音机的基本操作 操作键 [E] [F] : 调谐电台。可更改频率切换方 • 大部分功能可通过信号源控制画面控制。 法(见表中 2) 。 要进入无线电信号源,请触按信号源选择画 : 触按以静音或取消静音。 • 面中的 [Radio] 图标。 (第 61 页) 预设列表 控制画面 触按屏幕右侧以显示预设列表。 再次触按 • 以关闭列表。 调出所记忆的电台。 • 触按 2 秒钟时,可将当前接收的电台存储 • 在内存中。 功能面板 触按画面左侧以显示功能面板。 再次触按以 关闭面板。 [TI](仅限 FM) : 设定交通信息模式接通。 • 详情请参阅 交通信息(第 74 页) 。 [SETUP :... -
Page 73: 存储的操作
收音机 存储的操作 选择操作 Ñ Ñ 自动存储 预设选择 可以自动存储接收良好的电台。 可以将存储的电台进行分类并选择。 触按需要的波段键。 触按画面右侧的 [ ]。 从列表中选择一个电台。 触按画面左侧的 [ ]。 触按 [AME]。 Ñ 按节目类型搜索 (仅限FM) 在收听.FM.广播时,可以调谐至具有某个特 定节目类型的电台。 触按画面左侧的 [ ]。 触按 [PTY]。 h 开始自动存储。 Ñ 手动存储 可将当前接收的电台存储在内存中。 选择想要存储在内存中的电台。 触按要在其中储存电台的 [FM#] (#:1-24) 或 [AM#] (#:1-12) 1 秒钟,直至听到“哔” 的一声为止。... -
Page 74: 交通信息
收音机 交通信息 (仅限于FM) 无线电设置 交通报道开始时,可以自动收听和观看交通 可以设定调谐器的相关参数。 信息。然而,该功能要求使用包括.TI.信息 触按画面左侧的 [ ]。 的无线电广播数据系统。 触按 [SETUP]。 触按画面左侧的 [ ]。 触按 [TI]。 h “Radio.SETUP” ( 无线电设置) 画面显示。 设定下列各项目。 h 设定交通信息模式。 ■ Ñ 交通报道开始时 如果电台的接收不良,则自动切换到通过 相同的广播数据系统网络广播相同节目的 自动显示交通信息画面。 电台。初始值为“ON” 。 RDS CT ■ 同步无线电数据系统电台时间数据和本机 的时钟。 “ON” (初始值) 、 “OFF”... -
Page 75: 蓝牙的控制
蓝牙的控制 蓝牙的控制 Ñ 关于手机和蓝牙音频播放机 通过蓝牙功能,可以使用各种功能 : .收听音 频文件、拨打 / 接听电话。 本机符合以下蓝牙规格 : 使用蓝牙 设备的信息 版本 蓝牙版本 4.1 配置文件 手机 : 蓝牙是一种短距离无线电台通信技术,适用 HFP(Hands Free Profile,免提配置文件) 于移动电话、便携式电脑及其他移动设备。 SPP (Serial Port Profile, 串行端口配置文件) 蓝牙装置无需借助线缆即可连接并彼此通 PBAP(Phonebook Access Profile,电话簿 连接配置文件) 信。 音频播放机.: 备注 A2DP(Advanced Audio Distribution Profile,高质量音频传输配置文件) • 在驾驶时,不要进行如使用电话簿拨号等复 杂操作。在进行此类操作时,请将车停在安 AVRCP(Audio/Video Remote Control 全之处。 Profile,音频 / 视频遥控配置文件) •... -
Page 76: 从蓝牙设备登录
显示设置选单画面。 功能。当 iPod touch 或 iPhone 连接到本机时, 将出现认证对话框。 对本机进行验证操作, 触按 [Bluetooth]。 或对 iOS 智能手机将智能手机作为蓝牙装置 登录。 开启您的智能手机 / 手机上的蓝牙功能。 在智能手机 / 手机上搜索装置 ( “DMX820WXS” ) 。 根据显示的消息操作智能手机 / 手机。 在智能手机 / 手机上确认请求。 ■ h 显示蓝牙设置画面。 有关各项设定,请参照以下部分。 连接蓝牙设备. (第 77 页) • 如果需要 PIN 码,请输入 PIN 码... -
Page 77: 播放蓝牙音频装置
蓝牙的控制 Ñ 连接蓝牙设备 播放蓝牙音频装置 触按蓝牙设置画面上的 [Select Device]。 大部分功能可通过信号源控制画面控制。 要输入蓝牙信号源,请触按信号源选择画面 上的 [Bluetooth] 图标。. (第 61 页) Ñ 蓝牙的基本操作 控制画面 触按需要连接的装置名称。 设备名称 /[ ]/[ 所连接的设备名称。 • ] : 重复当前音轨 / 文件夹。每次触按 • 该键,重复模式将按以下顺序切换 ; 重复 文件( ) 、重复文件夹( ) 、重复 备注 所有歌曲( )... - Page 78 蓝牙的控制 触按需要连接的装置名称。 功能面板 触按画面左侧以显示功能面板。 再次触按以 关闭面板。 BT DEVICE CHANGE] : 选择要通过蓝牙音 • 频 (A2DP) 或应用程序 (SPP) 连接的设备。 参阅 连接蓝牙音频(第 78 页) 。 播放模式指示灯 / 播放时间 D 、 H : 当前播放模式指示灯 各图标的含义如下 ; D (播放) 、 B (快进) 、 A (快退) 、 H (暂 Ñ...
-
Page 79: 使用免提装置
蓝牙的控制 使用免提装置 ● 蓝牙设置 1) 触按 [ ]。 显示蓝牙设置画面。 可以通过将蓝牙手机与本机连接来使用电话 功能。 备注 备注 • 诸如电池和天线等状态图标可能与手机上显 示的不同。 • 在连接 Apple CarPlay 或 Android Auto 期间, • 将移动电话设置为私用模式,可以禁用免提 蓝牙免提功能及两台蓝牙设备连接无法使用。 功能。 仅能使用 Apple CarPlay 或 Android Auto 免提 功能。 使用通话记录拨打电话 Ñ 拨打电话 触按 [ ]。 触按 [Û]。 从列表中选择电话号码。... - Page 80 蓝牙的控制 Ñ 语音识别 使用预设号码拨打电话 可以使用与本机连接的手机的语音识别功 触按 [ ]。 能。可以通过语音搜索手机电话簿。 (本功能 取决于手机。 ) . 触按姓名或电话号码。 按 [ ] 按钮 1 秒钟。 按下 1 秒钟 h 出现语音识别画面。 开始讲话。 备注 使用电话簿拨打电话 • 可以触按免提画面中的 [ ] 使用语音识别功 能。 触按 [ ]。 从列表中选择想要呼叫的人。 从列表中选择电话号码。 备注 •...
- Page 81 蓝牙的控制 Ñ 接听电话 ● 调节接收机的音量 按.[S].或.[R].键。 触按 [ ] 以接听电话或 ] 以拒绝接听来电。 ● 输出拨号音 触按 [DTMF] 显示拨号音输入画面。 触按画面上需要的键可发出拨号音。 ● 切换讲话语音输出 每次触按 [ ] 均会在手机和扬声 ]/.[ 器之间切换讲话语音输出。 备注 ● 来电等候 • 在监控观察摄像头时,即使有来电本画面也 如果在进行通话过程中接到另一来电,触按 不会显示。 要显示此画面,请按 [TEL] 按钮或 将汽车的换挡旋钮返回到驾驶员位置。 ] 可接听新来电。.保留当前通话。...
- Page 82 蓝牙的控制 Ñ Ñ 预设电话号码 电话簿转移 可以将常用电话号码登录至本机。 可通过 PBAP 转移蓝牙智能手机中的电话簿。 触按 [ 触按 [ ]。 ]。 触按 [Edit]。 触按 [ ]。 h 电话簿数据传输开始。 备注 选择要进行预设的位置。 • 如果电话簿包含超过 1000 个条目,则无法转 移电话簿数据。 删除电话簿 触按 [ ]。 h 出现确认信息。 触按 [Yes]。 [Delete all] ■ 要删除预设号码,请触按 [Delete all],然 后触按确认画面上的...
-
Page 83: 其他外部组件
其他外部组件 其他外部组件 Ñ 摄像机的设置 观察摄像机 按 [MENU] 键。 h 出现弹出菜单。 备注 触按 [SETUP]。 • 要连接摄像机,请参阅 第 98 页 。 • 要使用后视摄像头,需要进行反向引线连接。 h 显示设置选单画面。 (第 98 页) 触按 [Camera]。 • 换挡至倒车位(R)时显示后视画面。 Ñ 显示摄像头画面 按 [MENU] 键。 h 摄像机画面显示。 h 出现弹出菜单。 设定下列各项目。 触按 [Camera]。 Parking Guidelines ■ 您可显示泊车指引,以便在您换档至倒车 位(R)时可以更轻松地泊车。... -
Page 84: 外部音频 / 视频播放器-Av-In
其他外部组件 要调整泊车指引 外部音频 / 视频播放器—AV-IN 备注 将外部组件连接至 AV-IN 输入端子。 (第 • 根据后视摄像头随附的说明将后视摄像头安 98 页) 装在适当位置。 • 在调整泊车指引时,务必使用停车制动器以 选择 [AV-IN] 作为信号源。 (第 61 页) 防汽车移动。 打开所连组件并开始播放信号源。 触按摄像头画面中 [Parking Guidelines] 的 [ON]。 (第 83 页) 触按摄像头画面上的 [Guidelines SETUP]。 选择 标志,调节泊车指引。 调节所选标志的位置。 确保 A 和 B 横向平行,且 C 和 D 长度 相同。... -
Page 85: 显示器画面的设置
设置 设置 显示器画面的设置 系统设置 您可以在视频画面中调整图像质量。 备注 按 [MENU] 键。 • 可从多功能菜单启动此部分中的各操作。 h 出现弹出菜单。 按 [MENU] 键。 触按 [Screen Adjustment]。 h 出现弹出菜单。 触按 [SETUP]。 h 显示屏幕控制画面。 按照以下调节各个项目。 Contrast / Brightness / Colour / Tint ■ 有关各项设定,请参照以下部分。 调整各项目。 设置 AV. (第 89 页) • 备注 显示设置. (第 87 页) • 设置用户界面 (第 86 页) •... -
Page 86: 用户界面设置
设置 Ñ 方向盘遥控器的学习功能 用户界面设置 只有汽车装备了方向盘遥控器时才能使用本 您可设置用户界面参数。 功能。 按 [MENU] 键。 如果方向盘遥控器不兼容,学习可能无法完 成,可能显示错误消息。 h 出现弹出菜单。 触按用户界面画面中的 [Steering Remote 触按 [SETUP]。 Controller]。 h 显示.SETUP(设置)画面。 h 显示方向盘遥控器画面。 触按 [User Interface]。 触按需要设定的功能。 h 显示用户界面画面。 设定下列各项目。 Beep ■ 打开或关闭按键触按音。 初始值为“OFF” 。 备注 Language ■ 选择语言。 • 可以使本机一次学习全部按钮。这时,逐个 按下全部按钮 ; 在按下全部按钮后,触按方 Steering Remote Controller ■... -
Page 87: 特殊设置
设置 特殊设置 显示的设置 可设置特殊参数。 按 [MENU] 键。 按 [MENU] 键。 h 出现弹出菜单。 h 出现弹出菜单。 触按 [SETUP]。 触按 [SETUP]。 h 显示.SETUP(设置)画面。 h 显示.SETUP(设置)画面。 触按 [Display]。 触按 [Special]。 h 出现显示画面。 h 特殊画面显示。 设定下列各项目。 设定下列各项目。 Dimmer ■ 选择调光器模式。 DEMO ■ OFF : 显示器和按钮不会变暗。 设定演示模式。初始值为“ON” 。 ON : 显示器和按钮变暗。 Software Information ■ SYNC (默认)... - Page 88 设置 Ñ 更改背景图像或颜色 要登录原始图像 可以通过连接的 USB 装置加载图像,并将其 在显示画面上触按 [Background]。 设为背景图像。 开始操作本程序之前,需要连接具有需要加 选择图片。 载图像的装置。 触按背景画面中的 [User1 Select] 或 [User2 Select]。 选择需要装载的图像。 预先选择背景颜色。 提前选择原始图像。 要选择背景颜色 触按背景画面上的 [Background Color]。 触按 [Enter]。 选择背景颜色。 h 加载选择的图像, 显示返回至背景画面。 备注 • 触按 [ ] 逆时针旋转。 • 触按 [ ] 顺时针旋转。...
-
Page 89: Av.设置
设置 AV设置 可以设定.AV.参数。 按 [MENU] 键。 h 出现弹出菜单。 触按 [SETUP]。 h 显示.SETUP(设置)画面。 触按 [AV]。 h AV.画面出现。 设定下列各项目。 AV-OUT ■ 指定是否从 AV OUTPUT 端子输出当前信 号源信号。 “ON” / “OFF” (初始值) 备注 • 仅能从 AV IN 和 USB(视频文件)信号源 输出图像。 • 如果在播放 AV-IN 信号源时选择了后视摄 像头图像的显示,则 AV OUTPUT 端子不 会输出图像。 CarPlay Sidebar ■... -
Page 90: 控制音频
控制音频 控制音频 扬声器 /交迭点设置 注意 • 可从多功能菜单启动此部分中的各操作。 按 [MENU] 键。 可以调节音频平衡或重低音扬声器电平等各 h 出现弹出菜单。 项设置。 触按 [Audio]。 按 [MENU] 键。 h 出现音频画面。 h 出现弹出菜单。 触按 [Speaker/X’over]。 触按 [Audio]。 选择一种车型。 可以设置车型和扬声器网络等。 当您选择自己的车型时,会自动设置延迟 时间对准(用于每个声道声音输出的时序 调整)以获得最高的环绕声效果。 触按需要调节的扬声器( 1 ) ,并按照如 有关各项设定,请参照以下部分。 下所示设置各项目( 2 ) 。 设置扬声器 / 分频点. (第 90 页) •... -
Page 91: 控制一般音频
控制音频 X’over TW(高音扬声器)Gain * ■ ■ 显示扬声器交迭点设置画面。 调节高音扬声器电平。 (在扬声器选择画 面上选择前侧时) 可以调节在选择扬声器类型时自动设置的 交迭点设置。 Phase Inversion* ■ 有关详情,请参阅 分频网络设置(第 91 设置重低音扬声器输出的相位。 页) 选中 [Phase Inversion] 以将相位进行 180 度转向。 (在扬声器选择画面上选择了重 Ñ 分频网络设置 低音扬声器时) 可设置扬声器的交迭点频率。 仅 当在 [X’over] 中将“LPF 触按 [X’over]。 FREQ”/“HPF FREQ”设为“Through” 以外的模式时。 仅 当在 [Speaker Setup] 中将 “Tweeter” 设定为“Small”... -
Page 92: 均衡器控制
控制音频 均衡器控制 SW Level ■ 调整重低音扬声器音量。 当重低音扬声 器设置为“None”时,本设定无法使用。 可以对各分类选择最佳设定来调节均衡器。 参见 扬声器 /交迭点设置(第 90 页) 。 按 [MENU] 键。 Ñ 调用EQ曲线 h 出现弹出菜单。 触按 [Audio]。 触按 [Preset Select]。 h 出现音频画面。 选择均衡器曲线。 触按 [Equalizer]。 触按画面,按照需要设定图形均衡器。 备注 • [iPod] 仅在 iPod 信号源期间可用。 Ñ 保存EQ曲线 调整 EQ 曲线。 增益电平(虚线框区域) ■ 触按各频率条以调节增益电平。... -
Page 93: 音量补偿
控制音频 音量补偿 音响效果 微调当前信号源的音量,将不同信号源之间 可以设定音响效果。 的音量差最小化。 按 [MENU] 键。 按 [MENU] 键。 h 出现弹出菜单。 h 出现弹出菜单。 触按 [Audio]。 触按 [Audio]。 h 出现音频画面。 h 出现音频画面。 触按 [Sound Effect]。 触按 [Volume Offset]。 设定下列各项目。 触按 [+] 或 [ − ] 以调节电平。 Bass Boost ■ 在“OFF”/ “1”/ “2”/ “3”中设置低音 Initialize ■... -
Page 94: 聆听位置 /.Dta
控制音频 聆听位置 /DTA 位置 DTA 的控制 可以细调聆听位置。 由于距所选座位更近的扬声器具有更长的延 触按 [Adjust]。 迟时间,因此需调整声音延迟时间,以便使 触按 [Delay]。 各扬声器发出的声音同时到达听众。 按 [MENU] 键。 触按 [T] 或 [U] 调整所选扬声器的延迟时 h 出现弹出菜单。 间。 触按 [Audio]。 h 出现音频画面。 触按 [Position/DTA]。 从 [Front R](右前) 、[Front L](左前) 、 触按 [Level]。 [Front All](整个前面)及 [All] 中选择聆 听位置。 触按 [T] 或 [U] 调整所选扬声器的音量。 备注... -
Page 95: 遥控器按钮的功能
遥控 遥控 遥控器按钮的功能 可以使用遥控器 KNA-RCDV331(选购附件) 操作本机。 将遥控器直接对准面板上的遥控传感器。 • Ñ 请勿将遥控传感器暴露在强光下(直射日 • 切换操作模式 光或人工照明) 。 将其操作模式开关转至“DVD.” • • • • 切换到将要播放的音频源。 播放或暂停。 Û 收到来电时,应答来电。 VOL R S 调整音量。 在使用调谐器信号源期间, 选择要接收的 FM/ AM 频段。 AM– 选择将要播放的音轨或文件。 在使用调谐器信号源期间, 切换到本机接收的广播电台。 静音 / 恢复声音 未使用。 –... -
Page 96: 连接 / 安装
连接 / 安装 连接 / 安装 安装之前 使用聚氯乙稀绝缘带或其它类似材料绝缘 • 未连接的电缆。为了避免短路,请勿移除 未连接电线或端子末端的罩帽。 安装本机之前,请注意下列事项。 请将扬声器正确连接到其相应的端子。如 • 果共用 ¤ 导线或将其与汽车的金属部件连 # 警告 接,可能造成本机损坏或无法正常工作。 如果将点火导线(红色)和蓄电池导线(黄 • 只有两个扬声器连接到系统时,请将连接 • 色)与汽车底盘(接地)连接, 将造成短路, 器连接到两个前置输出端子或两个后置输 可能导致火灾。始终将这些导线通过保险 出端子 (不得混接前置和后置端子) 。例如, 丝盒与电源连接。 如果将左侧扬声器的 ¢ 连接器与前侧输出 不得拆除点火导线 (红色) 和蓄电池导线 (黄 端子连接,则不得将 ¤ 连接器与后侧输出 •... -
Page 97: 安装本机
连接 / 安装 Ñ 用于安装的随机附件 安装本机 1 或 2 汽车托架 (M5 × 6 mm) (M5 × 8 mm) x6 (2 m) (3 m) 1 或 2 Ñ Ñ 麦克风装置 安装步骤 1) 检查麦克风(附件 3 )的安装位置。 1) 为了防止发生短路,请拔出点火钥匙,切 断蓄电池的 ¤ 端子连接。 2) 清洁安装表面。 3) 揭下麦克风(附件 3 )的保护纸,然后将 2) 正确连接各装置的输入和输出连接线。 麦克风粘贴在如下所示的位置。 3) 将本机与导线束连接器连接。请参阅 导线 4) 连接麦克风导线至本机,使用胶带等在数 束连接器功能指南(第 99 页) 。 个位置固定。... - Page 98 连接 / 安装 Ñ 将导线与端子连接 USB端子 (1.0 m) 5V = 1.5A 淡绿色 (停车传感器导线) USB 装置 附件4: 驻车延长线缆 罩帽 为了保证安全, 请务必连 接停车传感器。 连接汽车的停车制动器检 测开关导线束。 附件 3 蓝牙麦克风 紫色/白色 (倒车传感器导线) 重低音预输出 使用任选的后视摄像机 时, 连接至汽车的倒车灯 罩帽 导线束。 FM/AM 天线 保险丝 连接器 E (15A) 连接器 D 后侧音频预输出 (左; 白, 右; 红) 连接器 C 请参阅...
- Page 99 连接 / 安装 Ñ Ñ 导线束连接器功能指南 连接 iPod/iPhone/Android 连接器 A 安卓智能手机 连接器 C Micro USB至USB连接线 iPod/iPhone Lightning (闪电) 连接器 KCA-iP103 (0.8 m) 连接器 E USB端子 (1.0 m) 连接器 D ■ 连接器.A 5V = 1.5A 引脚 功能 罩帽 SWC KEY2 SWC KEY1 SWC GND ■ 连接器.C 引脚 功能 反向 i Pod/iPhone最大供电电流: DC 5 V = 1.5 A SWC GND 另售...
-
Page 100: 故障排除
故障排除 故障排除 问题和解决方法 错误消息 如果发生故障,请首先检查下表内容,寻找 如果没有正确操作本机,画面将显示错误原 可能发生的问题。 因的消息。 NoDevice/无装置(USB 装置) 备注 虽然没有连接 USB 装置,但是选择了 USB 装置作 为信号源。 • 本机的某些功能可能因本机的某些设定而被 † 将信号源变更为 USB/iPod 以外的信号源。连接 关闭。 USB 装置,然后再次将信号源变更为 USB 装置。 • 有时似乎是本机故障的现象,其实可能是因 Disconnected/断开(iPod、蓝牙音频播放机) 微小的误操作或配线失误造成的。 虽然没有连接 iPod/ 蓝牙音频播放机,但是选择了 iPod/ 蓝牙音频播放机作为信号源。 † 将信号源变更为除 iPod/ 蓝牙装置以外的其他信 号源。连接... -
Page 101: 可播放的媒体和文件
附录 附录 可播放的媒体和文件 本机可播放各种媒体和文件。 Ñ 关于文件 以下音频和视频文件均受支持。 备注 • 即使受支持,取决于媒体或设备的类型或条件,也可能无法进行播放。 ■ 播放音频文件 模式 比特率 取样频率 位计数 AAC-LC(.m4a) MPEG2/4 AAC LC 8 – 320kbps,VBR 16 – 48 kHz 16 位 HE-AAC(V1、V2) MP3(.mp3) MPEG-1/2 Audio Layer 3 8 – 320kbps,VBR 16 – 48 kHz 16 位 WMA(.wma) Windows 媒体音频标准 L3 型 8 – 320kbps 16 – 48 kHz 16 位 (版本 7、8、9) 线性 PCM (WAVE) (.wav) RIFF 波形音频格式 – 16 – 192 kHz 16 位... -
Page 102: 技术规格
附录 技术规格 ■ 蓝牙部分 蓝牙技术 ■ 监视器部分 : 蓝牙版本 4.1 频率 图像尺寸 : 2.402 – 2.480 GHz : 8.0 英寸宽(对角线) : 1 76.6 mm(宽)× 99.4 mm(高) 射频输出功率(E.I.R.P.) : + 4dBm(最大) ,功率等级 2 显示系统 : TN LCD 面板 最大通信距离 : 视距约为 10m(32.8 英尺) 驱动系统 : TFT 有源矩阵系统 音频编码解码器 : SBC/ AAC 像素数量 : 1 ,152,000(800H x 480V x RGB) 配置文件(支持多配置文件) • HFP(Hands Free Profile,免提配置文件) 有效像素... - Page 103 附录 ■ FM 调谐器部分 ■ 音频部分 频率范围(步进) 最大输出功率(前后) : 87.5 MHz – 108.0 MHz(50 kHz) : 50 W × 4 可用灵敏度(S/N : 30.dB) 全带宽功率(小于.1%.THD.时) : 13.2 dBf (1.3 μV/75 Ω) : 21 W × 4 静噪灵敏度(DIN.S/N : .46.dB) 输出频段 : 19.2 dBf (2.5 μV/75 Ω) : 20 – 20,000 Hz 频率响应(±.3.0.dB) 预输出电平(V) : 30 Hz – 15 kHz : 4 V/ 10 kΩ S/N(dB) 预输出阻抗 : 70 dB(单声道) : 1.3 kΩ 选择性(±.400.kHz) 扬声器阻抗...
-
Page 104: 关于本机
附录 关于本机 MPEG-4 VIDEO. NO LICENSE IS GRANTED OR SHALL BE IMPLIED FOR ANY OTHER USE. ADDITIONAL INFORMATION INCLUDING THAT RELATING TO PROMOTIONAL, INTERNAL AND COMMERCIAL USES ■ 版权声明 AND LICENSING MAY BE OBTAINED FROM MPEG LA, • Bluetooth® 文字商标和标志是归 Bluetooth SIG, LLC. - Page 105 附录 – Redistributions in binary form must reproduce the above copyright notice, this list of conditions and the following disclaimer in the documentation and/or other materials provided with the distribution. – Neither the name of the Xiph.org Foundation nor the names of its contributors may be used to endorse or promote products derived from this software without specific prior written permission.