NEC Express5800/T110i Getting Started
Hide thumbs
Also See for Express5800/T110i:
- Maintenance manual (222 pages) ,
- System configuration manual (45 pages) ,
- User manual (126 pages)
Advertisement
Quick Links
Getting Started!
Be sure to read this guide carefully before using this
server and keep this guide for future use.
Read and follow Safety Precautions and Regulatory Notices that comes with this product first.
The following describes the procedures from opening the carton box to
starting using this product. Be sure to follow these steps.
Instruction Manuals
Instruction manuals are available at NEC Web Site (http://www.nec.com/).
To see the manuals in EXPRESSBUILDER, follow the steps below.
(1) If you already have the EXPRESSBUILDER DVD, set the DVD into a computer
running Windows. Follow the on-screen messages to start the menu, and then go
to (4).
Tips: You can download EXPRESSBUILDER from NEC Web Site.
(2) To install Windows, follow this guide (reverse side).
(3) After installing Windows, click NEC EXPRESSBUILDER on the desktop or Start
Menu.
(4) Click Instruction Manuals on the following menu.
Express5800/T110i
Step 1
Check the accessories
Open the carton box, and then make sure you have all the accessories listed below:
Express5800/T110i server × 1
●
Getting Started (this guide) × 1
●
2nd Edition,
●
Safety Precautions and Regulatory Notices × 1
Aug 2018
●
SDR Update CD-ROM × 1
Screw for backup device × 8
●
Power cord × 1 or × 2*
●
●
Cable ties (for securing AC power cord) × 1 or × 2*
●
Bezel lock key × 2
Important: Keep accessories for future use.
* EXP334A only
Step 2
Install internal optional devices
Install internal optional devices. Go to Step 3 if you have not purchased optional
devices or if you purchased a Build to Order (BTO) product.
Note: See "Installing Internal Optional Devices" in User's Guide and the manual that comes with
the optional device.
Step 3
Place the server to a proper location
Determine the location to place this product.
Note: See "Installation and Connection" in User's Guide.
Environment:
<Operating>
Ambient temperature:5°C to 40°C*
Humidity: 10% to 85%*
2
Temperature gradient: ±10°C/hour
Air pressure: 749 to 1040 hpa
<Non-operation>
Ambient temperature: 5°C to 40°C*
2
Humidity: 10% to 85%*
Temperature gradient: ±15°C/hour
Air pressure: 749 to 1040 hpa
*1: 5°C to 48°C (when an optional
kit is installed; subject to
composition restrictions)
*2: 10% to 80% (when internal
LTO is installed)
100/200VAC bipolar grounded
outlet or bipolar outlet with
ground terminal (separate
adapter is required)
Installing the stabilizer
Remove the two screws from the stabilizer to remove the stabilizer from the server. Turn the stabilizer 90
degree as shown in the figure below, and then fix it by using the two screws. For details, see "Preparation for
installation" in User's Guide.
At least 150 mm clearance in
front of/behind the server
Cables for the mouse or other
devices are within easy reach
1
1
Clean and orderly room
Step 4
Connect cables
Connect cables to the server.
Note: See "Installation and Connection" in User's Guide.
A device with
serial interface
(such as a
modem)
Flat and sturdy desk
Display unit
USB devices
(such as a
terminal
adapter)
* The type of power supply unit depends on the type of system.
This figure shows the fixed power supply model.
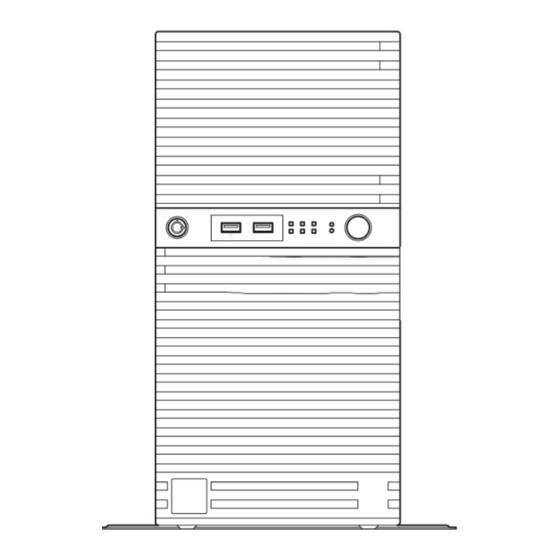
<Front view>
USB devices
Connect the provided
power cord to an outlet
<Rear view>*
when the cable
connection is complete.
Hub/Switching hub
Advertisement

Related Manuals for NEC Express5800/T110i


Summary of Contents for NEC Express5800/T110i
- Page 1 Place the server to a proper location (2) To install Windows, follow this guide (reverse side). Determine the location to place this product. (3) After installing Windows, click NEC EXPRESSBUILDER on the desktop or Start Menu. Connect the provided Note: See “Installation and Connection” in User’s Guide.
- Page 2 Installation Guide (Windows). beeps pattern, and then contact your sales representative. Tips: To see the guide, click NEC EXPRESSBUILDER on the desktop or go to NEC Web Site. (4) Press <F2> key while the following message appears on the bottom of screen.