
Related Manuals for Samsung G2613C


Summary of Contents for Samsung G2613C
-
Page 1: Table Of Contents
MICROWAVE OVEN G2613C SERVICE Manual MICROWAVE OVEN CONTENTS 1. Precaution 2. Statements 3. Operating Instructions 4. Disassembly and Reassembly 5. Alignment and Adjustments 800W 6. Troubleshooting G2613C 7. Exploded Views and Parts List 8. Wiring Diagrams SESA... - Page 2 (e) A Microwave leakage check to verify compliance with the Federal performance standard should be performed on each oven prior to release to the owner. Samsung Electronics...
-
Page 3: Precaution
10. Service technicians should remove their watches while repairing an MWO. 16. Always connect a test instrument's ground lead to the instrument chassis ground before connecting the positive lead; always remove the instrument's ground lead last. Samsung Electronics... - Page 4 PRECAUTION with the oven energized. Servicemen should remove their watches whenever DO NOT measure the voltage in the high voltage circuit working close to or replacing the magnetron. including filament voltage of magnetron. Samsung Electronics...
- Page 5 2. Specifications 2-1 Table of Specifications G2613C POWER SOURCE 230V 50Hz, AC POWER CONSUMPTION MICROWAVE : 1,350W GRILL : 1,000W OUTPUT POWER 800W (IEC-705) OPERATING FREQUENCY 2450MHz TIMER 60 MINUTES COOLING METHOD AIR COOLING MAGNETRON OM75SH(31) OUTSIDE DIMENSIONS 489(W) x 365(D) x 275(H)mm...
-
Page 6: Operating Instructions
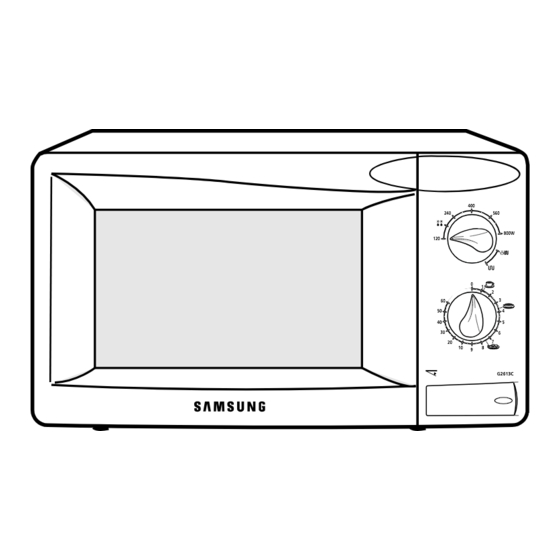
3. Operating Instructions 3-1 Control Panel DEFROST 800W INSTANT COOK G2613C Samsung Electronics... - Page 7 Operating Instruction 3-2 Features & External Views Ventilation Holes Heater Light Door Safety Interlock Holes 800W Control Panel Door Latches G2613C Open Door Push Button Guide Ring Glass Plate 800W G2613C 203mm 356.5mm 365mm 489mm 3-3 Checking That Your Oven is Operating Correctly NOTE: The oven must be plugged into an appropriate wall socket.
- Page 8 Serving Size Power level Standing Time 2. Turn the COOKING POWER CONTROL knob to Max Power. 100% 2~3mins. Drink 150ml 3. Turn the TIMER knob to select instant cook, drinks or jacket potatoes. Soup/ 200~300 100% 2~3mins Sauce Fresh 200~300 100% 2~3mins Vegetables Samsung Electronics...
-
Page 9: Disassembly And Reassembly
1. Discharge the high voltage capacitor. 2. Disconnect all the leads from the high voltage transformer. 3. Remove the mounting bolts on the high voltage transformer. 4. When replacing, connect the leads correctly and firmly. H. V. Trans Screws Samsung Electronics... - Page 10 1. Insertion depth of the thin metal plate should be 0.5mm or less. 4-3-4 Removal of Key Door & Spring Door "E" Remove pin hinge from Door "E" Detach spring from Door "E" and key door. Door Key Spring Key Samsung Electronics...
- Page 11 2. Disconnect the connectors from the heater ceramic and wire leade. Bracket 3. Remove two(3) screws securing the bracket upper to Upper the oven cavity. 4. Remove one screw securing the bracket heater. Ceramic Bracket Heater Heater Screw Samsung Electronics...
-
Page 12: Alignment And Adjustments
2. Isolate the magnetron from the circuit by disconnecting its leads. 3. A continuity check across the magnetron filament terminals should indicate one ohm or less. 4. A continuity check between each filament terminal Cooling Fins and the magnetron case should read "open". Samsung Electronics... - Page 13 ∞ Primary switch 5. Confirm that the gap between the switch ∞ Monitor switch (COM-NC) housing and ∞ Monitor switch (COM-NO) ∞ the switch actuator is no more than 0.5mm Secondary switch when door is closed. Samsung Electronics...
- Page 14 5. After heating for 2 minutes, measure the temperatures of water in each beaker. 6. Microwave heat distribution rate can be caicviated as follows : Minimum Temperature Rise Heat Distribution = X 100(%) Maximum Temperature Rise The result should exceed 65%. Samsung Electronics...
- Page 15 Hold the probe perpendicular to the cabinet door. Place the spacer cone of the probe on the door and/or cabinet door G2613C seam and move along the seam, the door viewing window and the exhaust openings moving the probe in a clockwise direction at a rate of 1 inch/sec.
-
Page 16: Troubleshooting
2) Defective con- The oven lamp does not light and fan motor Replace the timer. tacts of timer does not operate. NOTE: Interlock monitor switch must be replaced when the fuse is blown out. Samsung Electronics... - Page 17 3) Too small a If a small amount of food is heated repeatedly over To increase the oven load or no a long period of time, microwave turns off during load, place a glass of load operation. water into the oven. Samsung Electronics...
- Page 18 1) If there is no continuity in forward, direction the H.V.Diode is open. Replace. 2) If there is continuity in reverse direction, it's shorted. Fan motor Fan motor Check if the motor coil is open. Replace. does not rotate. Samsung Electronics...
-
Page 19: Exploded Views And Parts List
7. Exploded Views and Parts List 7-1 Main Exploded View Samsung Electronics... - Page 20 4713-001031 LAMP-INCANDESCENT 230V,173mA,40W,ORG,-,-,25x69mm CV/AIR DE71-60010A COVER-AIR PP(TB53),T1.7,WHT,64G,M745 DE93-20001A ASSY BODY LATCH 2ND-W1,M97G45/M9745 DE66-90113A LEVER-DOOR PP(TB53-GH10),T2.5,W31X100.5,-,12G,NTR,3RD-W DE26-10121B TRANS-H.V SHV-745EC1,230V,50HZ,KEC,2230V DE94-00089W ASSY DOOR G2613C/XEC,PURE-WHT,SESA DE61-50106A BRACKET-HVC SECC,T0.8,W31,L125.8 2501-001105 C-OIL 950nF,2.1KV,BK,54x35x80,20 DE91-70063A ASSY-HVD V2M6,PI9.0,0.05MT DE91-70061B ASSY-H.V.FUSE THV060T-0750-H,5KV0.75A,RED DE61-40017A FOOT PP(A353),BLK,MW5630T DE80-10003A BASE-PLATE SGCC1-Z,T0.8,W340,L550,M745...
- Page 21 Parts No. Description Specification Q'ty Remarks DE67-20186A SCREEN-DOOR SAN,T2.2,W354,L224,SMOG,3RD-0.7CU.FT DE64-40006A DOOR-KEY POM(TC3005),T2.0,12GR,BLK,CE94 DE61-70033A SPRING-KEY ES,HSWR10,PI0.6,D6.0,L22.3,BLU DE64-40322W DOOR-A ABS(HR0370),-,-,-,P-WHT,G2613C/XEC DE92-50126D ASSY DOOR-E M745,-,BLK,ASSY PURCHASING DE64-40008B DOOR-C PP,T1.5,BLK,CE745G DE01-00003A FILM-DOOR PE-FILM,T0.15,W142,L262,M745 DE61-80005A HINGE-UPPER SCP1,T2.3,ZN-COATIN,M745 DE61-80004A HINGE-LOWER SCP1,T2.3,ZN-COATING,M745 7-4 Assembly Control Box Parts List Ref.
- Page 22 SCREW-ASSY TAP TITE PH,TC,M4X8,SWRCH18A,ZPC2,GLD,W M/DRIV DE60-10098A SCREW-ASSY TAP TITE PH,TC,M4X8,SWRCH18A,ZPC2,GLD,W MG-TCO DE60-10195A SCREW-STAR POLE TH,*,2,4,12,SWCH18A,ZNC C-BACK DE60-20063A BOLT-FLANGE M4,10,ZPC3,YEL,MSWR HI-LOW DE60-20063A BOLT-FLANGE M4,10,ZPC3,YEL,MSWR HI-UPP DE60-10012A SCREW-TAP TITE TH,+,3,M4,L10,SWR10,ZPC2,TOOTH B-PLATE DE60-10069A SCREW-TAP TH TH,M4,L10,FRFZY RELAY DE60-10082H SCREW-A 2S-4X12,TOOTHED TIMER Samsung Electronics...
-
Page 23: Wiring Diagrams
S/W3 S/W3 PRIMARY GREEN LATCH SWITCH LATCH YELLOW/GREEN MWO MODE CYCEL MODE GRILL MODE SWITCH SWITCH High Voltage Circuit MAGNETRON HIGH VOLTAGE DIODE TO CHASSIS HIGH VOLTAGE CAPACITOR H.V.FUSE SYMBOL COLOR ORANGE BROWN BLACK BLUE HIGH VOLTAGE TRANSFORMER Samsung Electronics...