Table of Contents
Advertisement
Quick Links
Advertisement
Table of Contents

Related Manuals for Panasonic NR-BS63VS


Summary of Contents for Panasonic NR-BS63VS
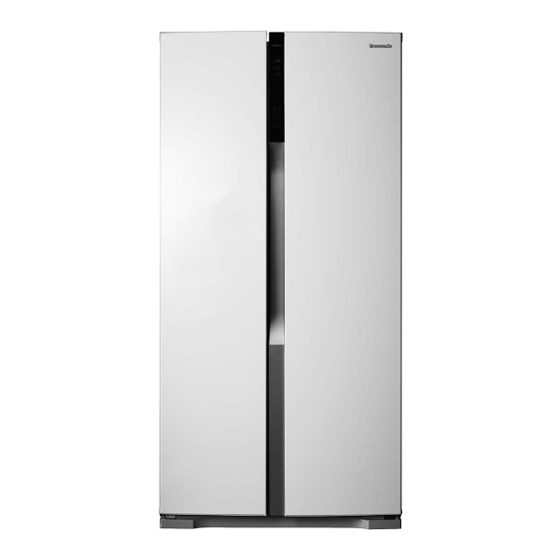
- Page 1 Operating Instructions Refrigerator-Freezer (Household use) NR-BS63VS Model No.
-
Page 2: Table Of Contents
Introduction Contents Introduction Caring for the environment ..................2 Safety instructions ....................3 Installation Installation ......................... 6 Choosing the right location ................ 6 Removing the doors .................. 7 Installing the refrigerator................9 Preparations .................... 10 Operation Parts and their functions ..................11 Interior and foods stored ................. -
Page 3: Introduction
Introduction Safety instructions Indicates the appliance must be earthed to Do not prevent electric shock Make sure you do this Do not take apart Indicates risk of death or serious injury. This appliance is not intended for use by persons (including children) with reduced physical, sensory or mental capabilities, or lack of experience and knowledge, unless they have been given WARNING supervision or instruction concerning use of the appliance by a person responsible for their safety. - Page 4 Introduction Do not use electrical appliances inside the food storage compartments of the appliance, unless they are of the type recommended by the manufacturer. Do not try to disassemble, repair or modify the refrigerator yourself. ● You may injure yourself – or others – with burns or electric shock, or damage the refrigerator. If your appliance needs alterations or repair, please consult authorized service centre.
- Page 5 Introduction Indicates risk of injury or damage to property. CAUTION Do not put glass bottles or containers in the freezer. ● When the contents freeze, the glass may break. Do not touch the inside walls of the freezer or items stored in the freezer with wet hands. ●...
-
Page 6: Installation
Installation Installation Choosing the right location Install the refrigerator in a location which satisfies the following criteria: ● Where the refrigerator will not be exposed to direct sunlight ● Where the refrigerator will be at a distance from heating appliances, cooking appliances and other sources of heat ●... -
Page 7: Removing The Doors
When you want to remove the doors, please contact your dealer, an authorized service centre or access to our Web site (http://panasonic.net). CAUTION Panasonic or its Authorized agent cannot be held responsible if you remove the doors by yourself. Dimensions (mm): W900 × D610 × H1845 (Without Door) - Page 8 Installation Removing the freezer/fridge door When removing the door ● Ensure the door is in the closed position. ● Handle the removed door carefully to keep it safe from damage and impact. (Please refer to the illustrations below.) 1 Remove the top hinge cover. Turn the hinge cover screw counterclockwise, and remove it.
-
Page 9: Installing The Refrigerator
Installation Installing the refrigerator The refrigerator comes on four casters to enable it to be moved easily. Carefully read through the section “Choosing the right location”, and install the refrigerator in the best location. Once the installation location has been decided upon, secure the refrigerator, and adjust it so that it is level. Removing the front grille When the two doors are opened and the front grille is viewed from above, two screws –... -
Page 10: Preparations
Installation Preparations Maintenance Remove all the packing materials and tapes. Wipe the inside of the refrigerator using a soft cloth which has been dipped in lukewarm water and then wrung out. Wash and completely dry the ice box before installing it. (Do not use a dish dryer, hair dryer or other appliance when drying.) Connecting the power plug to the power outlet When the power plug is connected to the power outlet, the temperature display starts... -
Page 11: Operation
Operation Parts and their functions Interior and foods stored Freezer Fridge 1 Glass shelves 5 Hygiene active LED The positions of these shelves (except for the Antibacterial/deodorizing filter and LED. third shelf from the top in the freezer) can be 6 Sealed case door shelf adjusted. -
Page 12: For Saving Energy
Operation Frozen foods, meats, fish, ice cream, etc. Freezer -17 °C to -25 °C Butter, dairy products, eggs, drinks, seasonings, cooked foods, etc. 0 °C Zone Meats, fish, ham, sausages, etc. Fridge 1 °C to 7 °C 2 °C Zone Vegetables, fruits, etc. -
Page 13: Control Panel
Operation Control panel Display area 1 Cooling power level Cooling power by the refrigerator is indicated here. Lowest power level ( when the compressor is shut down or running at lowest speed) Low power level (when the compressor is running at low speed) Medium power level (when the compressor is running at medium speed) High power level... -
Page 14: Setting The Temperature
Operation Setting the temperature The temperatures of the fridge and freezer can be changed. At the time of purchase, the temperatures are set as shown below. Fridge: 4 °C Freezer: -20 °C 1 The control panel lights up, the temperature inside the refrigerator is displayed. 2 The temperature display start flashing, indicating that the temperatures can be set. -
Page 15: Using The Handy Functions
Operation Using the handy functions This refrigerator comes with a number of useful functions for specific applications. 1 The control panel lights up. 2 The function display start flashing, indicating that the functions can be set. 3 “ ” starts flashing. 4 Select the function to be used. - Page 16 Operation Super Freeze In this mode, the freezer can be cooled rapidly, enabling the fresh foods, etc. which are Mode placed there to be frozen. The Super Freeze Mode is automatically released after about 50 hours. Notes: ● When the Super Freeze Mode is set, the temperature inside the freezer may drop below the set temperature.
-
Page 17: How To Make Ice
Operation How to make ice 1. Gently pull out the ice tray and fill the ice tray with Ice tray water to the water level line. Then carefully replace the ice tray horizontally. 2. When the ice cubes are ready, turn the knob Water level line clockwise (turn to the end and release), the ice cubes will drop from the ice tray into the ice box. -
Page 18: Appendix
Appendix Removing and re-installing Glass shelves Raise the back part of the shelf slightly, and pull out the shelf. To re-install the shelf, align it with the left and right guides, and push it into place. Drawers Pull the drawer out all the way, and while raising the back part of the drawer slightly, and pull out the drawer. -
Page 19: Cleaning And Maintenance
Appendix Cleaning and maintenance Conduct periodic cleaning and maintenance to ensure that the refrigerator will be kept clean and that it will continue to operate for a long time to come. Before cleaning or conducting maintenance, be absolutely sure to disconnect the power plug from the power outlet. -
Page 20: Checks After Cleaning And Maintenance
Appendix Checks after cleaning and maintenance Is the supply cord damaged? Has the power plug become hot? Is the power plug firmly connected to the power outlet? If the supply cord is damaged, remove the power plug from the socket and contact your dealer or an authorized service centre. -
Page 21: Troubleshooting
Appendix Troubleshooting If you feel that the refrigerator is not working properly, check out the following points first. If the trouble persists, disconnect the power plug and contact your dealer or an authorized service centre. General You hear unusual sounds from the ●... - Page 22 Appendix The LED light does not come on. ● Has the refrigerator been set to the Fridge Off Mode? In the Fridge Off Mode, the front tower LED light of the fridge does not come on. ● Is the power to the refrigerator on? The alarm sounds, and the ●...
-
Page 23: Specifications
(private households) [India Only] For the purpose of recycling to facilitate effective utilization of resources, please return this product to a nearby authorized collection center, registered dismantler or recycler, or Panasonic service center when disposing of this product. Please see the Panasonic website for further information on collection centers, etc. - Page 24 Panasonic Corporation Website : http://panasonic.net/ Y0113-0 AH-310750 © Panasonic Corporation 2012 Printed in P.R.C.