Table of Contents
Advertisement
Quick Links
Advertisement
Table of Contents

Related Manuals for Medisana 79046


Summary of Contents for Medisana 79046
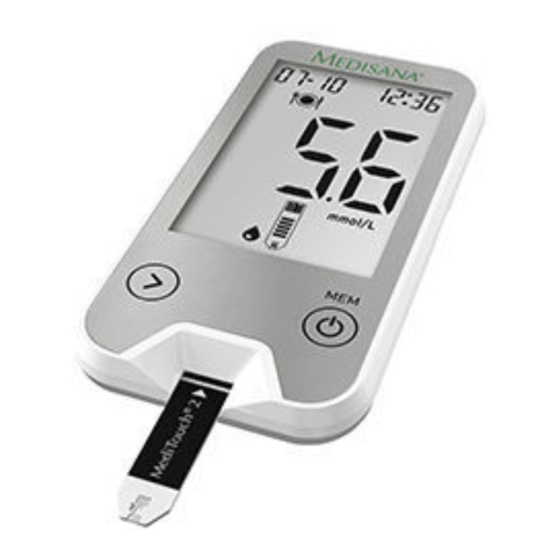
- Page 1 MEDITOUCH 2 CONNECT Blood glucose monitor for self-testing Memory slots ® MediTouch 2 98/79 EG Test reminder connect Certified medical device Instruction manual Please read carefully! USB port Years warranty Art. 79046 ® Bluetooth 4.0 0483...
-
Page 2: Table Of Contents
9.1 Display and troubleshooting ......3.1 Items supplied and packaging ......9.2 Cleaning and maintenance ......9.3 Reset the meter 3.2 Special features of the MEDISANA blood ..........® glucose monitor MediTouch 2 connect ..9.4 Technical specifications ........4 Getting started ............ -
Page 3: Device And Controls
Device and controls Monitor Display Battery compartment (on the back) > - Button for memory access, to enter values and to look at test results - Button to confirm settings, delete re- sults or to switch on the device (press and hold for appr. 3 seconds). - Page 4 Device and controls Test strips, control solution and lancing device Sleeve YYYY-MM Trigger button AST cap Carrier A. Blood sample area Expiration (absorbent slot) date Cap end B. Reaction cell (adjus- C. Grip/holder table) D. Insert in the direction of the arrow E.
- Page 5 Device and controls Display Time Date (month:day) (hours:minutes) Before Control solution Meals (AC) measurement mode Alarm (before meals After with automatic alarm Meals (PC) after 2 hours to remind you to perform a test arning regarding after meals) a possible diabe- Ketone Bluetooth - ®...
-
Page 6: Explanation Of Symbols
1 Explanation of symbols The following signs and symbols on items, packaging and in the instruction manual bear important information: This instruction manual belongs to this NOTE These notes give you useful device. It contains important information additional information on the about starting up and operation. - Page 7 1 Explanation of symbols In vitro diagnostic medical device (for external use only) This blood glucose monitor corresponds to the requirements of the EU guideline 98/79 for in vitro diagnostic devices. Do not re-use Use by Storage temperature range Contains sufficient for <n> tests <n>...
-
Page 8: Safety Information
2 Safety information IMPORTANT INFORMATION! RETAIN FOR FUTURE USE! Read the instruction manual carefully before using this device, especially the safety instructions, and keep the instruction manual for future use. Should you give this device to another person, it is vital that you also pass on these instructions for use. - Page 9 2 Safety information Contraindications • The system is not suitable for diagnosing diabetes for children younger than 12 years. For use on older children ask your doctor. • It is not suitable for diagnosing diabetes or for testing the blood glucose levels of newborn babies.
- Page 10 2 Safety information • If a fault occurs, do not try to repair the unit yourself. Attempts to do so will void the warranty. Refer all servicing to authorized service personnel. • Always keep the monitor clean and store it in a safe place. Protect the monitor from direct sunlight to prolong its service life.
-
Page 11: Instructions For Your Health
2 Safety information 2.2 Instructions for your health • Test results below 60 mg/dL (3.3 mmol/L) are an indication of hypoglycemia, meaning the • This blood glucose monitor is intended for blood glucose level is too low. If the reading is actively testing a person’s blood glucose at above 240 mg/dL (13.3 mmol/L), symptoms of home. - Page 12 2 Safety information • For additional advice on your health, read the • instruction manual for the test strips carefully. Use a new sterile lancet and a new test strip for every test. • Lancets, test strips and alcohol pads are WARNING disposable.
-
Page 13: Glucose Test Strips
2 Safety information • Do not use test strips which have already 2.3 Instructions for using the blood exceeded the expiry date, as this can distort glucose test strips the test result. The expiry date is printed on the ® •... -
Page 14: Instructions On How To Use The Control Solution
• To ensure the control solution does not get ® • Only use MEDISANA MediTouch 2 connect contaminated, wipe away the remaining control solution. solution on the tip of the container with a clean ®... -
Page 15: Useful Information
® Touch 2 connect that you have purchased is • 1 Instruction manual & 1 Quick reference guide a top quality product from MEDISANA. • 1 USB-cable In order to achieve the desired effect with your • 1 Teststrips manual ®... -
Page 16: Special Features Of The Medisana Blood
® Your MediTouch 2 connect blood glucose monitor from MEDISANA consists of five main parts: the blood glucose monitor, the lancing device, the lancets, the test strips and the control solution. -
Page 17: Getting Started
4 Getting Started 4.1 Inserting the batteries CR2032 CR2032 3V x 1 3V x 1 1. Open the battery com- 3. Close the lid of the 2. Insert two batteries as partment on the back battery compartment. shown. The device will side of the device by It will "snap"... - Page 18 4 Getting Started WARNING • Do not attempt to recharge these BATTERY SAFETY INFORMATION batteries! • Do not disassemble batteries! There is a danger of explosion! • Remove discharged batteries from the • Do not short circuit! device immediately! There is a danger of explosion! •...
-
Page 19: Setting The Time And Date
4 Getting Started 4.2 Setting the time and date The correct setting of time and date is especially important, if you intend to use the memory function of the device. 4. The icon appears in the display. The device is now ready for mmol/L the test with... -
Page 20: Operating
5 Operating 5.1 Using the control solution Performing a test with control solution Why do I need to perform a test with control WARNING solution? Before you perform a test with When you perform a test with control solution, control solution, read section 2 on you will find out whether your monitor and test Safety instructions (p. - Page 21 5 Operating You need the device, a test strip and the control solution. mmol/L mmol/L mmol/L > > > 3. Place the device on a flat and even surface, e.g. like a table. > 1. Insert a test strip into the 2.
- Page 22 5 Operating mmol/L mmol/L 5.4 - 7.2 mmol/L > > Sample illustration for a target range on the test strips container mmol/L 5. Press the container so that a 8. When a sufficient amount of 10. In the display, a test result tiny droplet forms on the tip of control solution has been ab- appears.
- Page 23 5 Operating Evaluating the control test result Cause Remedy The permissible range for the control solution Did the monitor work Repeat the test as describ- reading is indicated on the label of the test strip properly? ed in section 5.1. If pro- container.
-
Page 24: Preparing The Blood Glucose Test
5 Operating 5.2 Preparing the blood glucose test WARNING Using the lancing device Lancets are intended to be used only once. The lancing device enables you to hygienically Used test strips and lancets are consider- and easily draw a drop of blood for the blood ed hazardous, biological non-biode- glucose test and it is quick and painless. - Page 25 5 Operating 1. Wash your hands with soap 3. Replace the protective and warm water. Rinse and cap on the lancing de- dry thoroughly. If needed, vice and tighten by you can also rub the area turning it in an anti- 2.
- Page 26 5 Operating Markings for lancing depths 4. Set the appropriate lancing 5. Set the lancing device by 6. The lancing device is ready depth, as described on the extending it until it clicks to use. Do not lance your pages before. into place.
-
Page 27: Using The Ast Cap
5 Operating 5.3 Using the AST cap Discuss the readings from an AST It is generally recommended that a blood sample measurement with your doctor, if: for a blood glucose test performed at home is • The glucose results are often taken from the fingertip. - Page 28 5 Operating The blood sample This is how to do it: can also be taken Select a part of the body that is soft, from: not too densely covered with hair and not near a bone or a vein. Massage the area gently to prepare the skin and to improve the circulation.
-
Page 29: Determining The Blood Glucose Level
5 Operating 5.4 Determining the blood glucose level mmol/L mmol/L > > mmol/L 1. Insert a test strip into the monitor in the 3. When the blood drop 4. Place the lancing de- direction of the arrow. The symbol symbol flashes in vice on a finger tip appears automatically. - Page 30 5 Operating mmol/L > mmol/L 5. Place the drop onto the blood sample area 6. When a sufficient amount of blood has been on the end of the test strip. Pay attention, absorbed by the reaction cell you will hear a that not any blood gets on the top of the beep and in the display "...
- Page 31 5 Operating mmol/L mmol/L If it was not possible to transfer the test 8. The „bt“-symbol flashes after a beep ® result via Bluetooth , results may be and the device tries to establish a ® Bluetooth -connection to the manually transferred later on to your ®...
-
Page 32: Discarding Used Lancets
5 Operating 5.5 Discarding used lancets 1. Open the lancing device by 2. Take out the used lancet 3. Move the sliding switch, loca- twisting the protective cap in (without touching it directly) ted on the other side of the a clockwise direction and and stick it into its protective trigger button, which ejects... -
Page 33: Evaluating A Test Result
5 Operating 5.6 Evaluating a test result Unusual test results If your test result is not what you expected, pro- WARNING ceed as follows: Never change the prescribed dose of 1. Perform a control test, see section 5.1 Using medicine or treatment on your own initia- the control solution tive on the basis of one test result from a 2. - Page 34 5 Operating Take your monitor with you to the doctor’s and test yourself five minutes before or after a trained NOTES nurse has taken a blood sample from you. Take • Studies have shown that electromagnetic into account that the technology in the laboratory fields can affect the test results.
-
Page 35: Typical Symptoms Of High Or Low Blood Glucose
5 Operating 5.7 Typical symptoms of high or low Result is lower than 3,33 mmol/L blood glucose (60 mg/dL): In order to better understand your test results, The test result is lower than reference normal you can find some typical symptoms for high range (70 - 130 mg/dL resp. -
Page 36: Memory
6 Memory 6.1 Saving the test results 6.2 Accessing and deleting test results Your monitor can save up to 480 test results, in- You can access test results anytime without cluding the time and date. You can access the having to insert a test strip. Test results which readings at any time. - Page 37 6 Memory 2. To delete a test result, simulta- > neously press and hold for 3 seconds. “dEL” appears 1. Press and hold for 2 se- in the display. conds to access the display 3. Presss to delete the result. mode for single values in The display shows "OK".
-
Page 38: Integration In Vitadock Online
6 Memory / 7 Integration in VitaDock online If the following display appears during memory ® MEDISANA MediTouch 2 connect recall process, the device has no test results features an integration option for transferring in memory so far. Perform a blood glucose test your measured values through the USB cable to first, so that the device can save a test result. - Page 39 ® 7 Integration in VitaDock online > > > 1. Connect the monitor to your 2. The transfer of your 3. After successful transfer, personal computer with the measured values to the "OK" appears in the display ® USB-cable. The VitaDock app resp.
-
Page 40: Data Transfer To Vitadock+ App Via Bluetooth
® ® 8 Data transfer to VitaDock+ app via Bluetooth ® After each measurement the device automatically tries to send the test results via Bluetooth to your iOS- or Android mobile device. If this transfer is not successful, you may transfer multiple test results later on manually - therefore check chapter 8.1 Manual data transfer of measured results to ®... -
Page 41: Manual Data Transfer Of Measured Results To Vitadock+ App
® 8.1 Manual data transfer of measured results to VitaDock+ app ® ® The test results may also be transferred manually via Bluetooth to the VitaDock+ app. Therefore ® make sure, Bluetooth is activated on your mobile device and follow these steps: mmol/L >... -
Page 42: Miscellaneous
9 Miscellaneous 9.1 Display and troubleshooting Display The monitor automatically checks its own system when you switch it on and shows you any irregu- larities in the display. To ensure that the display is working properly, switch on the monitor. Press and hold down the -button for approx. - Page 43 9 Miscellaneous mmol/L Cause Damp / used Low batteries Memory Error System error test strip Remedy Replace with a Replace with First replace the First replace the new test strip. new batteries. batteries. If error batteries. If error The device will 005 appears again, 001 appears again, not delete earlier...
- Page 44 9 Miscellaneous mmol/L mmol/L mmol/L mmol/L Test result is higher than Test result is lower than Test result is higher than 1,1 mmol/L (20 mg/dL) 13,8 mmol/L (250 mg/dL) 35,0 mmol/L (630 mg/dL) Repeat the test. If the result Repeat the test. If the result Repeat the test.
- Page 45 9 Miscellaneous mmol/L "Ht" / "Lt" appears. Ambient tempe- Blood sample or control solution quantity is not rature is too high or too low, not within the required range of 10°C - 40°C enough. (50°F - 104°F). The user is warned about Repeat the test with a new a potentially incorrect test result if the test proceeds.
- Page 46 9 Miscellaneous mmol/L ® ® Bluetooth Transfer error during Bluetooth Transfer error during upload of upload of a single test result multiple test results If it was not possible to transfer the test Check the connection between your meter ® result after a measurement via Bluetooth , and the mobile device first.
-
Page 47: Cleaning And Maintenance
9 Miscellaneous 9.2 Cleaning and maintenance • Make sure that dirt, dust, blood, control so- lution, water or alcohol do not penetrate the Monitor ® test strip slot or get onto the buttons on the in- Your MediTouch 2 connect blood glucose side of the monitor. -
Page 48: Reset The Meter
9 Miscellaneous 9.4 Technical specifications 9.3 Reset the meter Name and model: MEDISANA blood gluco- ® se monitor MediTouch 2 connect Measuring method: electrochemical biosensor technology Measuring range: 1.1 - 35.0 mmol/L Measuring time: approx. 5 seconds Memory: 480 test results with time... -
Page 49: Accessories
R&TTE- Weight: approx. 47 g without directive 1999/5/EC. The complete declaration of batteries conformity can be demanded from Medisana AG, Article number: 79046 Jagenbergstr. 1, 41468 Neuss, Germany or can EAN number: 40 15588 79046 1 be downloaded from the Medisana Homepage (www.medisana.com). -
Page 50: Disposal
9 Miscellaneous 9.6 Disposal This product must not be disposed of together with domestic waste. All users are obliged to hand in all electrical or electronic devices, regardless of whether or not they contain toxic subs- tances, at a municipal or commercial collection point so that they can be disposed of in an en- vironmentally acceptable manner. -
Page 51: Warranty
The following warranty terms apply: during transport to the service centre. 1. The warranty period for MEDISANA products is three years from date of purchase. In case d. Accessory parts which are subject to nor-... -
Page 52: Service Address
10 Warranty 10.2 Service address You can find out which is your responsible service centre from your supplier Further information and the country-specific service addresses can be found at: www.medisana.com/meditouch2connect... - Page 56 MEDISANA AG Jagenbergstraße 19 41468 NEUSS Germany eMail: info@medisana.de Internet: www.medisana.com 79046GB V1.2 04/2015...