Table of Contents
Advertisement
Quick Links
Advertisement
Table of Contents

Related Manuals for Panasonic F-60MZ2


Summary of Contents for Panasonic F-60MZ2
-
Page 2: Safety Precautions
Safety precautions Always follow these instructions To avoid the possibility of causing injury to users or damage to properties, please follow all the explanations written below. This symbol denotes an action that is COMPULSORY. This symbol denotes an action that is PROHIBITED. WARNING A state that may be caused by the mishandling of products, which, if not avoided, may lead to the possibility of death or... - Page 3 Safety precautions Always follow these instructions CAUTION To avoid the possibility of causing This product is for in house use only. injury to users or damage to properties, Do not install at a windy places. please follow all the explanation written Can cause injury if Ceiling Fan drops.
-
Page 4: Chú Ý Về An Toàn
Chú ý về an toàn Phải luôn thực hiện theo các hướng dẫn này Để tránh khả năng người sử dụng bị chấn thương hay thiết bị bị hư hỏng, hãy tuân theo những hướng dẫn sau đây. Biểu tượng này thể hiện những hành động BẮT BUỘC. Biểu tượng này thể... - Page 5 Chú ý về an toàn Phải luôn thực hiện theo các hướng dẫn này LƯU Ý Để tránh trường hợp bị chấn thương Chỉ lắp đặt sản phẩm trong nhà. Không lắp đặt ở những nơi có gió thổi. với người dùng hay có những hư Có...
-
Page 6: Maintenance
Maintenance Bảo dưỡng Check the Ceiling Fan condition annually. If Kiểm tra tình trạng của Quạt Trần hàng năm. problem occurs, stop using the Ceiling Fan. Nếu có vấn đề xảy ra, ngưng sử dụng Quạt Refer to a service, sales or maintenance shop. Trần. -
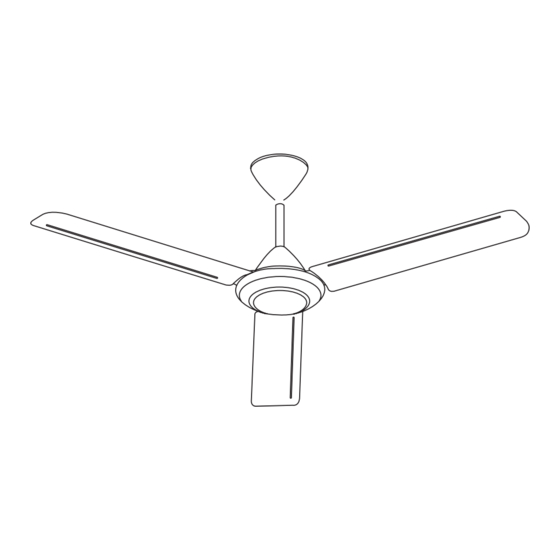
Page 7: Name Of Parts
Name of parts Tên bộ phận Parts pieces Tên bộ phận chiếc Upper Canopy Vỏ Động Cơ Phía Trên Pipe (9 or 12 or 16 or 18 or 22 inch) Ống Trụ (9 hoặc 12 hoặc 16 hoặc 18 hoặc 22 inch) Lower Canopy Vỏ... - Page 8 How to install Cách lắp đặt Insert the canopy Lắp vỏ động cơ Pull out the Safety Wire from Pipe Kéo Dây An Toàn từ Ống Trụ như hình vẽ. shown. Tháo Vít Dây An Toàn Remove Safety Wire Screw Cất các vít này để...
- Page 9 How to install Cách lắp đặt Assemble the Motor Assembly to Lắp bộ động cơ vào ống trụ the Pipe Kéo Dây Nguồn (từ nguồn điện) và luồn Pull the Power Cord (from the power supply) vào lỗ Ống Trụ như hình vẽ. and insert into the Pipe hole as shown.
- Page 10 How to install Cách lắp đặt Fix the Pipe and the Motor Assembly with the Cố định Ống Trụ và Bộ Động Cơ bằng Bu-lông Ellipse Bolt , the P-R Washers , the Hình Êlip , Vòng Đệm P-R , Vòng Đệm Lò Fix the Pipe and the Motor Assembly with the Spring Washer , the Hexa Nut...
- Page 11 How to install Cách lắp đặt Connect the Power Cord to the 3 pin Nối Dây Nguồn với 3 Chốt Nối Terminal Blue (Neutral) / Xanh dương (Trung tính) Brown (Live) / Nâu (Dây nóng) Green•Yellow (Earth) / Xanh lá•Vàng (Nối đất) WARNING CẢNH BÁO Make sure all the terminals are...
- Page 12 How to install Cách lắp đặt Assemble the Blade assembly Lắp bộ Cánh Quạt vào Bộ Động Cơ set to the Motor Assembly Remove the Blade Screws (6 pieces, Tháo Vít Cánh Quạt (6 chiếc, màu bạc) silver colour) from the Motor Assembly khỏi Bộ...
- Page 13 How to install Cách lắp đặt Install to the ceiling Lắp lên trần nhà Take out the Pulley Set from the parts set. Lấy Bộ Puly từ bộ phụ tùng. Luồn Móc C của Bộ Puly vào Ống Trụ Cross the C Hook of the Pulley Set to the nghiêng và...
- Page 14 How to install Cách lắp đặt Loop the Safety Wire to the Ceiling Hook Gài Dây An Toàn vào Móc Treo Trần and fix it to the Pipe with the Screw và cố định vào Ống Trụ bằng Vít đã được removed in page 8, 1- tháo ở...
- Page 15 How to install Cách lắp đặt Connecting to the power supply / Nối với nguồn điện Blue (Neutral) / Màu xanh dương (Trung tính) Rated voltage is mentioned on product. / Điện áp định mức có ghi trên sản phẩm. Green▪Yellow (Earth) / Double poles Xanh lá▪Vàng (Nối đất)
- Page 16 How to install Cách lắp đặt Fix the Canopy Lắp Vỏ Động Cơ Adjust the position of Upper Canopy Điều chỉnh vị trí của Vỏ Động Cơ Phía Trên fix it to the Pipe tightening the screw firmly. và cố định vào Ống Trụ siết chặt vít The distance between the Upper Canopy and Khoảng cách giữa Vỏ...
- Page 17 How to install Cách lắp đặt Installation of the Speed Regulator Lắp hộp số tốc độ Loosen the screws from the Speed Regulator Nới lỏng các vít ở Nắp Hộp Số Tốc Độ Cover . Open the Speed Regulator by Mở...
-
Page 18: How To Use
How to install Cách lắp đặt Final confirmation Kiểm tra lần cuối Measure the distance using a measuring tape. Đo khoảng cách bằng thước dây. Adjust all the Blades to get an equal distance Điều chỉnh tất cả Cánh Quạt để khoảng cách from the ceiling to the tip of the Blade từ... -
Page 19: Specifications
Specifications Thông số kỹ thuật Voltage (VAC) Điện Áp (VAC) Frequency (Hz) Tần Số (Hz) Wattage (W) Điện Năng (W) 15 / 66 Speed 1 / Speed 5 Tốc độ 1 / Tốc độ 5 Rotation (RPM) Số Vòng Quay (RPM) 94 / 225 Speed 1 / Speed 5 Tốc độ... - Page 20 Panasonic Corporation Web site: https://holdings.panasonic/global 60MZ28850CV © Panasonic Ecology System Co., Ltd 2021-2023 M0820-3053...