Table of Contents
Advertisement
Quick Links
Advertisement
Table of Contents

Related Manuals for Whirlpool VS2511


Summary of Contents for Whirlpool VS2511
- Page 1 產品安全指引及使用說明指南 VS2511...
-
Page 2: Important Safety Instructions
IMPORTANT SAFETY INSTRUCTIONS When using an electrical appliance, basic precautions should always be followed, including the following: READ ALL INSTRUCTIONS BEFORE USING THIS APPLIANCE WARNING : To reduce the risk of fire, electric shock, or injury: 1. Do not pick up detergent, kerosene, blizzard, nee- dle, ash, wet dust, dirty water and match, etc. - Page 3 9. Do not use if the plug or cord is damaged. 10. Switch the appliance off after use. 11. The charging base requires a 100-240V~, 50/60 Hz supply. Do not use any other power source. 12. Only the supplied charging base should be used with the appliance.
- Page 4 22. Caution: Only charge the vacuum cleaner with the Charging bracket supplied. During charging, the plug feels warm to the touch. This is normal. 23. Caution: Never block the exhaust air openings dur- ing vacuuming. 24. Caution: Switch off the appliance when you re- charged it.
- Page 5 IMPORTANT SAFETY INSTRUCTIONS (for Bed Cleaner) 1. Check the rating label of Bed Cleaner matches the dedicated Handheld unit. 2. This Bed Cleaner is intended for normal household use only. Do not use the appliance outdoors. Do not use the appliance for other uses than its intended use.
-
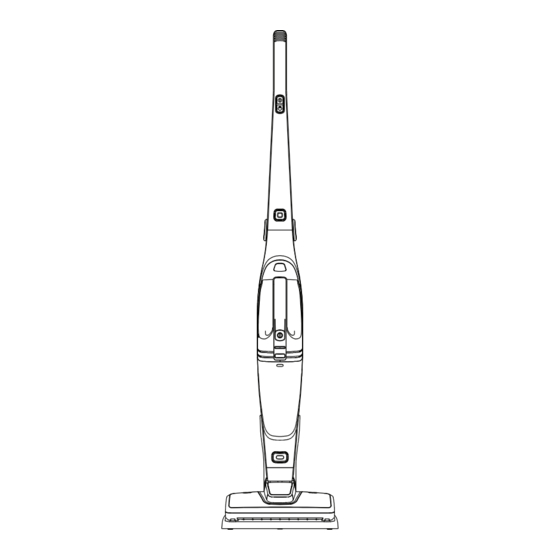
Page 6: Product Overview
PRODUCT OVERVIEW UPRIGHT UNIT: 1. ON/OFF switch 6. LED light 2. ECO speed switch 7. Motorized brush 3. Foldable handle release 8. Folding handle button 9. Handheld handle 4. Handheld release button 10. Handheld unit 5. Motorized brush 11. Charging bracket release button... - Page 7 PRODUCT OVERVIEW HANDHELD UNIT: 12. ON/OFF switch 20. Extended crevice tool 13. Battery/ Charging indicator 21. Wide brush / Upholstery 14. Dust container release button adaptor 15. Seal ring 22. Wide brush 16. HEPA filter 23. Upholstery 17. Outer filter 24.
-
Page 8: Application Of Accessories
APPLICATION OF ACCESSORIES Adaptor: Insert the Adaptor [19] into the inhale handheld nozzle of dust container. It acts as an adaptor for the connection of accessories for different purposes. To remove the Adaptor from dust container just pull firmly outward. Extended Crevice Tool: Connect [20] Extended Crevice Tool is for cleaning small areas which are difficult to reach, such as corners, gaps, holes, etc. - Page 9 PRODUCT ASSEMBLING Foldable Handle Lift the handle to an upright position, the handle will lock To lower the handle, press the automatically. folding handle release button. Press Assembling the Charging bracket Mounting Screws Wall Mount Hole Plastic Wall Anchors • Charging bracket assembly must be placed on a flat ground, mounting screws and plastic wall anchors can fix the charging bracket on the wall.
- Page 10 PRODUCT CHARGING Charging the Vacuum Cleaner Charge the battery when: ˙using the product for the first time ˙after not using the product for a long period of time ˙when the unit is at low power and the battery/ charging indicator flashes red. 1.
-
Page 11: Led Indicator
LED INDICATOR Status LED color Power ON Blue Low battery Blue flashing Empty battery Red flashing Charging Charging complete Blue Bad battery Red & Blue alternative flashing OPERATION Make sure the battery is fully charged before use. Operation of the upright vacuum cleaner 1. -
Page 12: Maintenance And Cleaning
MAINTENANCE & CLEANING Empty the dust container ˙Dirt and liquid in the dust container should be emptied after each use or at the time when the dust exceeds the maximum dust marking. ˙Always switch off the vacuum cleaner before cleaning. 1. - Page 13 4. Remove the filters and wash with water. Dry it before re-installing it. NOTE: Do not clean the vacuum cleaner with paint thinner or chemical solutions as this will damage the vacuum cleaner. 5. Fit the inner and outer filter into the dust container. Make sure you have dried the inside of the dust container.
- Page 14 Maintenance for Motorized brush Carry out the maintenance if any waste threads or hair gets tangled in the brush. Press the motorized brush release button to detach the motorized brush from the upright unit. Regular Maintenance Slowly rotate the brush manually and remove any foreign objects Take out tangled around the brush.
- Page 15 5. Re-install the rotating brush back into the motorized brush...
- Page 16 8. UV lamp tube door This Bed Cleaner must be operated with rated 9. Rear wheel (UV triggered device) Handheld unit of VS2511 HOW TO USE THE UV BED CLEANER 1. Fit the Handheld unit onto the UV bed cleaner.
- Page 17 2. Press the Power Button on the Handheld unit to power on. Power Button 3. Slide on the surface of your bed to clean. Slide Bedding surface 4. How to detach UV Bed Cleaner from Handheld unit. Hold the Handheld unit tightly with one hand, then press the two Handheld unit release buttons with your other hand at the same time to unlock.
-
Page 18: Maintenance & Cleaning
NOTE Rotating brush (UV triggered device) Rear wheel (UV triggered device) There are totally two triggered devices at the rear wheel of UV bed cleaner and rotating brush. UV lamp will be power on only when all these two triggered devices are actuated. MAINTENANCE / CLEANING 1. - Page 19 2. How to clean the rotating brush. a. Use your fingers to pull the two rotating brush door locks. b. Then detach the door. Take out the rotating brush, Remove the hair on the and clean it. rotating brush. Scissors Re-assemble the rotating brush and brush door to the UV Bed Cleaner after cleaning.
- Page 20 3. How to clean or exchange the UV lamp tube. a. Use your fingers to pull the two UV lamp tube door locks. b. Then detach the door. a. Use your fingers to hold the UV lamp tube and then rotate it by 90°...
-
Page 21: Troubleshooting
Model : VS2511 Battery : 25.2V Li-ion Adaptor : Input: AC 100-240V~ 50/60Hz Output: DC 32V 400mA Model : UV Bed Cleaner Compatible VC model : Handheld unit of 25.2V VS2511 UV lamp power : 4W Input Voltage : 25.2V... -
Page 22: Disposal Of The Appliance
DISPOSAL OF THE APPLIANCE At the end of its working life, the product must not be disposed of as urban waste. It must be taken to a special local authority differentiated waste collection center or to a dealer providing this service. Disposing of a household appliance separately avoids possible negative consequences for the environment and health deriving from inappropriate disposal and enables the constituent material to be recovered... - Page 23 安全使用注意事項 當使用吸塵機時,必須留意以下安全事項: 使用本產品前請閱讀所有使用說明。 警示:為防止火警、觸電或受傷: 1. 請不要用吸塵機吸洗滌劑、煤油、玻璃水、火柴等物品。 2. 請不要用吸塵機吸水泥、石膏粉、牆粉等微小顆粒,或者玩具 紙團等較大物體,否則會引起吸塵機堵塞、馬達損壞等故障。 3. 請不要讓吸塵機靠近火源及其它高溫地方。 4. 使用吸塵機前,請注意要裝好HEPA過濾網和吸扒。 5. 請不要將水或其他液體傾倒或濺入機器中,以免引起短路燒壞 機器。 6. 在使用新電池前或長期存放後第一次使用電池,請將電池充滿 電。長時間存放不使用本機時,應每三個月進行一次充放電。 7. 當您的吸塵機充滿電、需要清潔或維修時,請拔下插頭,插拔 電源線時請握住插頭,不要拉扯電線。 8. 清潔吸塵機時請使用乾布,不要用汽油、天拿水等否則會損毀 機體。 9. 如電源線破損,切勿使用電接頭。 10. 使 用後請關掉電源。 11. 電 接頭只適用於100-240V~,50/60Hz電源,切勿使用任何其 他電源。 12. 只 可使用隨機附送的充電座。 13. 切 勿吸水或任何其他液體;切勿吸易燃物質;煙灰必須完全冷 卻才可吸取。...
- Page 24 安全使用注意事項 18. 請 小心監督兒童,確保他們不會把玩本裝置。 19. 本 裝置乃家用電器,除本說明書列明的用途外,切勿作任何其 他用途。 20. 本 裝置不含任何使用者可自行修理的零件。如擅自拆解或維 修,保養即告失效。 21. 用 後請擺放在不受陽光直接照射的地方,拆除所有配件,請勿 讓兒童觸及。 22. 警 告:吸塵機只可使用隨機附送的充電座。充電期間接頭會微 熱,此乃正常。 23. 警 告:吸塵期間切勿堵塞排氣口。 24. 警 告:先關掉吸塵機,才可再充電。 重要說明 — 使用本產品前請先細閱 本吸塵機透過強力馬達以高壓吸入空氣。為確保高效性能及操 作安全,必須定期清潔吸管及過濾網,以及在集塵箱滿溢前和 每次使用後傾清塵垢。 過濾網不潔和集塵箱未傾清會影響氣流,導致吸塵機性能降 低。 長期疏忽清潔會令氣流堵塞,可能導致吸塵機損壞至無法修 復。如用戶不按本說明書所述清潔過濾網、吸管及集塵箱而導 致吸塵機損壞,本廠恕不提供保養。 請保留使用說明...
- Page 25 安全使用注意事項 (床褥吸扒配件) 1. 請檢查床褥吸扒上的銘牌,須與專用的手提式吸塵器使用。 2. 此床褥吸扒僅供家庭使用,請勿在戶外地方使用本產品,請勿 將本產品用於其他用途上。 3. 請勿將床褥吸扒浸在水中或其他液體中,避免有觸電的危險。 4. 請勿將床褥吸扒放在高溫的地方,應遠離暖風機或氣體/電爐等 熱源地方。 5. 若發現滾刷被異物堵塞,使用前請先清除堵塞物。 6. 若對產品正常操作有任何疑問 (如發現異常聲音、氣味、冒煙) ,或發現產品有損壞,請勿繼續使用本產品。關機並拔下電源 插頭,然後諮詢您的經銷商。 7. 沒有按照產品製造商的指示使用本產品及其配件可能會造成傷 害。 8. 請勿濕手觸摸本產品。 9. 在操作過程中,請勿將產品指向眼睛、耳朵或嘴巴部位。 10. 請 勿直接注視已開啟的 UV 紫光外燈,否則會損害視力。...
- Page 26 產品部件概述 直立式吸塵器: 1. 開關按鈕 8. 摺疊把手 2. 主機速度調節開關 9. 手提式把手 3. 摺疊把手按鈕 10. 手 提式吸塵器 4. 手提式吸塵器釋放按鈕 11. 充 電座 5. 電動滾刷釋放按鈕 6. LED 照明燈 7. 電動滾刷...
- Page 27 產品部件概述 手提式吸塵器: 12. 開 關按鈕 20. 特 長縫隙吸嘴 13. 電 量/充電指示燈 21. 毛 刷/傢俱吸嘴接頭 14. 塵 杯釋放按鈕 22. 毛 刷 15. 密 封圈 23. 傢 俱吸嘴 16. H EPA濾網 24. 延 伸軟管 17. 外 部濾網 18. 塵 杯 19. 配 件連接器...
- Page 28 配件介紹: 配件連接器 : 將配件連接器 [19] 插入手提式吸塵器塵杯吸嘴部分。用作不同配件的連接頭。 要從塵杯中取出連接器,只需將其向外拉出即可。 特長縫隙吸嘴 : 連接特長縫隙吸嘴 [20] 用於清潔空間偏少的地方及難以接觸到的粉塵/毛髮。 例如房間的角落,地面淺淺的凹槽。 毛刷 : 將毛刷配件 [22] 放在“毛刷/ 傢俱吸嘴接頭 [21]”前端,並插入接頭前端的坑 槽,然後向中間位置滑動。 毛刷可以使用於清除桌子、毛髮、布質梳發及地毯上的纖維等等。 傢俱吸嘴 : 將傢俱吸嘴 [23] 放在“毛刷/ 傢俱吸嘴接頭 [21]”前端,並插入接頭前端的坑 槽,然後向中間位置滑動。 傢俱吸嘴可以使用於清除紡織品、窗簾、床上用品和枕頭布上之塵埃。 延伸軟管 : 將延伸軟管 [24] 兩端連接到配件及配件連接器 [19] 上。延伸軟管有助於在一些 狹窄和隱藏的區域進行清潔。...
- Page 29 產品組裝 摺疊把手 將把手扳回原本直立位置 後,把手將自動鎖緊。 如需摺曲把手,請按下 摺疊把手按鈕。 關閉 按壓 充電座組裝 金屬螺絲 掛牆孔 塑膠錨栓 ˙充電座組裝後務必放於平坦地面,金屬螺絲與塑膠錨栓可將充 電座固定在靠牆位置 ˙金屬螺絲與塑膠錨栓放在充電座底部,在牆面鑽孔放上塑膠錨 栓,再以金屬螺絲固定,即可將充電座固定在靠牆位置 可拆式電動滾刷 電動滾刷 電動滾刷 釋放按鈕 LED 燈...
- Page 30 產品充電 吸塵器充電 以下情況請將電池充電: ˙初次使用產品時 ˙長時間未使用產品時 ˙吸塵器電量即將耗盡,電量/充電指示燈將閃爍紅光。 1.將手提式吸塵器插入直立式吸塵器 確保直立式吸塵器已關閉。避免手提式吸塵器 和直立式吸塵器之間出現障礙物。 2.將直立式吸塵器放到充電座上 ˙請務必將充電座置於平坦穩固的地面上。 ˙將直立式吸塵器放到充電座上。 ˙若未以正確方式將直立式吸塵器放到充電座上, 將無法開始充電。 電源供應器 ˙避免充電座和吸塵器之間積聚灰塵,如有 接口 需要,應清理充電接頭。 ˙充電時請小心,以避免電源線絆倒吸塵器。 3.將電源線插到插座上 ˙充電提示燈將發出紅光,表示吸塵器正在充電中。 燈光 附註:電池充電完畢後,充電提示燈將變成藍色。 亮起 提示:吸塵器在使用前,建議充電 6 小時。 ˙在充電時,充電座和吸塵器發熱純屬正常現象。 ˙即使開關按鈕開啟,若把吸塵器放回充電座充 電,吸塵器會自動停止工作。 ˙充電時,吸塵器有斷電保護功能,此時即使按下 開關按鈕,吸塵器也無法啟動。...
- Page 31 產品充電 電量 / 充電指示燈 狀態 LED 顏色 電源開啟 藍色 電量低 藍光閃爍 電量耗盡 紅光閃爍 充電中 紅色 充電完畢 藍色 電池故障 紅光與藍光交錯閃爍...
- Page 32 產品使用 操作方式 使用前請確認電池已充滿。 直立式吸塵器操作方式 1. 按下開關啟動直立式吸塵器。 2. 使用時,請按下主機速度調節開關,以選擇“快速”或“節 能”操作模式,在“快速”模式下,產品會處於最大的吸力。 而在“節能”模式下,產品會處於相對低噪音及較長之操作時 間。 3. 操作時,地刷上的 LED 照明燈將亮起。 4. 產品直立於地上停放時,請務必關閉吸塵器,因為運轉的刷毛 可能損壞地板或地毯。 5. 產品不使用時,建議靠牆直立存放,並防止孩童靠近玩耍,以 免產品傾倒受損。 手提式吸塵器操作方式 1. 按下手提式吸塵器釋放按鈕,將手提式吸塵器從直立式吸塵器 取下。按下開關以啟動吸塵器。手提式吸塵器將開始運轉。 2. 從任何方向吸塵直到乾淨為止。 3. 按下開關以關閉吸塵器。稍微將吸塵器頭向上舉,避免灰塵在 關閉前從塵杯掉出。 4. 吸塵前請將塵杯清空,將吸塵器收起來之前,請將吸塵器清乾 淨。 5. 將手提式吸塵器裝回直立式吸塵器。...
- Page 33 清潔與保養 清空塵杯 ˙在每次使用後或灰塵超出最大集塵量時,應清空塵杯中的灰塵。 ˙清潔前請務必將吸塵器關閉。 1. 將吸塵器垂直擺放,進氣口(吸嘴端)指向下方,避免灰塵灑 落。請按下吸塵器頂端的釋放按紐,在垃圾桶上方解開塵杯, 並從塵杯拆下濾網托架。 2. 握住外部濾網上的兩個唇部,從塵杯拉出濾網。 3. 將塵杯中的灰塵倒入垃圾桶。...
- Page 34 清潔與保養 4. 塵杯與濾網可以用水清洗乾淨。在裝回去之前,請將塵杯及濾網風 乾。 附註:不可使用含有磨蝕性或腐蝕性的清潔劑清潔吸塵器,否則 吸塵器將受損。 5. 請將HEPA濾網裝回外部濾網再裝回塵杯中。請務必將塵杯內側 風乾。 6. 將塵杯裝回。 警告: ˙請勿吸取大型物品,例如衛生紙,否則將堵住吸塵器,導致吸 力減弱。 ˙請勿吸取易燃物,在灰燼冷卻前,請勿吸取灰燼。 ˙請務必常常清空灰塵和清潔濾網,否則灰塵將導致馬達受損。...
- Page 35 清潔與保養 電動滾刷維護 若線頭或頭髮在滾刷中打結,請進行清理。按下電動滾刷釋放按 鈕,將電動滾刷從直立式吸塵器拆下。 定期維護 用手慢慢轉動滾刷,並清除纏 繞在滾刷上的異物。 清空灰塵 當無法用手轉動滾刷時,應將滾刷拆下並進行清理。 1.滑動滾刷鎖。 2.轉動以開啟滾刷蓋。 滑動 滾刷鎖 3.拆下滾刷。 4.清除滾刷上的頭髮。 舉起滾刷右側並拆下滾刷。 剪刀 5.將滾刷裝回電動滾刷。...
- Page 36 產品部件概述 床褥吸扒: 1. 床褥吸扒 2. 手提式吸塵器釋放按鈕 (旁邊兩個按鈕) 3. LED 照明燈 4. 滾刷 (UV 紫外光啟動器) 5. 滾刷門 6. 前滾輪 7. UV 紫外光燈管 8. UV 紫外光燈管門 床褥吸扒必須以 VS2511手提式吸塵器一同使用。 9. 後滾輪 (UV 紫外光啟動器) 產品使用 如何使用床褥吸扒配件 1. 將手提式吸塵器裝到清潔床褥吸扒配件...
- Page 37 2. 按下手提式吸塵器上的開關按鈕啟動吸塵器 開關按鈕 3. 從不同方法移動吸塵器清潔床褥表面 移動方向 床褥表面 4. 如何從手提式吸塵器拆下床褥吸扒 按住手提吸塵器,同時按下床褥吸扒 兩旁的手提式吸塵器釋放按鈕。...
- Page 38 注意 滾刷 (UV 紫外光啟動器) 後滾輪 (UV 紫外光啟動器) 床褥吸扒共有兩個 UV 紫外光啟動器,分別在後滾輪位置和滾刷位 置,只有當這兩個啟動器同時啟動時,UV 紫外光燈才會開啟。 清潔與保養 1. 如何清潔床褥吸扒 用微濕的毛巾或紙巾擦拭床褥吸扒,然後 待吸扒完全乾透後才可使用。...
- Page 39 2. 如何清潔滾刷 a. 用 手拉開兩個滾刷門扣 b. 拆 下滾刷門 取下滾刷,然後清潔滾刷 清除滾刷上的頭髮 剪刀 清潔完畢後,將滾刷和滾刷門重新裝回床褥吸扒上。...
- Page 40 3. 如何清潔或更換 UV 紫外光燈管 a. 用 手拉開兩個 UV 紫外光燈管門扣 b. 拆 下燈管門扣 a. 用 手握住 UV 紫外光燈管,然後將燈管 順時針或逆時針旋轉 90° b. 取 出 UV 紫外光燈管 清潔完畢或更換燈管後,將 UV 紫外光燈管和燈管門重新裝回床褥 吸扒上。...
- Page 41 滾輪安全裝置與床 將吸塵器放在床褥表面上並開啟吸塵 動。 褥表面距離太遠。 器,觀察滾刷有否發出運作聲音,或 UV 紫外光燈管有否亮起。 *注意: UV 紫外光燈對眼睛有害,請避 免直接注視 UV 紫外光燈。 手提式吸塵器與床 將手提吸塵器從床褥吸扒上拆下,然 褥吸扒接觸不良。 後再重新安裝,確保兩者正確地連 接。 滾刷不能轉動。 滾刷被異物纏繞。 根據說明書上指示清潔滾刷。 UV 紫外光燈管 沒有正確地安裝UV 拆下 UV 紫外光燈管,然後重新安裝。 不能運作。 紫外光燈管。 UV 紫外光燈管效 聯絡技術人員/維修中心查詢配件狀 能已消耗完。 況。 兩個啟動器的其中 將吸塵器完全地放置在床褥表面上, 一個沒有被啟動 確保後滾輪位置和滾刷位置能夠完全 接觸到床褥表面。 產品規格 機型:VS2511 電池:25.2V 鋰電池 適配器: 輸入:AC 100-240V~ 50/60Hz 輸出: DC 32V 400mA 機型:UV床褥吸扒 相容吸塵機型:VS2511 25.2V 手提吸塵機 UV燈功率:4W 輸入:25.2V...
- Page 42 產品棄置 本產品壽命結束後,不可當作都市廢物棄置,必須送到 當地特設的廢物分類回收中心或提供相關服務的代理。 獨立處置家居電器可避免因為處理不當而危害環境和健 康,並可回收組成物料,從而節省能源及資源。為提醒 用戶獨立棄置家居電器,本產品印有劃上交叉的有輪垃 圾桶圖符。...