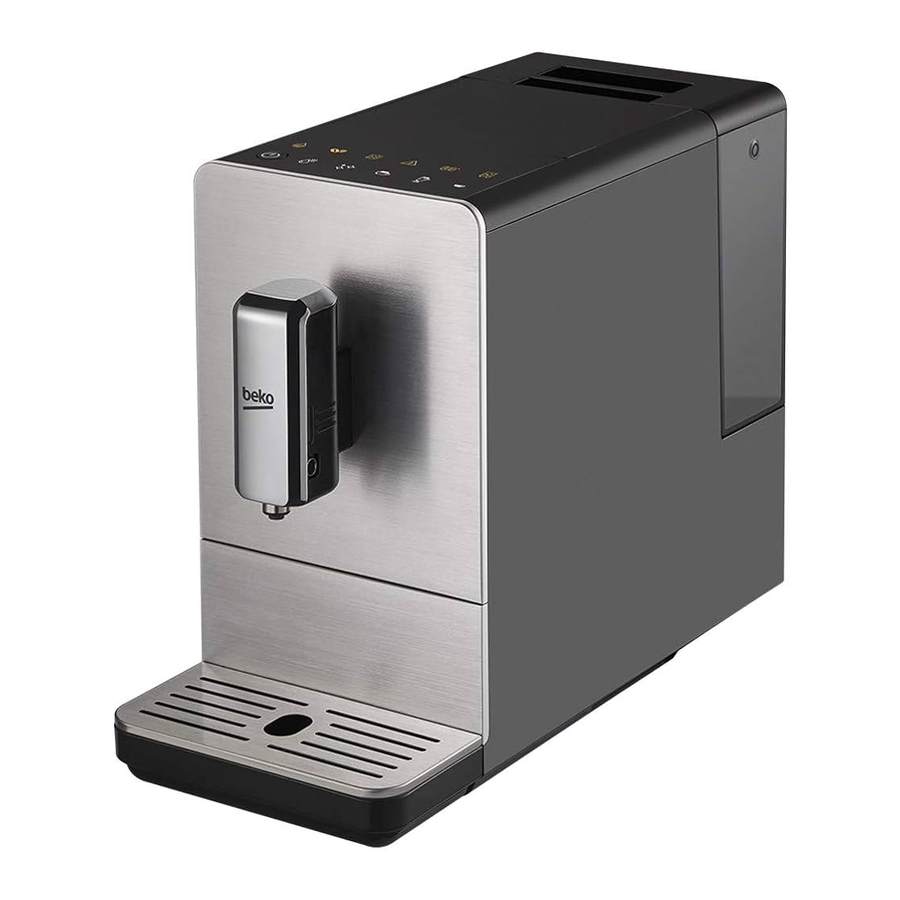
Advertisement
Meanings of the symbols
Following symbols are used in the various section of this manual:
 Important information or useful hints about usage.

Warning for hazardous situations with regard to life and property.

Warning indicates a potentially dangerous situation.

Warning indicates potential material damage.
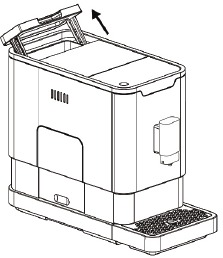
Overview

- External Drip Tray
- Internal Drip Tray
- Coffee Grounds Container
- Adjustable coffee spout
- Control Panel
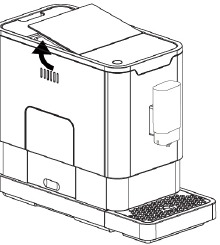
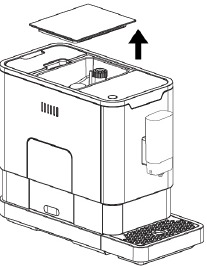
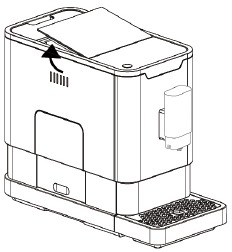
- Coffee Bean compartment
- Coffee Beans Container Cover
- Water Tank
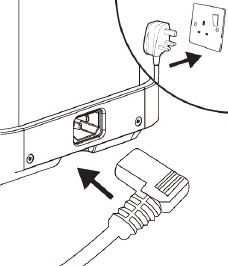
- Power cord
- Brewer
- Service Door
- Cleanness brush
- Milk container
- Milk container lid
- Connection milk tube
- Container milk tube
- Milk tube connector
- Connection rubber
Technical data
Power supply:
220-240 V~, 50-60 Hz
Power: 1350 W
Technical and design modifications reserved.
Display
Control Panel
 | Flashing: Low water level/ Water tank missing |
 | Lack of bean |
 | Lights up stably: coffee grounds container is full Flashing: Internal Drip Tray/coffee grounds container is missing |
 | Lights up stably: Brewer is missing/ installed improperly Flashing: Service door is opened / installed improperly |
 | Lights up stably: Requires to do descaling Flashing: Descaling is under process |
 | Empty System Function is running |
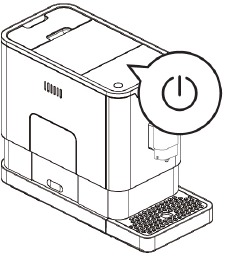
 | Power ON/OFF Button |
 | Hot Water Button |
 | Espresso Button |
 | Cappuccino |
 | Latte Macchiato |
 | One time: Quick clean Two time: Milk frother function |
In the box, three packs of cleaning agents are included for the process of self-cleaning.
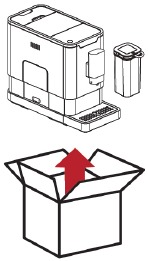
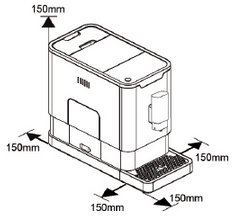
Preparation
Installation
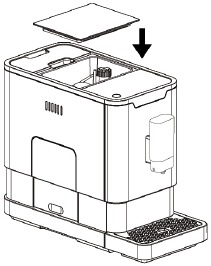
Remove any protective films, stickers and any other packing material on the appliance.
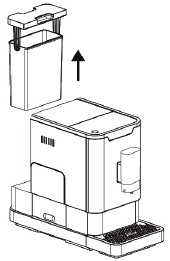
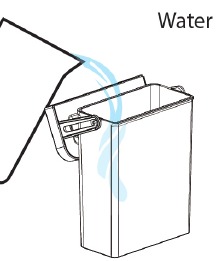
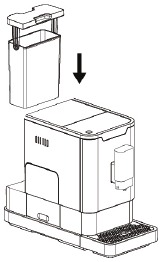
Filling the water tank
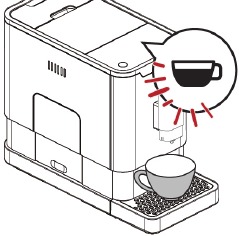
When  is flashing, the water tank is in low water level and requires filling the water tank.
To prevent overflow of water from the water tank, do not add water directly into the appliance with another container.
Never fill the water tank with warm, hot, sparkling water or any other liquid which might damage the water tank and the machine.
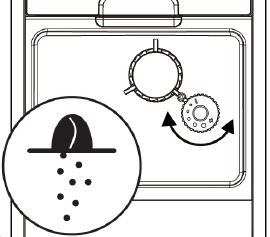
Never do the grinding adjustment when the grinder is not operating. It may damage the grinder.
The dots on the adjuster knob indicate the fineness of the grind.

Operation
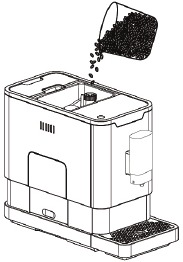
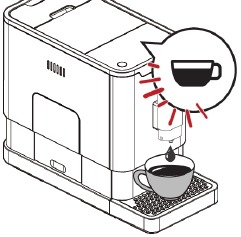
When  is flashing, the appliance needs to be filled with coffee bean.
Fill the coffee bean container only with coffee beans. Grounded coffee, instant coffee, caramelized coffee and any other objects may damage the machine.
Press the hot water button to clean inside of the coffee maker before first use.
The Appliance is equipped with auto-shut off. Depending on the mode you have selected the appliance will have different autoshut off timing.
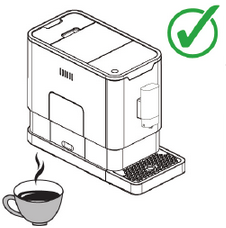
Making Coffee
Adjusting The Volume Of Your Coffee/ Hot Water
You can memorize your desired volume of coffee for espresso and also the hot water from 25ml to 250ml.
You can reset the volume of coffee back to the factory setting by selecting the default setting.
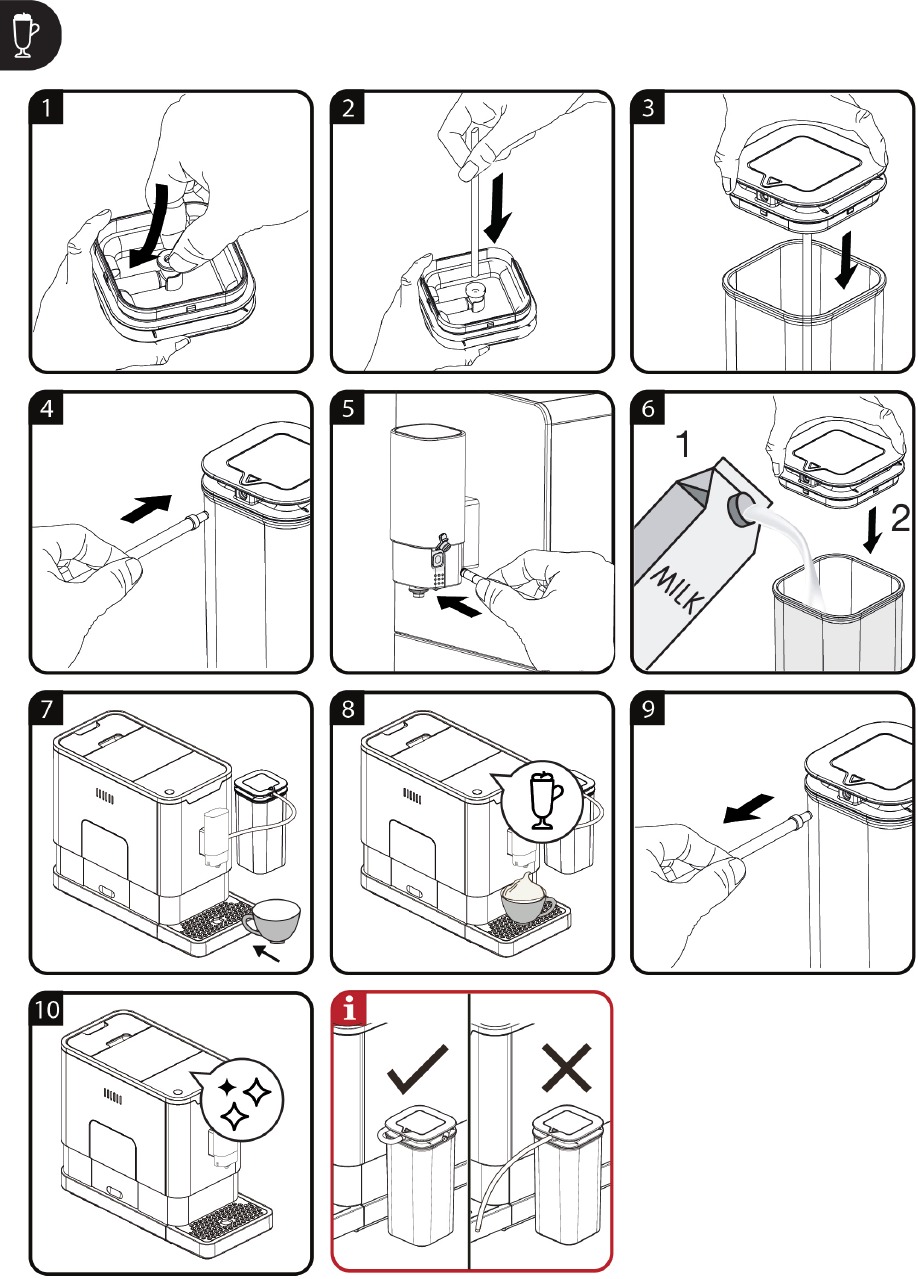
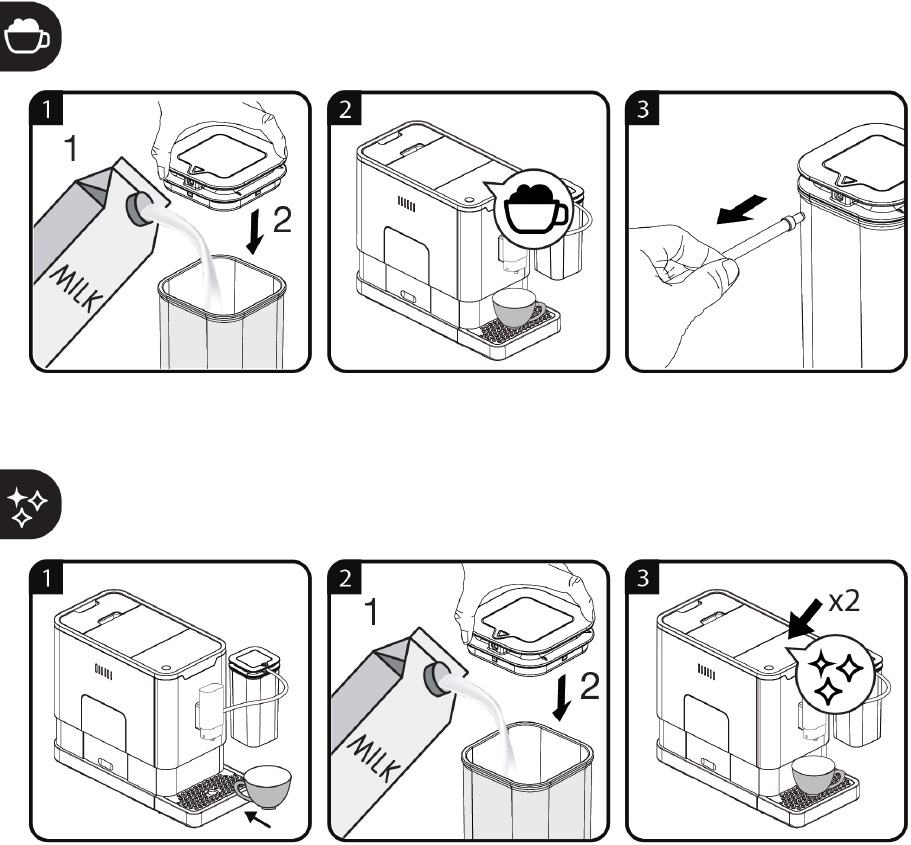
There is a protective cover for the milk tube connector inlet, just take it off when you need to insert the milk tube connector.
Cleaning the automatic milk froth system before first use.
Use cold milk (at a temperature of approximately 5°C/41°F) with a protein content of at least 3% to ensure an optimal frothing result
After use, press button once to perform quick cleaning the system. See chapter "Daily Cleaning of the appliance", section cleaning the automatic milk froth system).
Hot Water
The appliance can dispense hot water by simply pressing the hot water button. The hot water button and the illumination will lights up indicates that the appliance is heating up the water. When the hot water button and the illumination turn off, the water is ready to serve.
Mode Selection
The machine has two different setting: default setting, ECO mode and speed mode. In ECO mode, the appliance helps to save more energy. In speed mode, the user can make their coffee faster than in default setting.
| ECO Mode | Speed Mode | Default Setting | |
| Illumination Light | No | Yes | Yes |
| Pre-brewing* | Yes | No | Yes |
| Auto shut off time | 10mins | 30mins | 20mins |
| Cup Volume memory | Yes | Yes | Yes |
The pre-brewing function moistens the grounded beans in the brewer with a small amount of water before full extraction. This expands the coffee grounds to build up a greater pressure in the brewer which help extraction of all the oils and full flavor from the grounded beans.
- When the machine is in standby condition, press and holds the
![]() for 5 seconds.
for 5 seconds. - The
![]() will then be flashing and the following button will have the following indications for different settings:
will then be flashing and the following button will have the following indications for different settings: Cappuccino button
![]()
Latte button
![]()
Espresso button
![]()
In ECO Mode Lights ON Flashing Flashing In Speed Mode Flashing Lights On Flashing In Default Setting Flashing Flashing Lights On - Press the Cappuccino button for ECO mode, Latte button for speed mode and Espresso button for default setting. Two Beep sound will be heard indicates that the mode is being selected. (Note: If you are pressing the relative lights on button for each mode, the machine will not response).
- If you would like to remain the setting unchanged, press
![]() again or wait for 5 seconds for the machine to return to the standby condition
again or wait for 5 seconds for the machine to return to the standby condition


Cleaning
Cleaning of the appliance
Never use any abrasive, vinegar or descaling agents not included in the box to clean the appliance.
When  lights up, the coffee grounds container needs to be empty.
When lights up stably, it indicates that the brewer is missing / installed improperly. When is flashing, it indicates that the service door is missing/installed improperly.
It is important to do this step daily to make sure the function of automatic milk frother running in good condition.


Self-Cleaning
Please wait for finishing the self cleaning process and then switch off the machine.
When  is flashing, it indicates that the appliance needs to undergo self-cleaning. The appliance will remain in the best condition if this function is performed at least once a month or more regularly depending on the hardness of water used. It is also suggested that to
- Fully fill the water tank.
- Adding one pack of cleaning agent included in the box to the water tank.
![]()
Do not use vinegar or other cleaning agent to do self-cleaning of this appliance. The cleaning agent might damage the appliance. - Plug in the appliance.
- Place a sufficient large container under the coffee spout.
- In standby condition, press and hold
![]() and Latte button
and Latte button ![]() for 5 seconds. A beep sound will be heard with
for 5 seconds. A beep sound will be heard with ![]() and Latte button
and Latte button ![]() will be flashing.
will be flashing. - Press Latte button
![]() to confirm undergoing the self-cleaning process. To resume back to the standby condition, press
to confirm undergoing the self-cleaning process. To resume back to the standby condition, press ![]() .
. - Will be flashing indicates that the appliance is undergoing the self-cleaning process.
![]()
Keep skin/body away from the hot water. - When all the water in the water tank is being dispensed out,
![]() and Latte button
and Latte button ![]() will be flashing. Remove all the remaining solution in the water tank and fill the tank with normal tap water until the max position. When water is filled into the water tank,
will be flashing. Remove all the remaining solution in the water tank and fill the tank with normal tap water until the max position. When water is filled into the water tank, ![]() will goes off. Then the appliance will continue the self-cleaning process.
will goes off. Then the appliance will continue the self-cleaning process. - When the self-cleaning process is completed, the appliance will switch off automatically.
 for 5 seconds. A beep sound will be heard with
 Empty System Function
The empty system function is recommended to be used before long period of non-use, frost protection and before talking to repair agent.
- In standby condition, press and hold the
![]() and Espresso button
and Espresso button ![]() together for 5 seconds.
together for 5 seconds. ![]() will then be flashing.
will then be flashing.- Remove the water tank from the appliance.
![]() will light up stably indicates that the empty system is under process. You can press
will light up stably indicates that the empty system is under process. You can press ![]() before removing the water tank to resume back to the standby condition.
before removing the water tank to resume back to the standby condition. - When the empty system function is completed, the appliance will switch off automatically.
![]()
After perform EMPTY SYSTEM FUNCTION; press the hot water button until water can come out from spout when the coffee maker is reused again.
Manual Rinsing
You can perform a manual rinsing cycle to clean the coffee nozzle after use. It is also suggested to perform a manual rinsing if the appliance has not been used for a long period of time.
- In standby condition, press and hold the
![]() and hot water button
and hot water button ![]() together.
together. ![]() will flashing. The coffee nozzle will then dispense a small amount of water which is used for the rinising.
will flashing. The coffee nozzle will then dispense a small amount of water which is used for the rinising.
![]()
Water comes out of the coffee nozzle is hot and is collected in the drip tray underneath. Avoid contact with splashes of water.- After rinsing, the appliance will return to the standby condition.
Further Setting
Adjusting The Quantity Of Your Coffee/ Hot Water
The machine can memorize your desired volume of coffee and hot water.
Preparing quantity for Latte Macchiato /Cappuccino/Coffee
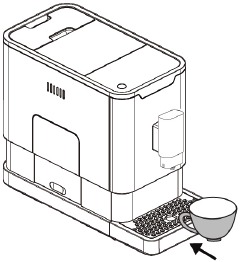
- Place a cup under the spout
- Switch on the machine, all buttons lights on.
- Press Latte/Cappuccino / Coffee button, only your desired one illuminates.
- If machine dispenses milk, press and hold the button to continue and release the button when milk froth reaches your desired volume. Milk froth stops with two beep sounds and the volume is now stored.
- If machine dispenses coffee, touch and hold the button to continue and release the button when coffee reaches your desired volume. Coffee stops with two beep sounds and the volume is now stored.
Preparing quantity for Hot Water
- Place a cup under the spout
- Switch on the machine, all buttons lights on.
- Press Hot Water button, the button illuminates only.
- The machine dispenses hot water. Touch and hold the button; release the button when it reaches your desired volume. Dispensing stops now and the volume is now stored
The Latte/Cappuccino/Coffee/Hot water button is programmed: every time it's pressed, the machine will brew the same amount set.
Troubleshooting
| Problem | Cause | Solution |
| The appliance does not work. | The appliance is not connected to the mains. |
|
| No or delayed response in several trials of pressing on function key on the panel |
| Unplug the appliance. Restart after few minutes Clean the panel with the cloth provided |
| The coffee is not hot enough. |
| Rinse the appliance at least 3 times before making the coffee. |
| The coffee cannot come out from spout. | Empty system function maybe used before. | Press the hot water button until water can come out from spout. |
| The first cup of coffee is poor quality. | The first run of grinder does not pour sufficient quantity coffee power into the brewing unit. | Throw the coffee away. The other coffees will always be of good quality. |
| Coffee has no cream. |
| Change or using appropriate brand of coffee bean. |
| The touch buttons are not sensitive | Not pressing the touch button from the front direction of the appliance | Press the lower bottom part of the icon of the touch button from the front direction of the appliance. |
| The appliance takes too long time to warm up. | Excessive scale has built up. | Descale the appliance. |
| The water tank is removed / the water level is very low in the water tank but have no alert. | The area near the water tank connector is wet. | Wipe the water around the water tank connector |
| Internal drip tray is filled with a lot of water. | Coffee powder too fine which block the water to come out. | Adjust the coffee fineness to bigger dot during grinder operation. |
| Coffee is delivered too slowly or a drop at a time. | Coffee powder too fine which block the water to come out. | Adjust the coffee fineness to bigger dot during grinder operation. |
| Lack of bean indicator flashes but there is still a lot of coffee bean inside the container. | Internal coffee powder outlet is blocked. | Follow the steps in Cleaning the coffee powder outlet. |
| No milk foam out from the machine | The automatic milk frother is dirty or not assembled or installed correctly | Clean the automatic milk frother and make sure it is correctly assembled or installed. |
| No milk foam out from the machine | The hole of Milk tube connector is blocked by milk residues | Refer to section "Daily Cleaning of the appliance",follow "cleaning the milk container and connection milk tube", Clean the connector and make sure all the hole on the connector is clean, use needle or bristle of brush to clean the hole. |
| The hole of Milk tube connector is blocked by milk residues which hardly to be cleaned | The milk tube connector not be cleaned for a long time | Soaking the connection milk tube into warm water for an hour, follow the "cleaning the milk container and connection milk tube" in section "Daily Cleaning of the appliance", keep using frothing milk function to clean until water come from dispenser smoothly. Use needle or bristle of brush to clean the hole |
| The milk froth is of poor quality | The type of milk used is not suitable for frothing | Different types of milk result in different amounts of froth and different forth qualities. Semi skimmed or full-fat cow's milk gives good results. |
| The temperature of the milk is too high | No milk foam out from the machine | |
| Milk spray out the table | Milk dispensing tube is not put in place | Milk foam spray out from dispenser |
| Descaling indicator keep flashing even after the descaling process | Decaling process is not completed | Please be patient and wait for the process finish. The machine will auto shut off automatically, don't switch off the machine manually |
Important instructions for safety and environment
This section includes the safety instructions that will help providing protection against personal injury and material loss risks. Failure to follow these instructions invalidates the granted warranty.
Danger of electric current
Danger to life by electric current!
Contact with live wires or components could lead to serious injury or even death!
Observe the following safety precautions to avoid electric shocks:
- Do not use the coffee machine if the connecting cable or mains plug are damaged.
- Before reusing the coffee machine, the mains cable must be renewed by a qualified electrician.
- Do not open the housing of the coffee machine. Danger of electric shock if live connections are touched and/or the electrical and mechanical configuration is changed.
- Before cleaning the bean container, pull the mains plug of the appliance out of the socket. Danger from rotating coffee mill!
Danger of burning or scalding
Parts of the coffee machine can become very hot during operation! Dispensed drinks and escaping steam are very hot!
Observe the following safety precautions to avoid burning/scalding yourself and/or others:
- Do not touch either of the metal sleeves on both coffee spouts.
- Avoid direct contact of the skin with escaping steam or hot rinsing, cleaning and descaling water.
Fundamental safety precautions
Observe the following safety precautions to ensure safe handling of the coffee machine:
- Never play with packaging material. Risk of suffocation.
- Inspect the coffee machine for visible signs of damage before use. Do not use a damaged coffee machine.
- If the connecting cable is damaged, it should only be replaced by a service agent recommended by the manufacturer in order to prevent any danger! Please contact the manufacturer or his customer service.
- Repairs to the coffee machine must only be carried out by an authorised specialist or by the works customer service. Unqualified repairs can lead to considerable danger for the user. They will also void the warranty.
- Repairs to the coffee machine during the warranty period may only be carried out by service centres authorised by the manufacturer, otherwise the warranty will become void in the event of subsequent damage.
- Defective parts may only be replaced with original spare parts. Only original spare parts guarantee that the safety requirements are met.
- This appliance can be used by children from the age of 8 up as well as by persons with reduced physical, sensory or mental abilities or with lacking experience and/or knowledge, if these persons are supervised or have been instructed how to use the appliance in a safe way and have understood the hazards which could arise from using it. Children must not play with the appliance. Cleaning and user maintenance shall not be made by children unless they are older than 8 and supervised.
- This appliance is intended to be used in household and similar applications such as:
- staff kitchen areas in shops, offices and other working environments,
- farm houses,
- by clients in hotels, motels and other residential type environments,
- bed and breakfast type environments.
- Protect the coffee machine against the effects of weather such as rain, frost and direct sunlight. Do not use the coffee machine outdoors.
- Never immerse the coffee machine itself, the mains cable or the mains plug into water or other liquids.
- Do not clean the coffee machine or accessories in a dish washer.
- Do not pour any other liquids apart from water or place foodstuffs into the water tank.
- Do not fill the water tank beyond the maximum mark (lower edge of the filling hole) (1.4 litres).
- Only operate the machine when the coffee grounds container, drip tray and the cup grate are fitted.
- Do not pull the cable to remove the plug from the mains socket or touch with wet hands.
- Do not hold the coffee machine with the mains cable.
- Keep the appliance and its cord out of reach of children aged less than 8 years.
- Do not operate the hot water function continuously for more than one tank of water.
Intended use
The fully automatic coffee machine Beko is intended for use in homes and similar applications, for instance in staff kitchens, shops, offices and similar areas or by customers in bed & breakfast, hotels, motels and other living accommodation. This coffee machine is not intended for commercial use. The machine is only intended for preparing coffee and heating milk and water. Any other use other than previously stated is considered as improper use.
Danger resulting from improper use!
If not used for its intended purpose or used in any other way, the coffee machine may be or become a source of danger.
Therefore, the coffee machine may only be used for its intended purpose.
Observe the procedures described in this user manual.
No claims of any kind will be accepted for damage or injury resulting from use of the coffee machine for other than its intended purpose.
The risk has to be borne solely by the machine owner.
Plug Wiring
The moulded plug on this appliance incorporates a 13 A fuse. Should the fuse need to be replaced an ASTA approved BS1362 fuse of the same rating must be used. Do not forget to refit the fuse cover. In the event of losing the fuse cover, the plug must not to be used until a replacement fuse cover has been fitted. Colour of the replacement fuse cover must be the same colour as that visible on the pin face of the plug Fuse covers are availabe from any good electrical store.
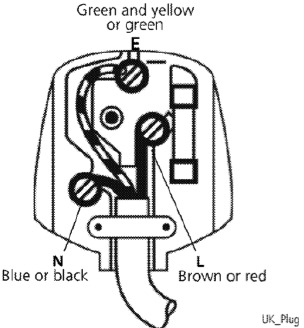
- Fiting a different plug
- As the colours of the wires in the mains lead of this appliance may not correspond with the coloured markings identifying the terminals on your plug, proceed as follows:
- Brown cable = L (Live)
- Blue cable = N (Neutral)
- Green/yellow cable must be connected to ground (E)
![]() line
line - With the alternative plugs a 13 A fuse must be fitted either in the plug or adaptore or in the main fuse box. If in doubt contact a qualified electrician.
Please call our UK based Customer Service department if you need help or advice from us:
United Kingdom and Northern Ireland: 0333 207 9710
Republic of Ireland: 01 862 3411
You can also contact us through our website: www.beko.co.uk

Documents / Resources
References
Download manual
Here you can download full pdf version of manual, it may contain additional safety instructions, warranty information, FCC rules, etc.
Download Beko CEG5331 - Bean To Cup Coffee Machine With Milk Frother Manual
Advertisement
Thank you! Your question has been received!


Need Assistance?
Do you have a question about the CEG5331 that isn't answered in the manual? Leave your question here.