Table of Contents
Advertisement
Quick Links
Advertisement
Table of Contents

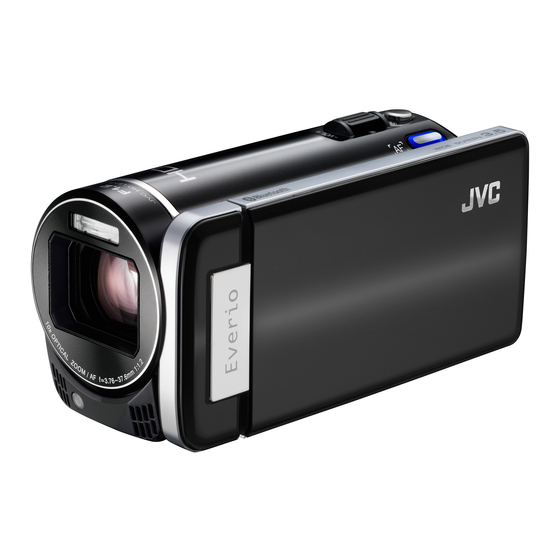
Related Manuals for JVC Everio GZ-HM860


Summary of Contents for JVC Everio GZ-HM860
- Page 1 HD MEMORY CAMERA Detailed User Guide GZ-HM960/GZ-HM860 LYT2339-003A...
-
Page 2: Table Of Contents
Recording while Displaying a Magnified View of a Selected Face Table of Contents (FACE SUB-WINDOW) ............63 Reducing Camera Shake ............64 Taking Videos in iTunes Format ..........65 Beginner's Guide ............5 Slow-motion (High-speed) Recording ........66 Charging .................. 5 Recording at Intervals (TIME-LAPSE RECORDING) ..... - Page 3 Installing the Provided Software (Built-in) ......114 PROTECT/CANCEL ............139 Backing Up All Files ............115 COPY ................139 Organizing Files ............... 116 MOVE ................139 Recording Videos to Discs ..........117 TRIMMING ............... 139 Backing Up Files Without Using Provided Software ..118 UPLOAD SETTINGS ............
- Page 4 Maintenance Specifications...
-
Page 5: Beginner's Guide
Beginner's Guide [Getting Ready] Charging A Open your feet to the width of your shoulders. Refer to the operating instructions found in the animation on the Detailed B Extend your right hand and hold the camcorder over your head. User Guide. C Hold the LCD monitor with your left hand and adjust the angle accordingly. -
Page 6: Holiday Season/Christmas
Useful Shooting Techniques Holiday Season/Christmas Recording the Christmas Party Record the happy Christmas celebration with your family! Photo by 101st CAB, Wings of Destiny Photo by InnerSpirit Creative Commons Attribution-No Derivative Works 3.0 Creative Commons Attribution-No Derivative Works 3.0 After all preparations, it is finally the Christmas party itself. Not only should you record the candle-blowing scene, but also the smiles of Decorating the Tree and Preparing the Dinner the family while being surrounded by good food, or even the father who is... -
Page 7: Wedding
Useful Shooting Techniques Wedding Recording the Expressions and Comments of Guests Setting the shot from eye level to chest level Create an awesome wedding video for the bride and groom! Discussing and Planning Before the Event You can record comments from the guest by going around asking, "Please say a few words for the bride and groom". -
Page 8: Travel
AC Adapter The JVC AC adapter supports voltages from 100 V to 240 V, and hence can be used anywhere in the world. Bring along the adapter if you are traveling for a long time. Charge the battery pack while sleeping so that you can record with full battery power the next day. - Page 9 Useful Shooting Techniques Battery Charger Using Pan at the Places of Interest Tourists spots with beautiful scenery or historical sites are places that you would certainly want to record. To capture the magnificence of a scene which cannot be fitted into a single frame, try the panning technique.
-
Page 10: Amusement Park
Useful Shooting Techniques Amusement Park Inducing Responses by Calling Out Take more shots of the smiling faces of everyone in the family! Videos with no waving of hands nor laughter are not only dull when you view them later, but also put the capability of the audio-recording function of the Taking Videos or Still Images According to the Attraction camcorder to a waste. - Page 11 Useful Shooting Techniques Advanced Operation with Backlight Compensation When the subject’s face is in backlight or when the expression cannot be seen clearly, the Intelligent Auto function of this unit automatically increases its brightness for recording. If Intelligent Auto fails to function as expected or if the brightness correction is insufficient, you can increase the brighness by using backlight compensation in the Manual mode.
-
Page 12: Getting Started
Getting Started Precautions on Playing Back 3D Images (for GZ-HM960) Images recorded in 2D mode can be converted to 3D and played back on this unit. You can enjoy realistic and powerful 3D images by playing back on a 3D compatible TV. -
Page 13: Verifying The Accessories
Getting Started Verifying the Accessories If any of the items are missing or defective, consult your JVC dealer or the nearest JVC service center. Illustration Description AC Adapter AC-V11U (for GZ-HM860) Connects to this unit to charge the battery pack. -
Page 14: Attaching The Core Filter
Getting Started Basic User Guide Read well and keep in a safe place where it can be accessed easily when necessary. Memo : SD cards are sold separately. “Types of Usable SD Card” (A p. 17) “Using an Eye-Fi Card” (A p. 18) When using the AC adapter overseas, please prepare a commercially available converter plug for the country or region of visit. -
Page 15: Charging The Battery Pack
It goes out when charging is finished. Caution : Be sure to use JVC battery packs. If you use any other battery packs besides JVC battery packs, safety and performance cannot be guaranteed. Charging time: Approx. 2 h 30 m (using supplied battery pack) The charging time is when the unit is used at 25°C. -
Page 16: Grip Adjustment
Getting Started Grip Adjustment Inserting an SD Card When a commercially available SD card is inserted, recordings can still be made to the card without stopping when the remaining recording time on the built-in memory runs out. “Types of Usable SD Card” (A p. 17) “Using an Eye-Fi Card”... -
Page 17: Types Of Usable Sd Card
Getting Started Using SD cards (including SDHC/SDXC cards) other than those specified Removing the Card above may result in recording failure or data loss. Push the SD card inward once, then pull it out straight. To record videos with “VIDEO QUALITY” set to “UXP”, use of a Class 6 compliant SDHC/SDXC card is recommended. -
Page 18: Using An Eye-Fi Card
Getting Started Using the Touch Screen Using an Eye-Fi Card Eye-Fi is an SD memory card with wireless LAN function. Icon operation buttons, thumbnails, and menu items are displayed on the Using an Eye-Fi card, you can transfer videos and still images to a computer touch screen according to the mode in use. -
Page 19: Names Of Buttons And Functions On The Lcd Monitor
Getting Started Names of Buttons and Functions on the LCD Monitor Playback Screen (Still Image) The following screens are displayed during the video and still image modes, and operate as the touch screens. Recording Screen (Video/Still Image) Recording/Playback Mode Button Switches between recording and playback modes. -
Page 20: Clock Setting
Getting Started Clock Setting Menu Screen The “SET DATE/TIME!” screen appears when you turn on this unit for the first time after purchase, when it has not been used for a long time, or when the clock is not set yet. Set the clock before recording. -
Page 21: Resetting The Clock
Getting Started Resetting the Clock Set the date and time. Set the clock with “CLOCK ADJUST” from the menu. Tap “MENU”. When the year, month, day, hour, or minute item is tapped, “∧” and “∨” will be displayed. Tap ∧ or ∨ to adjust the year, month, day, hour, and minute. Tap “Q”. -
Page 22: Changing The Display Language
Getting Started Changing the Display Language Holding this Unit The language on the display can be changed. When holding this unit, keep your elbows close to your sides to prevent camera shake. Tap “MENU”. Tap “Q”. Tap “LANGUAGE”. Caution : Be careful not to drop this unit during transportation. -
Page 23: Using The Remote Control
Getting Started Using the Remote Control Operation Buttons on Remote Control Unit You can operate this unit from a distance away using the supplied remote control. Recording Start/Stop Button Starts/stops video recording. Memo : Point the remote control toward the sensor directly and use it within 5 m Still Image Button from this unit. -
Page 24: Using Bluetooth-Compliant Devices
Getting Started Using Bluetooth-compliant Devices Improving the Communication A Some connected devices may not be able to support the capabilities This unit is equipped with Bluetooth function. of this unit. You can do the following using a Bluetooth-compliant device via wireless Verify the compatibility before using. -
Page 25: Registering A Bluetooth-Compliant Device
SPP (Serial Port Profile, Device B) Headset 1 HSP (Headset Profile, HS) For details, refer to the following homepage. http://www.jvc-victor.co.jp/english/download/bluetooth/index.html Caution : Operation is not guaranteed on all devices. Tap “Bluetooth”. Communication may not be carried out properly near radio equipment or broadcasting stations. - Page 26 Getting Started Responding to Registration Requests from Bluetooth- The system starts to search for Bluetooth-compliant devices in the compliant Devices area that can be registered. The method of setting varies with the device. Refer also to the Tap “MENU”. instruction manual of the device. Tap the device to register.
-
Page 27: Connecting To A Registered Bluetooth-Compliant Device
Getting Started The method of setting varies with the device. Refer also to the Connecting to a Registered Bluetooth-compliant Device instruction manual of the device. To use a Bluetooth-compliant device on this unit, it is necessary to establish Tap “YES”. connection with the device after registering it. -
Page 28: Changing The Settings Of A Registered Bluetooth-Compliant Device
Getting Started Table of Compatible Connections Caution : If connection cannot be established with a device, check the registered Connection Case Case 1 Case 2 Case 3 Case 4 Case 5 devices and register again. Up to two Bluetooth devices can be connected to this unit. Headset 1 Sending or receiving of audio data using the headset is not possible in the still image recording mode. -
Page 29: Transferring Still Images To A Bluetooth-Compliant Device
Getting Started Transferring Still Images to a Bluetooth-compliant Device Smartphone Changes the mobile phone to be used as smartphone. When Bluetooth connection is established with a BIP/OPP-compliant device, you can transfer recorded still image data to this device. GPS Receiver Changes the device to be used as GPS receiver. -
Page 30: Operation Using A Smartphone
To change the destination to transfer to, tap “CHANGE For details, refer to the following homepage. DESTINATION”. http://www.jvc-victor.co.jp/english/download/bluetooth/index.html After image transfer is complete, tap “EXIT”. Application Software for Android Smartphone To continue to transfer more images, tap “SEND OTHER IMAGES”. -
Page 31: Bluetooth Application For Smartphones
Getting Started A list of previously downloaded applications is displayed. Bluetooth Application for Smartphones C Tap on the “Everio Controller” application. D Tap [Uninstall], then tap [OK]. Capabilities of this Application Memo : By installing this application on a smartphone, you can connect the The specifications of Android Market™... - Page 32 Getting Started When “WAITING FOR REQUEST FROM THE DEVICE” appears, perform the following operations on the smartphone. Press the “MENU” button on the home screen, then tap [Settings]>[Wireless & networks]>[Bluetooth settings]. (Operation on the smartphone) Tap [Bluetooth] to add a check mark. (Operation on the smartphone) The Bluetooth function turns on.
- Page 33 Getting Started Displays on the Screen Still Image Recording Mode Video Recording Mode Still Image Playback Mode Video Playback Mode...
- Page 34 Getting Started Names of Buttons and Functions Name of Button Function Mode Video Still Image Recording Playback Recording Playback Video/Still Image Mode Switches between video and still image modes. Recording/Playback Mode Switches between recording and playback modes. Zoom (T) Zooms to the T (telephoto) end. Zoom (W) Zooms to the W (wide angle) end.
- Page 35 Getting Started This function is also available in the still image playback mode. Operating Details To display the map, it is necessary to activate location information transmission during video or still image recording. Displaying Camera’s Screen on Smartphone During video playback, the map changes (moves) together with the - MONITOR Function changes in location information.
- Page 36 Getting Started After transferring is complete, a window to select the data processing method appears. Move the slide bar in the setting window to the right and left to change the interval. Tap [OK] to complete the setting. Press the “RETURN” button to exit the settings menu. Canceling the Setting :...
- Page 37 Getting Started Changing the Software’s Background Color Press the “MENU” button to display the settings (SETTINGS) button. Tap the settings (SETTINGS) button to display the settings menu. Tap [OK] to complete the transfer. Tap [BACKGROUND COLOR] to display the setting window. Checking the Transferred Still Image :...
-
Page 38: Radio Waves Used By This Product
Getting Started Troubleshooting Radio Waves Used by this Product This product makes use of radio waves in the ISM band (2.4 GHz). Trouble Reason and Action Although a radio station license is not required for using this product, please take note of the following. Unable to connect to Check that there are no obstacles between camera. -
Page 39: Using This Unit Overseas
Getting Started Using this Unit Overseas Setting the Clock to Local Time when Traveling Change the date and time display to the local time by selecting your travel The shape of the power outlet varies according to countries and regions. destination in “AREA SETTING”... -
Page 40: Setting Daylight Saving Time
Enables the battery pack to be charged without AA-VG1 using this unit. Component Cable For viewing in high picture quality. Tap “Q”. QAM1266-001 Consult your nearest JVC service center. HDMI Cable For viewing in high picture quality. VX-HD310 Transmits video, audio, and control signals VX-HD315 between devices. - Page 41 Getting Started Approximate Recording Time (Using Battery) 3D Display on LCD Monitor (for GZ-HM960) Battery Actual Recording Time Continuous Recording Pack Time 35 m VG114U (Supplied) 50 m 1 h 30 m VG121U 1 h 30 m 2 h 45 m VG138U 2D Display on LCD Monitor (for GZ-HM960) Battery...
-
Page 42: Recording
Recording Taking Videos in Intelligent Auto Mode Indications During Video Recording You can record without worrying about the setting details by using the Intelligent Auto mode. Settings such as exposure and focus will be adjusted automatically to suit the shooting conditions. In case of specific shooting scenes such as person etc., its icon is displayed on the screen. - Page 43 Recording Scenes of Intelligent Auto Operation Buttons for Video Recording Display Icon Description Captures one’s skin beautifully. Allows people to be captured naturally. Focuses at a far distance and captures a sharp image with vivid colors. Records with minimal noise in the overall image. Allows night scenes to be captured accurately with minimal noise in the overall image.
-
Page 44: Zooming
“REC MEDIA FOR IMAGE”. recording media for storage. Memo : JVC will not be responsible for any lost data. The size of the still image that is captured in the video mode is 1920 x Memo : 1080. -
Page 45: Taking Still Images In Intelligent Auto Mode
Recording Taking Still Images in Intelligent Auto Mode Indications During Still Image Recording You can record without worrying about the setting details by using the Intelligent Auto mode. Open the LCD monitor and select the still image mode. The still image mode icon appears. Display Icon Description Check if the recording mode is Intelligent Auto. - Page 46 Recording Operation Buttons for Still Image Recording Useful Settings for Recording When “AUTO POWER OFF” is set to “ON”, this unit turns itself off automatically to conserve power when it is not operated for 5 minutes. (only when using the battery pack) “AUTO POWER OFF”...
-
Page 47: Zooming
Recording Manual Recording Zooming The angle of view can be adjusted using zoom. You can adjust settings, such as brightness and shutter speed, by using the Use the W end (wide angle end) to shoot a wider field of view. manual mode. -
Page 48: Scene Selection
Recording Manual Recording Menu Scene Selection The following items can be set. Common scenes that are often encountered can be recorded with the most suitable settings. Name Description Tap “MENU”. SCENE SELECT Recordings that suit the shooting conditions can be performed easily. “Scene Selection”... -
Page 49: Adjusting Focus Manually
Recording *The image is only an impression. Adjusting Focus Manually Set this when the focus is not clear in Intelligent Auto or when manual Setting Effect focusing is desired. Increases gain and brightens the scene b NIGHTALIVE Tap “MENU”. automatically using a slow shutter when the surrounding is dark. -
Page 50: Using Focus Assist
Recording Using Focus Assist Adjusting Brightness Focused subject is outlined in color for more precise focus. You can adjust the brightness to your preferred level. Tap “MENU”. Tap “MENU”. Tap “BRIGHTNESS ADJUST”. Tap “FOCUS ASSIST”. Tap ∧ or ∨ to move upward or downward for more selection. Tap ∧... -
Page 51: Setting Shutter Speed
Recording Setting Shutter Speed Setting Aperture You can set the shutter speed to suit the type of subject. You can adjust the aperture to capture an image with only the subject in focus. Tap “MENU”. Tap “MENU”. Tap “SHUTTER SPEED”. Tap “APERTURE PRIORITY”. -
Page 52: Setting White Balance
Recording The larger the aperture value, the darker the subject appears. Setting White Balance You can set the color tone to suit the light source. Tap “MENU”. Tap “WHITE BALANCE”. Tap ∧ or ∨ to move upward or downward for more selection. Tap L to exit the menu. -
Page 53: Setting Backlight Compensation
Recording The setting will not change if “MWB” is being tapped too fast (less than 1 Setting Backlight Compensation second). You can correct the image when the subject appears too dark due to backlight. Tap “MENU”. Tap “BACKLIGHT COMP.”. Tap ∧ or ∨ to move upward or downward for more selection. Tap L to exit the menu. -
Page 54: Taking Close-Up Shots
Recording Creating Animation Effects (ANIMATION Taking Close-up Shots EFFECT) You can take close-up shots of an object using the tele macro function. You can add various effects to videos to create a different atmosphere from the usual recording. Open the LCD monitor and select the video mode. *The image is only an impression. - Page 55 Recording During Setting After Setting Note Animation (effect) appears when smiles are detected. Animation (effect) appears when smiles are detected. Animation (effect) appears when smiles are detected. Animation (effect) appears when smiles are detected. Animation (effect) appears when the screen is touched.
-
Page 56: Registering Human Face Personal Authentication Information
Recording Registering Human Face Personal Tap “RECORD” and record the face from the front. Authentication Information By registering the face of a person beforehand, focus and brightness can be adjusted automatically by the face tracking function. Up to 6 faces, together with names and priority levels, can be registered. - Page 57 Recording Memo : Tap “OK”. Faces may not be registered correctly in the following cases: - when the face appears either too small or too large compared to the frame - when it is too dark or too bright - when the face appears horizontal or slanted - when a part of the face is hidden - when there are multiple faces within the frame To increase the accuracy of face recognition, fit only one face within the...
-
Page 58: Setting Smile%/Name Display
Recording Memo : Setting SMILE%/NAME DISPLAY The camera is able to detect up to 16 faces. Smile levels will be displayed “SMILE%/NAME DISPLAY” allows you to set the items to display when faces for up to 3 of the largest faces displayed on the screen. are detected. -
Page 59: Editing The Registered Face Information
Recording “Registering Human Face Personal Authentication Information” Editing the Registered Face Information (A p. 56) Editing Registered Face Information You can change the name, priority level, and face information that are registered. Tap “MENU”. Tap “FACE REGISTRATION”. Tap ∧ or ∨ to move upward or downward for more selection. Tap L to exit the menu. - Page 60 Recording Canceling (Deleting) Registered Face Information You can cancel (delete) the face information that is registered. Tap “MENU”. Tap “YES” to delete the face information of the selected person. Tap “NO” to return to the previous screen. Tap “OK” when the deletion complete screen appears. Tap “FACE REGISTRATION”.
-
Page 61: Capturing Subjects Clearly (Touch Priority Ae/Af)
Recording Capturing Subjects Clearly (TOUCH Setting Details PRIORITY AE/AF) Deactivates the function. “TOUCH PRIORITY AE/AF” is a function that adjusts focus and brightness based on a tapped position. FACE e appears on the screen. Recording is performed while By registering the face of a person beforehand, you can enable tracking of TRACKING tracking and automatically adjusting the tapped face the person even without specific selection during recording. -
Page 62: Capturing Smiles Automatically (Smile Shot)
Recording Capturing Smiles Automatically (SMILE Memo : SHOT) This function may not work properly depending on the shooting conditions (distance, angle, brightness, etc.) and the subject (direction of face, smile level, etc.). It is also difficult to detect a smile in backlight. “SMILE SHOT”... -
Page 63: Recording While Displaying A Magnified View Of A Selected Face (Face Sub-Window)
Recording Recording while Displaying a Magnified View Caution : of a Selected Face (FACE SUB-WINDOW) Take note of the following when “FACE SUB-WINDOW” is set. - Functions such as digital zoom, zoom operation on the touch screen, You can record while viewing both the overall image of the scene and simultaneous still image recording, “TIME-LAPSE RECORDING”, “HIGH magnified image of a subject’s expression. -
Page 64: Reducing Camera Shake
Recording Reducing Camera Shake Setting the Enhanced AIS Mode The area of correction in the enhanced AIS mode is greater than that in the When the image stabilizer is set, camera shake during recording can be AIS mode. Camera shake can be reduced more effectively even when effectively reduced. -
Page 65: Taking Videos In Itunes Format
Recording Taking Videos in iTunes Format Memo : “EXPORT SHOOTING” is not available when “TIME-LAPSE By recording with the EXPORT setting turned on, you can transfer the videos RECORDING” is set. to Apple's software iTunes when this unit is connected to a PC. “LIB.”... -
Page 66: Slow-Motion (High-Speed) Recording
Recording Slow-motion (High-speed) Recording Start recording. You can record videos in slow-motion by increasing the recording speed to emphasize the movements, and play back the slow-motion video smoothly. This is a handy function for checking movements, such as golf swings. Recording Speed 300 fps Image Size... -
Page 67: Recording At Intervals (Time-Lapse Recording)
Recording Recording at Intervals (TIME-LAPSE Start recording. RECORDING) Enables the changes of a scene that occur slowly over a long period to be shown within a short time by taking frames of it at a certain interval. This is useful for making observations such as the opening of a flower bud. Open the LCD monitor and select the video mode. - Page 68 Recording Indications During Time-Lapse Recording Time-Lapse Setting The greater the number of seconds, the longer the recording interval. Setting Details Deactivates the function. 1SEC INTERVAL Takes a frame at 1-second intervals. Recorded videos will be played back at 30 times speed.
-
Page 69: Recording Automatically By Sensing Movements (Auto Rec)
Recording Recording Automatically by Sensing Recording starts automatically when the subject within the red frame Movements (AUTO REC) moves. This function enables the unit to record automatically by sensing the changes in subject’s movement (brightness) within the red frame displayed on the LCD monitor. -
Page 70: Taking Group Shots (Self-Timer)
Recording Taking Group Shots (Self-timer) Take a still image. The 10-second self-timer and Face Detection self-timer are convenient functions for taking group photos. The 2-second self-timer is useful for preventing camera shake caused by pressing the shutter button. Memo : A timer appears and countdown to shooting starts. -
Page 71: Setting The User Button
Recording Setting the USER Button After making sure that everyone is facing the camera, press the SNAPSHOT button. By assigning one of manual adjustment functions that you frequently use to the USER button, you can access the function quickly. Assigning a Function to the USER Button Select video or still image mode. -
Page 72: Remaining Recording Time/Battery Power
Recording Remaining Recording Time/Battery Power Making Adjustments with the USER Button Operate as follows. You can check the remaining video recording time on the built-in memory Functions with settings that change (or turn ON/OFF) with and SD card as well as the remaining battery power. every press Open the LCD monitor and select the video or still image mode. - Page 73 Recording Approximate Video Recording Time Quality Built-in Memory SDHC/SDXC Card 16 GB 4 GB 8 GB 16 GB 32 GB 48 GB 64 GB 1 h 20 m 20 m 40 m 1 h 20 m 2 h 50 m 4 h 20 m 5 h 50 m 30 m...
-
Page 74: Playback
Playback Playing Back Videos Operation Buttons for Video Playback You can select and play back the recorded videos from an index screen During Index Screen Display (thumbnail display). Select video mode. Tap q to select the playback mode. Display Description A Date Moves to the previous/next date B <... - Page 75 Playback During Video Playback Adjusting the Volume of Videos You can tap on the volume adjustment button to control the volume. Tap U. Tap “+” or “-”. Display Description A Timeline Bar Tap on a random position - Moves to the tapped position Drag playback point to the left or right - Starts playback from the new position...
-
Page 76: Playing Back 3D Images (For Gz-Hm960)
Playback Playing Back 3D Images (for GZ-HM960) Playing a Video with Defective Management Information Switch to the 3D mode by pressing the 3D button such that the button lights The management information of a video may be damaged if recording is not performed correctly, such as turning off the power in the middle of recording. -
Page 77: Playing Back Still Images
Playback Playing Back Still Images Operation Buttons for Still Image Playback You can select and play back the recorded still images from an index screen During Index Screen Display (thumbnail display). Select still image mode. Tap q to select the playback mode. Still images that are recorded continuously within 2 seconds or with the continuous shooting mode will be grouped together. -
Page 78: Playing Back 3D Images (For Gz-Hm960)
Playback During Still Image Playback Playing Back 3D Images (for GZ-HM960) Switch to the 3D mode by pressing the 3D button such that the button lights The mode changes between 3D and 2D with every press of the 3D button. When the 3D mode is activated, the button lights up. -
Page 79: Searching For A Specific Video/Still Image
Playback Searching for a Specific Video/Still Image Connecting to and Viewing on TV When there is a large number of recorded videos and still images, it is difficult You can connect this unit to a TV for playback. Select the most suitable way to look for the desired file from the index screen. -
Page 80: Playing Back 3D Images (For Gz-Hm960)
Playback displayed every 30 minutes. To turn off the message display, set “3D Playing Back 3D Images (for GZ-HM960) DISPLAY WARNING” to “OFF”. (for GZ-HM960) If you are using a 3D compatible TV, you can play back 3D images by “3D DISPLAY WARNING (for GZ-HM960)”... -
Page 81: Operation Method
Playback Operating in Conjunction with TV via HDMI Caution : To play back 3D images, refer also to “Precautions on Playing Back 3D Connecting this unit to an HDMI-CEC-enabled TV using the HDMI cable Images”. allows linked operations with the TV to be performed. “Precautions on Playing Back 3D Images (for GZ-HM960)”... -
Page 82: Playing Back 2D Images (For Gz-Hm960/Gz-Hm860)
Playback Playing Back 2D Images (for GZ-HM960/GZ-HM860) Connecting via the HDMI Mini Connector The image quality on TV varies with the type of TV and the connecting cable. If you are using an HDTV, you can play back in HD quality by connecting to Select the connector that best suits your TV. - Page 83 Playback Operating in Conjunction with TV via HDMI Connecting via the Component Connector Connecting this unit to an HDMI-CEC-enabled TV using the HDMI cable You can connect this unit to the component connector of a TV to play back allows linked operations with the TV to be performed. videos in analog high-definition quality.
-
Page 84: Playing Back A Dvd Or Blu-Ray Disc Created On This Unit
Playback Playing Back a DVD or Blu-ray Disc Created Connecting via the AV Connector on this Unit By connecting the supplied AV cable to the AV connector, videos can be played back on a TV. BD/DVDs created using the backup function on this unit can be played back Refer also to the instruction manual of the TV in use. -
Page 85: Editing
Editing Deleting Unwanted Files Delete unwanted videos and still images when the space in the recording media is running out. The capacity of the recording media can be restored after deleting the files. “Deleting the Currently Displayed File” (A p. 85) “Deleting Selected Files”... -
Page 86: Protecting Files
Editing Protecting Files Prevent important videos/still images from being deleted accidently by protecting them. “Protecting/Releasing Protection of the Currently Displayed File” (A p. 86) “Protecting/Releasing Protection of Selected Files” (A p. 86) Caution : When the recording media is formatted, even the protected files will be After deleting is complete, tap “OK”. - Page 87 Editing Protect marks I appear on the selected files. Tap “MENU”. Protect marks I disappear from the deselected files. Tap “PROTECT/CANCEL”. Tap on the files to protect or release protection of. P appears on the selected files. To remove P from a file, tap on the file again. I and P are displayed on the files that are already protected.
-
Page 88: Capturing A Still Image In The Video During Playback
Editing Capturing a Still Image in the Video during Combining Videos Recorded by Seamless Playback Recording You can capture still images of the scenes you like in the recorded videos. Videos that are recorded on two separate media and with “SEAMLESS RECORDING”... -
Page 89: Capturing A Required Part In The Video (Trimming)
Editing Capturing a Required Part in the Video (TRIMMING) Select the required part of a video and save it as a new video file. The original video remains in its existing location. Select video mode. Tap the media to store to. Tap q to select the playback mode. -
Page 90: Capturing Videos For Uploading To Youtube
Editing Capturing Videos for Uploading to YouTube Tap e to pause playback at the desired end point, then tap “B”. Capture and copy a part of a recorded video (maximum 15 minutes) for uploading to YouTube, and save it as a YouTube video. When capturing videos for YouTube, the duration cannot be longer than 15 minutes. -
Page 91: Preparing Videos To Transfer To Itunes
Editing Preparing Videos to Transfer to iTunes Tap e to pause playback at the desired start point, then tap “A”. Set EXPORT attributes to the recorded videos by adding a “LIB.” mark. When EXPORT attributes are set, the videos can be registered to iTunes easily using the supplied software on a PC. -
Page 92: Copying
Copying Creating Discs with a DVD Writer Tap the video to edit. You can copy the recorded files to discs or play back the created discs using an optional DVD writer. Compatible DVD Writers Product Name Description DVD Writer Enables the images recorded on this unit to be CU-VD3U copied to a DVD without using a PC. -
Page 93: Preparing A Dvd Writer (Cu-Vd3U)
Copying Changing the Media of the DVD Writer Preparing a DVD Writer (CU-VD3U) Set the type of media according to the loaded DVD. Connect the USB cable and the AC adapter. Prepare a DVD writer. Turn off the camcorder by pressing the M button for about 2 seconds. “Preparing a DVD Writer (CU-VD3U)”... -
Page 94: Preparing A Dvd Writer (Cu-Vd50U)
Copying Preparing a DVD Writer (CU-VD50U) Creating a Disc Connect the USB cable and the AC adapter. Prepare a DVD writer. Insert a new disc into the DVD writer. Turn off the camcorder by pressing the M button for about 2 seconds. “Preparing a DVD Writer (CU-VD3U)”... - Page 95 Copying Copying All Files Tap “YES” or “NO”. (A mode only) All videos or still images recorded on this unit will be copied. You can also select and copy only the videos or still images that have never been copied. Select video or still image mode.
- Page 96 Copying Prepare the discs accordingly. Copying Files by Date Videos or still images are sorted and copied according to the date on which they were recorded. Select video or still image mode. Tap “SELECT AND CREATE” (video) or “SELECT AND SAVE” (still image).
-
Page 97: Copying Selected Files
Copying Copying Selected Files Tap “YES” or “NO”. (A mode only) Select and copy the desired videos or still images individually. Select video or still image mode. When “YES” is selected, videos with similar recording dates are Tap “SELECT AND CREATE” (video) or “SELECT AND SAVE” (still displayed in groups. - Page 98 Copying To check the created disc, refer to ““Playing Back with a DVD Writer” (A p. 99) ”. “Playing Back with a DVD Writer” (A p. 99) While the video mode is shown in the image, the same operations apply for the still image mode. Tap “EXECUTE”.
-
Page 99: Playing Back With A Dvd Writer
Copying When “DO YOU WANT TO FINALIZE?” appears Finalizing Discs After Copying This appears when “AUTO FINALIZE” in the “COMMON” menu is set to Finalize the disc after copying is finished. This enables the disc to be played “OFF”. back using this unit, PC, DVD writer, DVD player, or external Blu-ray drive that supports the BD-MV and AVCHD formats. -
Page 100: Creating Discs With An External Blu-Ray Drive
Copying Creating Discs with an External Blu-ray Drive Preparing an External Blu-ray Drive Memo : You can copy the recorded files to discs or play back the created discs using When connecting to the external Blu-ray drive, use a USB cable with Mini- an optional external Blu-ray drive. -
Page 101: Creating A Disc
Copying Creating a Disc Insert a new disc. Press the power button on the external Blu-ray drive to turn on the Creating a Disc power. Prepare an external Blu-ray drive. Insert a new disc into the external Blu-ray drive. “Preparing an External Blu-ray Drive” (A p. 100) Copy files to the disc with the following methods. - Page 102 Copying Copying Files by Date Videos or still images are sorted and copied according to the date on which they were recorded. Select video or still image mode. The number of discs required to copy the files is displayed. Prepare the discs accordingly. Tap “YES”...
- Page 103 Copying Prepare the discs accordingly. Copying Selected Files Select and copy the desired videos or still images individually. Tap “YES” or “NO”. (A mode only) Select video or still image mode. Tap “SELECT AND CREATE” (video) or “SELECT AND SAVE” (still image).
-
Page 104: Playing Back With An External Blu-Ray Drive
Copying Playing Back with an External Blu-ray Drive Tap “EXECUTE”. You can play back the Blu-ray discs created on this unit. Prepare an external Blu-ray drive. Insert the Blu-ray disc to play back into the external Blu-ray drive. “Preparing an External Blu-ray Drive” (A p. 100) Tap “PLAYBACK”... -
Page 105: Creating A Disc Using A Connected Blu-Ray Recorder
B Connect the AC adapter to this unit. This unit powers on automatically when the AC adapter is connected. Be sure to use the supplied JVC AC adapter. Tap q to select the playback mode. * The AC adapter shown in the illustration is AC-V11U. -
Page 106: Dubbing Files To A Vhs Tape By Connecting To A Vcr
This unit powers on automatically when the AC adapter is connected. “Preparing a USB External Hard Disk Drive” (A p. 107) Be sure to use the supplied JVC AC adapter. “Copying All Files” (A p. 107) “Playing Back Files in the USB External Hard Disk Drive” (A p. 108) Tap q to select the playback mode. -
Page 107: Preparing A Usb External Hard Disk Drive
Copying Preparing a USB External Hard Disk Drive Copying All Files All videos or still images recorded on this unit will be copied. Memo : You can also select and copy only the videos or still images that have never When connecting to the external hard disk drive, use a USB cable with been copied. -
Page 108: Playing Back Files In The Usb External Hard Disk Drive
Copying Playing Back Files in the USB External Hard Disk Drive After copying, tap “OK”. Videos or still images saved in an external hard disk drive can be played back on this unit. Select video or still image mode. Press and hold the M button for 2 seconds or more to turn off this unit Tap “PLAYBACK”. -
Page 109: Deleting Folders In The Usb External Hard Disk Drive
Copying Deleting Folders in the USB External Hard Disk Drive Formatting the USB External Hard Disk Drive Files that are copied to the external hard disk drive can be deleted. All files on the external hard disk drive can be deleted. Caution : Caution : Deleted files cannot be restored. -
Page 110: Importing Files From The Usb External Hard Disk Drive
Copying Importing Files from the USB External Hard Disk Drive Tap “YES”. You can copy video files from a USB external hard disk drive to the built-in memory of this unit or an SD card. Select video mode. Importing starts when “YES” is tapped. To cancel importing of files, tap “STOP”, then tap “YES”. -
Page 111: Copying Files To An Sd Card
Copying Copying Files to an SD Card You can copy videos and still images from the built-in memory to SD card. Copying still images to cards makes it convenient to bring them to the shop for printing (developing). Caution : Make sure that there is enough space left in the destination medium. -
Page 112: Moving Files To An Sd Card
Copying Moving Files to an SD Card You can move videos and still images from the built-in memory to SD card. Files that are moved will be deleted from the built-in memory. Moving still images to SD cards makes it convenient to bring them to the shop for printing (developing). -
Page 113: Copying To Windows Pc
Asia (Philippines) (English): +63-2-438-0090 China (Chinese): 10800-163-0014 (toll-free) Homepage http://www.pixela.co.jp/oem/jvc/mediabrowser/e/ For details on how to upload to YouTube or transfer files to iTunes, refer to “MediaBrowser Help” in the “Help” menu of Everio MediaBrowser 3 BE. Verifying System Requirements (Guideline) Right-click on “Computer”... -
Page 114: Installing The Provided Software (Built-In)
A Connect using the provided USB cable. B Connect the AC adapter to this unit. This unit powers on automatically when the AC adapter is connected. Be sure to use the supplied JVC AC adapter. C The “SELECT DEVICE” menu appears. Tap “CONNECT TO PC”. -
Page 115: Backing Up All Files
B Connect the AC adapter to this unit. After backup is complete, click “OK”. This unit powers on automatically when the AC adapter is connected. Be sure to use the supplied JVC AC adapter. C The “SELECT DEVICE” menu appears. Tap “CONNECT TO PC”. -
Page 116: Organizing Files
Copying Organizing Files Disconnect the USB cable and close the LCD monitor. After backing up your files, organize them by adding labels such as “Family Trip” or “Athletic Meet”. This is useful not only for creating discs, but for viewing the files too. Double-click on the Everio MediaBrowser 3 (3 BE) icon. -
Page 117: Recording Videos To Discs
Europe (UK, Germany, France, and Spain) (English/German/French/Spanish): +800-1532-4865 (toll- free) Other Countries in Europe (English/German/French/Spanish): +44-1489-564-764 Asia (Philippines) (English): +63-2-438-0090 Click “Settings” to select the menu background. China (Chinese): 10800-163-0014 (toll-free) After setting, click “Start”. Homepage http://www.pixela.co.jp/oem/jvc/mediabrowser/e/ After copying is complete, click “OK”. -
Page 118: Backing Up Files Without Using Provided Software
B Connect the AC adapter to this unit. This unit powers on automatically when the AC adapter is connected. Everio MediaBrowser 3 BE Be sure to use the supplied JVC AC adapter. -Blu-ray C The “SELECT DEVICE” menu appears. -DVD-Video -AVCHD Tap “CONNECT TO PC”. -
Page 119: List Of Files And Folders
Copying Disconnecting this Unit from Computer Caution : When the folders or files are deleted/moved/renamed in the computer, Click “Safely Remove Hardware and Eject Media”. they cannot be played back on this unit anymore. Memo : To edit/view the files, use a software that supports AVCHD (video)/JPEG (still image) files. -
Page 120: Copying To Mac Computer
This unit powers on automatically when the AC adapter is connected. (still image) files. Be sure to use the supplied JVC AC adapter. When removing this unit from the computer, drag and drop the C The “SELECT DEVICE” menu appears. -
Page 121: Menu Settings
Menu Settings Operating the Menu Operating the Common Menu You can configure common setting items regardless of the mode using the There are three types of menus in this unit. common menu. Main menu - Menu that contains all the items specific to the video Tap “MENU”. -
Page 122: Operating The Face Short Cut Menu
Menu Settings Operating the Face Short Cut Menu You can configure various settings of face-related functions in either the video or still image recording mode using the face short cut menu. Tap “V” in the video or still image recording mode. Tap the desired menu and setting. -
Page 123: Main Menu For Video Recording
Menu Settings Main Menu for Video Recording You can adjust various settings, such as brightness and white balance, to suit the subject or purpose. You can also change settings such as picture quality and gain. Select video mode. Tap “MENU”. Setting Details SCENE SELECT... - Page 124 Menu Settings Setting Details TOUCH PRIORITY AE/AF Automatically adjusts focus and brightness based on the subjects’ faces or selected area. “Capturing Subjects Clearly (TOUCH PRIORITY AE/AF)” (A p. 61) LIGHT Turns on/off the light. “LIGHT” (A p. 126) Camera shake during recording can be effectively reduced. “Reducing Camera Shake”...
-
Page 125: Scene Select
Menu Settings SCENE SELECT BRIGHTNESS ADJUST Settings to suit the shooting condition can be selected. Adjusts the overall brightness of the screen. Operating Details Operating Details “Scene Selection” (A p. 48) “Adjusting Brightness” (A p. 50) FOCUS SHUTTER SPEED Focus can be adjusted manually. Shutter speed can be adjusted. -
Page 126: Light
Menu Settings LIGHT GAIN UP Turns on/off the light. Makes the subject appear bright automatically when recording in dark places. Setting Details Setting Details Does not light up. Deactivates the function. AUTO Lights up automatically when the surrounding is dark. Electrically brightens the scene when it is dark. -
Page 127: Wind Cut
Menu Settings WIND CUT EXPORT SHOOTING Reduces the noise caused by wind. Records videos for transferring to iTunes by setting EXPORT attributes. Operating Details Setting Details “Taking Videos in iTunes Format” (A p. 65) Deactivates the function. ANIMATION EFFECT Activates the function. Records videos or still images with special effects. -
Page 128: Shutter Mode
Menu Settings SHUTTER MODE CONT. SHOOTING SPEED Continuous shooting settings can be adjusted. Sets the speed for continuous shooting. Setting Details Setting Details RECORD ONE Records one still image. HIGH SPEED Shoots up to 40 still images continuously in the SHOT still image mode in about 2.7 second. -
Page 129: Smile Shot
Menu Settings SMILE SHOT VIDEO QUALITY Automatically captures a still image upon detection of a smile. Sets the video quality. Operating Details “Capturing Smiles Automatically (SMILE SHOT)” (A p. 62) Setting Details Enables recording in the best picture quality. SMILE%/NAME DISPLAY Applies to Blu-ray discs only. -
Page 130: Zoom
Menu Settings ZOOM SEAMLESS RECORDING Sets the maximum zoom ratio. Continues recording on the SD card without stopping when the remaining space on the built-in memory runs out. Setting Details Setting Details 10x/OPTICAL Enables zooming up to 10x. Does not switch recording media automatically. 15(13)x/DYNAMIC Enables zooming up to 15x when the image stabilizer is set to the normal mode or turned off. -
Page 131: X.v.color
Menu Settings x.v.Color ZOOM MIC Captures the true colors. Sets the zoom microphone. (Use an x.v.Color compatible TV for playback.) Setting Details Setting Details Deactivates the zoom microphone. Captures colors with the same standard as TV Records audio sounds in the same direction as the broadcasting. -
Page 132: Main Menu For Still Image Recording
Menu Settings Main Menu for Still Image Recording You can adjust various settings, such as brightness and white balance, to suit the subject or purpose. You can also change settings such as picture quality and gain. Select still image mode. Tap “MENU”. - Page 133 Menu Settings Setting Details TOUCH PRIORITY AE/AF Automatically adjusts focus and brightness based on the subjects’ faces or selected area. “Capturing Subjects Clearly (TOUCH PRIORITY AE/AF)” (A p. 61) FLASH Sets the flash to use. “FLASH” (A p. 135) SELF-TIMER Use this when taking a group photo.
-
Page 134: Scene Select
Menu Settings SCENE SELECT BRIGHTNESS ADJUST Settings to suit the shooting condition can be selected. Adjusts the overall brightness of the screen. Operating Details Operating Details “Scene Selection” (A p. 48) “Adjusting Brightness” (A p. 50) FOCUS SHUTTER SPEED Focus can be adjusted manually. Shutter speed can be adjusted. -
Page 135: Flash
Menu Settings FLASH SELF-TIMER For setting the flash. Use this when taking a group photo. Operating Details Setting Details “Taking Group Shots (Self-timer)” (A p. 70) Flash does not fire. GAIN AUTO Flash fires automatically when the surrounding is Enables selection of the ISO level. dark. -
Page 136: Auto Rec
Menu Settings AUTO REC CONT. SHOOTING SPEED Starts/stops recording automatically by sensing the changes in subject’s Sets the speed for continuous shooting. movement (brightness) within the red frame displayed on the LCD monitor. Operating Details Setting Details “Recording Automatically by Sensing Movements (AUTO REC)” (A p. 69) HIGH SPEED Shoots up to 40 still images continuously in the still image mode in about 2.7 second. -
Page 137: Smile Shot
Menu Settings SMILE SHOT IMAGE SIZE Automatically captures a still image upon detection of a smile. Sets the image size (number of pixels) for still images. Operating Details “Capturing Smiles Automatically (SMILE SHOT)” (A p. 62) Setting Details 3968X2976(11.8M) Takes still images with aspect ratio 4:3. SMILE%/NAME DISPLAY 2656X1992(5.3M) Sets the items to display when faces are detected. -
Page 138: Main Menu For Video Playback
Menu Settings Main Menu for Video Playback You can delete or look for specific videos. Select video mode. Tap q to select the playback mode. The mode changes between recording and playback with every tap. Tap “MENU”. Setting Details SEARCH DATE You can search and play videos or still images according to recording dates. -
Page 139: Search Date
Menu Settings SEARCH DATE K2 TECHNOLOGY Narrows down the video index screen according to recording dates. Reproduces small or high-pitched sounds that cannot be recorded during Operating Details recording, and plays back with a sound quality close to the original. “Date Search”... -
Page 140: Main Menu For Still Image Playback
Menu Settings Main Menu for Still Image Playback You can delete or look for specific still images. Select still image mode. Tap q to select the playback mode. The mode changes between recording and playback with every tap. Tap “MENU”. Setting Details SEARCH DATE... -
Page 141: Search Date
Menu Settings SEARCH DATE PROTECT/CANCEL Narrows down the still image index screen according to recording dates. Protects files from being deleted accidently. Operating Details Operating Details “Date Search” (A p. 79) “Protecting/Releasing Protection of the Currently Displayed File” (A p. 86) “Protecting/Releasing Protection of Selected Files”... -
Page 142: Common Menu
Menu Settings Common Menu Tap “MENU”. Tap “Q”. Setting Details CLOCK ADJUST Resets the current time or sets to the local time when using this unit overseas. “Clock Setting” (A p. 20) “Setting the Clock to Local Time when Traveling” (A p. 39) “Setting Daylight Saving Time”... - Page 143 Menu Settings Setting Details TOUCH SCREEN ADJUST Adjusts the response position of the buttons on the touch screen. “TOUCH SCREEN ADJUST” (A p. 149) 3D DISPLAY WARNING (for GZ-HM960) Sets whether to display warnings during 3D playback. “3D DISPLAY WARNING (for GZ-HM960)” (A p. 150) DISPLAY ON TV Displays icons and date/time on a TV screen.
-
Page 144: Clock Adjust
Menu Settings CLOCK ADJUST MONITOR BRIGHTNESS Resets the current time or sets to the local time when using this unit overseas. Sets the brightness of the LCD monitor. Operating Details “Clock Setting” (A p. 20) Setting Details “Setting the Clock to Local Time when Traveling” (A p. 39) Brightens the backlight of the monitor regardless “Setting Daylight Saving Time”... -
Page 145: Rec Media For Video
Menu Settings REC MEDIA FOR VIDEO REC MEDIA FOR IMAGE Sets the recording media of videos. Sets the recording media of still images. Setting Details Setting Details BUILT-IN Records videos to this unit's built-in memory. BUILT-IN Records still images to this unit's built-in memory. MEMORY MEMORY SD CARD... -
Page 146: Operation Sound
Menu Settings OPERATION SOUND AUTO POWER OFF Turns on or off the operation sound. Prevents the situation of forgetting to turn off the power when this is set. Setting Details Setting Details Turns off the operation sound. Power is not turned off even if this unit is not operated for 5 minutes. -
Page 147: Quick Restart
Menu Settings QUICK RESTART REMOTE Enables the power to turn on quickly when the LCD monitor is opened again Enables remote control operation. within 5 minutes. Setting Details Setting Details Disables remote control operation. Deactivates the function. Enables remote control operation. Enables the power to turn on quickly when the LCD monitor is opened again within 5 minutes. -
Page 148: Demo Mode
Menu Settings DEMO MODE 3D LEVEL ADJUST (for GZ-HM960) Plays a demonstration of the special features of this unit. The 3D effect of 3D images may appear either too strong or too weak. In these cases, you can correct the 3D effect by adjusting the parallax (3D LEVEL ADJUST). -
Page 149: Touch Screen Adjust
Menu Settings TOUCH SCREEN ADJUST Adjusts the response position of the buttons on the touch screen. Tap “MENU”. Setting ends and returns to the menu screen. Caution : Do not tap areas other than the “+” mark during touch screen adjustment (steps 4 - 5). -
Page 150: Display Warning (For Gz-Hm960)
Menu Settings 3D DISPLAY WARNING (for GZ-HM960) DISPLAY ON TV Sets whether to display warnings during 3D playback. Displays icons and date/time on a TV screen. Setting Details Setting Details Hides 3D warning displays. Does not display icons and date/time on TV. Shows 3D warning displays at a regular interval. -
Page 151: Video Output
Menu Settings VIDEO OUTPUT COMPONENT OUTPUT Sets the aspect ratio (16:9 or 4:3) according to the connecting TV. Sets the definition of the video output from the COMPONENT connector. Setting Details Setting Details Select this when connecting to a conventional TV 480i Outputs at 480i. -
Page 152: Hdmi Output
Menu Settings HDMI OUTPUT Displaying the Item Sets the output from the HDMI connector of this unit when it is connected to Tap “MENU”. a TV. 3D Mode (for GZ-HM960) Setting Details AUTO Output images according to the supported monitor input format. -
Page 153: Hdmi Control
Menu Settings HDMI CONTROL AUTO FINALIZE Sets whether to link operations with an HDMI-CEC compliant TV. Finalizes the discs created automatically so that they can be played back on compatible devices. Setting Details Setting Details Turns off linked operations. Allows data to be added to the created discs later, Turns on linked operations. -
Page 154: Factory Preset
All settings return to their default values. UPDATE Updates the functions of this unit to the latest version. For details, refer to the JVC homepage. (When no program to update the software of this unit is available, nothing will be provided on the homepage.) http://www.jvc-victor.co.jp/english/global-e.html... -
Page 155: Format Sd Card
Menu Settings FORMAT SD CARD ERASE ALL DATA Deletes all files on the SD card. Execute this process when disposing of this unit or passing it to another person. Setting Details Tap “MENU”. FILE Deletes all files on the SD card. FILE + Deletes all files on the SD card and resets the folder MANAGEMENT... -
Page 156: Names Of Parts
Names of Parts Front Rear POWER/CHARGE (Power/Charge) Lamp Lights up: Power "ON" SNAPSHOT (Still Image Recording) Button Blinks: Charging in progress Takes a still image. Goes out: Charging finished Zoom/Volume Lever ACCESS (Access) Lamp During shooting: Adjusts the shooting range. Lights up/blinks during recording or playback. -
Page 157: Bottom
Names of Parts Bottom Interior Speaker Outputs audio sound during video playback. USB Connector Tripod Mounting Hole Connects to computer using a USB cable. “Tripod Mounting” (A p. 22) HDMI Connector SD Card Slot Connects to an HDMI TV. Insert an optional SD card. USER Button “Inserting an SD Card”... -
Page 158: Lcd Monitor
Names of Parts LCD Monitor LCD Monitor Turns the power on/off by opening and closing. Enables self-portraits to be taken by rotating the monitor. “Using the Touch Screen” (A p. 18) “Names of Buttons and Functions on the LCD Monitor” (A p. 19) Caution : Do not press against the surface with force or subject it to strong impact. -
Page 159: Indications On The Lcd Monitor
Indications on the LCD monitor Common Recording Indications Video Recording TOUCH PRIORITY AE/AF Video Mode “Capturing Subjects Clearly (TOUCH PRIORITY AE/AF)” (A p. 61) “A / B (Video/Still Image) Button” (A p. 157) Backlight Compensation Video Quality “Setting Backlight Compensation” (A p. 53) “VIDEO QUALITY”... -
Page 160: Still Image Recording
Indications on the LCD monitor Still Image Recording Video Playback Video Mode “A / B (Video/Still Image) Button” (A p. 157) Still Image Mode Video Quality “A / B (Video/Still Image) Button” (A p. 157) “VIDEO QUALITY” (A p. 129) Image Size Operation Indicator “IMAGE SIZE”... -
Page 161: Still Image Playback
Indications on the LCD monitor Still Image Playback Still Image Mode “A / B (Video/Still Image) Button” (A p. 157) Folder Number File Number Date/Time “Clock Setting” (A p. 20) Media “REC MEDIA FOR IMAGE” (A p. 145) Battery Indicator “Remaining Recording Time/Battery Power”... -
Page 162: Troubleshooting
Recording stops automatically. If you use any other battery packs besides JVC battery packs, safety and performance cannot be guaranteed. Be sure to use JVC battery packs. Recording stops automatically as it cannot be performed for 12 or more consecutive hours according to specifications. -
Page 163: Card
Troubleshooting Card Images are projected vertically on the TV. Set “VIDEO OUTPUT” in the “COMMON” menu to “4:3”. “VIDEO OUTPUT” (A p. 151) Cannot insert the SD card. Adjust the TV's screen accordingly. Make sure not to insert the card in the wrong direction. “Inserting an SD Card”... -
Page 164: Editing/Copying
Troubleshooting Editing/Copying Computer Unable to delete file. Unable to copy files to the computer's HDD. Files (videos/still images) that are protected cannot be deleted. Release Connect the USB cable correctly. protection before deleting the file. “Backing Up All Files” (A p. 115) “Protecting Files”... -
Page 165: Screen/Image
There are bright or dark spots on the screen. recording media for storage. JVC will not be responsible for any lost data. While the LCD monitor screen has more than 99.99% effective pixels, 0.01% of the pixels may be bright spots (red, blue, green) or dark spots. This is not... -
Page 166: Error Message
CHECK CARD'S WRITE PROTECTION SWITCH the clock. (If the message still appears, the clock battery is exhausted. Set the write protect switch of the SD card to off. Consult your nearest JVC dealer.) “Clock Setting” (A p. 20) INSUFFICIENT AVAILABLE SPACE COMMUNICATION ERROR Delete files, or move files to a computer or other devices. - Page 167 Troubleshooting “Improving the Communication” (A p. 24) Check the registered device and register again. “Registering a Bluetooth-compliant Device” (A p. 25) Refer to the instruction manual of the connected device.
- Page 168 Maintenance Perform regular maintenance of this unit to enable it to be used for a long time. Caution : Be sure to detach the battery pack, AC adapter, and power plug before performing any maintenance. Camcorder Wipe this unit with a dry, soft cloth to remove any dirt. When it is extremely dirty, soak the cloth in a solution of neutral detergent, wipe the body with it, and then use a clean cloth to remove the detergent.
-
Page 169: Specifications
Specifications Camera Item Details Item Details Lowest illumination 8 lux (GAIN UP: ON) Power supply Using AC adapter: DC 5.2 V 2 lux (GAIN UP: AUTO SLOW-SHUTTER) Using battery pack: DC 3.6 V 1 lux (SCENE SELECT: NIGHTALIVE) Power consumption (GZ-HM960) Flash Recommended shooting distance: Within 2 m... -
Page 170: Still Image
Specifications Connectors AC Adapter (AC-V11U) (for GZ-HM860) Item Details Item Details HDMI output HDMI mini connector (x.v.Color compatible) Power supply AC 110 V to 240 V, 50 Hz/60 Hz connector Output DC 5.2 V, 1 A Component output Y, Pb, Pr component output Allowable operating 0°C to 40°C (32°F to 104°F) Y: 1.0 V (p-p), 75 Ω...