Epson r-d1 - Rangefinder Digital Camera User Manual
Rangefinder digital camera
Hide thumbs
Also See for r-d1 - Rangefinder Digital Camera:
- User manual (59 pages) ,
- (55 pages) ,
- Product support bulletin (10 pages)
Table of Contents
Advertisement
Quick Links
Download this manual
See also:
User Manual
Advertisement
Table of Contents
Troubleshooting

Related Manuals for Epson r-d1 - Rangefinder Digital Camera


Summary of Contents for Epson r-d1 - Rangefinder Digital Camera
- Page 1 User’s Guide for cameras with firmware upgraded to version 2.0...
-
Page 2: Copyright Notice
Seiko Epson Corporation. The information contained herein is designed only for use with this Epson printer. Epson is not responsible for any use of this information as applied to other printers. -
Page 3: Table Of Contents
Contents Introduction Setting ISO Sensitivity ....... 21 Setting the Exposure....... . . 21 Warnings, Cautions, and Notes. - Page 4 Viewfinder Indicators ......47 EPSON PhotoRAW ......39 Power Supply .
-
Page 5: Warnings, Cautions, And Notes
Introduction The Epson R-D1 offers the convenience of digital imaging technology Life-size magnification with the classic features of a traditional rangefinder camera to produce The R-D1 comes with a viewfinder with 1.0x magnification, so what high-quality photographs and an enjoyable shooting experience. -
Page 6: Chapter 1 Getting Started
Unpacking Your Camera Make sure you have these items: Battery charger Power cord (for battery charger) Camera body Lens hole cover User’s Guide CD-ROMs: EPSON PhotoRAW/EPSON RAW Plug-in ® ® Adobe Photoshop 2.0 (may not be included in some regions) Battery... -
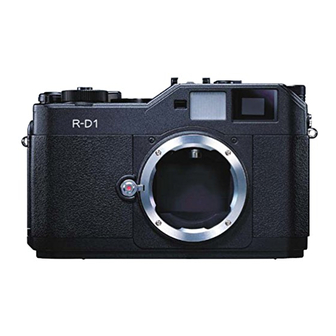
Page 7: Camera Parts And Functions
Camera Parts and Functions Front View Rangefinder window Images from this window are used to display the image superimposing field in the center of the finder frame. Bright-line frame illumination window Receives light to illuminate bright-line frames in the viewfinder. Viewfinder window Images from this window are displayed in the viewfinder. -
Page 8: Top View
Top View Power switch Shutter charge lever Switches the power on or off. (See “Turning Used to cock the shutter before taking the Camera On and Off” on page 18 for each picture. (See “Taking a Picture” on details.) page 18 for details.) Shutter speed/ISO sensitivity dial Shutter release button Sets the shutter speed, exposure... - Page 9 Back View Rangefinder eyepiece Used to compose your pictures and to focus on the subject. AE-lock button Locks the shutter speed at the metered value when using automatic exposure. (See “Locking the Exposure Setting (AE-lock)” on page 24 for details.) Quality (Q) / White Balance (WB) lever Used to set image quality or white balance.
-
Page 10: Lcd Monitor
LCD Monitor (LCD) button Switches between the shooting mode and the playback mode. (MENU) button Displays the main menu on the LCD monitor when in the playback mode. (ENTER) button Sets the selected item or settings when in the playback mode. Also toggles between single and tile display modes. -
Page 11: Attaching The Strap To The Camera
Using the Battery Caution: Only use the Epson lithium-ion battery (EU-85). Do not use any other make or model of battery under any circumstances. 3. Lace the end of the strap through the holes in the protective pad Charging the Battery and the metal ring. - Page 12 1. Connect the power cord to the battery charger, then plug it into an 2. Insert the battery into the battery charger with the terminal end electrical outlet. first. The red indicator light on the charger lights up to indicate the battery is being charged.
-
Page 13: Installing The Battery In The Camera
Installing the Battery in the Camera Using a Memory Card 1. Make sure the camera’s power switch is in the Off position, then You cannot take pictures unless a memory card is installed in the open the battery cover. camera. The camera accepts SD memory cards of up to 2 GB capacity. Caution: ❏... -
Page 14: Inserting A Memory Card
Inserting a Memory Card Removing the Memory Card 1. Make sure that the memory card is not locked. Slide the write 1. Make sure the memory card access light is off, then open the protect switch to unlock the card if needed. memory card slot cover. -
Page 15: Mounting And Removing Lenses
Mounting an M-mount Lens Mounting and Removing Lenses 1. Align the dot on the lens with the red dot on the lens release button. The camera accepts a wide variety of M-type bayonet mount (M-mount) lenses. You can also use L-type screw mount (L-mount) lenses by attaching a third-party adapter ring. -
Page 16: Removing An M-Mount Lens
Removing an M-mount Lens Mounting and Removing an L-mount Lens For an L-mount lens, you need an optional M-bayonet adapter ring. 1. Press the lens release button and turn the lens body Attach the adapter ring to the lens, then install the lens on the camera counterclockwise. - Page 17 Determining the Effective Focal Length The CCD sensor in this camera is an APS-C size, about 34% smaller than the area covered by 35 mm film. This effectively increases the working focal length of the attached lens by 1.53x to produce the equivalent 35 mm focal length.
-
Page 18: Chapter 2 Taking Photos
Chapter 2 Taking Photos Turning the Camera On and Off Taking a Picture 1. Make sure the camera is turned on and a memory card is installed. Turn on Turn off 2. Before taking a picture, you may need to adjust the white balance, image quality setting, ISO sensitivity, exposure, and focus, as described on the following pages. -
Page 19: Setting White Balance
4. Gently press the shutter release button. You should hear a clacking 2. Rotate the jog dial to select the desired white balance setting. sound that indicates the shutter release. DUMMY The selected setting is indicated on the status gauge: Setting Description A (Auto) -
Page 20: Setting Image Quality
Set the image quality as follows: Setting Image Quality 1. Pull up and hold the Q/WB lever at the Q position. Image quality determines the format in which the image is saved, the size of the image as it will be displayed on a computer screen, and the file size of image stored in a memory card. -
Page 21: Setting Iso Sensitivity
Setting ISO Sensitivity Setting the Exposure The ISO sensitivity setting determines the camera’s sensitivity to You can set the exposure automatically or manually. Automatic available light. As ISO sensitivity is increased, less light is required to exposure is a convenient feature that works sufficiently under most expose an image, which permits faster shutter speeds. -
Page 22: Setting The Shutter Speed Manually
Follow these steps: Setting the Shutter Speed Manually You can specify the shutter speed from 1 to 1/2000 sec., or B (Bulb). 1. To use automatic exposure, rotate the shutter speed dial to the AE position. To set the shutter speed, rotate the shutter speed dial to the desired shutter speed value. -
Page 23: Setting The Aperture
B (Bulb) Setting Setting the Aperture The bulb setting is used for shooting night pictures or astronomical Rotate the lens aperture ring to the desired value. objects. With this setting, the shutter stays open as long as the shutter release button is depressed. Note: ❏... - Page 24 With Manual Exposure Locking the Exposure Setting (AE-lock) When manual exposure is selected, the manually selected shutter speed You can lock the exposure setting at the metered value using the is lit and the metered speed flashes. AE-lock button. This is useful, for example, when you create a single panoramic picture from a series of images, to make sure they all have the same level of exposure.
-
Page 25: Focusing
Focusing The camera’s viewfinder has a magnification of 1.0x, which allows you to keep both eyes open when focusing on your subject. When focusing, keep your eye in the center of the rangefinder eyepiece for the best result. To focus on a subject, rotate the lens focusing ring until the double-image converges in the center of the bright-line frame. -
Page 26: Chapter 3 Viewing And Managing Photos
Chapter 3 Viewing and Managing Photos 3. Push the panel back into place. Opening the LCD Monitor 1. Pull open the rear panel using the notch at the bottom. DUMMY DUMMY Caution: ❏ Do not pick up or handle the camera by the rear panel. ❏... -
Page 27: Viewing Images
Image display Viewing Images 1. Make sure the camera is on. 2. Press the (LCD) button. The camera enters playback mode and displays the newest recorded image. 3. Rotate the jog dial (lower position) clockwise or counterclockwise to display the image you want to view. Monitor icons Current image/ total images... -
Page 28: Viewing Photo Information
Viewing Photo Information Icon Description Follow these steps to see more photo information: Indicates you can magnify or shrink the image by rotating the jog dial (lower position). Displayed only for 1. Display an image on the LCD monitor. the Magnify feature. 2. - Page 29 General Information Highlight Outlines and flashes highlight areas. File sequence number Image quality Indicates this image is locked Number of prints (if DPOF is set) Date and time this Composition Grid image was taken Shows the grid to aid composition. Exposure Histogram Shows the densities of shadow and highlight areas occupied in the image.
-
Page 30: Magnifying Images
Detailed Information Magnifying Images Lists detailed information about camera settings. Follow these steps to zoom in on an image displayed on the LCD monitor (up to 16x). 1. Display an image on the LCD monitor. 2. Press the (MENU) button. 3. -
Page 31: Running A Slide Show
Running a Slide Show Managing Images This feature allows you to view all the images in a slide show format, with a three-second interval between images. Deleting Images 1. Display an image on the LCD monitor. In playback mode, you can delete the currently displayed image or all 2. -
Page 32: Locking/Unlocking Images
5. In the confirmation screen, select OK using the jog dial, then press 4. Select Lock/Unlock 1 image, Lock all images, or Unlock all (ENTER) button. images using the jog dial (upper position), then press the (ENTER) button. Caution: When the image is locked, the lock ( ) icon is displayed at the top right This operation cannot be undone. - Page 33 3. Select (Print Order) using the jog dial, then press the (ENTER) button. 4. Select Set DPOF for one for the displayed image, or Set DPOF for all for all the images using the jog dial (upper position), then press (ENTER) button.
-
Page 34: Chapter 4 Customizing The Settings
Chapter 4 Customizing the Settings Using the Jog Dial You can use the LCD screen to adjust camera settings. Rotate the jog dial clockwise or counterclockwise to display the previous or next menu or photo. The jog dial is used in either the raised Accessing the Settings Menu or lowered position, depending on the menu or function. - Page 35 Setting Description Setting Description (Format SD Card) Formats the memory card. You can select (Film Setting) Allows you to quickly switch film profiles to best Quick Format or Full Format. See “Formatting suit the shooting subject or environment. For the Memory Card” on page 42 for details. each film profile (Film1, Film2, or Film3), you can assign Edge Enhance, Saturation, Tint, Contrast, (Initialize Settings)
-
Page 36: Basic Setup Menu
Basic Setup Menu Setting Description Calibrate Needles Displays the Needle Calibration menu to adjust Setting Description the status gauge needles: E (number of Time and Date Sets the current date and time remaining shots), R (image quality), E (year, month, day, hours and minutes). (remaining battery power), and A (white balance). - Page 37 Setting Description Assign USER Button You can assign one of the following functions to the (USER) button: Delete, Lock, Magnify, Print, and Film. By default, Delete is assigned to this button. Note: (USER) button does not function in the tile display mode. Customizing the Settings...
-
Page 38: Chapter 5 Opening Raw Images On Your Computer
Windows: OS: Microsoft Windows 98 Second Edition, To open RAW format images, you need to install the Epson PhotoRAW Me, 2000 Professional, XP Home Edition, XP software included on the CD-ROM that came with your camera: Professional ❏ EPSON PhotoRAW is a standalone application that can process ®... -
Page 39: Installing The Software
❏ Click Start, point to Settings, and select Control Panel, Add/Remove Programs, and then click EPSON PhotoRAW. Uninstalling RAW Plug-In ❏ Click Start, point to Programs, and select EPSON PhotoRAW, and If you need to uninstall the RAW Plug-in, follow the instructions below. then click Uninstall. -
Page 40: Opening A Raw Image
EPSON PhotoRAW starts and the main window is displayed. Note: ❏ If the EPSON RAW Plug-In does not start automatically even if you select a RAW file, select Open from the File menu, and select EPSON RAW Plug-In from the Format drop-down list. Then select the RAW file. -
Page 41: Chapter 6 Maintenance And Troubleshooting
Chapter 6 Maintenance and Troubleshooting 3. Use the following to set the time and/or date: Setting the Time and Date Jog dial Changes the value. 1. Press (LCD), then (MENU) to display the main menu on the (ENTER) button Moves the cursor forward. LCD monitor. -
Page 42: Calibrating The Status Gauge
5. Select Finish using the jog dial, then press (ENTER). Calibrating the Status Gauge 6. Repeat steps 2 through 4 if you want to calibrate the other needles. The gauge readings may deviate slightly from the set positions over 7. Select Finish using the jog dial, then press (ENTER). -
Page 43: Cleaning The Camera Body
Caution: Caution: ❏ Do not use blower cans that use compressed air. Do not remove the memory card from the camera while the card is being formatted. ❏ Do not touch the sensor with your finger or a cloth. Doing so may damage the sensor and may affect image quality. -
Page 44: Storing The Camera
Storing the Camera Troubleshooting If you are not planning to use the camera for a long period of time, Error Messages remove the battery and store it at room temperature in a dry location. Store the camera in its case. Do not store the camera in following Message Remedy conditions:... -
Page 45: Where To Get Help
(800-463-7766). Or you can purchase online at www.epsonstore.com (U.S. sales) or www.epson.ca (Canadian sales). Internet Support Visit Epson’s support website for solutions to common problems. You can download documentation, get FAQs and troubleshooting advice, or e-mail Epson with your questions. -
Page 46: Appendix
Appendix Standards and Approvals Specifications Camera General Model type: Lens-interchangeable rangefinder digital EMC Directive 89/336/EEC EN55022 Class B camera EN55024 Dimensions: Height: 88.5 mm (3.54 in.) Width: 142 mm (5.68 in.) Lithium-ion Battery Depth: 39.5 mm (1.58 in.) Weight: Approx. 560 g (1.2 lb) EMC Directive 89/336/EEC EN55022 Class B Temperature:... -
Page 47: Optical System
JPEG compression ratio: Locked at 1/4 Exposure control: Automatic exposure (AE) with aperture priority and AE-lock/manual PRINT image matching: Supports PRINT Image Matching III Exposure compensation range: +/-2.0EV in 1/3EV steps (AE mode only) Optical System ISO sensitivity: 200/400/800/1600 Image sensor: Primary-color filter CCD 35 mm equivalent focal (APS size: 23.7 ×... -
Page 48: Battery Charger
Battery charge life-cycle: Number of shots possible Optional Accessory Under shooting conditions 1*: Up to about 1000 shots The following option is available for the camera. Under shooting conditions 2**: Up to about ❏ Lithium-ion battery (Model: EU-85) 360 shots (compliant with the CIPA standard) * Shooting conditions 1: Important Safety Instructions... -
Page 49: When Using The Strap
❏ Do not insert the battery into power outlets or other power sources, immediately. ❏ Use only an Epson Li-ion battery for this camera, as specified in such as cigarette lighters. ❏ Charge the battery before using it. The battery is not fully charged this manual. - Page 50 ❏ Use only the Epson battery charger provided to charge the Epson When storing the battery Li-ion battery Model EU-85. Never attempt to charge other types ❏ When not using this device for a long period, remove the battery of batteries in this charger as they may explode, leak, overheat, or from this product and store it separately.
- Page 51 ❏ If you use an extension cord with this product, make sure the total ❏ Do not remove the memory card while the power switch is on. amperage of all devices plugged into the extension cord does not When using the LCD exceed the cord’s ampere rating.
-
Page 52: Fcc Compliance Statement For United States Users
WARNING FCC Compliance Statement for United The connection of a non-shielded equipment interface cable to this States Users equipment will invalidate the FCC Certification of this device and may cause interference levels which exceed the limits established by the FCC This equipment complies with Part 15 of the FCC Rules. -
Page 53: Declaration Of Conformity
DECLARATION of CONFORMITY According to 47CFR, Part 2 and 15 for Class B Personal Computers and Peripherals; and/or CPU Boards and Power Supplies used with Class B Personal Computers: EPSON AMERICA, INC. Located at: MS 3-13 3840 Kilroy Airport Way... - Page 54 Index contacting Epson, 45 incompatible lens, 15 customer support, 45 mounting L-mount lens, 16 accessory shoe, 8 SD memory card, formatting, 42 mounting M-mount lens, 15 adapter ring, 15 setting release button, 7 AE-lock, 24 aperture, 23 AE-lock button, 9...