Table of Contents
Advertisement
This product is sold assuming that it will be installed by a
qualified installation technician with the required level of
knowledge and skill. Always have an installation specialist
or your dealer install and mount this product.
Pioneer shall not be held liable for any damage or injuries
resulting from this product's improper installation or
mounting, improper use, modification, or natural disasters.
En vendant ce produit, Pioneer suppose qu'il sera installé
par un installateur qualifié doté des connaissances et des
compétences nécessaires. Faites toujours installer ou
monter ce produit par un installateur spécialisé ou par
votre revendeur.
Pioneer ne saura être tenu responsable des dommages
matériels ou corporels qui résulteraient d'une installation
ou d'un montage défaillant, d'une mauvaise utilisation, de
la modification de ce produit ou encore de catastrophes
naturelles.
Advertisement
Table of Contents

Related Manuals for Pioneer KRP-WM02


Summary of Contents for Pioneer KRP-WM02
- Page 1 Always have an installation specialist or your dealer install and mount this product. Pioneer shall not be held liable for any damage or injuries resulting from this product's improper installation or mounting, improper use, modification, or natural disasters.
- Page 2 ディスプレイの通風孔をふさがないでください。通 据付工事専門業者取扱品 風孔をふさぐと内部に熱がこもり、火災の原因とな ることがあります。 このたびは、パイオニア製品をお買い求めいただきまして 人が容易にぶら下がったり寄り掛かれる場所には設 まことにありがとうございます。お使いになる前には取扱 置しないでください。破損や落下など、事故の原因 説明書をよくお読みになり、安全に正しくご使用ください。 になります。 また、お読みになったあとも、この取扱説明書は大切に保 管してください。 振動や衝撃の加わるような場所には設置しないでく ださい。破損や落下など、事故の原因になります。 「据付工事」について 屋外や温泉、海辺の近くには設置しないでください。 ◦ 本機は十分な技術・技能を有する専門業者が据え付 けを行うことを前提に販売されているものです。据 ディスプレイを長期間ご使用になりますと、ディス え付け・取り付けは必ず工事専門業者または販売店 プレイの熱や空気の流れで壁面が変色することがあ にご依頼ください。 りますのでご注意ください。 ◦ なお、据え付け、取り付けの不備、誤使用、改造、 天災などによる事故損傷については、弊社は一切責 組み立ての手順を守り、指定の箇所はすべて確実に 任を負いません。 ネジ留めしてください。指定を守らないと、破損や 落下など、事故の原因になります。 安全上のご注意 各部のネジを緩めたりすると落下などの事故の原因 になりますので、絶対に緩めないでください。 指定外のディスプレイへの取り付けや、改造および 安全上の絵表示について 他の用途での使用はしないでください。破損や落下 取扱説明書および製品に記されている注意事項には、損害 など、事故の原因になります。 のレベルや内容を示す絵表示が付けられていることがあり 安全のため、必ず二重安全の落下防止対策を行って ます。それら絵表示の意味は以下のとおりです。 ください。...
- Page 3 本製品とフラットパネルディスプレイの対応表 壁掛け金具 フラットパネルディスプレイ KRP-WM01 KRP-600 シリーズ KRP-WM02 KRP-500 シリーズ 部品の確認 組み立ての前に部品を確認してください。 ◦ 壁側金具を壁面に固定するためのネジ類は付属していません。別途ご用意ください。 ◦ プラスドライバーを別途ご用意ください。...
- Page 4 設置手順 ※ ディスプレイのイラストは KRP-600M です。 ◦ 落下防止対策の壁側のアイプレート (またはヒートン) は、 ディスプレイの重さに十分耐える強度のある場所に取り ディスプレイにディスプレイ側金具を取り付 付けてください。 ける。 ◦ ワイヤーの先端がディスプレイの通風孔などから内部に 入らないよう、端末処理にご注意ください。 ディスプレイとディスプレイ側金具を、上下をまちが えないように M8 ツバ付ボルトで固定してください 壁側金具を壁に取り付ける。 (4 カ所) 。 左右対称の位置に固定してください。 (8 カ所以上) このとき使用するネジ、ボルト類は壁の強度や材質に ◦ ディスプレイにキズおよび破損が生じないように、シー 適したものを別途ご用意ください。 トのようなものを敷いてください。 ◦ 必ず安定したテーブルなどの上で取り付けてください。 取り付け場所に、金具とディスプレイの質量に十分耐える強 度があることを確認してください。 ◦ スピーカーを取り付ける場合は、この段階で取り付けて ① はじめに壁や梁の強度を確認しながらディスプレイを ください。取り付け方はスピーカーの取扱説明書をご覧 取り付ける位置を決め、画面センターの位置を出す。 ください。 ◦ 各種ケーブル類は、この段階で取り付けてください。 また、各種ケーブル類は、周辺機器側には接続しないで ください。...
- Page 5 設置手順 ② 画面センターから上側 192 mm(KRP-WM01 の場 ⑤ 目印ラベルを壁およびディスプレイに貼る。 合) 、94 mm(KRP-WM02 の場合)に位置出し用の ◦ 目印ラベルは壁掛け位置の目印にする一時的なラベ ネジを仮留めする。 ルです。 ◦ あらかじめ目印ラベルを壁の目立たない場所にため し貼りして、壁紙に影響がないことをお確かめくだ さい。 ネジを仮留めする ◦ 目印ラベルをディスプレイの表面に貼ると、糊のこ りを起こす可能性がありますので、図のようにディ 画面センター スプレイの背面側に貼ってください。 * : KRP-WM01 ** : KRP-WM02 ③ 手順②のネジに壁側金具を引っ掛ける。 ④ 天井から壁側金具までの距離(A 、A )、または床か ら金具までの距離(B 、B )を測り、水平になるよ...
- Page 6 設置手順 ディスプレイ側金具の上部のツメを壁側金具 ディスプレイの位置を調整する。 に引っ掛ける。 (2 カ所) 左右方向にディスプレイの位置を微調整することがで きます。 目印ラベルに合わせてディスプレイを取り付けてくだ さい。上部のツメがきちんと引っ掛かり、ディスプレイ が水平で正しい位置に取り付いたか確認してください。 落下防止用ネジで金具を固定する。 (2 カ所) ディスプレイ側金具下の落下防止用ネジが止まるまで 締め込みます。 安全のため、60 型ディスプレイの取り付け作 業は必ず 3 人以上、50 型ディスプレイの取り 付け作業の場合は必ず 2 人以上で行ってくださ い。 ◦ 取り付けの際、スピーカーを付けた場合はスピーカー部 分を持たないでください。 ◦ 配線などが金具やディスプレイに挟まれたりしないよう にしてください。 固定したあとは目印ラベル、落下防止の注意タグをは ◦ ディスプレイ側金具を壁側金具に引っ掛けた状態で、ディ がしてください。 スプレイの下側を強く引っ張らないでください。ディス プレイの上側が壁に当たり、キズや故障の原因となりま 必ず落下防止用ネジを締め込み、ディスプレイ す。 側金具と壁側金具を固定してください。 落下防止の注意タグをはがすときに、指を切らないようにご 注意ください。...
- Page 7 設置手順 ディスプレイを少し手前に持ち上げてから、 フラットパネルディスプレイを外す場合 真上に持ち上げて外す。 作業を始める前にディスプレイと周辺機器の電源 プラグをコンセントから抜いてください。必要に応 じて周辺機器側の配線ケーブル類を外してください。 安全のため、60 型ディスプレイの場合は必ず 3 人以上、50 型ディスプレイの場合は必ず 2 人以上 で取り外しを行ってください。 ディスプレイ側金具を固定している落下防止 用ネジを緩める。 ◦ 落下防止用ネジにはストッパーがついているため、取り 外しはできません。ディスプレイ下側を手前に引けるよ うになるまで緩めてください。 ◦ ワイヤーで落下防止をしている場合には、必ずワイヤー も一緒に取付具から外してください。...
- Page 8 60.6 kg (金具+フラットパネルディスプレイ< KRP-600 シリーズのディスプレイとスピーカー取付時>) KRP-WM02: 3.7 kg(金具のみ) 38.2 kg (金具+フラットパネルディスプレイ< KRP-500 シリーズのディスプレイとスピーカー取付時>) KRP-WM01 ( 単位:mm) 1677 1465 235.5 235.5 10-8.5 x 20.5 18-6 x 63 KRP-WM02 ( 単位:mm) 1399 1233 2-6 x 120 10-8.5 x 20.5 4-6 x 63 ©2008 パイオニア株式会社 禁無断転載...
-
Page 9: Notes On Installation
• Pioneer shall not be held liable for any damage • Thoroughly read the operating instructions of the or injuries resulting from this product's improper Pioneer display and television for additional information installation or mounting, improper use, modification, about installation locations, and be sure to follow this or natural disasters. information. -
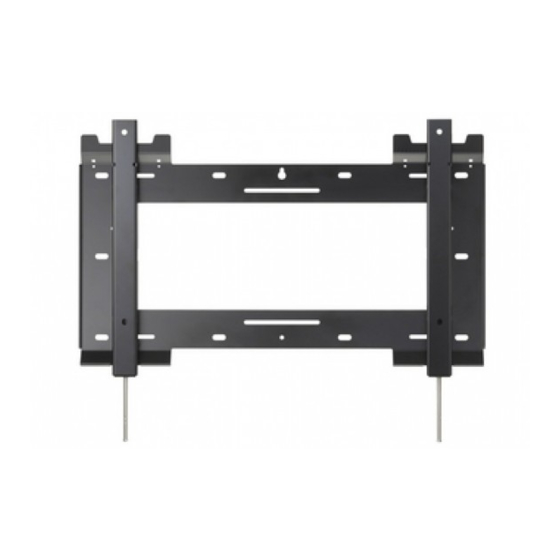
Page 10: Checking The Parts
Correspondence Between this Product and Pioneer Displays and Televisions Wall mount unit Pioneer displays and televisions KRP-WM01 PRO-141FD/KRP-600M/KRP-600A KRP-WM02 PRO-101FD/KRP-500M/KRP-500A Checking the Parts Check the parts before beginning assembly. • Screws for fixing the wall side fittings to the wall are not included. Purchase them separately. • A Phillips driver (not included) is also required for assembly. • Wall side fittings ×1 • Display side fittings ×2 •... -
Page 11: Installation Procedure
Installation Procedure * The Pioneer display and television illustration shows the • Attach the eye plate (or eye bolt) on the side of the wall where the fall-prevention measure is KRP-600M. implemented at a location of sufficient strength to Attach the display side fittings to the resist the weight of the Pioneer display and television. • Be careful to terminate the wires so that they will Pioneer display and television. not get inside the ventilation openings of the Pioneer Securely attach the display side fittings to the Pioneer display and television. display and television with the M8 Allen bolts (four Attach the Wall side fittings to the wall. locations), being careful to correctly orient the display Attach the wall side fittings to the wall in a horizontally side fittings the right side up as shown in the illustration. - Page 12 Installation Procedure 2 Temporarily attach the screw used for positioning about 5 Attach the guide labels to the wall and the Pioneer 192 mm (in the case of the KRP-WM01), or 94 mm (in display and television. the case of the KRP-WM02) above the screen center • The guide labels are provisional labels used to indicate location. the wall attachment locations. • First attach the guide labels to an inconspicuous location on the wall and check that they do not damage the wall paper.
- Page 13 Adjust the Pioneer display and television side fittings to the wall side fittings (two position. locations). The position of the Pioneer display and television can be fine-adjusted horizontally and vertically. Attach the Pioneer display and television so that it aligns with the guide labels. Check that the top hooks are...
- Page 14 Installation Procedure After lifting the Pioneer display and Removing the Pioneer display and television television slightly toward you, remove it by gently lifting it straight up. Before beginning this procedure, remove the power plugs of the Pioneer display and television and peripheral equipment from their outlets. If Caution necessary, also remove the connecting cables on the peripheral equipment side. In the case of a 60-inch display, always have three or more persons on hand when removing the display. In the case of a 50-inch display, have Caution two or more persons on hand. Loosen the fall-prevention screws fixing the display side fittings. Pioneer display and television Fall-prevention screws • The fall-prevention screws cannot be removed because they have a stopper. Loosen them until the lower part of the Pioneer display and television can be pulled toward you.
-
Page 15: External Dimensions Diagram
External Dimensions Diagram External Dimensions KRP-WM01: 994 mm (W) × 694 mm (H) × 25 mm (D) (39-1/8 in. (W) × 27-5/16 in. (H) × 31/32 in. (D)) KRP-WM02: 645 mm (W) × 516 mm (H) × 22 mm (D) (25-13/32 in. (W) × 20-5/16 in. (H) × 7/8 in. (D)) Weight KRP-WM01: 6.6 kg (14.6 lbs) (fittings only) 60.6 kg (133.6 lbs) (fittings + Pioneer display and television <PRO-141FD/KRP-600M/KRP-600A display with speakers>) KRP-WM02: 3.7 kg (8.2 lbs) (fittings only) 38.2 kg (84.2 lbs) (fittings + Pioneer display and television <PRO-101FD/KRP-500M/KRP-500A display with speakers>) KRP-WM01 Unit: mm (inch) 1677 (66-1/32) 1465 (57-11/16) 64 (2-17/32) (4-3/16) (4-3/16) 235.5 (9-9/32) 994 (39-1/8) 235.5 (9-9/32) 928 (36-17/32) 822 (32-3/8) - Page 16 • N’installez pas ce produit à un endroit où il serait soumis à des vibrations ou à des chocs, il pourrait tomber ou se Nous vous remercions d’avoir choisi un produit Pioneer. casser. Veuillez lire attentivement ce mode d’emploi pour savoir • N’installez pas l’écran en extérieur, près d’une source d’eau comment utiliser votre pied de table correctement et en toute chaude ou à...
- Page 17 Correspondance entre ce produit et les moniteurs et téléviseurs Pioneer Kit d’installation murale Moniteurs et téléviseurs Pioneer KRP-WM01 PRO-141FD/KRP-600M/KRP-600A KRP-WM02 PRO-101FD/KRP-500M/KRP-500A Contrôler les pièces Inspectez les pièces avant de commencer le montage. • Les vis d’installation des fixations murales sur le mur ne sont pas fournies. Achetez-les séparément. • Un tournevis cruciforme est également nécessaire pour le montage (non fourni). • Fixations murales ×1 • Fixations de l’écran ×2 • Rondelle • Etiquettes-guides ×1 (pour boulons M8) ×8...
-
Page 18: Procédure D'installation
Pioneer et la vis anti-chute. 1 Commencez par choisir l’endroit où vous allez installer le moniteur et téléviseur Pioneer en vérifiant la solidité • Si vous souhaitez installer des enceintes, faites-le à ce du mur ou de la poutre, puis déterminez l’endroit qui moment-là. Pour la procédure d’installation, consultez correspond au centre de l’écran. - Page 19 • Tout d’abord, collez les étiquettes-guide à un endroit où elles sont peu visibles sur le mur et vérifiez qu’elles n’endommagent pas le papier peint. Posez provisoirement • Si des étiquettes-guides sont posées sur la surface du la vis. moniteur et téléviseur Pioneer, de l’adhésif peut rester Centre de l’écran coller sur la surface. Posez-les donc à l’arrière de l’écran comme indiqué sur le schéma. * : KRP-WM01 **: KRP-WM02 Collez les étiquettes-guides...
- Page 20 (deux emplacements). La position du moniteur et téléviseur Pioneer peut être réglée de façon précise horizontalement et Posez le moniteur et téléviseur Pioneer de façon à ce verticalement. qu’il soit aligné sur les étiquettes-guides. Vérifiez que les crochets du haut sont bien accrochés et que le moniteur Moniteur et téléviseur Pioneer et téléviseur Pioneer est droit et fixé au bon endroit.
- Page 21 Procédure d’installation Après avoir soulevé le moniteur et Désinstaller le moniteur et téléviseur Pioneer téléviseur Pioneer légèrement dans votre direction, retirez-le en le soulevant un peu verticalement. Avant de commencer, débranchez la prise du moniteur et téléviseur Pioneer et de tous les périphériques. Si nécessaire, retirez également les Attention câbles de raccordement côté périphériques. Dans le cas d’un écran 60 pouces, faites-vous toujours aider d’au moins trois personnes lors de l’installation. Dans le cas d’un écran 50 pouces, Attention faites-vous aider d’au moins deux personnes. Desserrez les vis anti-chute qui maintiennent les fixations de l’écran.
-
Page 22: Schéma De Dimensions
KRP-WM02 Unità : mm 1399 1233 Centre de l’écran 2-6 x 120 10-8,5 x 20,5 4-6 x 63 Profondeur des supports d’enceintes Publication de Pioneer Corporation. Profondeur du moniteur et téléviseur Pioneer © 2008 Pioneer Corporation. Tous droits de reproduction et de traduction réservés. -
Page 23: Hinweise Zur Installation
• Dieses Produkt wird in der Annahme verkauft, oder herunterfallen. dass es von einem qualifizierten Techniker mit dem erforderlichen Wissens- und Fähigkeitsstand • Durch das Lösen der Schrauben könnte der Bildschirm installiert wird. Lassen Sie dieses Produkt immer von herunterfallen. Lösen Sie deshalb in keinem Fall die einem Installationsspezialisten oder Ihrem Händler Schrauben. installieren. • Montieren Sie den Pioneer Bildschirm und Fernseher • Pioneer soll für keinerlei Schäden oder Verletzungen nur auf die hier beschriebene Weise, nehmen Sie keine haftbar gemacht werden, die infolge von Änderungen vor und nutzen Sie das Gerät nur für die unsachgemäßer Installation oder Befestigung, falscher vorgesehenen Zwecke. Andernfalls könnte das Produkt Nutzung, Modifizierung oder Naturkatastrophen beschädigt werden oder herunterfallen. entstehen. • Achten Sie darauf, sicherheitshalber die doppelten Maßnahmen zu ergreifen, um das Herunterfallen des Produkts zu verhindern. -
Page 24: Note Sull'installazione
In caso di un display da 50-pollici, assicuratevi che ci siano due o più persone disponibili. • Leggete attentamente le istruzioni per l’uso del display e televisore Pioneer per ulteriori informazioni circa i luoghi di installazione e seguitele. Metodo d’uso • Non appendetevi né appoggiatevi al display: potreste farlo cadere o danneggiarlo. PRECAUZIONI DI SICUREZZA • Gli accessori metallici all’interno del display, le parti per... - Page 25 • Plaats dit product niet waar deze blootstaat aan trillen of schokken omdat het product daardoor kan breken of Hartelijk dank voor de aanschaf van dit product van Pioneer. omvallen. Lees s.v.p. de gebruiksaanwijzing door voor informatie • Installeer de display niet buiten, en niet bij een omtrent de juiste bediening van uw product.
-
Page 26: Precauciones De Seguridad
50 pulgadas siempre deberán intervenir dos personas o más. • Para más información acerca de dónde instalar el producto, lea atentamente el manual de instrucciones del monitor y televisor Pioneer y siga al pie de la letra los PRECAUCIONES DE SEGURIDAD procedimientos indicados. Método de uso Manipulación en caso de anomalía... - Page 27 需要專業安裝技術的產品 安全注意事項 感謝您購買本先鋒產品。 為使您熟知本機的正確操作方式 ,務求詳閱本 「操作手冊」 。 異常情況的處理 在您閱讀完手冊的內容後 ,請妥為保存,以備日後參考之用 。 若您發現有任何異常情況或故障,請立即交由專業技師進行 修復。 安裝注意事項 : 安裝 • 本產品的售出是以具有相關知識與技術等級的合格技師 • 本產品的售出是以具有相關知識與技術等級的合格技師進 進行安裝為前提,請務必由專業安裝人員或您的經銷商 行安裝為前提,請務必由專業安裝人員或您的經銷商安裝本 安裝本產品。 產品,不當的安裝可能導致本產品損壞或掉落。 • 對於不當安裝本產品 、不當使用或自然災害而導致的任 • 請選擇強度足以支撐壁掛架與顯示器重量的安裝位置 ,以 何損壞或人員受傷,先鋒公司概不擔負任何責任。 避免本產品受損或掉落;某些牆壁缺乏懸掛本產品所需的 結構強度 ,因此請務必諮詢專業技師。 • 請確定通風良好 ,以避免顯示器的周邊環境溫度超過 40 ˚C ; 顯示器內部所累積的熱量可能導致機械故障...
-
Page 28: Меры Предосторожности
дисплея, так что никогда не допускайте ослабления и монтажа этого продукта. винтов. • Pioneer не несет ответственности за любые • Не монтируйте дисплей и телевизор Pioneer иным повреждения или травмы, возникшие по причине образом, чем указано, не модифицируйте его и не ненадлежащей установки или ненадлежащего монтажа... - Page 29 В соответствии со статьей 5 Закона Российской Федерации “О защите прав потребителя” и Указанием Правительства Российской Федерации № 720 от 16 июня 1997 года, корпорация Pioneer Europe NV устанавливает условие на следующую продолжительность срока службы официально поставляемых на Российский рынок товаров.