Asus Xonar D-Kara User Manual
Pci 5.1 karaoke audio card
Hide thumbs
Also See for Xonar D-Kara:
- Quick start manual (121 pages) ,
- Quick start manual (106 pages) ,
- Quick start manual (136 pages)

Related Manuals for Asus Xonar D-Kara


Summary of Contents for Asus Xonar D-Kara
- Page 1 Xonar D-Kara PCI 5.1 Karaoke Audio Card User manual e7404_xonarkara.indd 1 7/4/12 3:33:51 PM...
- Page 2 Product warranty or service will not be extended if: (1) the product is repaired, modified or altered, unless such repair, modification of alteration is authorized in writing by ASUS; or (2) the serial number of the product is defaced or missing.
-
Page 3: Table Of Contents
Connecting a microphone ..........14 Connecting Line-In audio sources ........15 Xonar Audio Center............... 16 Xonar Audio Center GUI ..........16 Xonar D-Kara Audio Center Icon ........18 Music Main Settings ............19 Mixer/Volume ..............20 Effects ................22 FlexBass ................24 Karaoke Main Settings ............. -
Page 4: Notices
Notices Federal Communications Commission Statement This device complies with Part 15 of the FCC Rules. Operation is subject to the following two conditions: • This device may not cause harmful interference, and • This device must accept any interference received including interference that may cause undesired operation. -
Page 5: Safety Information
Trademarks Xonar and ASUS logo are trademarks of ASUSTek Computer Inc. “Dolby” and “Dolby Digital Live”, “Dolby Pro Logic IIx”, “Dolby Virtual Speaker”, “Dolby Headphone” are trademarks of Dolby Laboratories. EAX and A3D are trademarks of Creative Technology Ltd. - Page 6 e7404_xonarkara.indd 6 7/4/12 3:33:53 PM...
-
Page 7: Introduction
256 MB (or above) DRAM system memory • 60 MB available HDD space for driver installation package • CD-ROM drive (or DVD-ROM drive ) for software installation • High-quality headphones or powered analog speakers ASUS Xonar D-Kara PCI 5.1 Audio Card e7404_xonarkara.indd 1 7/4/12 3:33:53 PM... -
Page 8: Specifications Summary
Windows 7 / Vista / XP (32/64-bit) / MCE2005 Software 10-band Equalizer, 27 Environmental Effects, Enhancer, Mixer Size (Width x Height) 106.15mm x 178.06mm *Specifications are subject to change without notice. ASUS Xonar D-Kara PCI 5.1 Audio Card e7404_xonarkara.indd 2 7/4/12 3:33:53 PM... -
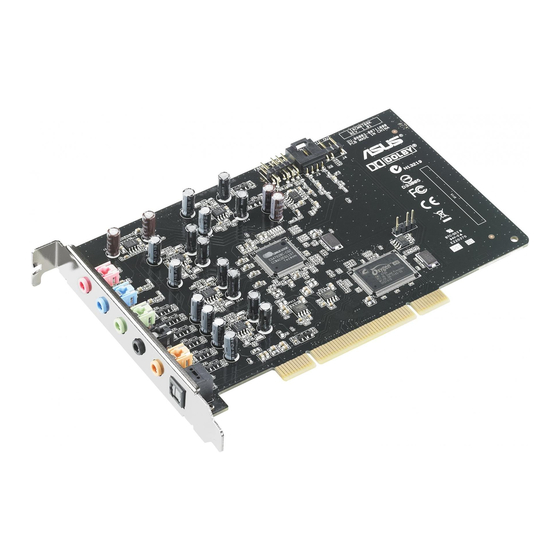
Page 9: Xonar D-Kara Card Layout
This optical TOSLINK digital output port connects to external digital decoders or digital speaker systems, home theater S/PDIF Out port systems, and AV receivers for outputting digital audio such as PCM, DTS Digital, DTS, WMA-Pro, etc. ASUS Xonar D-Kara PCI 5.1 Audio Card e7404_xonarkara.indd 3 7/4/12 3:33:54 PM... - Page 10 *To monitor your TV tuner card’s audio from this Aux-In, you must enable the “monitor” function for Aux-In in the Xonar Audio Center software’s recording mixer. Connects to a graphics card with HDMI support S/PDIF Out Header ASUS Xonar D-Kara PCI 5.1 Audio Card e7404_xonarkara.indd 4 7/4/12 3:33:54 PM...
-
Page 11: Installing The Hardware
Touch the metal back or side panel of the computer to avoid static electricity. Remove the chassis cover. Remove the metal bracket from an available PCI slot for the Xonar D-Kara audio card. Carefully insert the audio card into the PCI slot until the card is seated firmly in place. -
Page 12: Connecting To A Tv Tuner Card
Connecting to a TV tuner card If you have a traditional PCI TV tuner card on your PC, you may need to connect it to the Xonar D-Kara card to send the tuner card’s sound to your PC speakers. Secure the PCI TV tuner card and screw it into the back-panel. -
Page 13: Installing Software
Installing software Installing the card driver Install the audio card driver before installing the Xonar D-Kara driver. Otherwise, driver installation error may occur. After you have installed the Xonar D-Kara card, turn on your computer. Windows automatically detects the audio card and searches for device ®... -
Page 14: Connecting Speakers And Peripherals
Connecting speakers and peripherals Connecting digital speaker systems (Home Theater) The Xonar D-Kara makes surround sound playback through your home theater system possible. A single digital cable connection can carry high-quality digital audio from any of your PC audio sources to any digital speakers or AV Receivers. -
Page 15: Connecting Stereo Headphones
Connecting stereo headphones 5.2.1 Connecting Stereo Headphones Item Description Connect stereo headphones directly to this port. Front Out/Headphone Jack ASUS Xonar D-Kara PCI 5.1 Audio Card e7404_xonarkara.indd 9 7/4/12 3:33:57 PM... -
Page 16: Connecting Analog Speaker Systems
Connect “left surround” and “right surround” input ports of the analog amplifier to the Side L/R port. Center/Subwoofer Connect “center” and “subwoofer” input ports of the analog amplifier to the Center/Sub port. ASUS Xonar D-Kara PCI 5.1 Audio Card e7404_xonarkara.indd 10 7/4/12 3:33:58 PM... - Page 17 Mic In Line In AUDIO INPUTS Front L/R Side L/R Center/Sub SPDIF Out Item Description Front Out/Headphone Connect the speaker set’s 3.5mm plug to Front L/R port. Jack ASUS Xonar D-Kara PCI 5.1 Audio Card e7404_xonarkara.indd 11 7/4/12 3:33:58 PM...
- Page 18 Connect the front input port of the 4 channel speakers with the 3.5mm plug. Side Surround Out Connect the Surround input port of the 4 channel speakers with the 3.5mm plug. ASUS Xonar D-Kara PCI 5.1 Audio Card e7404_xonarkara.indd 12 7/4/12 3:33:59 PM...
- Page 19 Side Surround Out Connect the Surround input port of the 5.1 speakers with the 3.5mm plug. Center/Subwoofer Connect the Center/Subwoofer input port of the 5.1 speakers with the 3.5mm plug. ASUS Xonar D-Kara PCI 5.1 Audio Card e7404_xonarkara.indd 13 7/4/12 3:34:00 PM...
-
Page 20: Connecting A Microphone
Center/Sub SPDIF Out Item Description Connect the microphone’s 3.5mm plug to the Mic In port. Microphone Input Jack Headphone Jack Connect headphone plugs to the Front L/R port. ASUS Xonar D-Kara PCI 5.1 Audio Card e7404_xonarkara.indd 14 7/4/12 3:34:01 PM... -
Page 21: Connecting Line-In Audio Sources
Connect the 3.5mm plug of the CD/MP3 Player or any Line Input Jack other Line level analog audio sources into the Line-In port for sound recording (See the “Mixer” section of this User Manual). ASUS Xonar D-Kara PCI 5.1 Audio Card e7404_xonarkara.indd 15 7/4/12 3:34:01 PM... -
Page 22: Xonar Audio Center
Audio Center utility. If the icon does not appear on the system tray, launch the Xonar Audio Center from the Windows desktop by clicking Start > All Programs > ASUS Xonar D-Kara > Xonar D-Kara Audio Center. The Xonar Audio Center is the Graphical User Interface (GUI) for the Xonar D-Kara driver. - Page 23 Settings Menu Panel Settings, Mixer/Volume, Effects, FlexBass, and Enhancer. To start using the Karaoke features of the Xonar D-Kara, plug in your microphone and click the Karaoke tab in the Xonar D-Kara Audio Center. Click the Mixer option and select “microphone”.
-
Page 24: Xonar D-Kara Audio Center Icon
Item Description Information icon Click this icon to display driver options. Double-click the icon to launch the Xonar D-Kara Audio Center. Restore Click to restore Xonar Audio Center application window. About AsusAudio Click to find out more about Audio Center version. -
Page 25: Music Main Settings
The analog out setting defines your actual speaker Analog Out setting, such as front headphones, rear headphones, Dolby headphones, Dolby rear headphones, 2 speakers, 4 speakers, or 5.1 speakers. Xonar D-Kara will play the channels and process the proper 3D surround sound accordingly. S/PDIF Output... -
Page 26: Mixer/Volume
Mixer/Volume The mixer page is designed to control the volume for playback and recording on the Xonar D-Kara. The Xonar D-Kara also provides a high-quality digital monitoring function for playing the recorded audio from the speakers. 6.4.1 Playback Volume Item... - Page 27 Recording from Aux-In sources such as TV- tuner audio cards or other audio sources Line-In: Recording from Line-In jack for external audio devices Reset Click to reset all volume controls to the default settings. ASUS Xonar D-Kara PCI 5.1 Audio Card e7404_xonarkara.indd 21 7/4/12 3:34:04 PM...
-
Page 28: Effects
More options from the pull-down menu. 23 additional options are available in this menu. Environment size Three size settings are available for each environment: Large, Medium, and Small. ASUS Xonar D-Kara PCI 5.1 Audio Card e7404_xonarkara.indd 22 7/4/12 3:34:05 PM... - Page 29 Click the “+” button to add the defined parameters to the User Defined list as a preset. Click the “–” button to delete a saved preset from the User Delete Defined list. ASUS Xonar D-Kara PCI 5.1 Audio Card e7404_xonarkara.indd 23 7/4/12 3:34:05 PM...
-
Page 30: Flexbass
Description On/Off Click this button to disable or enable all FlexBass functions. Small/Large speaker Select the speaker type connected to the Xonar D-Kara. If option your speaker type cannot handle low-frequency signals (bass), select “Small” speaker type. Xonar D-Kara will filter out the bass signals and send them to the subwoofer channel. -
Page 31: Karaoke Main Settings
Karaoke Main Settings To start using the Karaoke features of the Xonar D-Kara, plug in your microphone and click the Karaoke tab in the Xonar D-Kara Audio Center. Click the Mixer option and select “microphone”. - Page 32 Click this button to access advanced controls and customize presets. Bypass Click this button to temporarily disable all sound effects to compare audio before and after sound effects are applied. ASUS Xonar D-Kara PCI 5.1 Audio Card e7404_xonarkara.indd 26 7/4/12 3:34:07 PM...
-
Page 33: Advanced Settings
Mic Boost On Select check box to boost the microphone audio by 20dB. Mix with Wave On Select check box if you intend to record music audio with your voice. ASUS Xonar D-Kara PCI 5.1 Audio Card e7404_xonarkara.indd 27 7/4/12 3:34:07 PM... - Page 34 Click edit to delete, rename, import, or export master preset. Edit 6.7.3 HPF/LPF High Pass Filter affects frequency ranges below the set cutoff frequency. Low Pass Filter applies to frequency ranges above the set cutoff frequency. ASUS Xonar D-Kara PCI 5.1 Audio Card e7404_xonarkara.indd 28 7/4/12 3:34:08 PM...
- Page 35 Ratio of signal expansion or compression when threshold is met. Attack Time Amount of time before effect is applied to audio when the signal level exceeds the threshold. ASUS Xonar D-Kara PCI 5.1 Audio Card e7404_xonarkara.indd 29 7/4/12 3:34:08 PM...
- Page 36 Drag the slider up or down to change the gain of each frequency band. Reset Click to reset settings to default. The reset option is only available under Manual Mode. ASUS Xonar D-Kara PCI 5.1 Audio Card e7404_xonarkara.indd 30 7/4/12 3:34:09 PM...
- Page 37 Modal density in late reverbation decay. High density represents more natural sounding timber. Low density represents more hollow or “colored” space like the bathroom. Room Intensity level for room effect ASUS Xonar D-Kara PCI 5.1 Audio Card e7404_xonarkara.indd 31 7/4/12 3:34:09 PM...
-
Page 38: Mixer
The tool-tip displays percentage increments. Click this button to mute or unmute the audio channel. Mute/Unmute button Reset Resets all volume controls to the default settings. ASUS Xonar D-Kara PCI 5.1 Audio Card e7404_xonarkara.indd 32 7/4/12 3:34:10 PM... - Page 39 The audio will be mixed into the streams from your PC and all DGP effects will be applied to both the source and the output. ASUS Xonar D-Kara PCI 5.1 Audio Card e7404_xonarkara.indd 33 7/4/12 3:34:10 PM...
- Page 40 Mic Boost On Select check box to boost the microphone audio by 20dB. Mix with Wave On Select check box if you intend to record music audio with your voice. ASUS Xonar D-Kara PCI 5.1 Audio Card e7404_xonarkara.indd 34 7/4/12 3:34:11 PM...
-
Page 41: Enhancer
Enhancer The Xonar D-Kara provides powerful features for karaoke, including Key-Shifting and Vocal Cancellation. Key-Shifting can change the pitch of the karaoke background music. Vocal Cancellation can reduce the original vocals in songs while retaining the music and symphony for karaoke. -
Page 42: Troubleshooting And Faqs
Q2. I cannot find the Xonar D-Kara Audio Center. Make sure you have installed the driver. Locate the Xonar D-Kara Audio Center icon in the System Tray on the bottom right-hand corner of the screen. Double-click the icon to open the Xonar D-Kara Audio Center. -
Page 43: Frequently Asked Questions (Faq)
Q1. Does the Xonar D-Kara support Windows 7/Vista? Yes, the Xonar D-Kara driver package does support Windows 7/Vista 32/64 bit with most key features available. Xonar D-Kara also supports DS3D GX on Windows 7/Vista, providing DirectSound 3D hardware and EAX gaming sound effects for many existing DirectX games. - Page 44 Sound effects can still be applied by using commercial or free audio editing software to convert the sound files to 48KHz. Please note that the frequency meter on the Xonar D-Kara Audio Center will not take effect when the playback source is at a 96KHz sample rate to prevent any processing distortion.